Originally posted January 2021
- Client: Blue-collar retiree
- Budget: N/A (gift)
- Core goal: get this man a better keeb, STAT
- Form-factor: TKL
If Bass Pro Shops sold a keyboard, it might look something like this. Deer, meet headlights.
My interests being what they are, I’m always looking for places a new keyboard could settle-in. After my sis and her husband both helped me move and recover from surgery, I felt like the least I could do was hook them up with a good keeb. After the fruitful if uninteresting search for a pink, clicky keyboard for my sister, I had a bit more opportunity to play around when it came to her husband.
He has an old early 2000’s desktop machine he uses for email and light browsing – it even still has the 4:3 CRT monitor. I bet most of you know what else it has – a beige, rattly mushbox of an OEM keyboard. Now there’s an experience I can improve with plenty of wiggle-room.
Our “customer” today is an outdoorsy country fellow who enjoys the simple life. Having retired not too long ago, he spends a little more time at home, mostly working on his truck – a very clean late 80’s / early 90’s GMC dually pickup in metallic cool green. I think I have just the perfect spare case for this fellow.
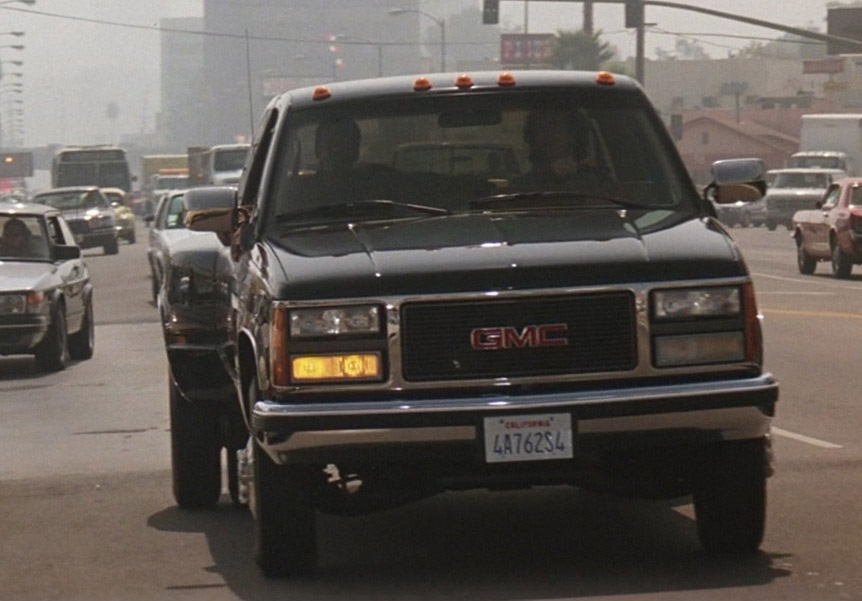
Not his truck, but you get the idea. (Image from Lethal Weapon, 1987)
Every keeb client is different; some like to be really involved and choose the parts themselves with technical advisement from the builder, and some just throw out some general criteria and let you go nuts. Since this one was a surprise, it was a mixture of freedom and reservation; while no specific requirements were in the way, I also wanted to make sure the final product was accessible to someone who had no interest in learning a new peripheral.
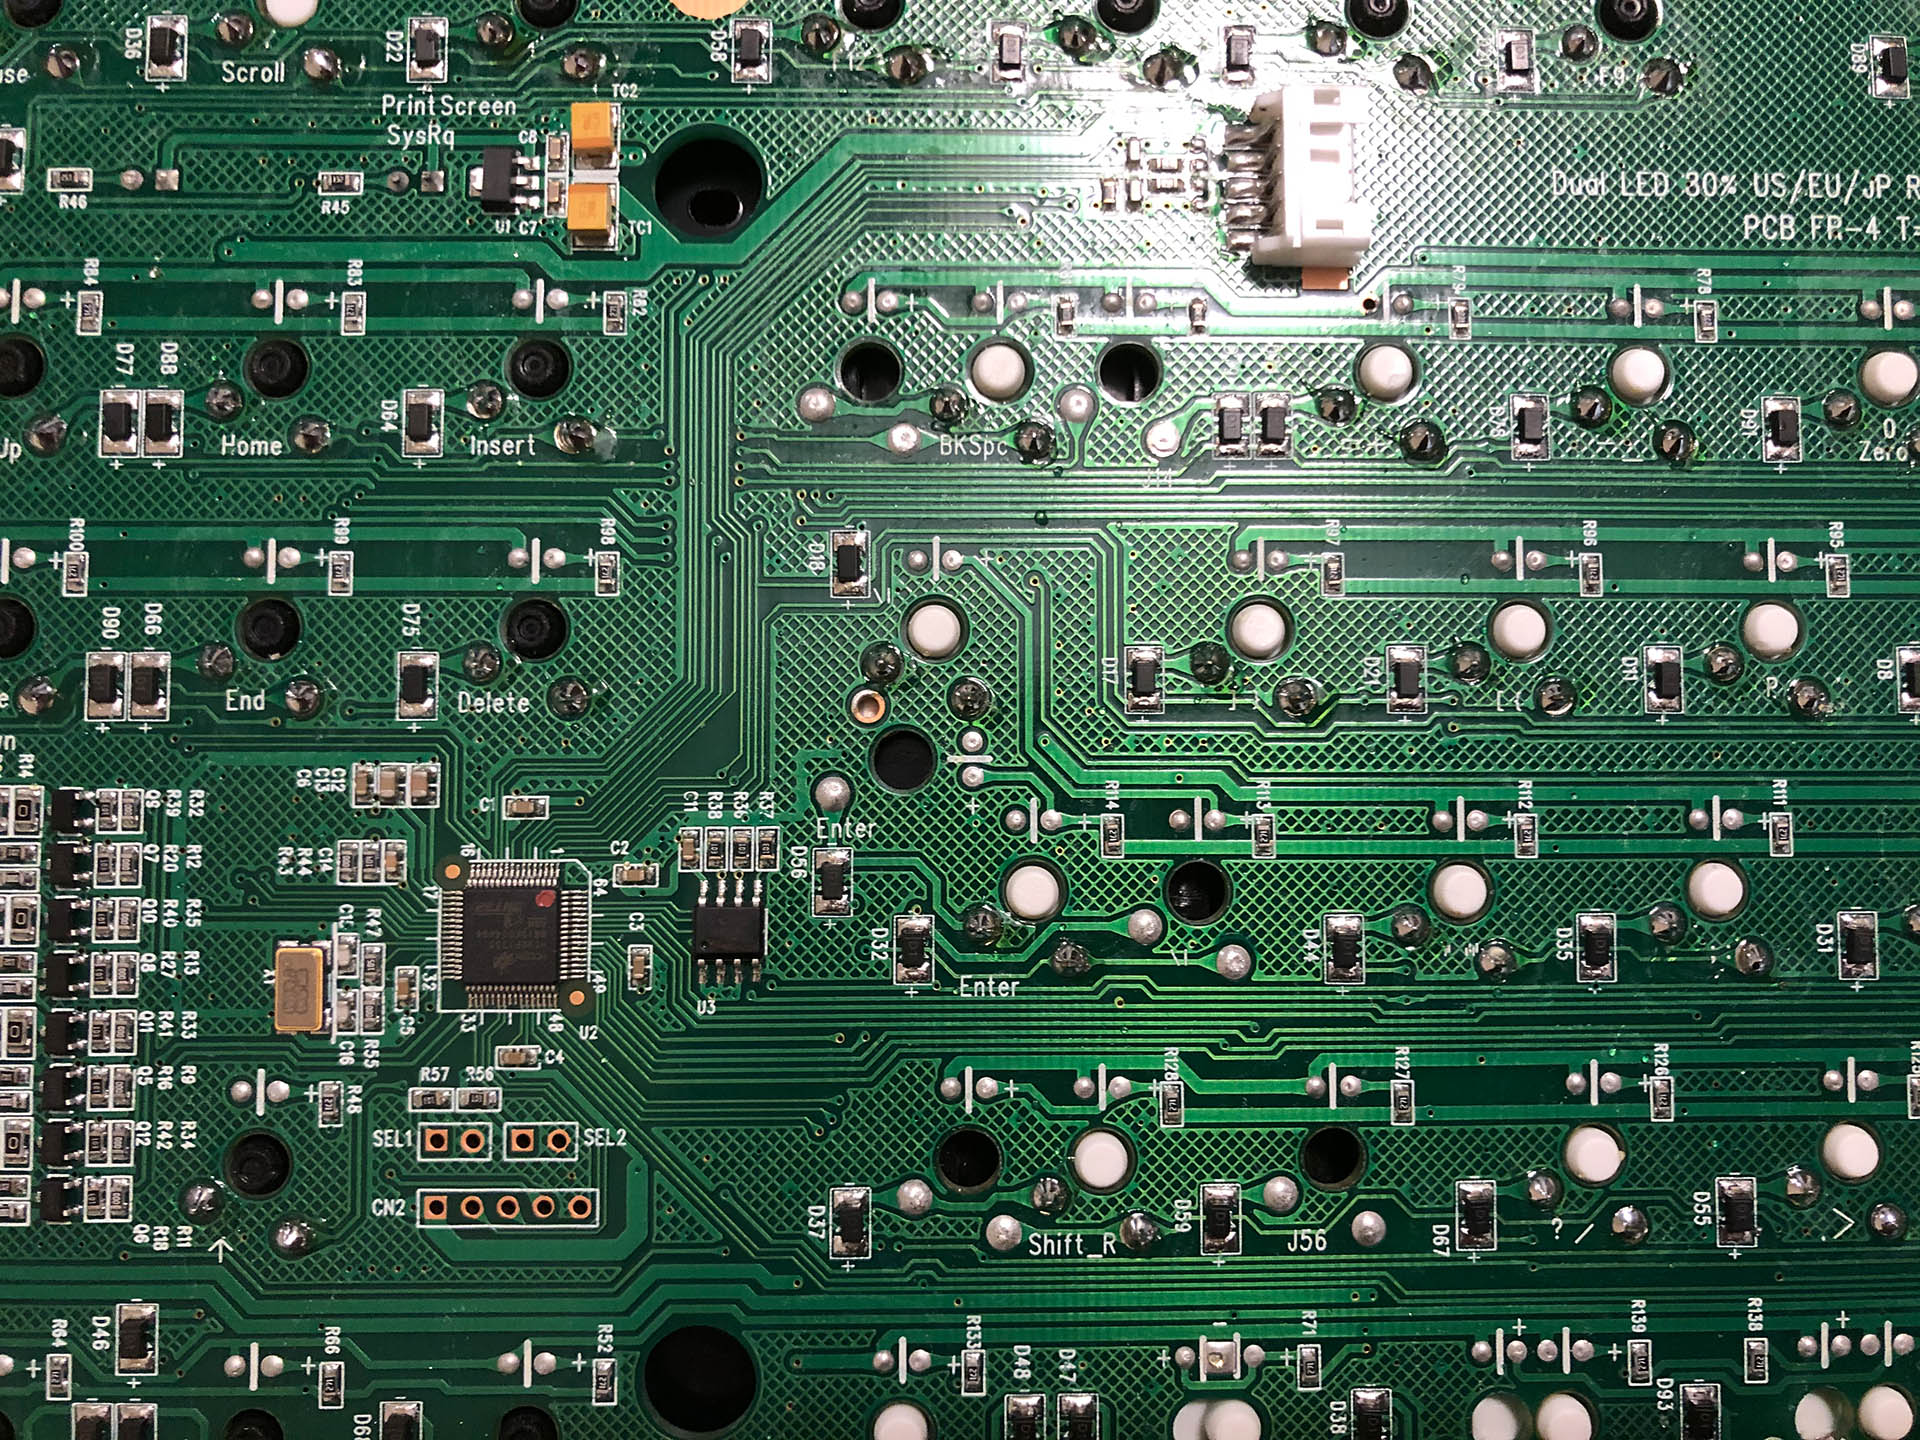
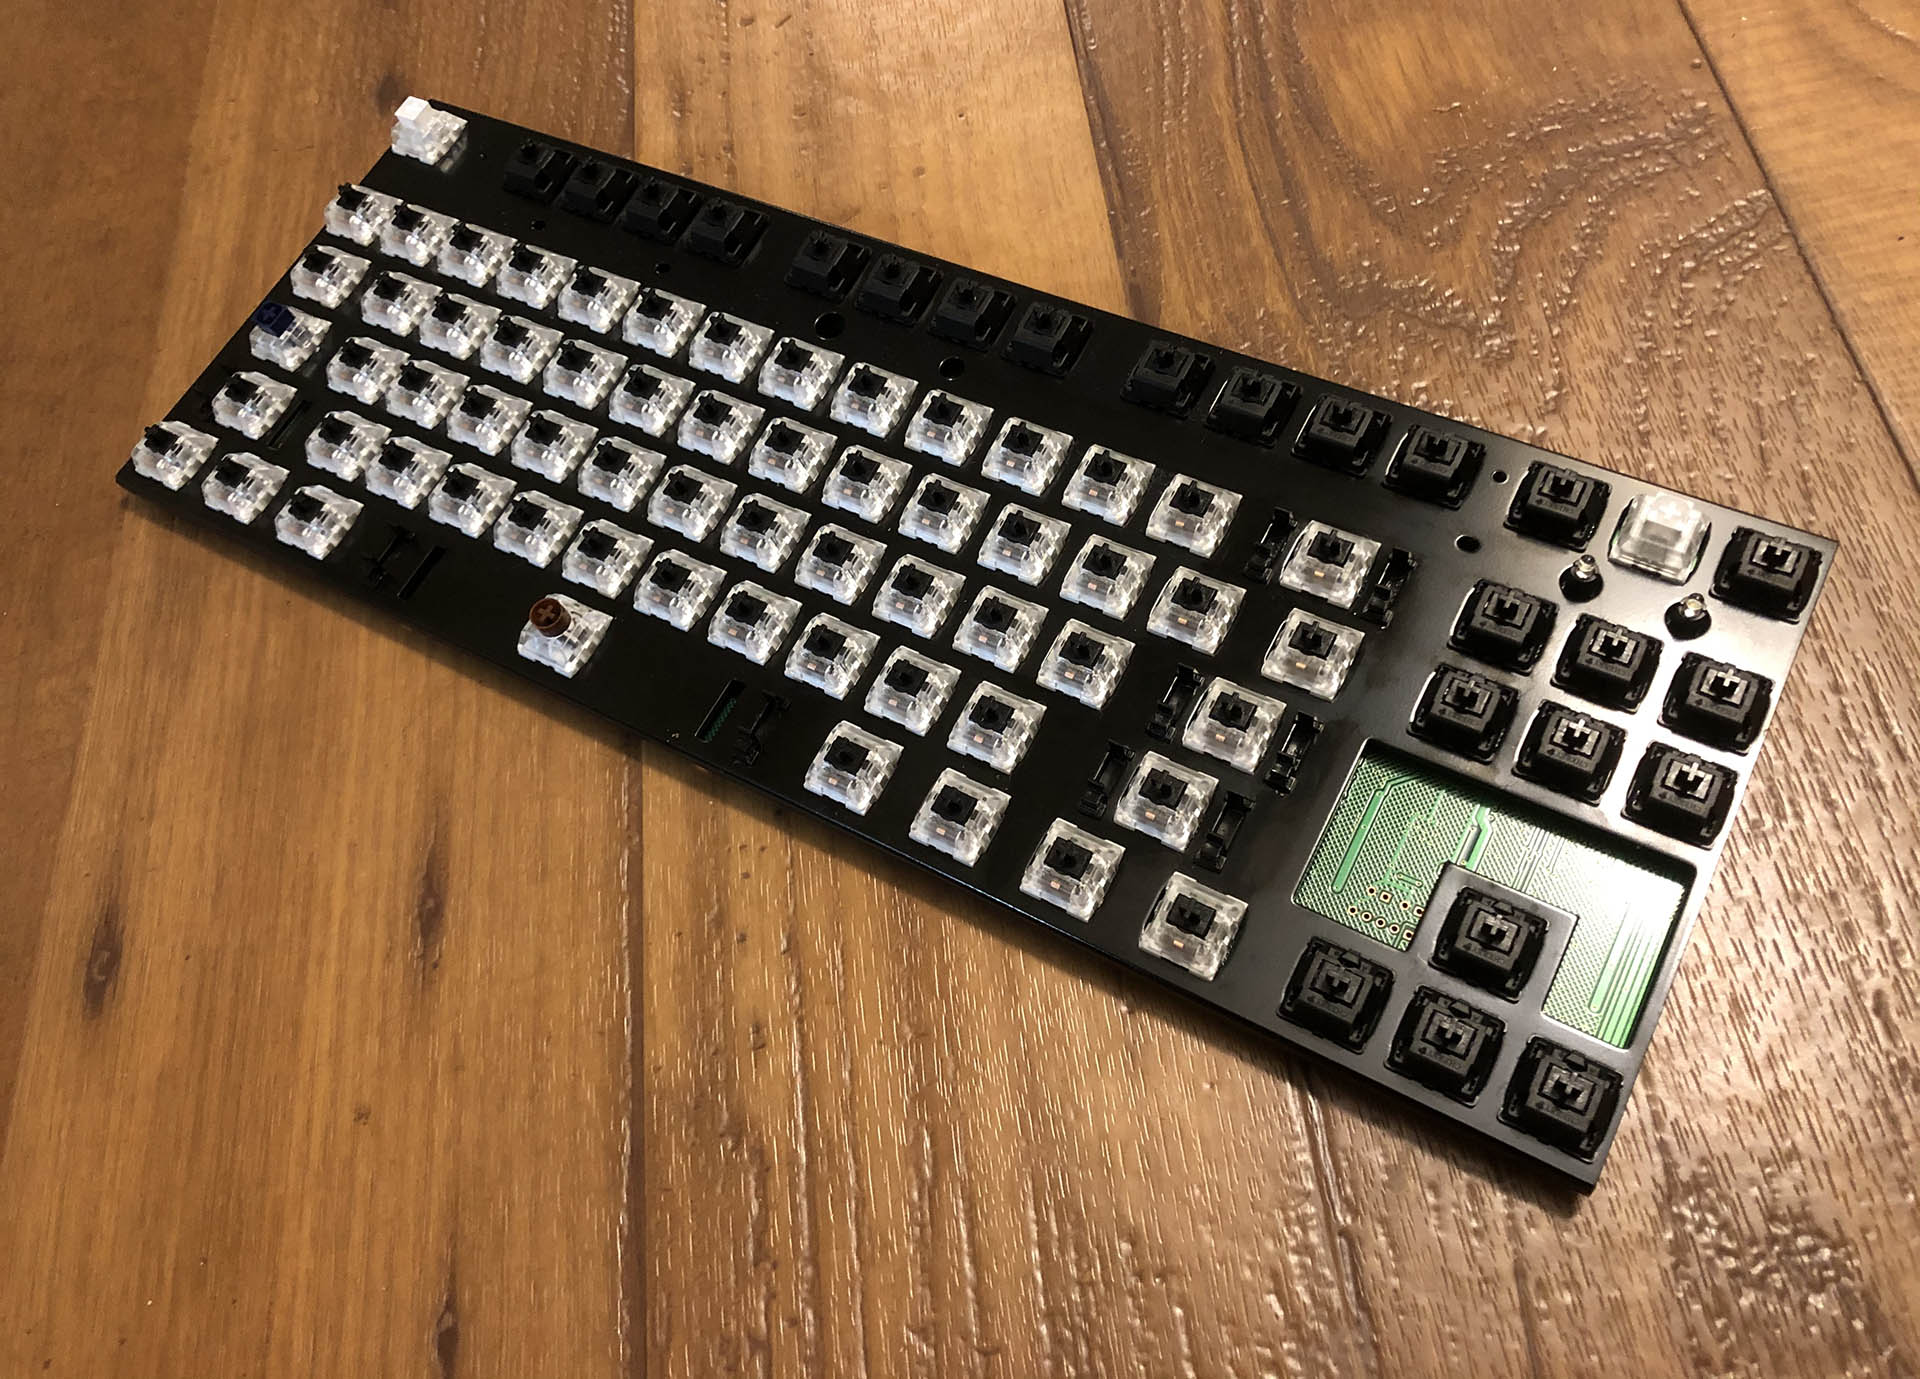
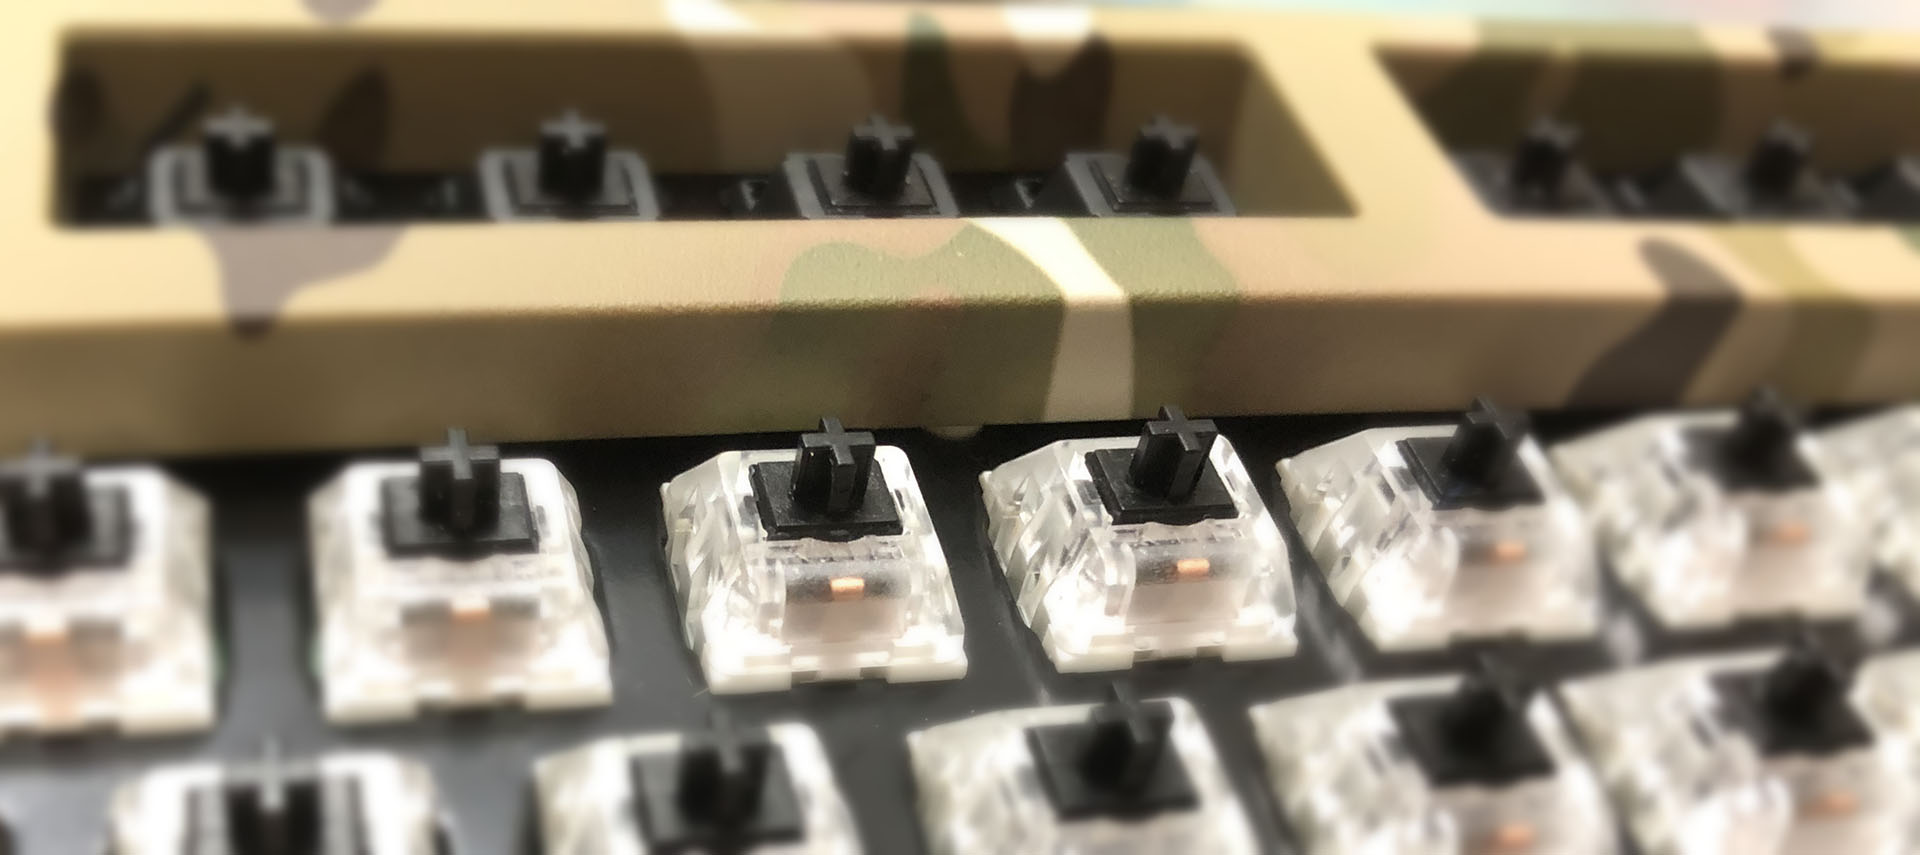
A close-ish look at the PCB we’ll be using for today’s build.
Hearing from my sis that he didn’t use the numpad much, TKL was an easy choice for two reasons. One, it’s familiar and thus accessible – satisfying the limitation. Two, I have lots of spare TKL parts – taking advantage of the wiggle room. Perfect!
I have three or four Costar-type chassis laying in the closet in various states of assembly. The plate, PCB, and bottom shell I used for this build come from a KBParadise V80; think a Filco or CoolerMaster, with lesser build quality but an absurdly-wide selection of switch options. When I was in the market for a silent keyboard around three years ago, it was the most available keyboard I could get with Cherry Silent Blacks that wasn’t cartoonishly overpriced.
Since the point here is to upgrade the typing experience from a cheap dome board, it was time to pull out the FR-301 and go brrrrrrrr about 175 times. Oh, I kid, I kid – sort of. I knew I wanted the stems for frankenswitching, and I knew the housings were good for other things too, so I had plenty of reasons to harvest these. But what will go in their place?
Something straightforward, no-nonsense, and readily available: Unholy Pandas.*
What’s an “unholy panda”? Here, the clear ones with the black stems. Generally, the leftovers from assembling Holy Pandas; a Halo housing with a Panda stem – which itself is a bog-standard linear, in this case from BSUN.
While you aren’t likely to find anyone in the custom community seeking these out, they’re actually quite passable linears, fully capable of both sounding and feeling good. Personally, I prefer using Halo True springs in them, which provide a “fast” progressive curve. Starting light and quickly getting heavy, they can offer a very bouncy experience – but they can also be tiring if you jump straight to them from a typical dome sheet – so I don’t think that’s the right spring for our casual enjoyer of keys.
Again reaching for something both approachable and readily available, I went with 60g BSUN Panda springs. While these often get used in Holy Pandas, I tend to use something else for those – so I have a ton of these left-over. Being used for linears in the first place, they do a great job filling that role here. For lube, I bagged the springs with 106 and brushed the stems and housings with 205g0. Paired with the thin single-layer ABS caps that shipped with the V80, I think these switches ended up sounding quite nice.
*About that asterisk up there. I used Unholy Pandas for all the alphas and mods, but I did this build during a rare, small window of time where I didn’t have Halo housings out the wazoo – so the F-row and navigation cluster got some of the harvested Cherry housings instead. More or less, those sound like Cherry Blacks – no complaints there.
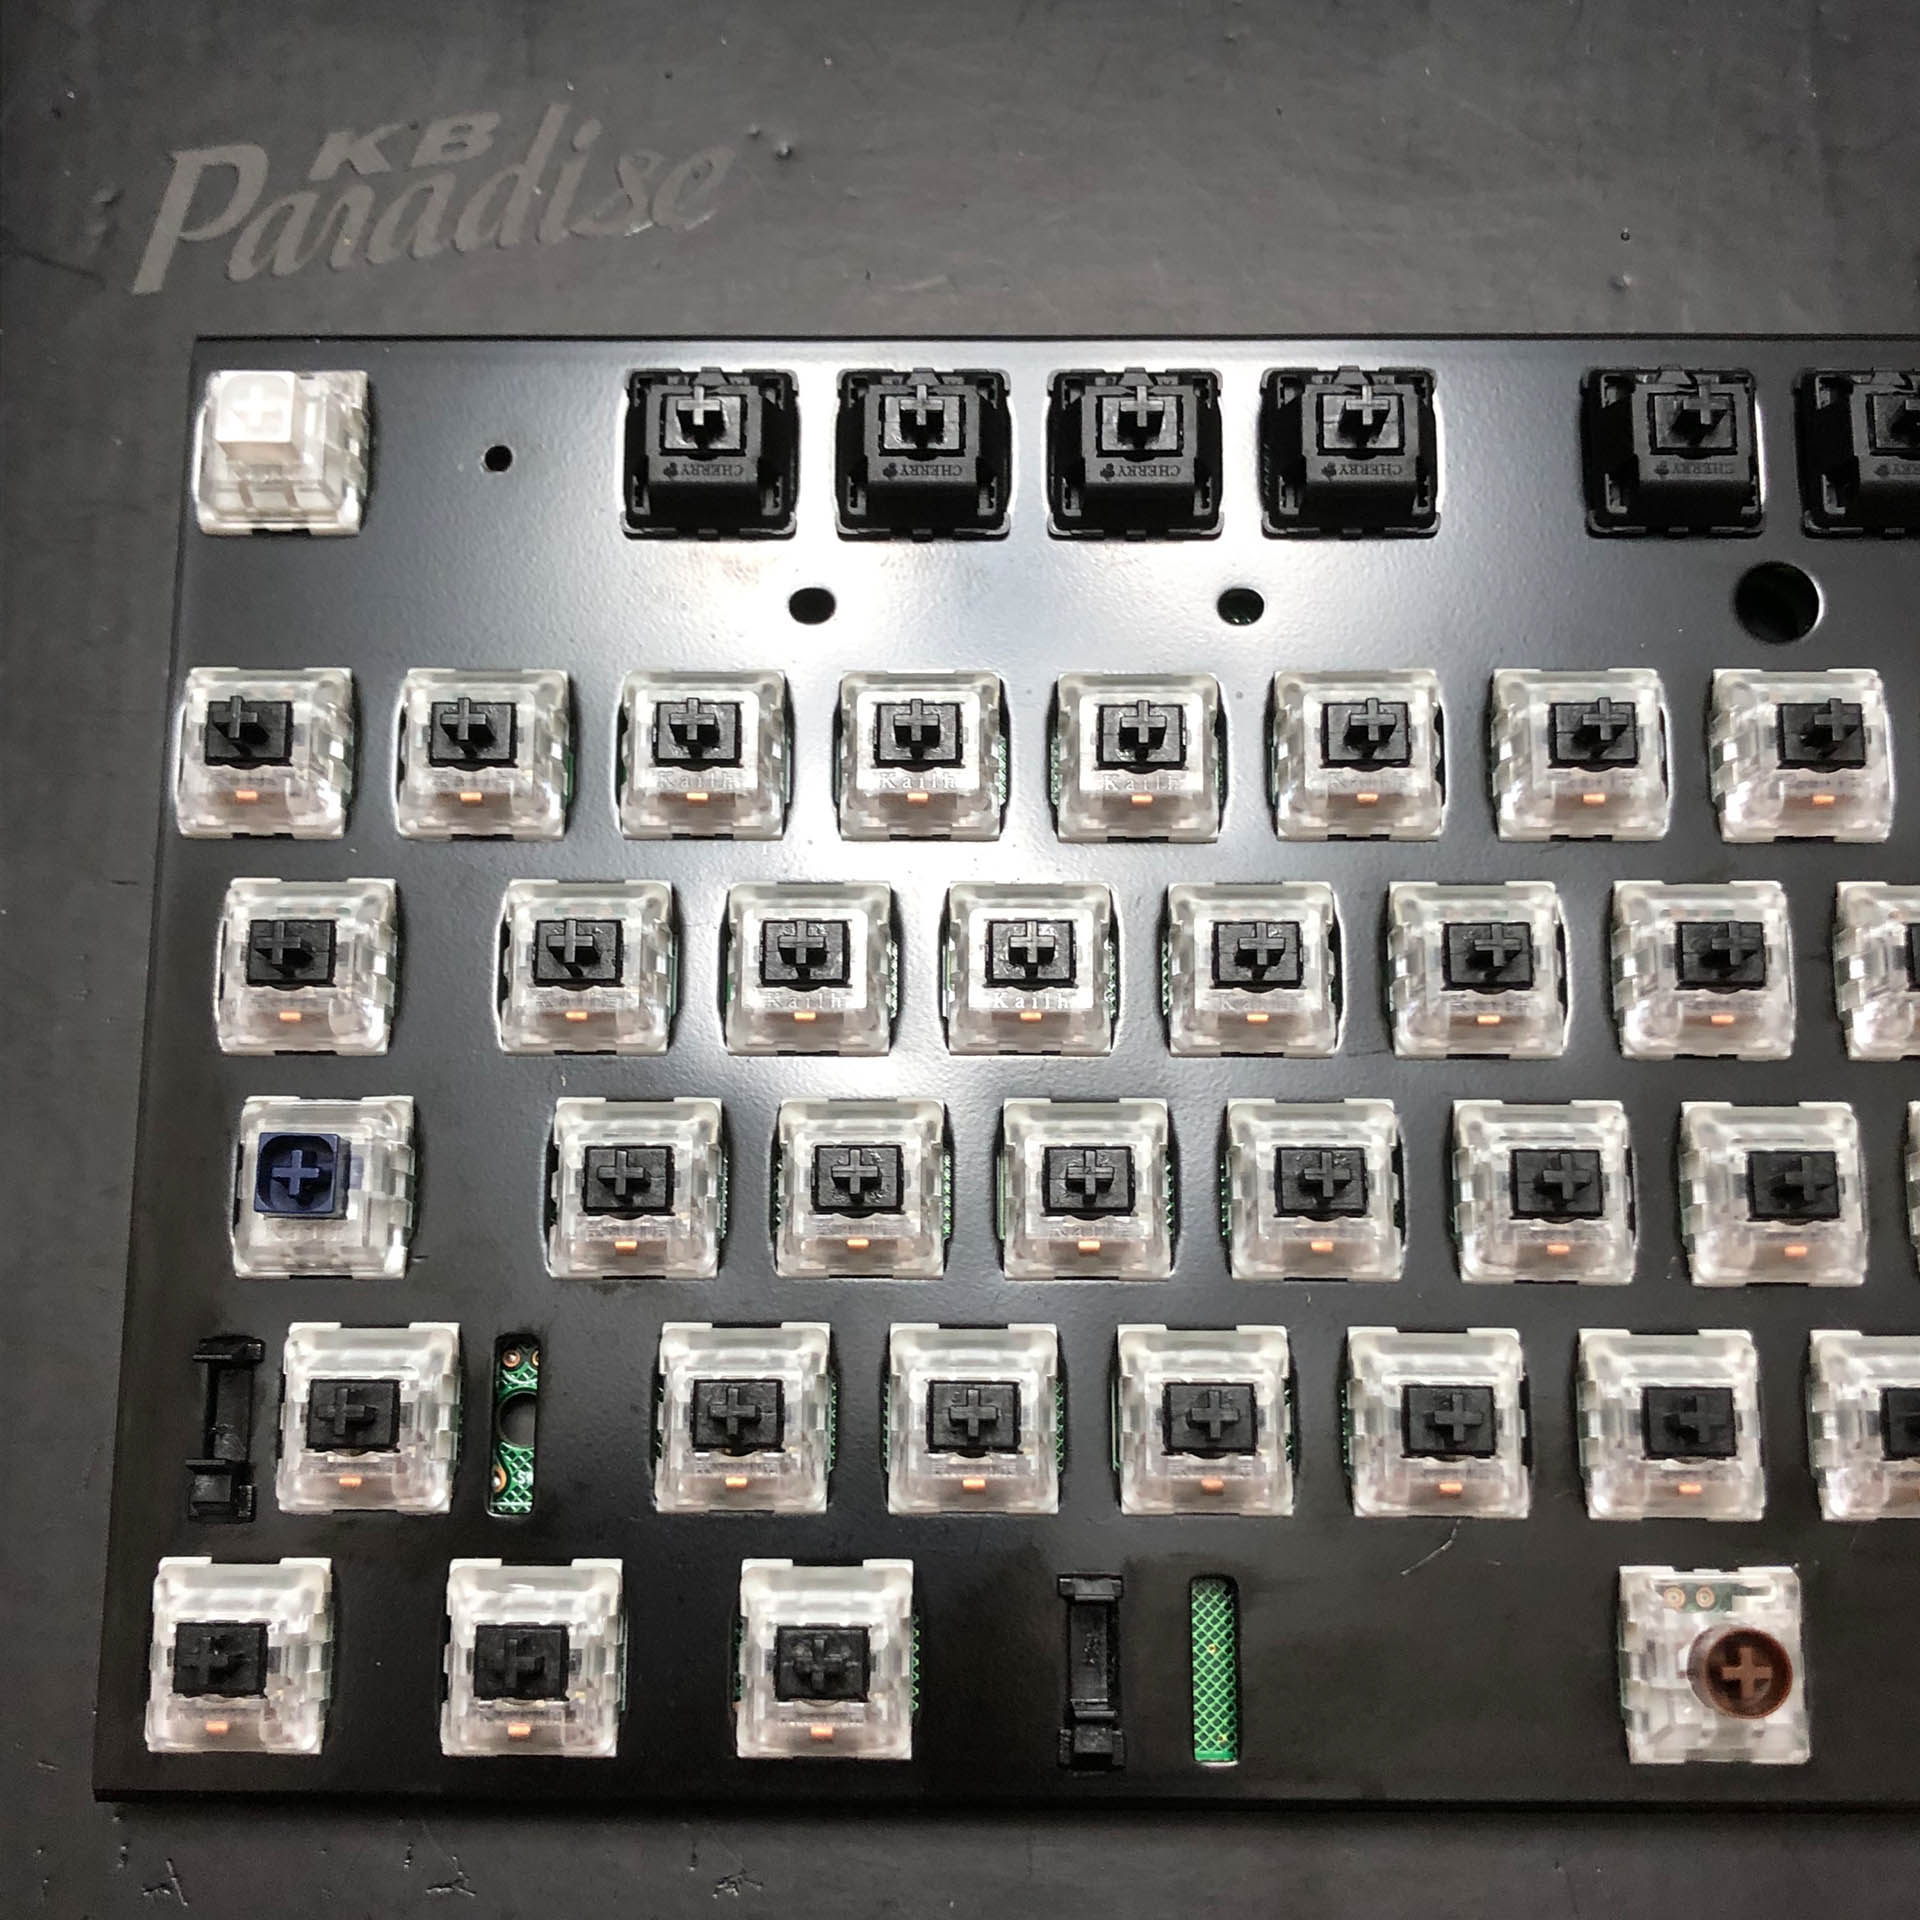
The fully-assembled “sandwich” – now complete with previously missing stabilizer inserts.
Since I already had a mixture going on, I figured, why not be a little creative? Modern keyboards don’t use actual locking switches for things like caps or scroll lock, but I bet our rugged man of the world here has used more keyboards like that than not – so I decided to emulate the experience by giving click-bar switches to the locking keys. I thew one on the ESC, too – just for a little satisfying emphasis in use. While the thin caps make linears sound a bit like pleasant rain on a fiberglass roof, I wouldn’t say the same about the space bar – so I used a Silent Box Brown to dampen it down to a level more comparable with its neighbors. (I also find Kailh’s Silent Box dampening pads quite pleasant to bottom-out on, so perfect for an otherwise noisy space bar.)
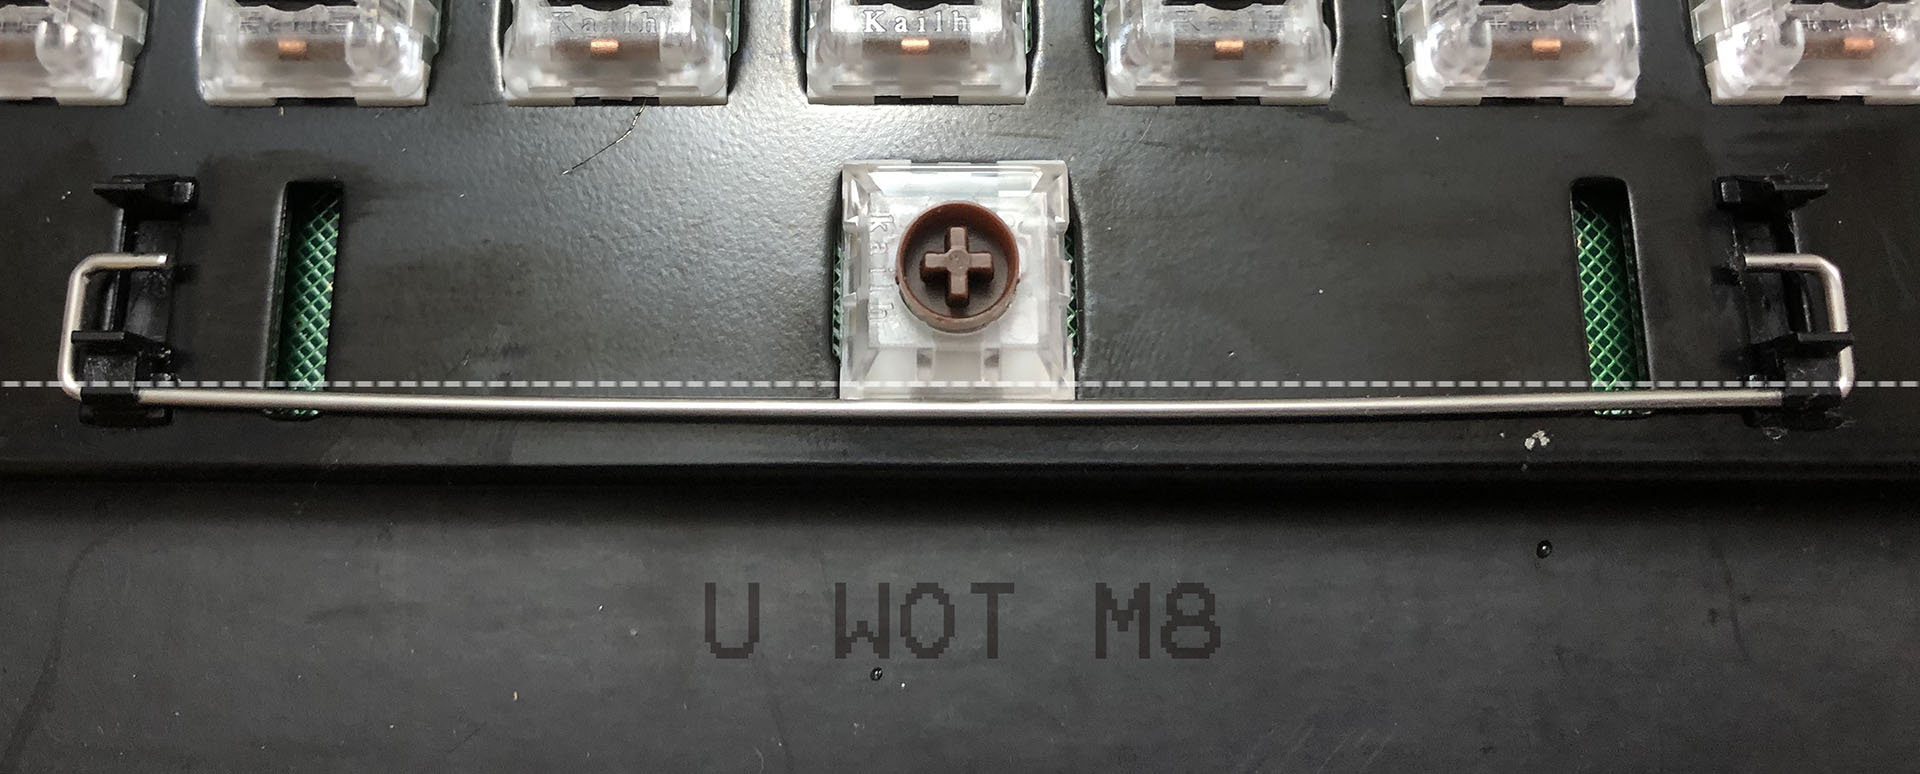
This is how the KBParadise V80 ships; with the wrong kind of stab wire, bent against the switch. Mmm, extra friction… Technically speaking it functions, but come on!
Keyswitch quirks all covered, a brief mention about the stabilizers; they’re Costar. While I’m sure at least a few of you unconsciously furrowed your brow just now, they can be a great choice for builds that won’t see much in the way of key or switch swapping. Like any other type, they aren’t all created equal – and the ones left on this board when I started this project were on the cheap side. I ordered a few fresh ones complete with the actual right kind of wire for the spacebar (lol wtf, KBP) and had an easy enough time installing them. A little grease (and maybe some cloth tape shims) in the right spots, and (good) Costar-style stabs can be pretty easy to make quiet with their smaller part count and general lack of plastic-on-plastic contact. (That’s right – these stabs only need ONE kind of lube. LUXURIOUS!)
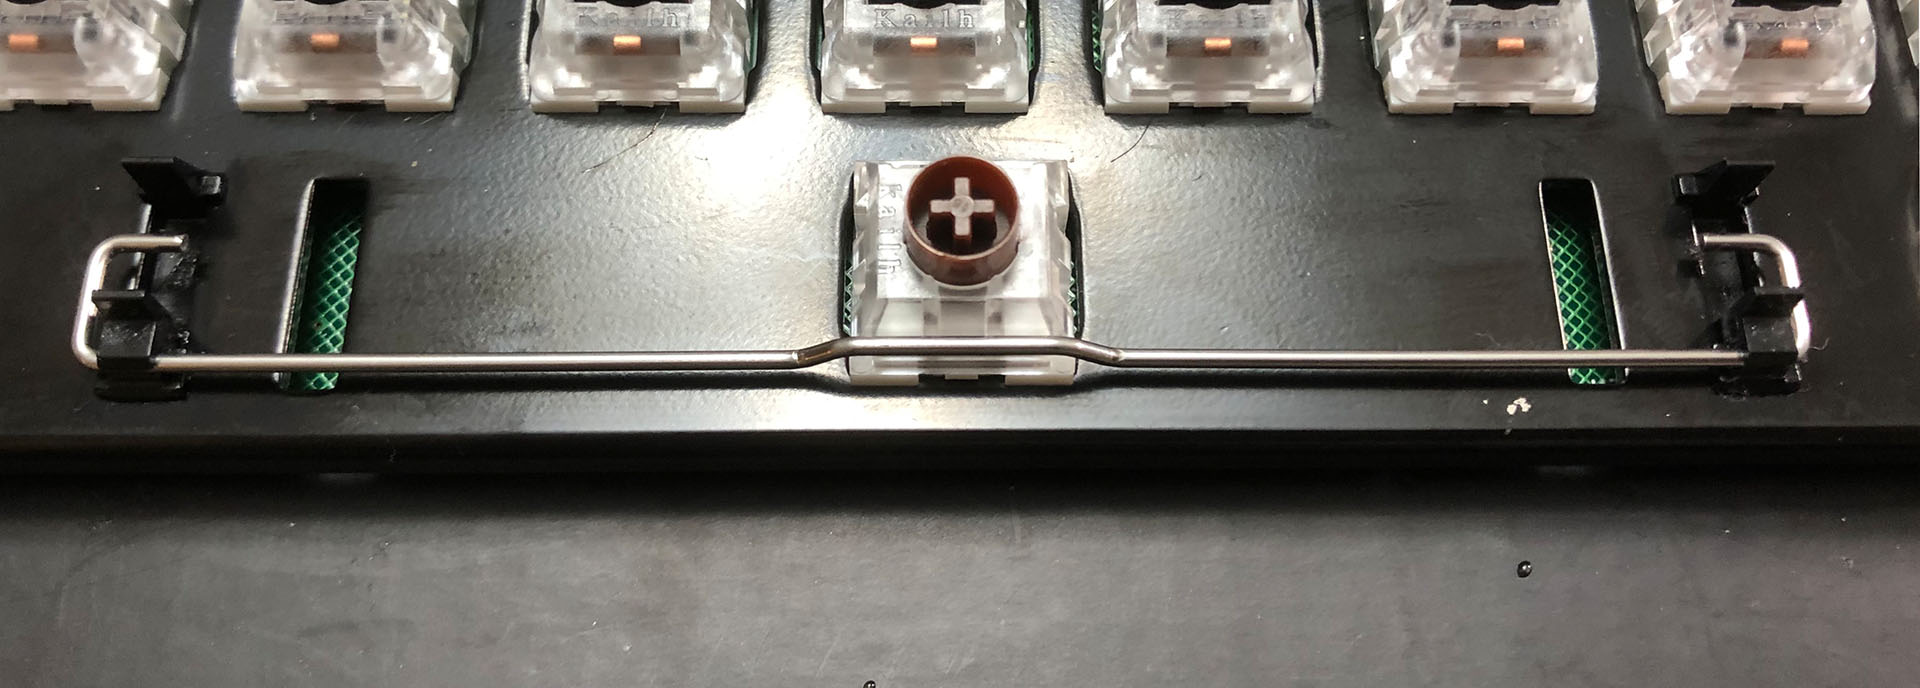
Ah, much better. I’m honestly not sure if this wire would have worked with the previously installed North-facing Cherry housings, but it does just fine with the “ambidextrous” Silent Box housing.
I mentioned before having the perfect case for this build – that being the top shell of a Filco Majestouch 2 Camouflage R (or MJ2R for short). I originally bought that board because I wanted a Filco that had media controls, and back then, I wasn’t comfortable installing something like a replacement controller. I’d quickly put the Camo’s plate and PCB into a different case, and placed the Camo shell in a box where it stayed for years.
Installing the case on a similar but distinct keyboard wasn’t exactly plug-and-play, but thanks to both keebs being derived from a similar template, it was easier than you might think. Physically, it takes three mods to install a Filco top shell onto a KBParadise bottom half;
1.) Remove a standoff here…
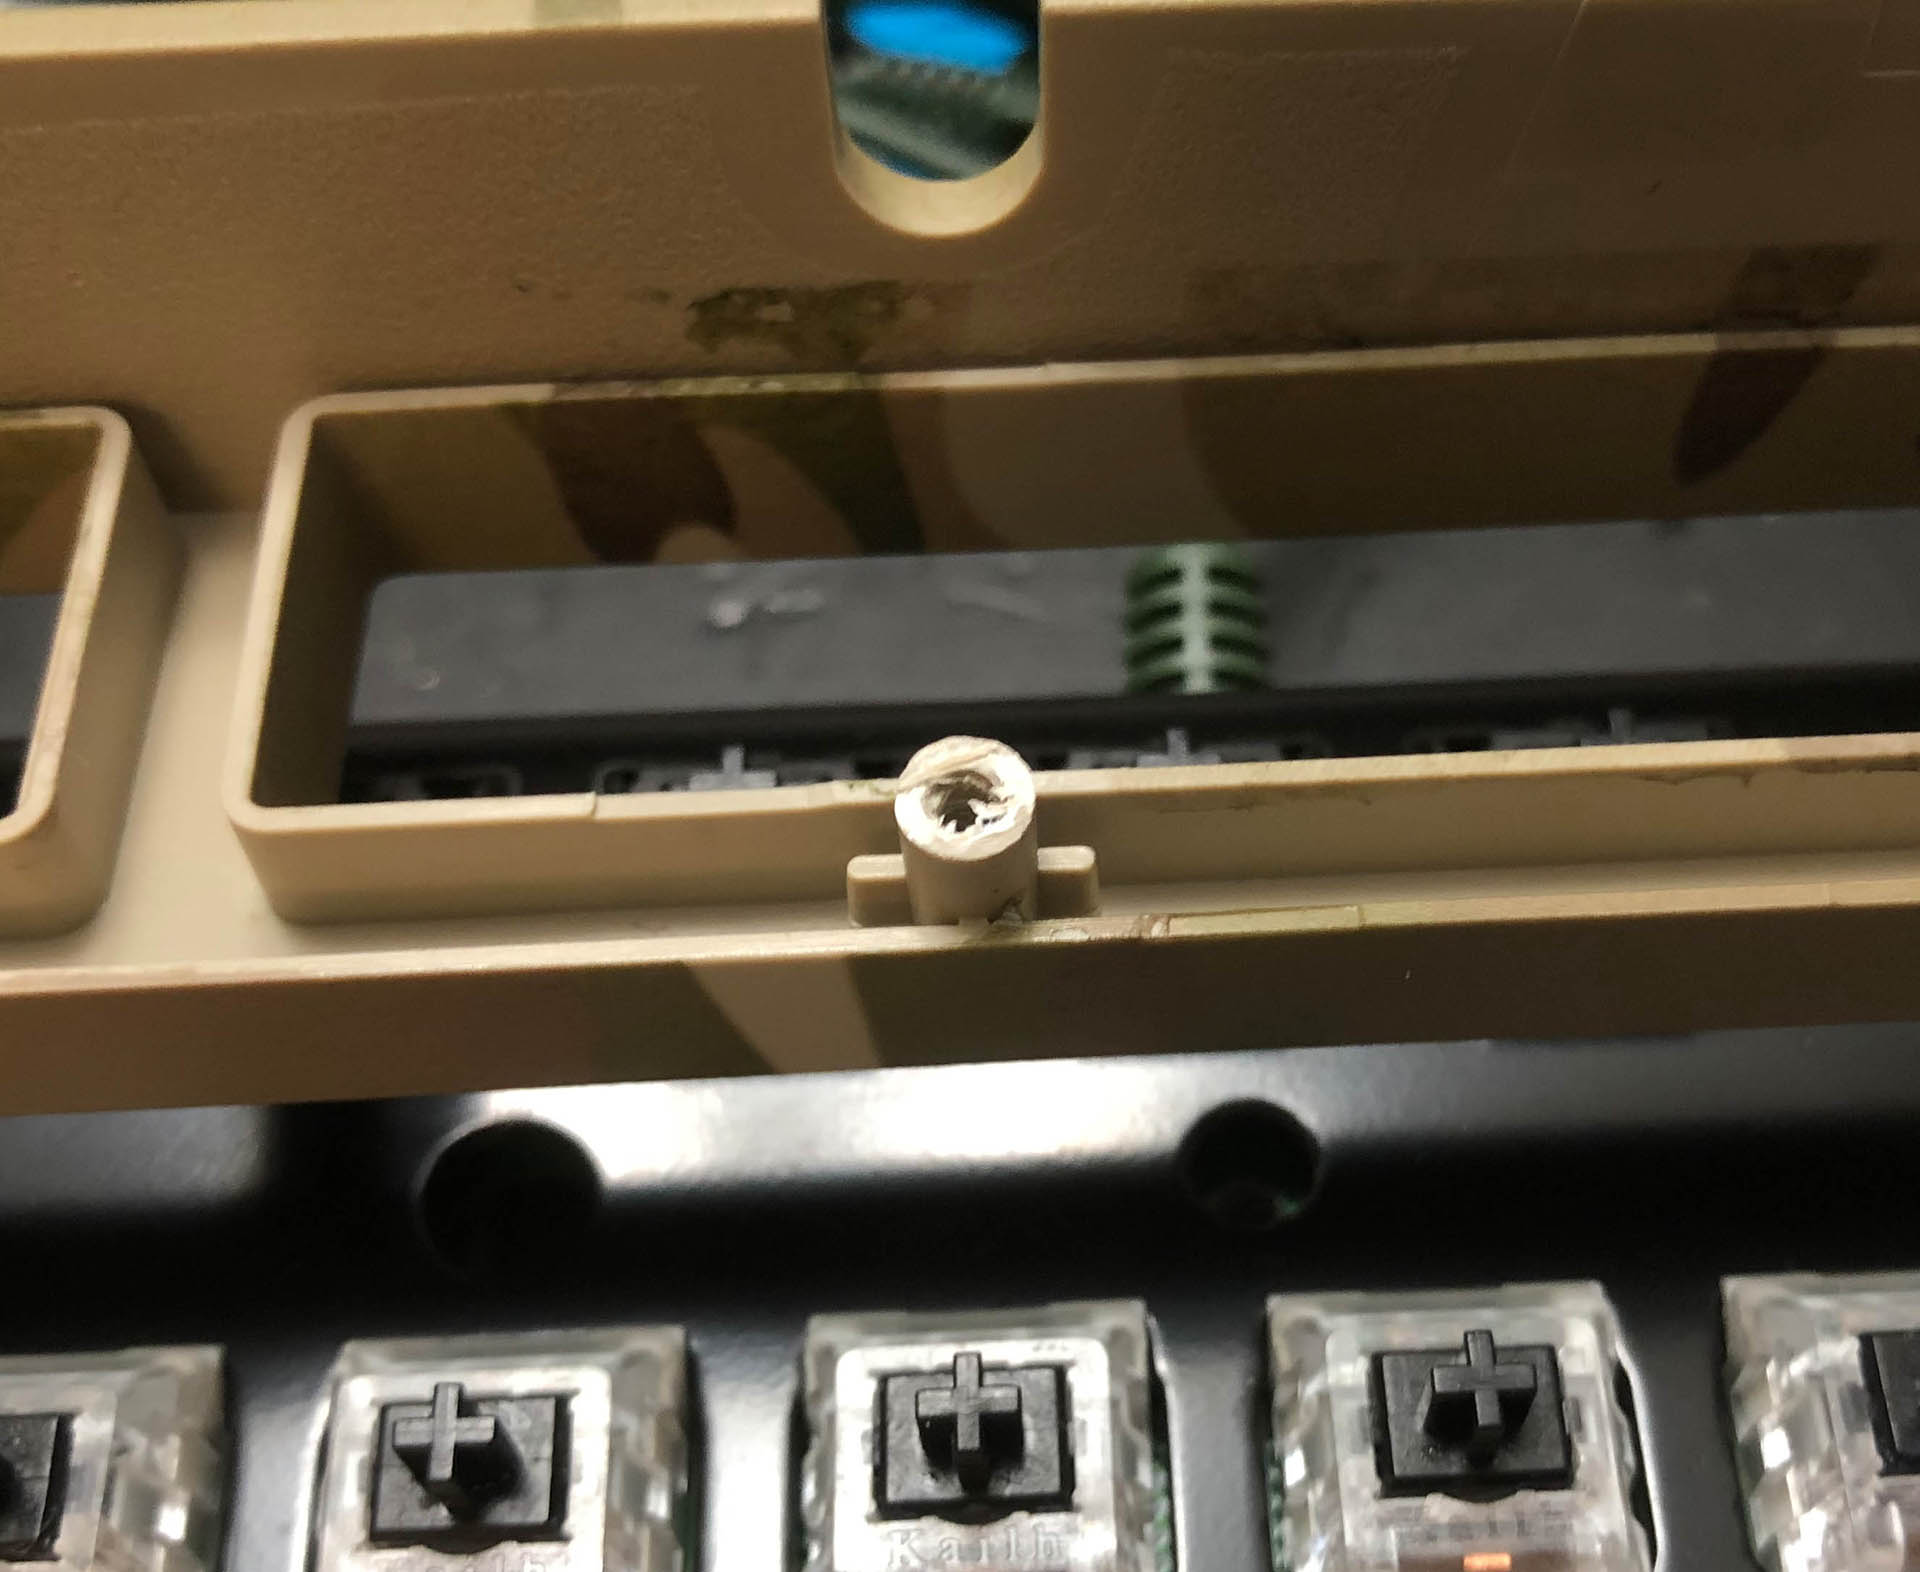
2.) Trim this one down a bit…
… because if you don’t, this happens.
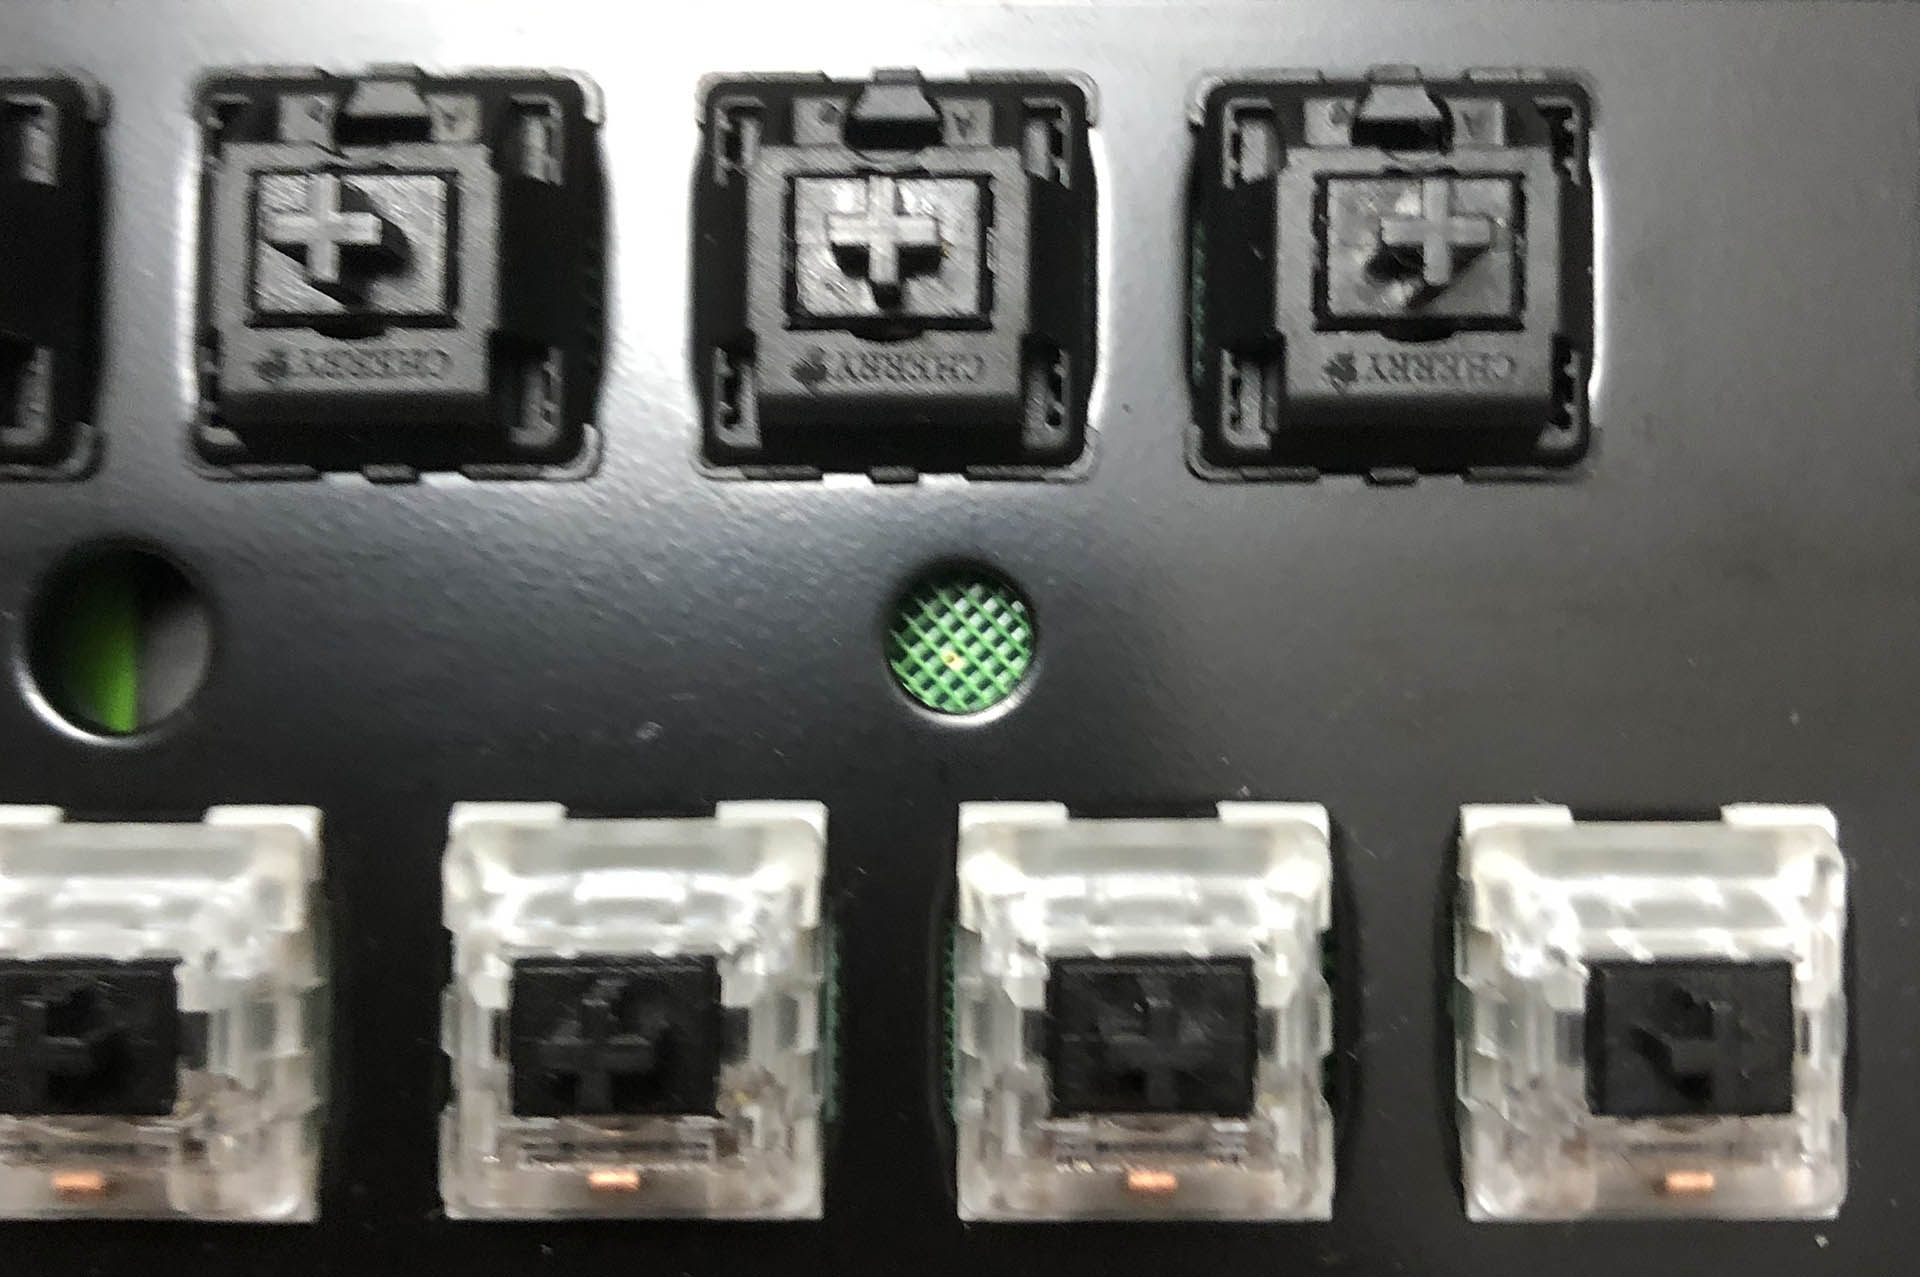
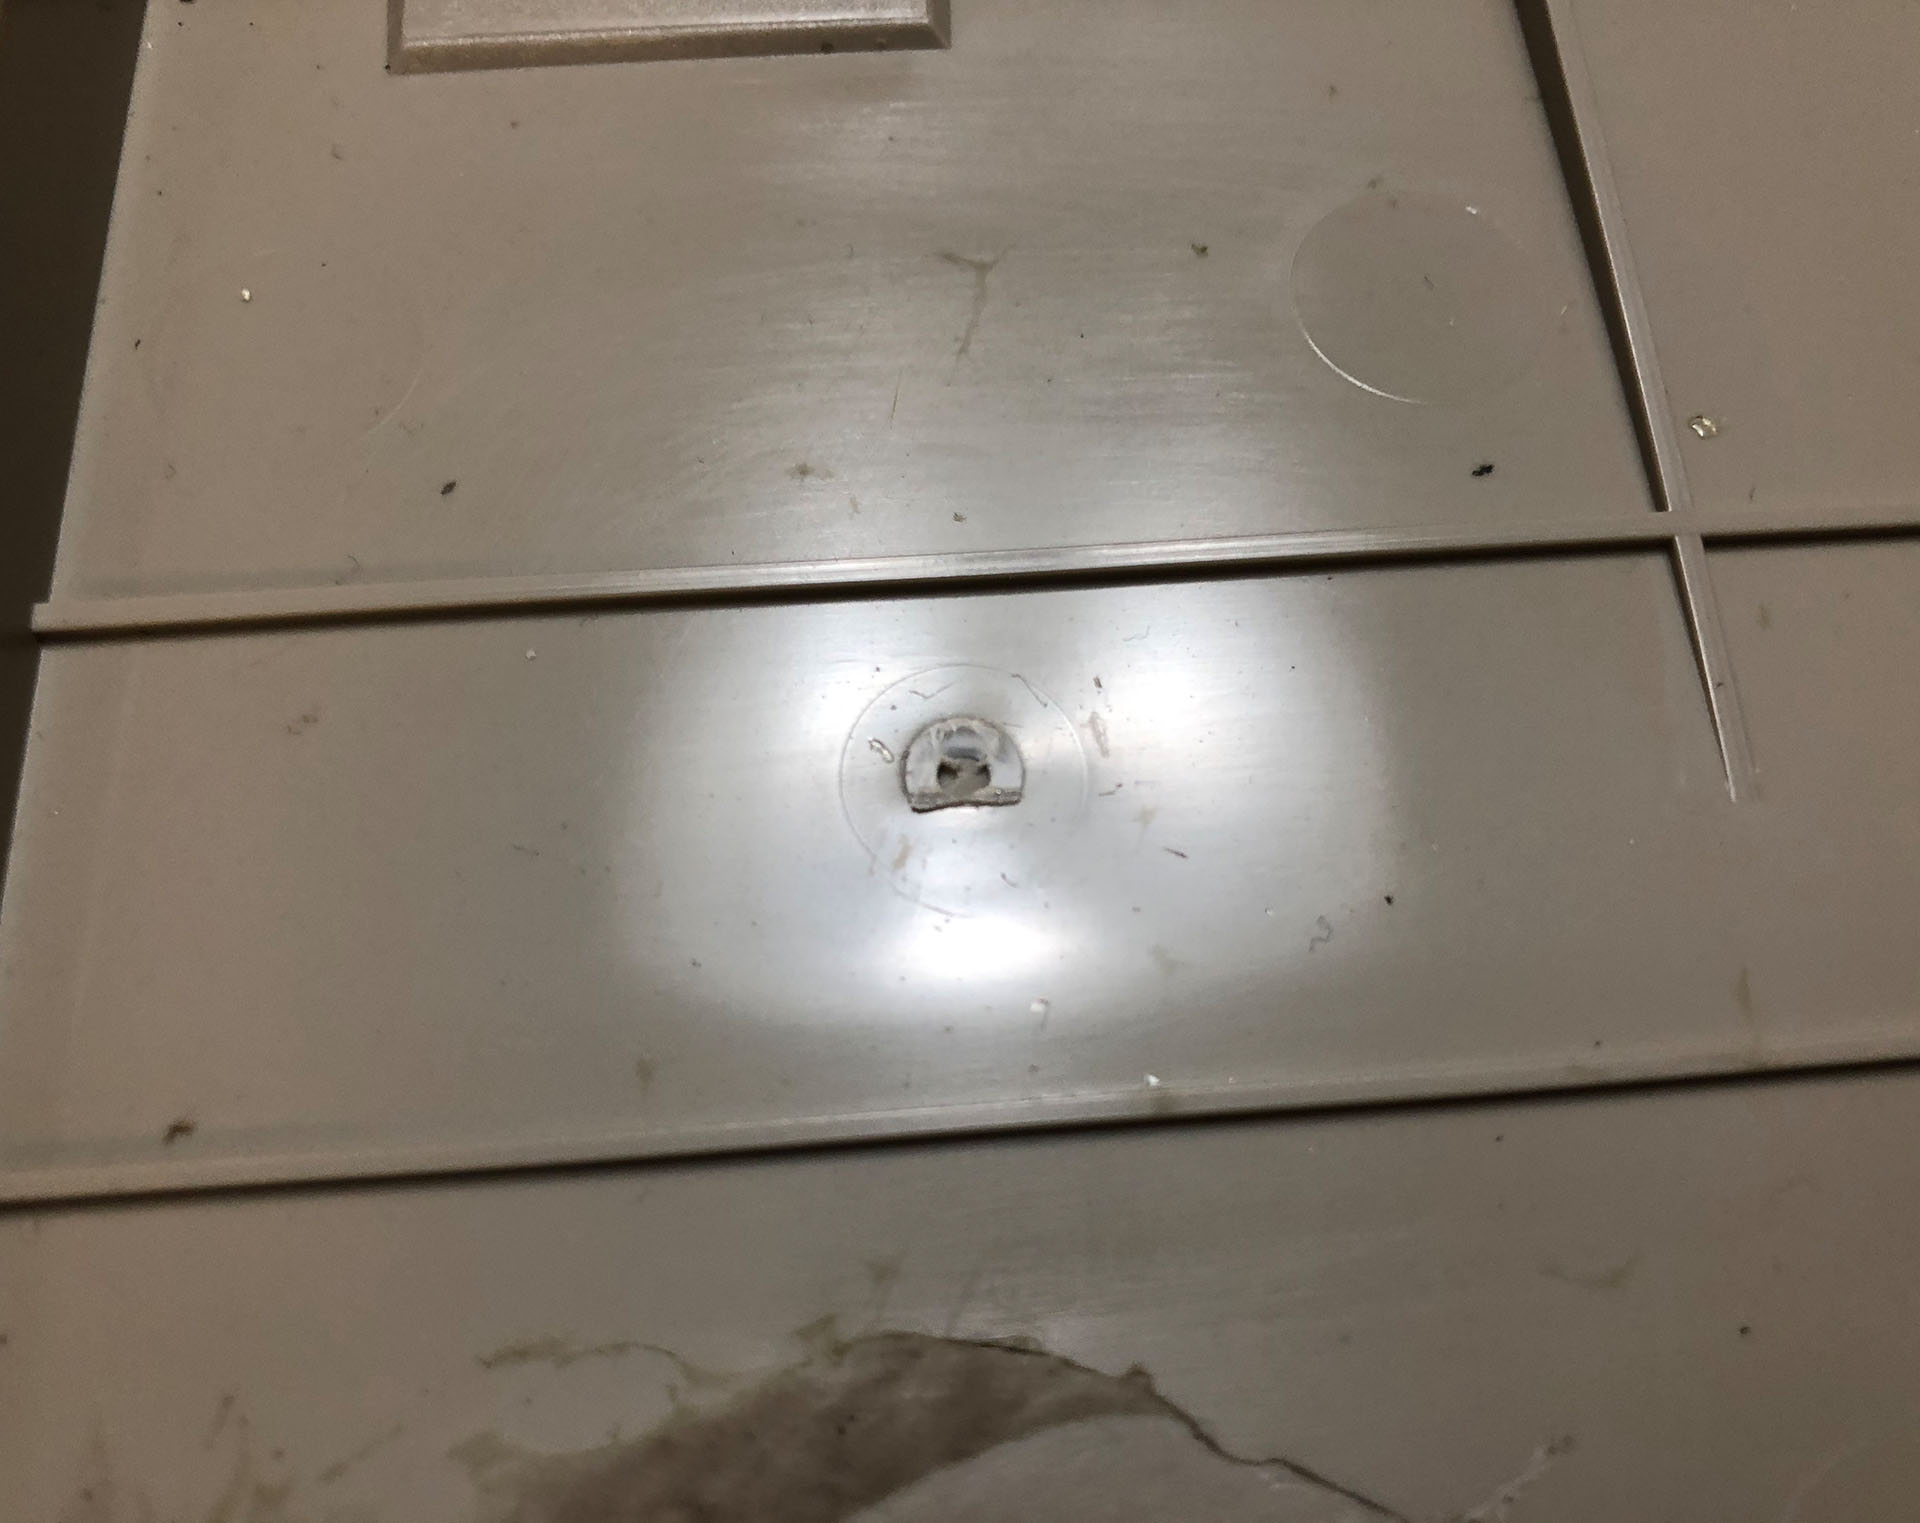
3.) Drill a hole in the PCB here; this is where you’ll be anchoring the case to the rest of the build, supplementing the front and back clips and friction-fit.
Having the plate attached makes this a bit easier, since it makes the hole placement pretty obvious.
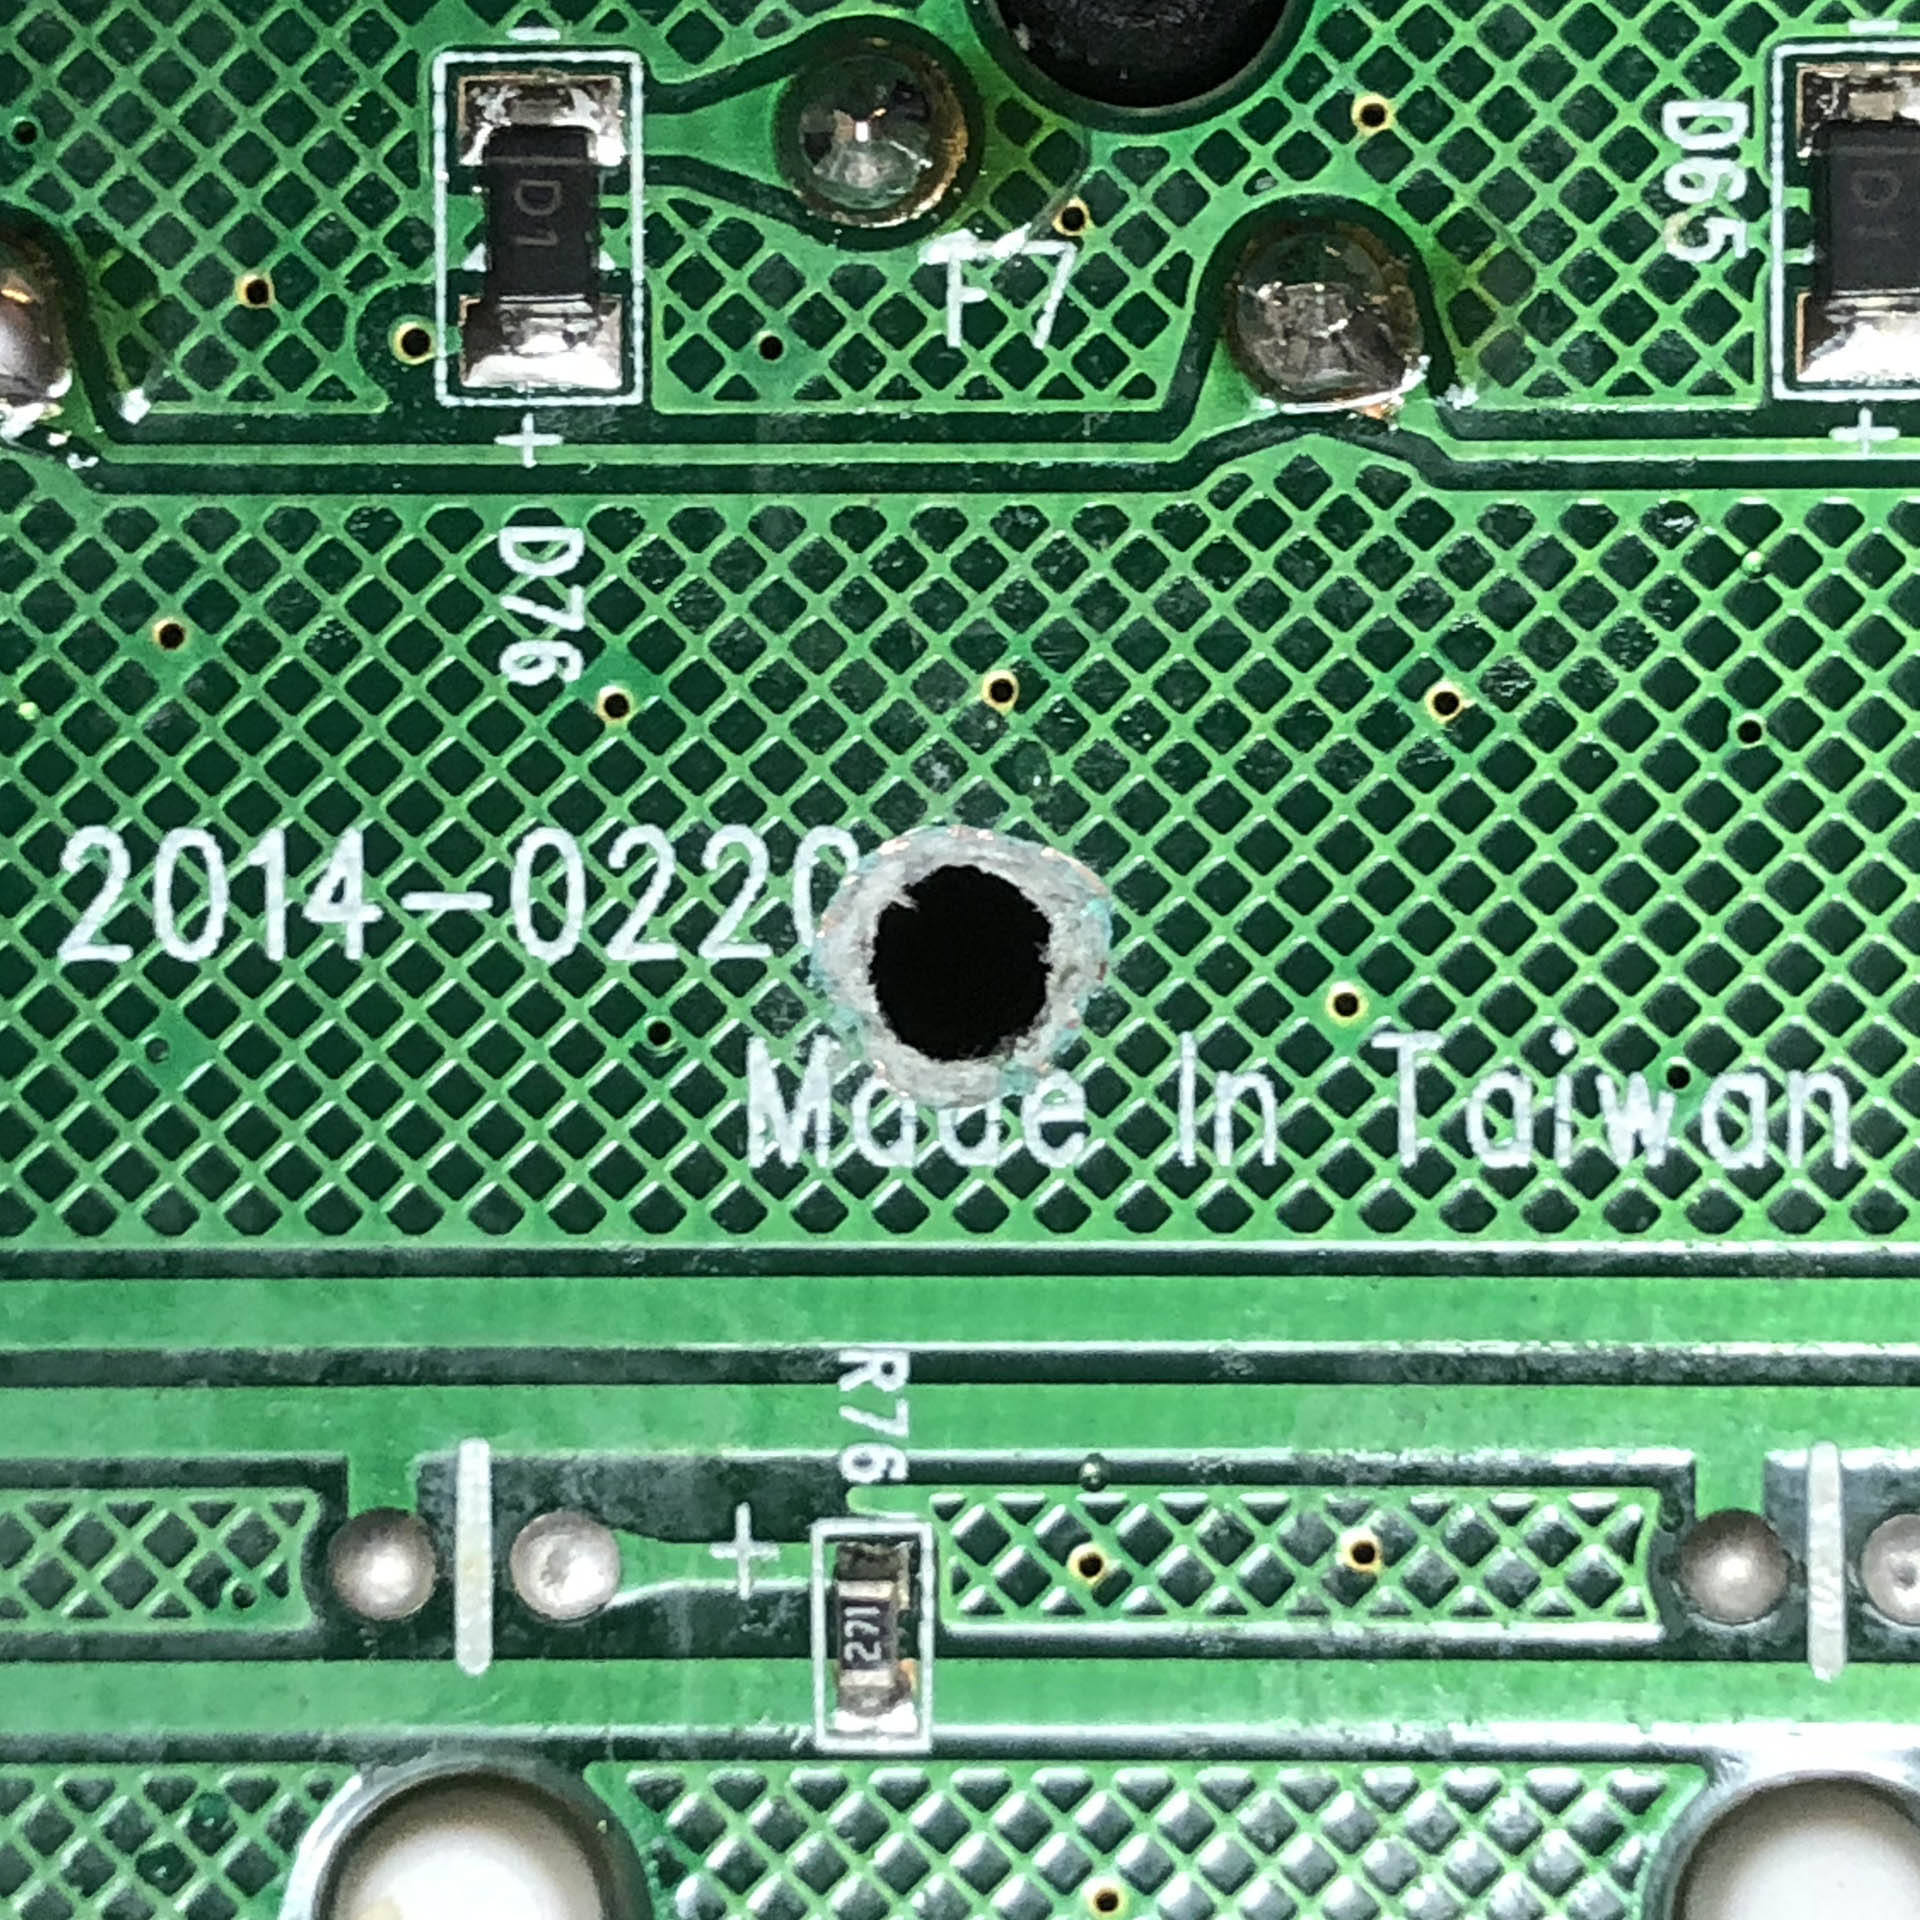
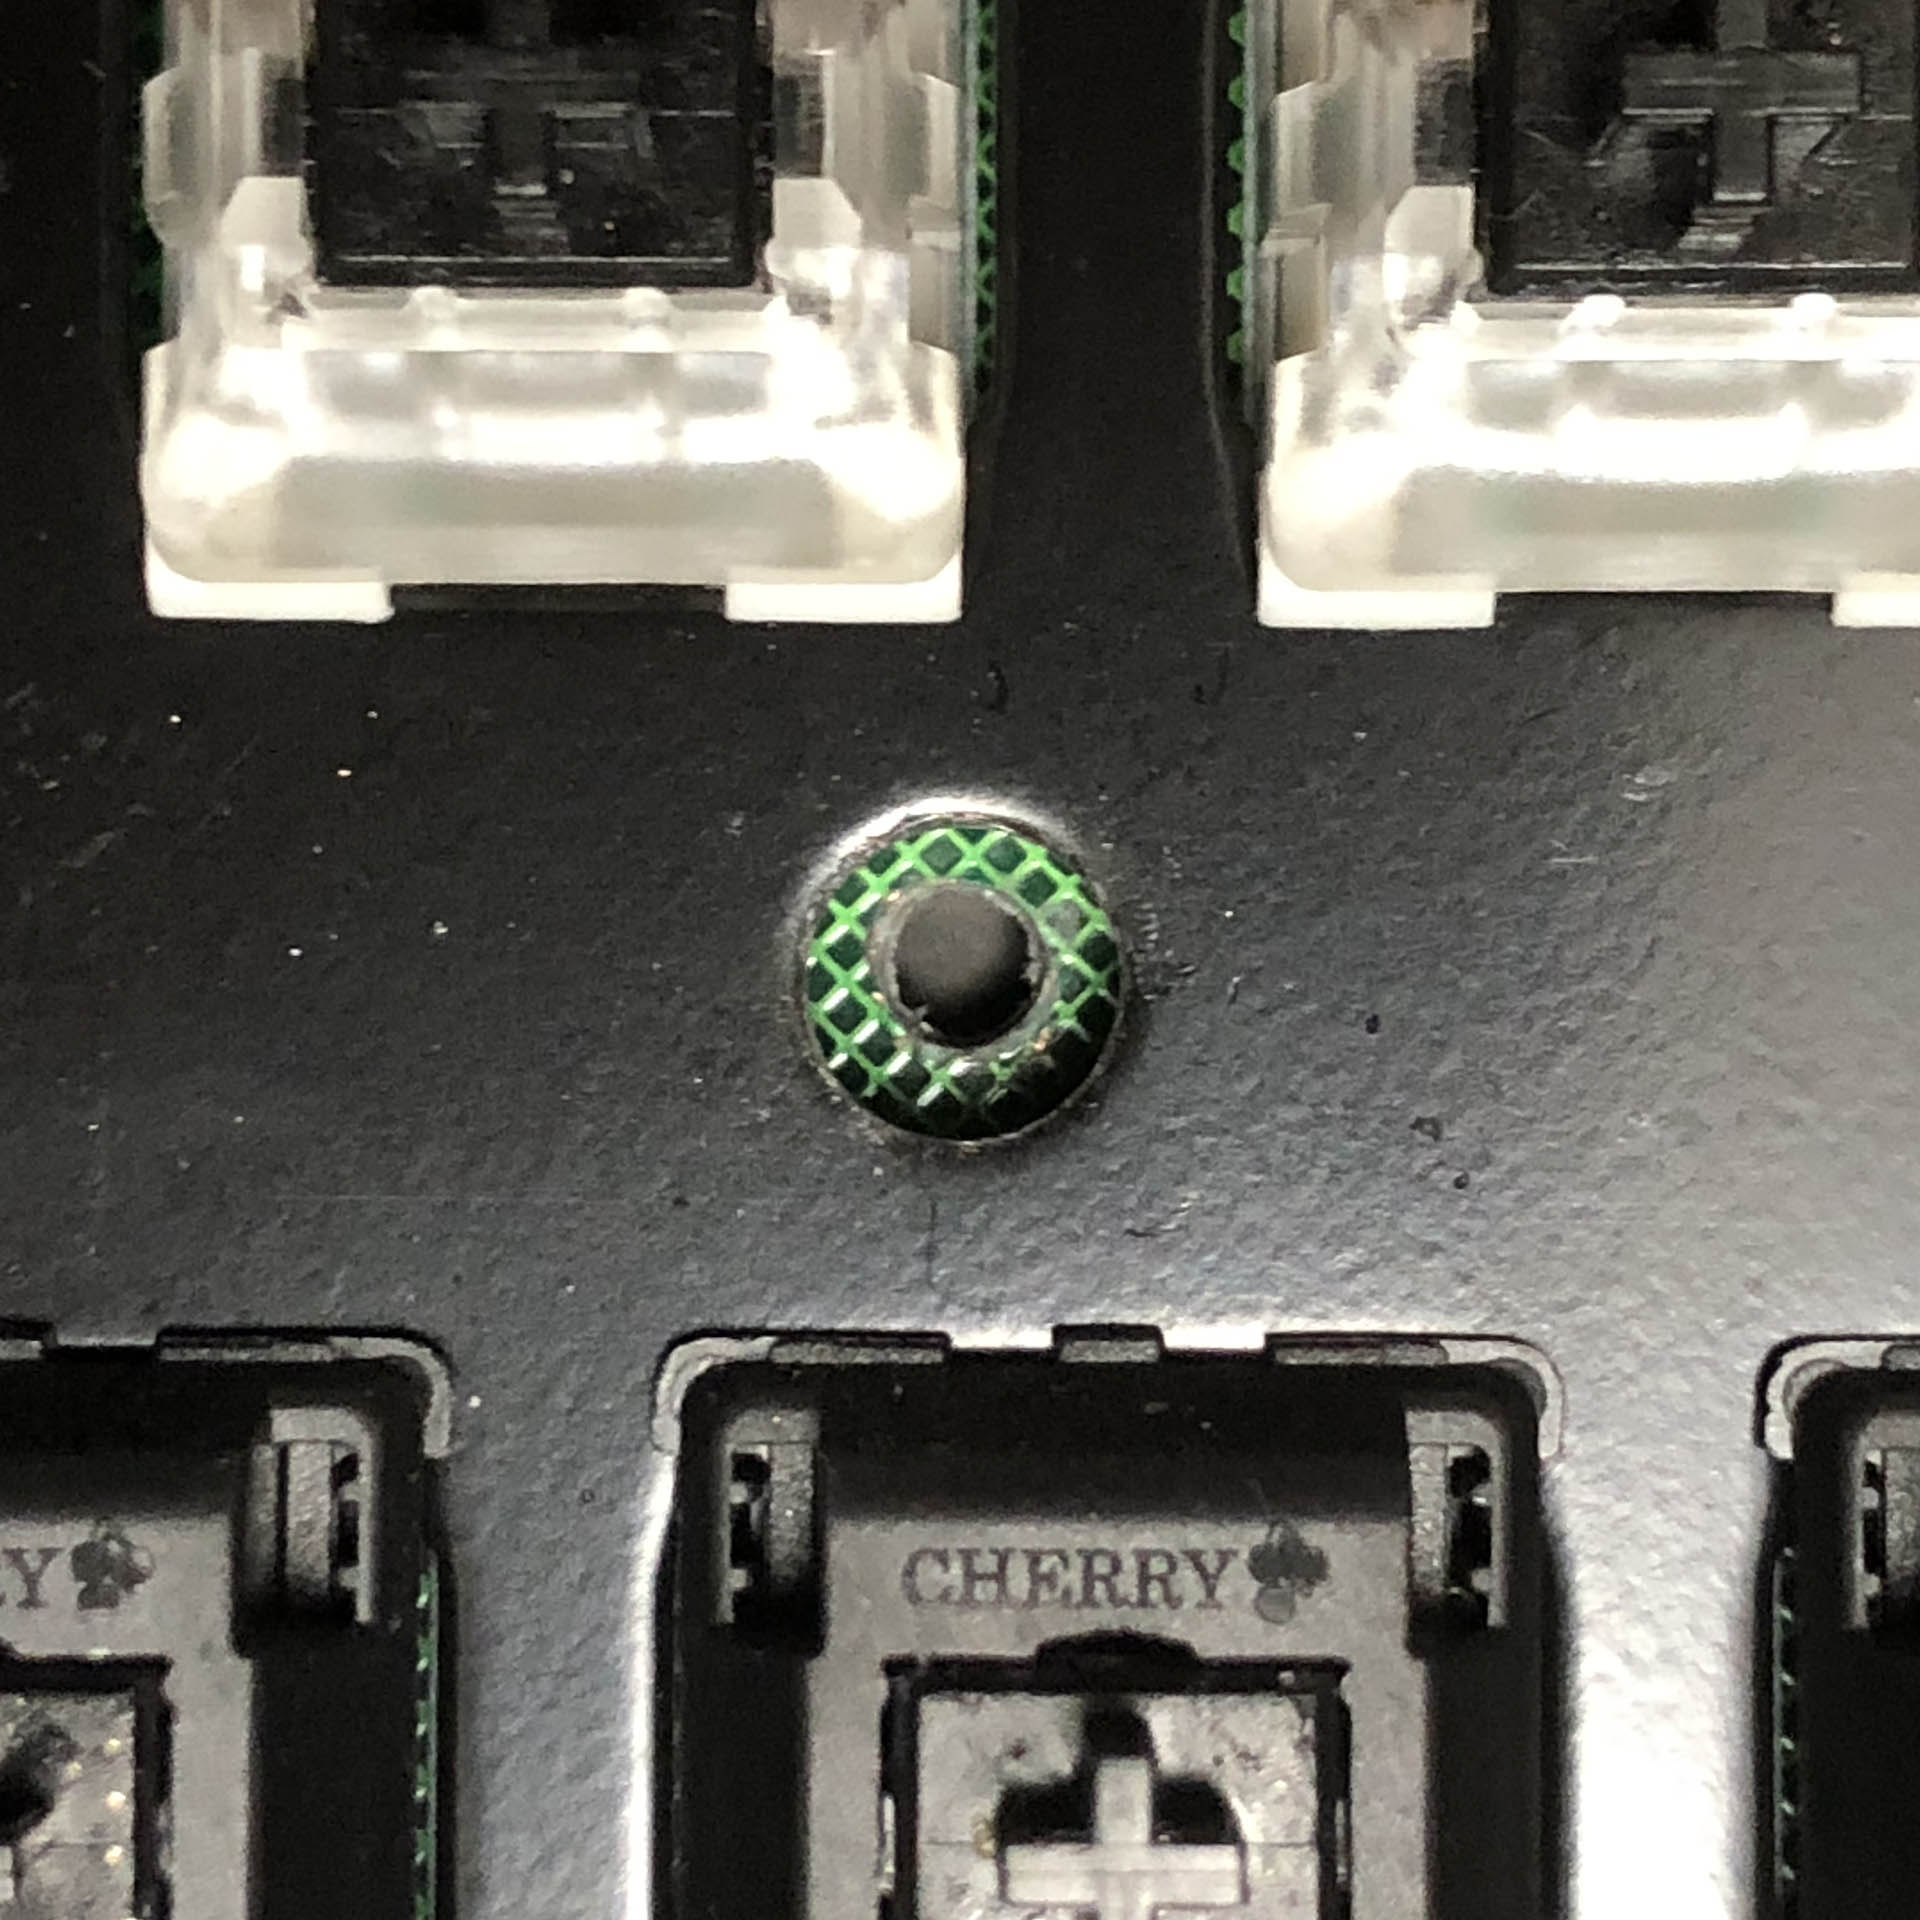
A look at the hole from the other side; no traces were harmed in the modding of this keyboard.
And that’s it! I used a fairly similar procedure to install a Turtle Beach Impact 500 into a YMDK full aluminum enclosure intended for a Filco MJ2.
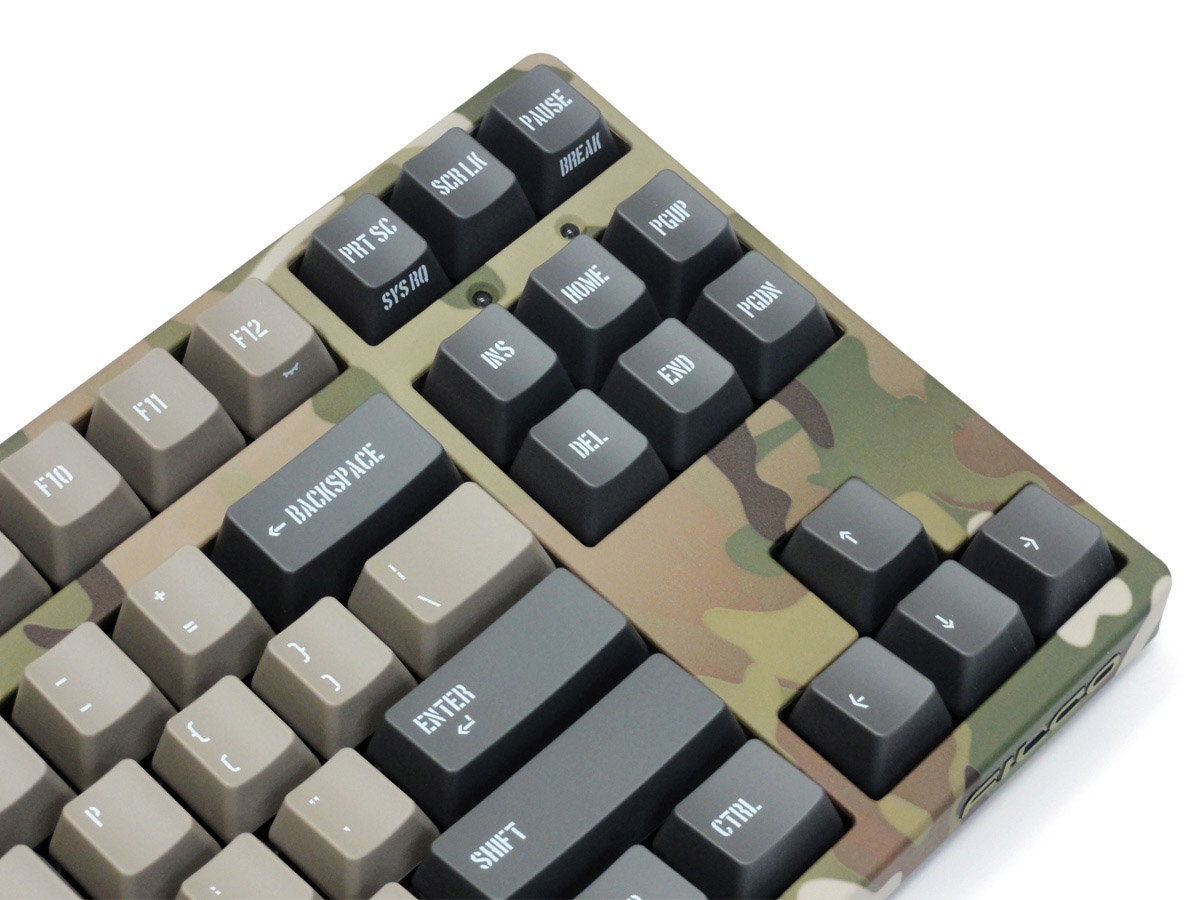
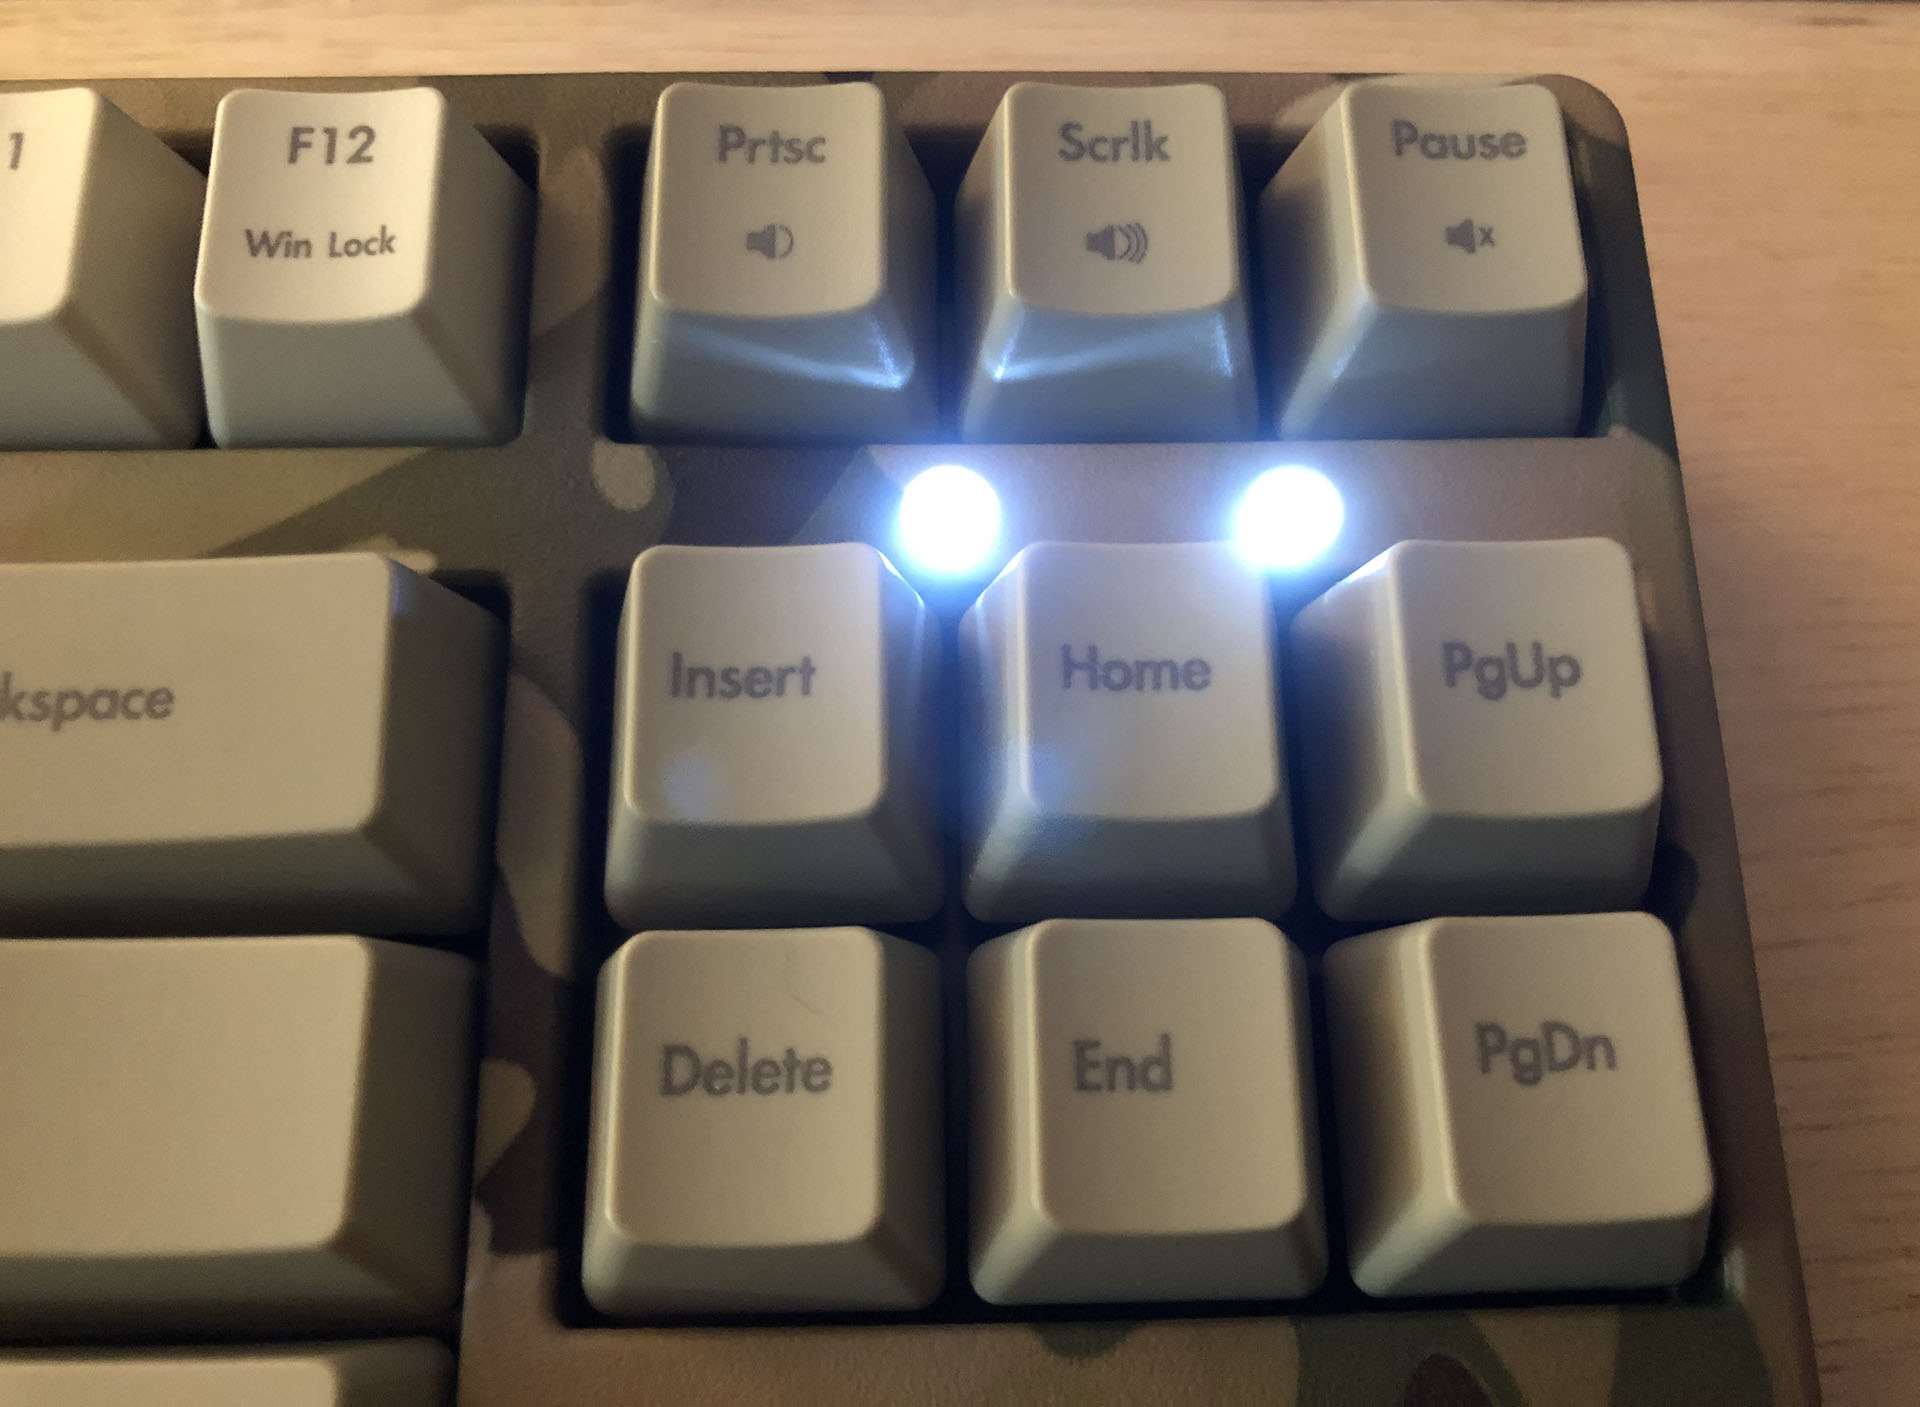
The Camo’s stock keycaps – Eeeeewwww
I also used the green rubberized cable that originally came with the Camo, because why not – and the stock V80 “Retro” keys I mentioned earlier fit quite well with the color scheme. They’re a two-tone sandy beige, and I actually like them with the camo print a bit better than the white-on-light-olive keys with dark-olive mods it was originally paired with. They had a pretty cheezy weathered stencil font, and also had sub-legends that didn’t match the PCB I was using, so going with the V80 keys was an easy choice.
Here’s the full case in all of its hydrodipped glory, adorning the now heavily-modded V80:
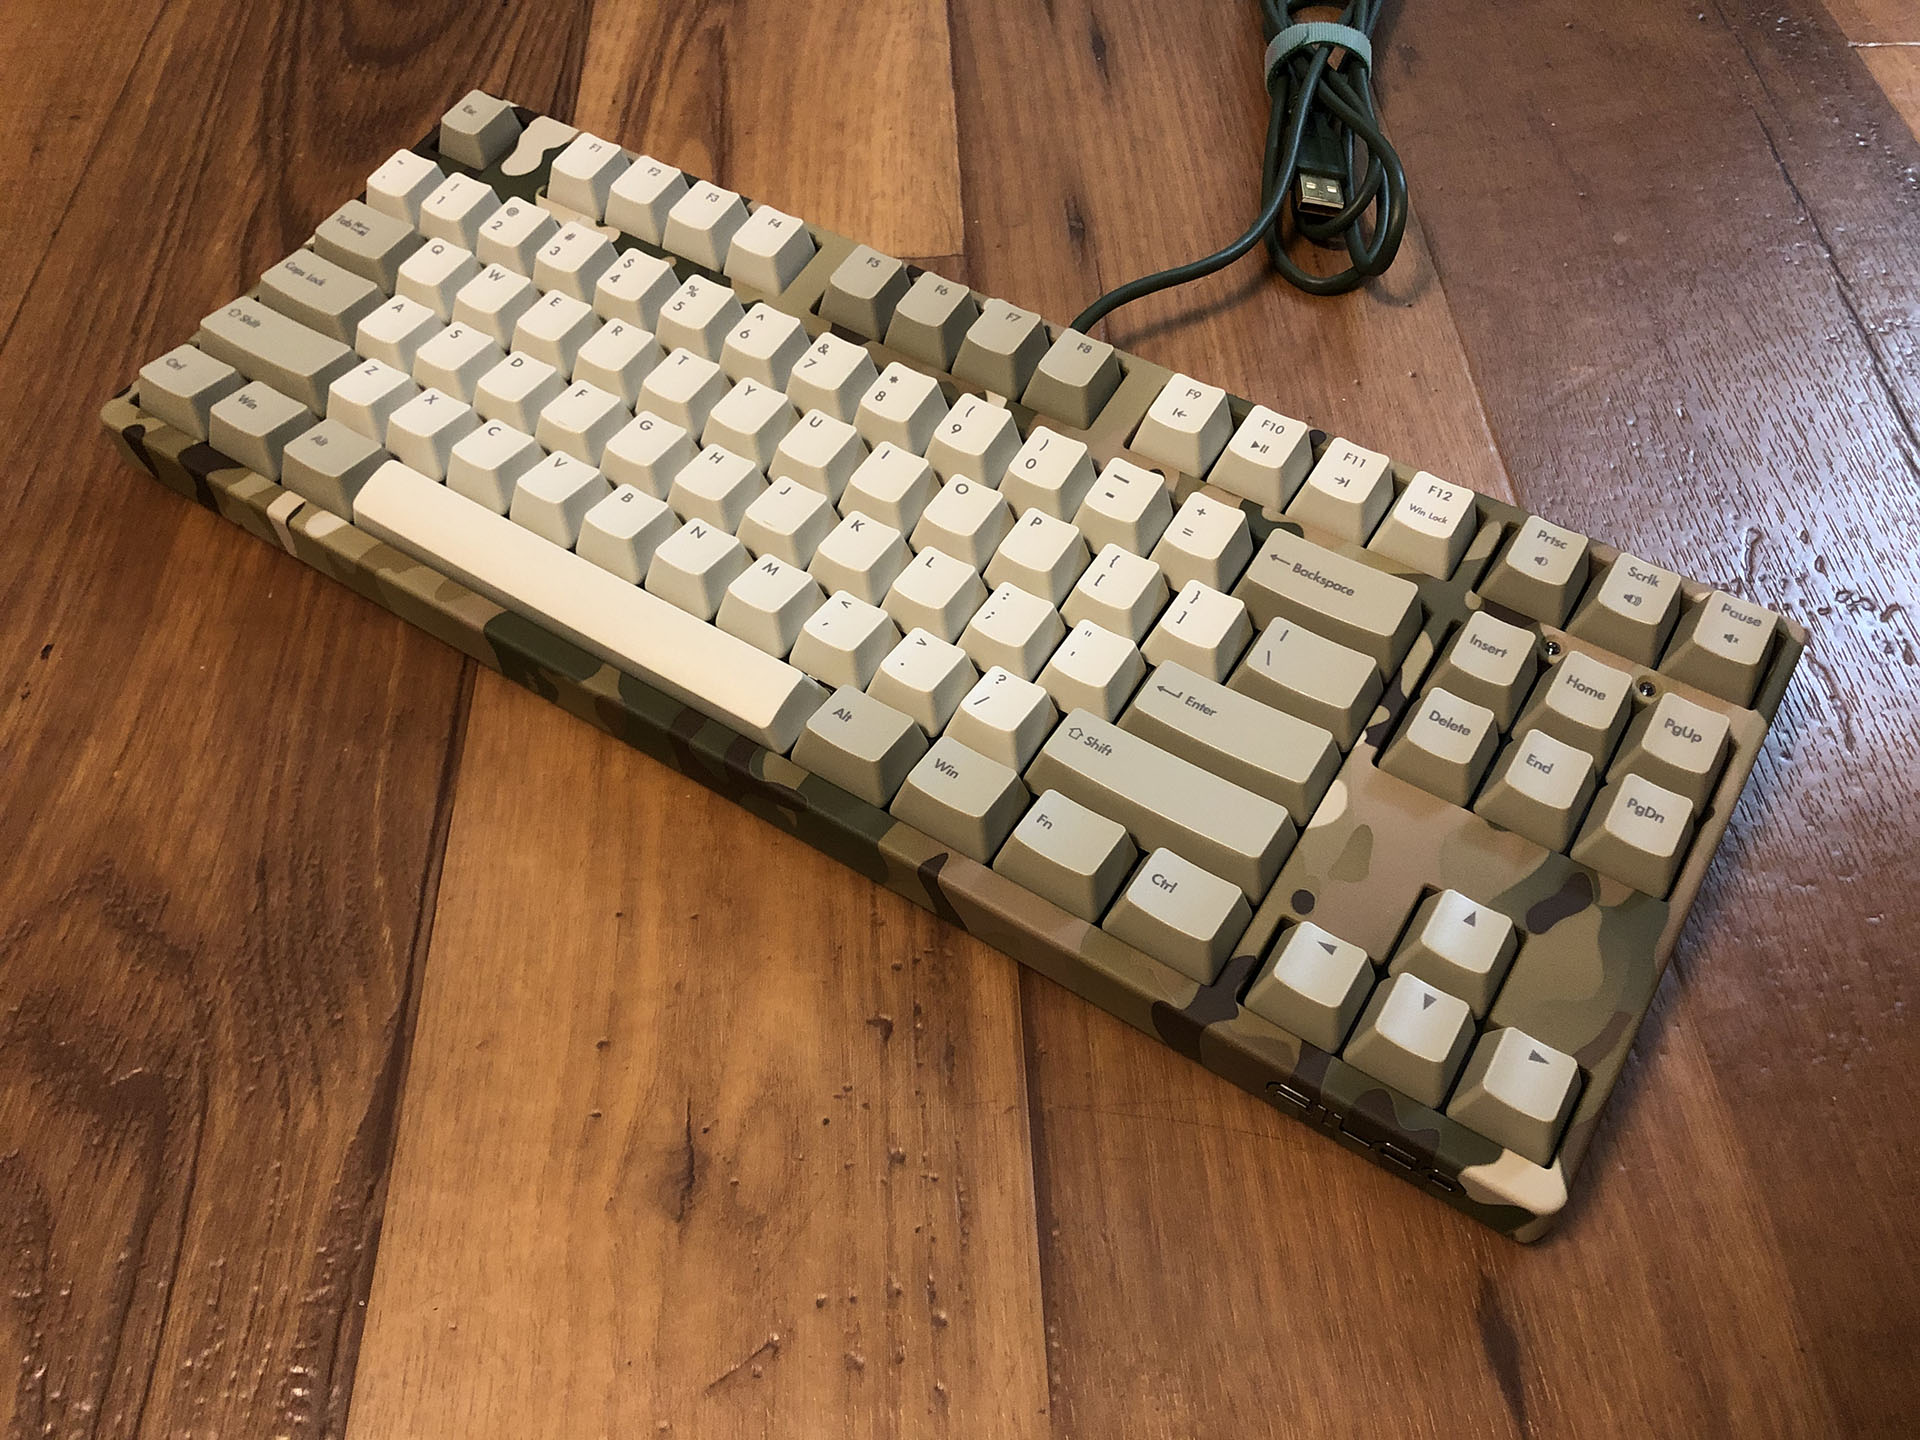
With its new aesthetic, I think this board might look more at home on a desk in a hunting lodge, rather than behind the counter at an Army surplus store.
And with that, the Country Living keeb is complete. Time to start up the fire pit-and crack open a PBR.