Originally posted March 2021
- Client: Programmer & Help Desk
- Budget: $200
- Core goal: Satisfying Silence for Work
- Form-factor: 60%
Very quiet, strong tactility, and some very nice keys. If you’re interested, come along and take the journey with me.
When one of our company’s new IT guys mentioned he wanted a good keyboard, I started asking him the keeb questions, narrowing-down layout selection first. He really didn’t hesitate, and went straight for 60% after seeing the usual suspects.
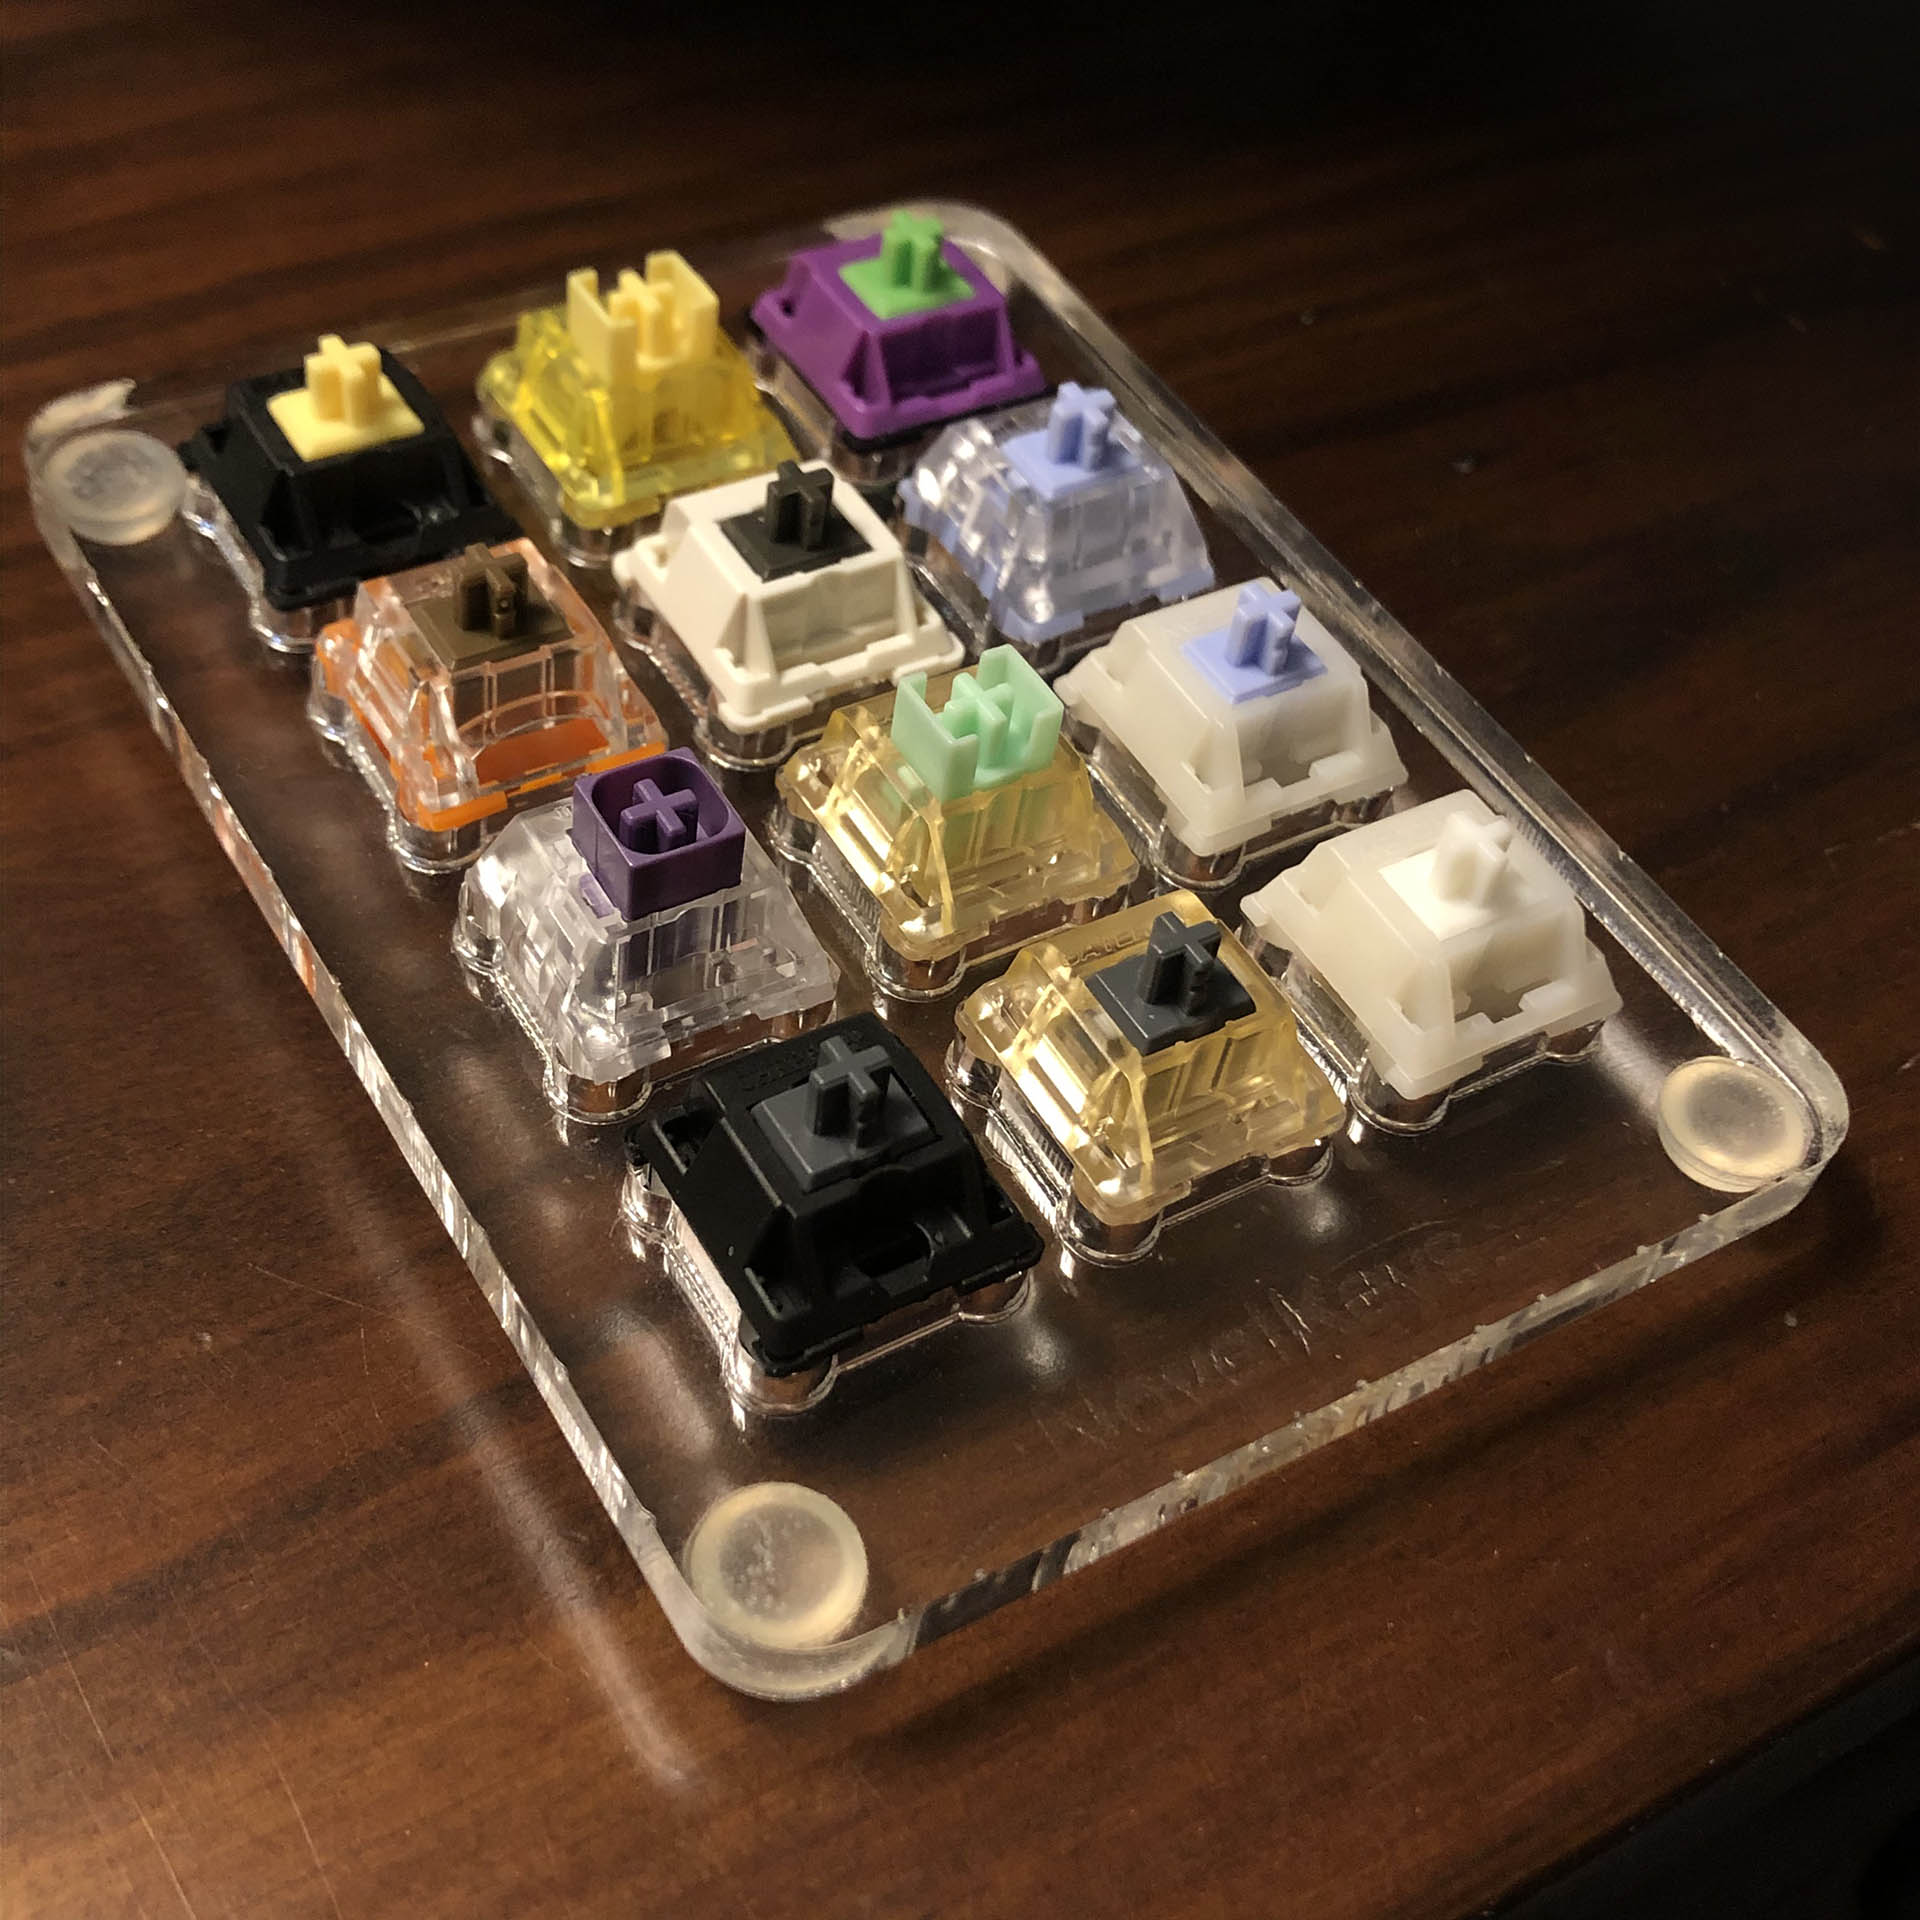
Not the exact switches, but you get the idea.
I gave him a 12-switch tester to try, and again he didn’t take long to hone-in on his favorite, a frankenswitch based around the Gazzew U4 stem and a linear leaf. He liked that it was quiet while also having the big bump, but he passed up other silent switches with the same stem and a stronger tactile leaf that weren’t as smooth or quiet.
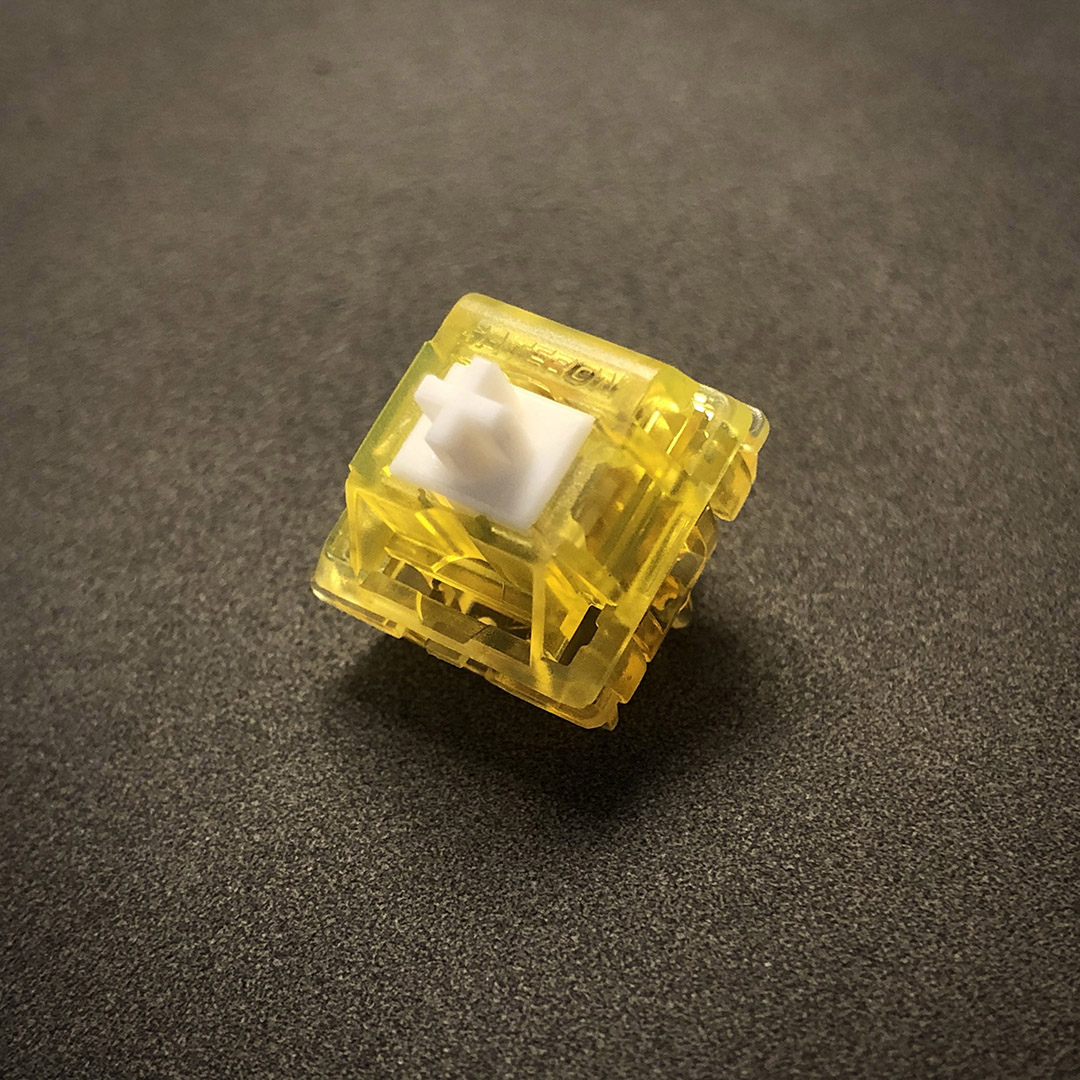
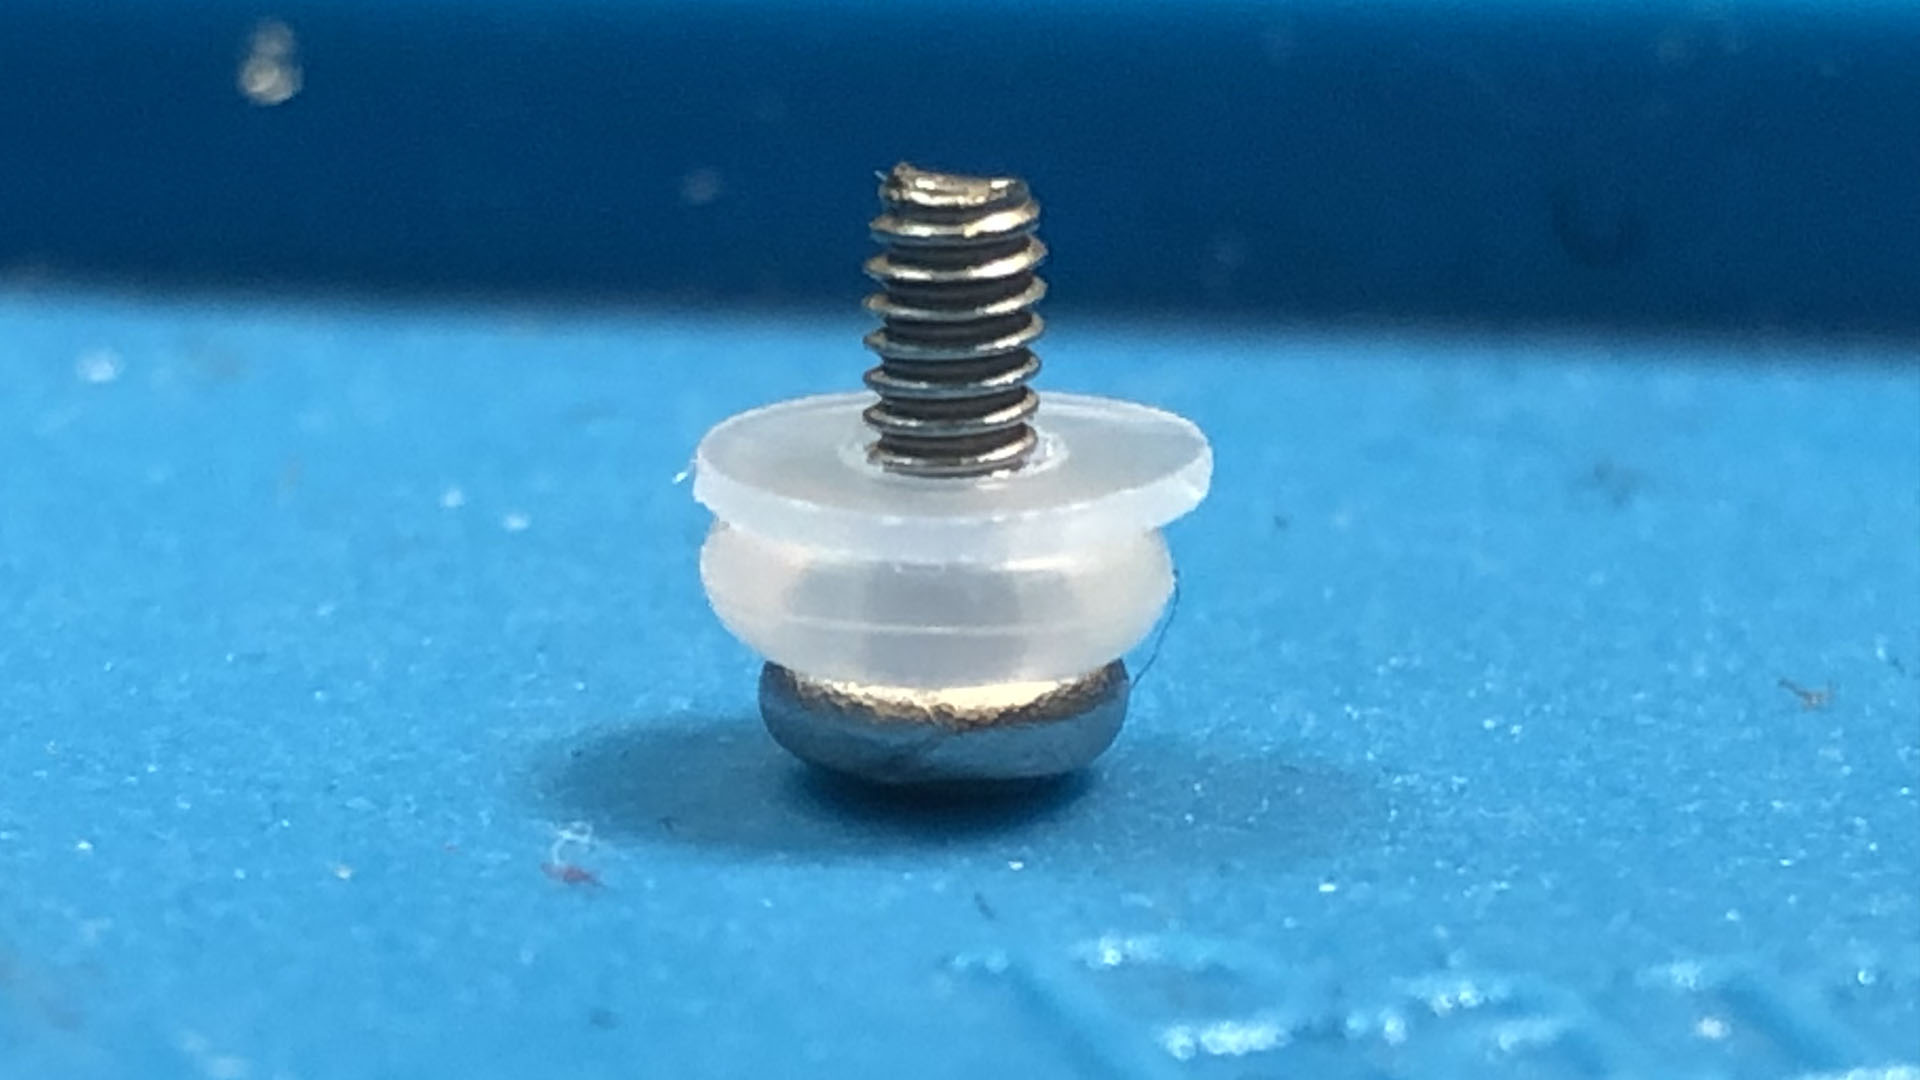
Our enabler’s – er, client’s switch of choice; a progressive silent tactile I call Lemon Lush.
Noting that he’d picked the single most expensive frankenswitch I think I’ve put together so far, that’s when I asked about budget. After giving him a feel for what exists in some different brackets, he went for $200. Later that day we were discussing priorities, and he said it seemed like switches were the most important part for a budget keyboard that doesn’t suck, and I generally agree.
I’d also observed his typing – he’s pretty heavy-handed, and punctuates his lines with a purposeful THONK of the Return key. With this and his other priorities in mind, I went about researching and selecting potential parts. Focusing on switches, his favorite of the 12 had a 68g progressive spring and an Ink housing – both couldn’t come along for the ride with this budget, so those nuanced springs got the cut in light of our friend’s heavy typing style.
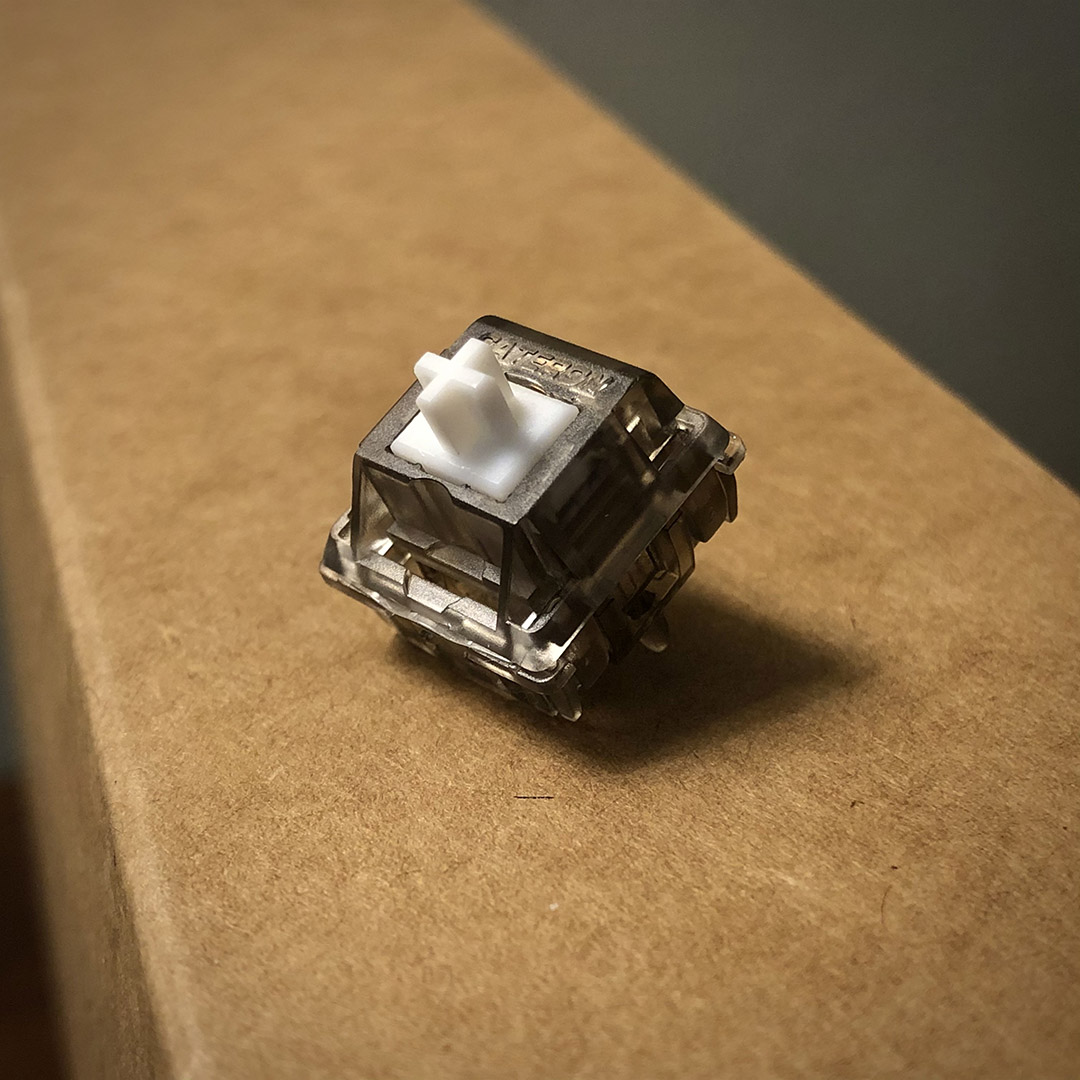
Taking custom springs out of the equation and accounting for a heavy-handed typing style, Black Ink U4s fit the bill.
I first went for BSUN Panda springs because I have a ton of them, but they really didn’t feel right with the U4 stem. Not bad – but not complimentary to all that potential in the U4. I was already using Ink Black housings, so I gave those springs a try instead – and they were a much better fit with Gazzew’s stem.
“Great,” I thought, “this will be an easy, straightforward build. Having just done a full-size with a vinyl wrap, this little guy will be a piece of cake!” …You know where this is going.
For stabilizers, I’d first started with some random screw-ins I had on-hand, but I just couldn’t get them to sound decent; I went with Durock V2 stabs after that. I also tried to use the pre-cut heat-shrink sleeves with both, and had not-so-good results. I’m going to give them another chance with some Cherry stabs, but I’m pretty sure those were the culprit for some quite heinous key-twist with these others. In fact, what I thought was the sound of stab rattle turned out to be the right shift key striking the adjacent ones!

The one part of building that still gives me trouble is getting stabs to both sound and feel good on a silent build – I got these to an acceptable balance, and the owner loves them – but I know there’s more potential in there – so improve I must. • As a funny aside: in five years of messing around with keyboards, working on this one was only the second time ever, and the first time during a build that I had a stab wire pop out – and it was with these Durock V1s. I blame the interaction between these stab inserts and the sleeves. And maybe because I was rushing. Okay, it was mostly the rushing… patience generally wins in this hobby.
One thing I did notice about the Durocks that they had in common with the randos; they do seem to allow for more twist than I’d prefer. I do think it was the heat-shrink pushing on the inserts that actually caused the twisting, but there is a lot of North/South play when the inserts are at the top of their travel. I got rid of the sleeves on most if not all the stabilized keys, and that did alleviate the twist enough to stop the striking.
Lubing and filming; Krytox GPL 205g0 and Deskeys gaskets.
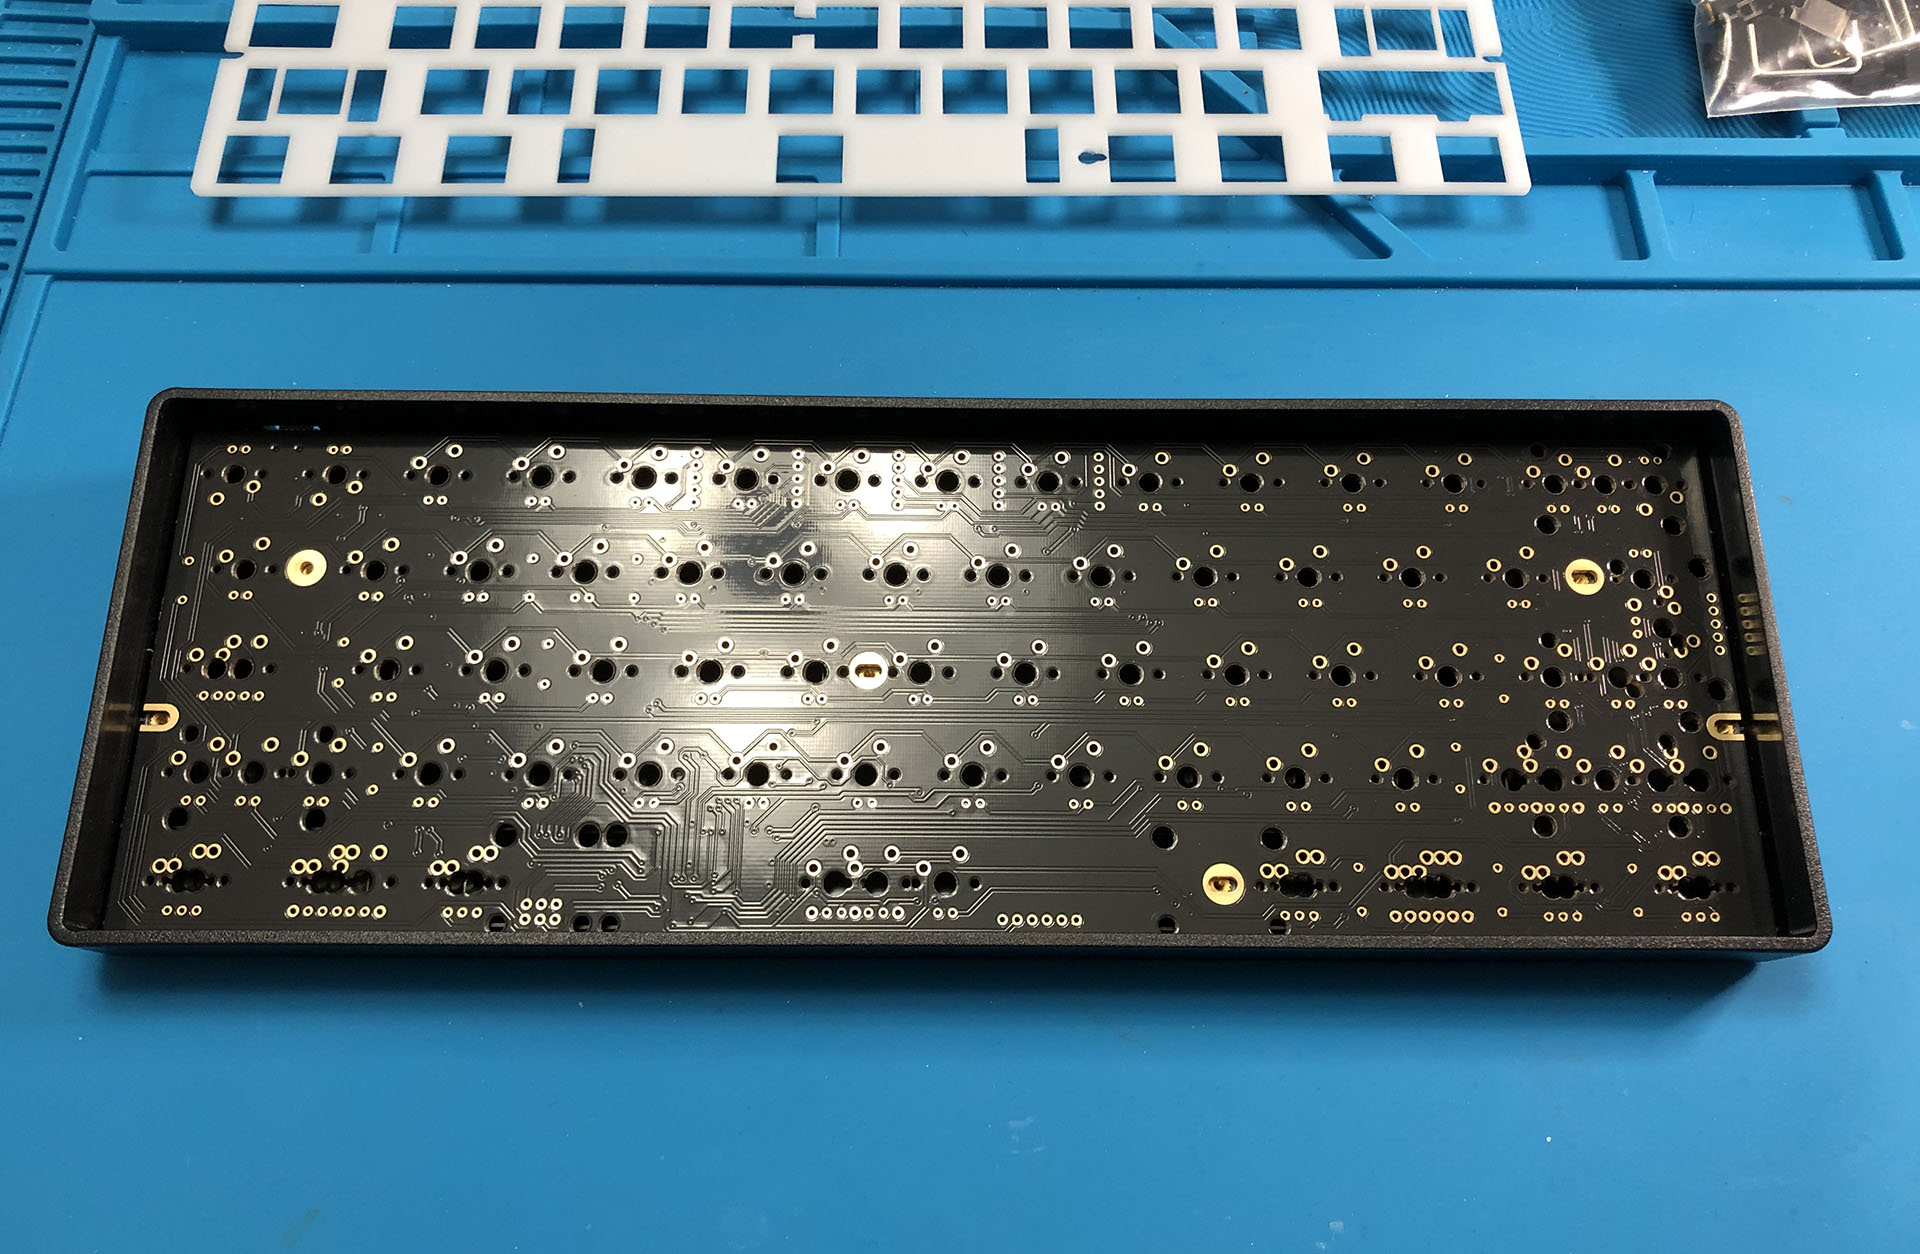
With switches sorted (and soaking up a good chunk of the budget), I went for a GH60 rev. C PCB, a basic plastic case from KBDFans, and a slightly mis-cut POM plate I had as an extra. When I’d converted the cut file to a different format, some of the holes for the PCB screws moved a bit – but POM is really soft. A little coaxing with some hand tools, and I could access the screws.
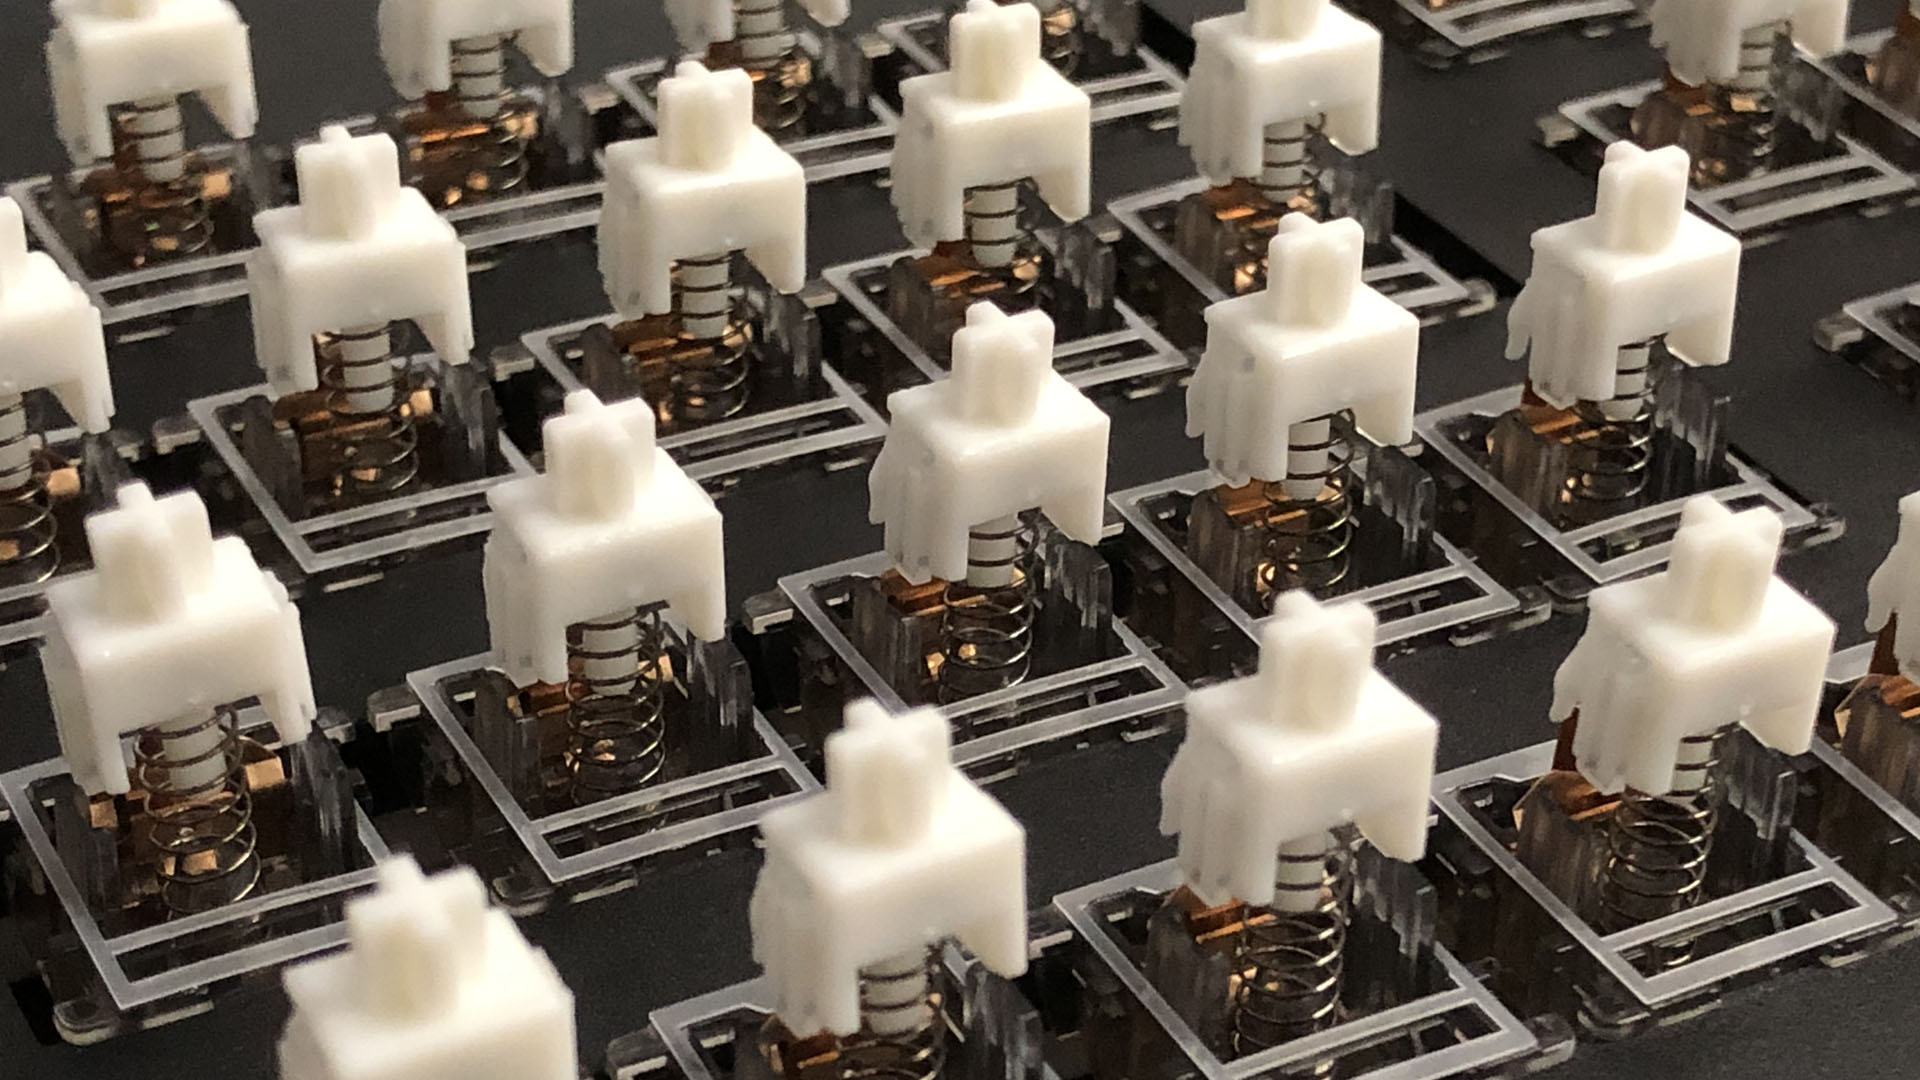
Something I learned that day: soft, slick plates are hard to work with when the only thing holding them in place are the clips on the switches! I’ll tell you right now – I fully built this keyboard no less than three times until I was satisfied with both the stabs and the plate. I got a method down, though – and one I would only use on a really soft plate like this, as opposed to what one might normally do when assembling a small tray-mount solder board.
Third attempt now – I started in one top corner, and worked my way down like a Space Invader – each time making sure to both hold the switch flush with the PCB and keep the plate supported in the right places so it wouldn’t fall off the switches.
Don’t let it drop…
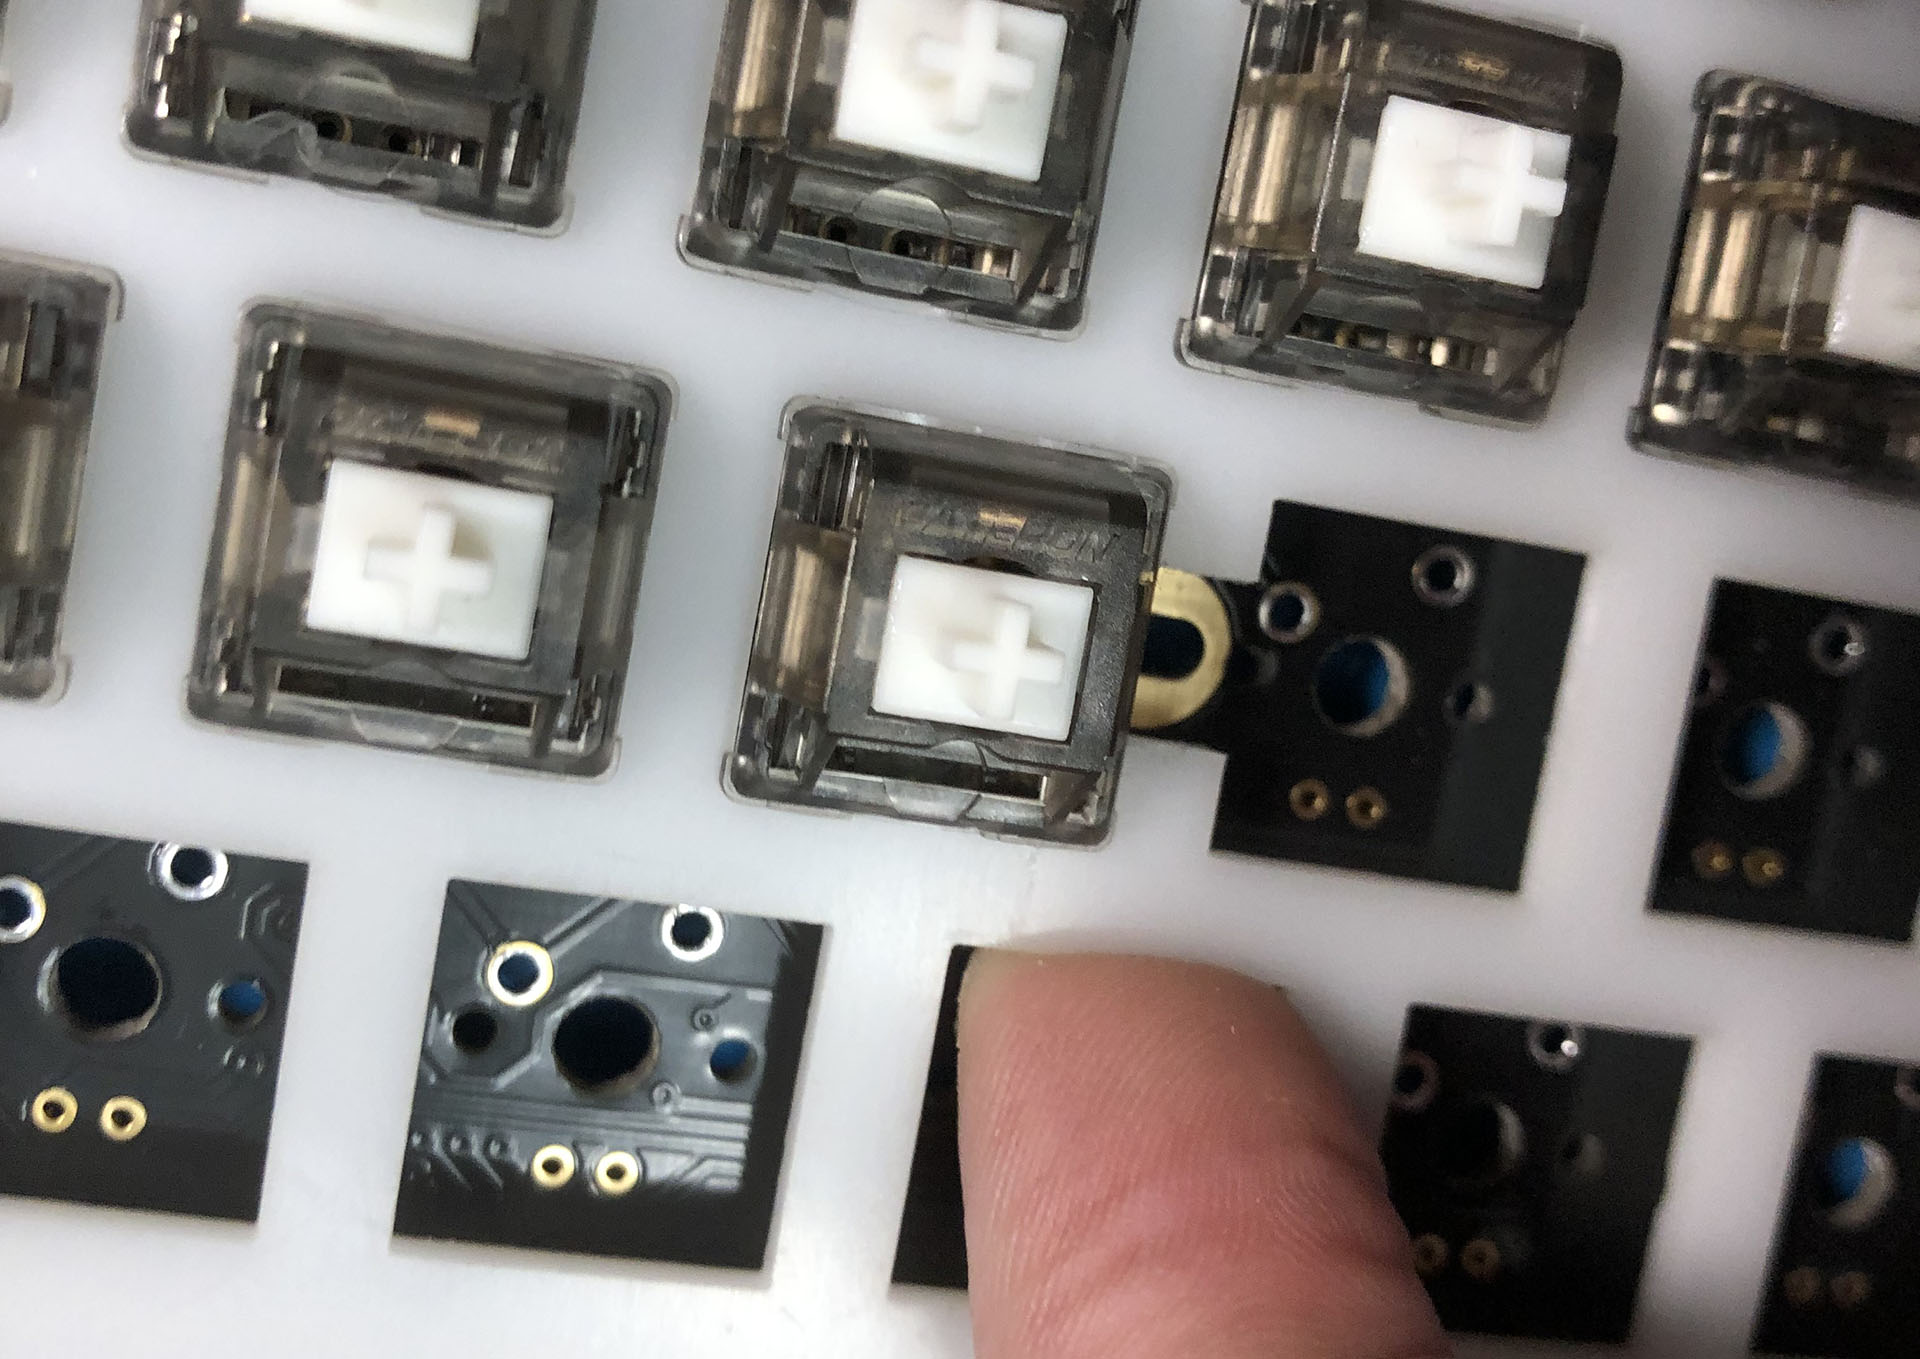
Oh, yeah – it did. A few times. I managed to pop it back into place with a couple toothpicks and a small hook tool. Once I finally had the “sandwich” together, I gently, awkwardly let it down into the tray and sighed a great sigh of relief when the plate stayed in place. In the two previous iterations, I’d used the burger-mount mod – that is, putting small o-rings on either side of the PCB mounting holes. It’s really quite tricky to install with stock screws, and extremely finicky when dialing-in the necessarily gentle tension on those screws. I ended up using plastic stab washers to help in a few places with slots instead of holes, which did make a difference.
Squishy borgar – also known as 5mm x 2mm x 1.5mm silicone o-rings.
Speaking of making a difference, holy wow does this mod do something. I was expecting a change, but not so much of one – this cheap tray mount keyboard was now more suspended and bouncy than my plastic gasket mount poly-plate whatever thing. Granted – it’s finicky and likely high maintenance, and it doesn’t have the nuance of an edge-mount system – but it’s so bouncy! For this build… maybe too bouncy. The silent stems made by Outemu, including Gazzew’s, all have relatively soft, large feet compared to most others. Combined with these and a super soft plate… Definitely too bouncy – and likely too high-maintenance for someone that just wants a reliable keyboard – so the next assembly was a bit less brow-moistening sans o-rings.
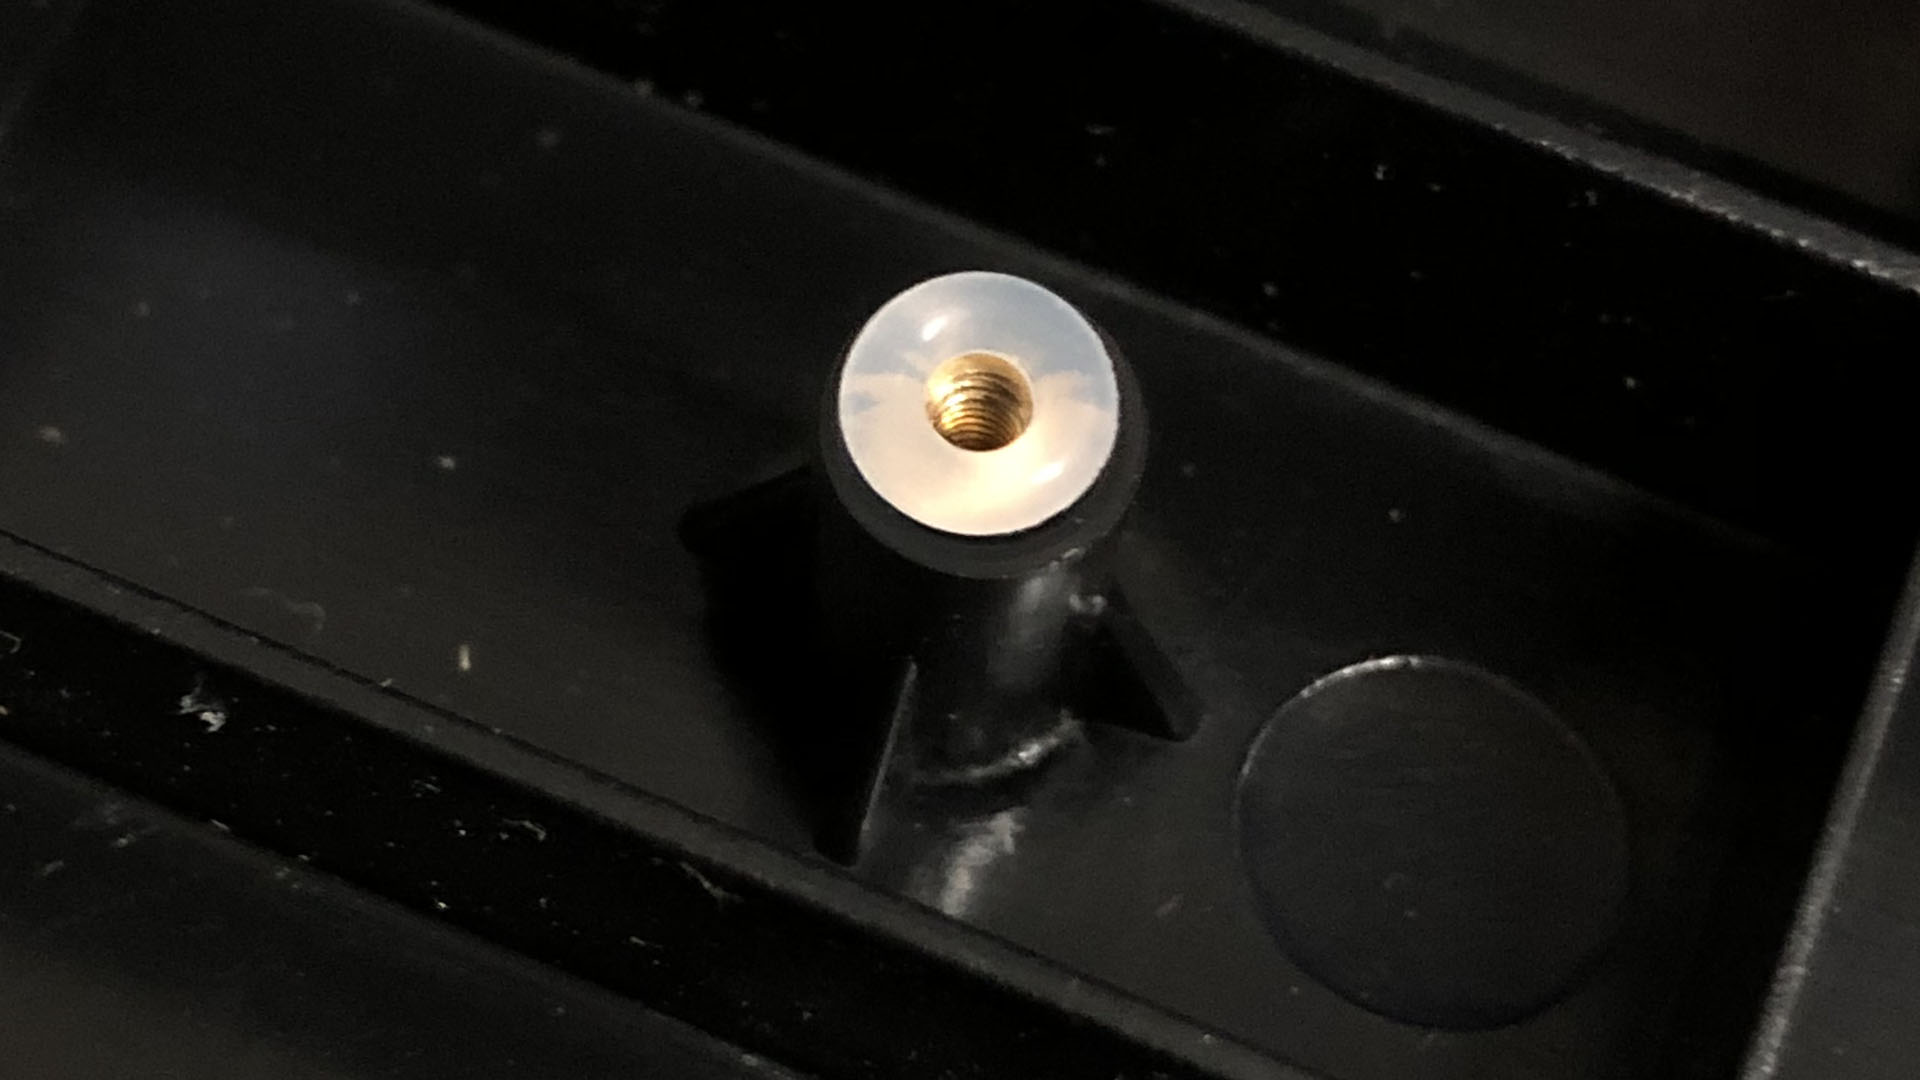
Seen here, a plate-screw with one o-ring and a plastic stab washer that I used for the slotted holes. It’s easy to see how much thread-space these take up before compression. If you want to try this legitimately transformative mod, do yourself a favor and grab yourself some longer screws ahead of time.
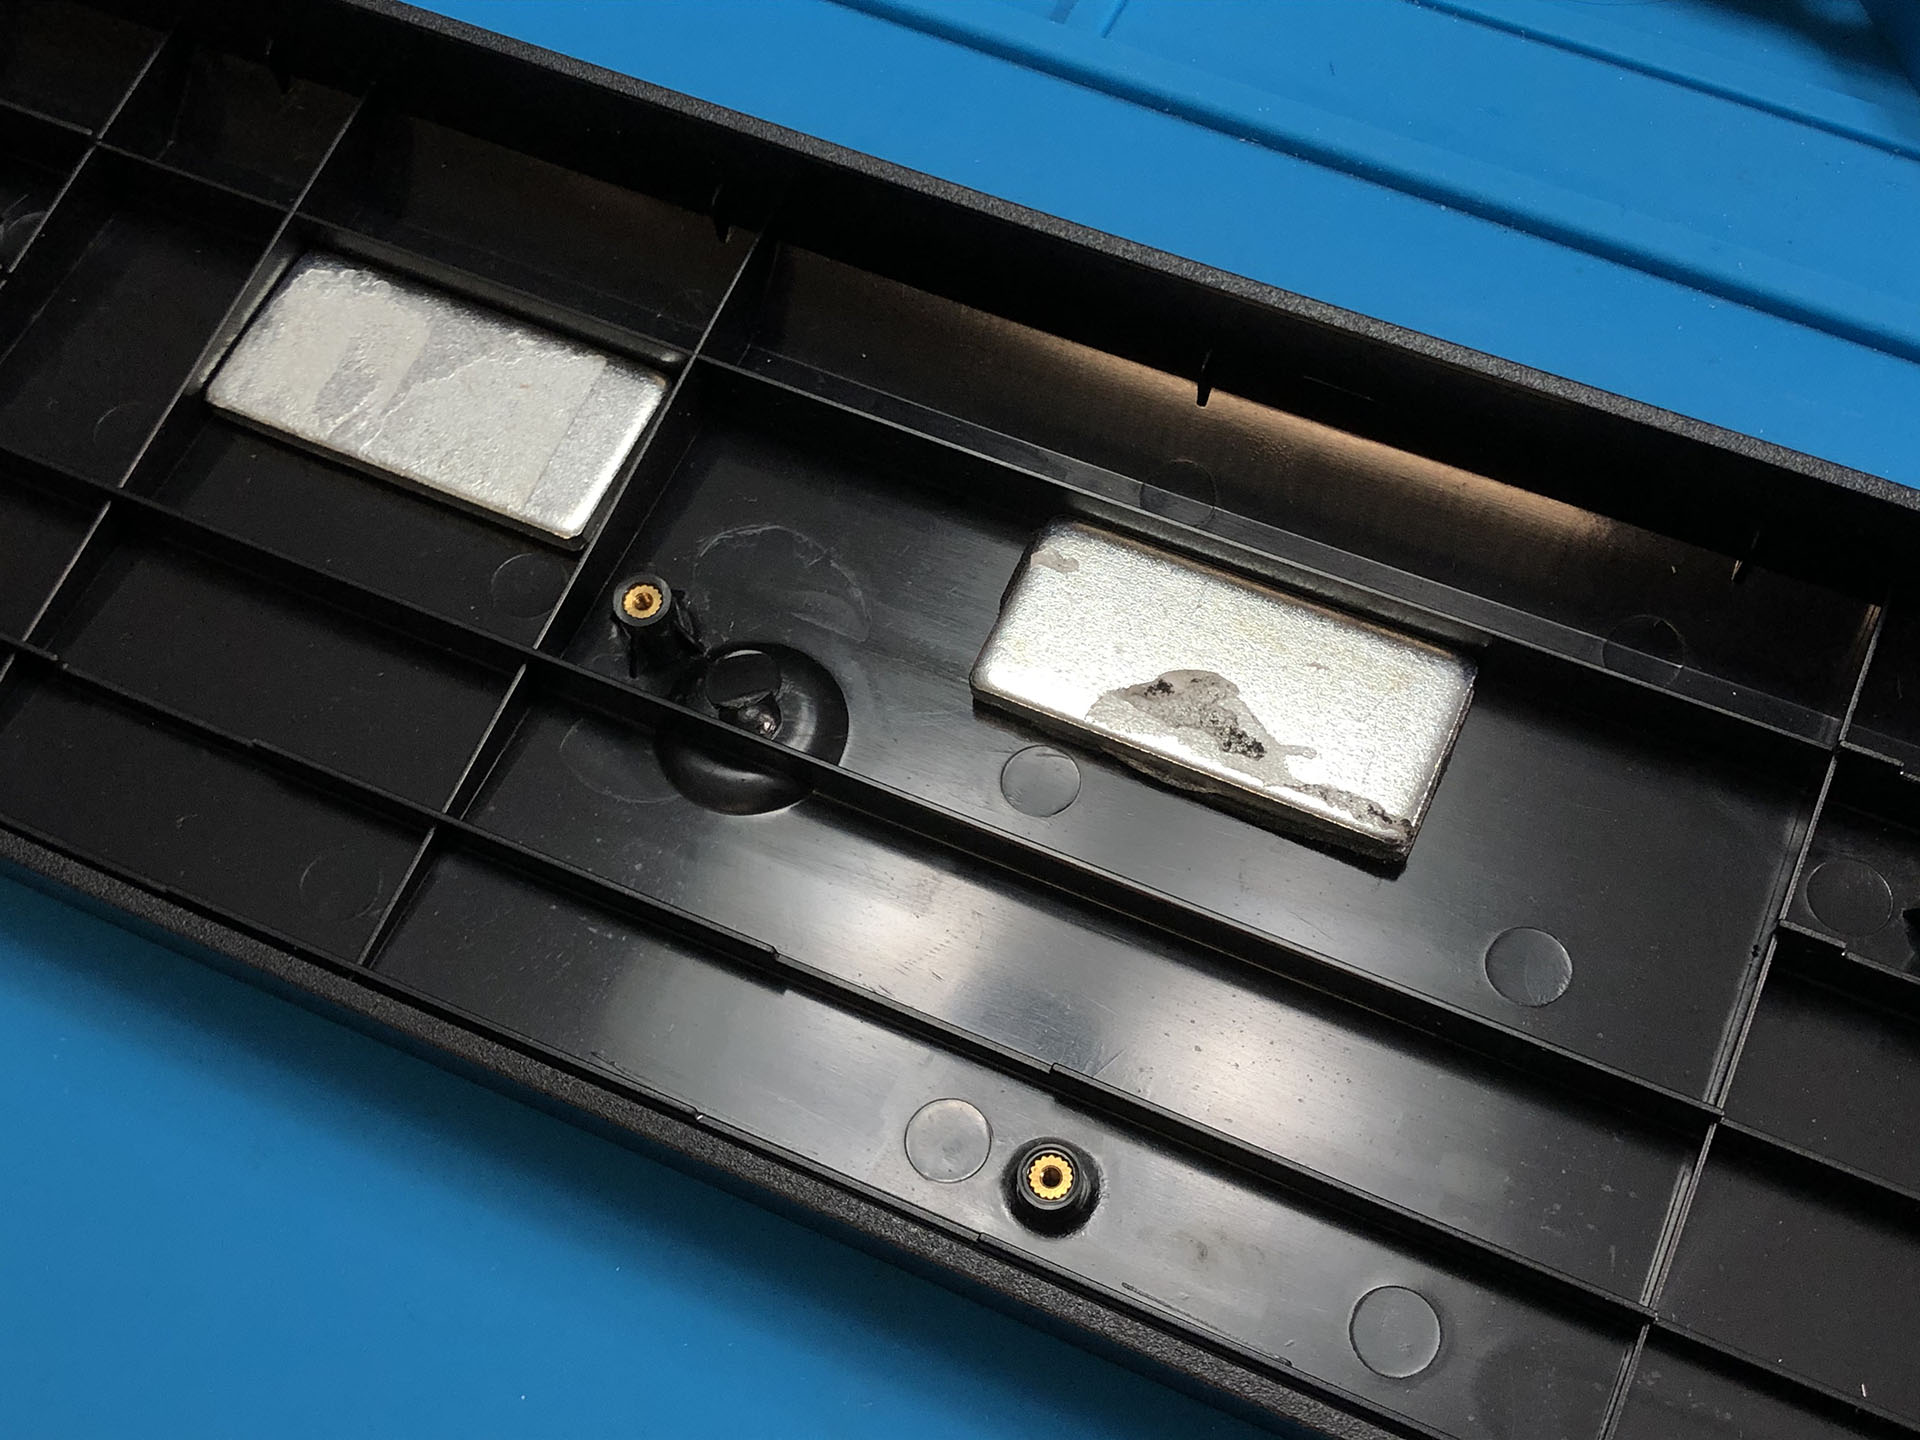
This is a fun time to mention that I stole two lead weights from a GMMK fullsize to weigh this board down a bit, since it used such a light plate and case. I put them in place with some double sided tape, and placed some cheap foam over them.
Not the prettiest guts – but functional. Such is ballin’ on a budget.
I did have a bit of an oops moment when I realized the GH60 uses USB mini, which is genuinely archaic at this point. I’m personally a fan of it, at least over micro, but I understand that most people aren’t, and there are good reasons for that besides just being old. The clipping mechanism is in the port instead of the cable, so when the clip wears out, you need to solder on a new port or get a new PCB – unlike pretty much any subsequent USB connector iteration. Ah well – the budget for the Ink housings came from the $20 I saved there, so it’s not all bad.
I threw in one of the USB mini cables I’ve been hoarding for years; they have nice minimal aluminum ends and a very flexible “braided” cable between. I mean really flexible. Like cooked spaghetti. Perfect for PS3 controllers! I wish I could find a USBC or micro cable like that. Anyway…
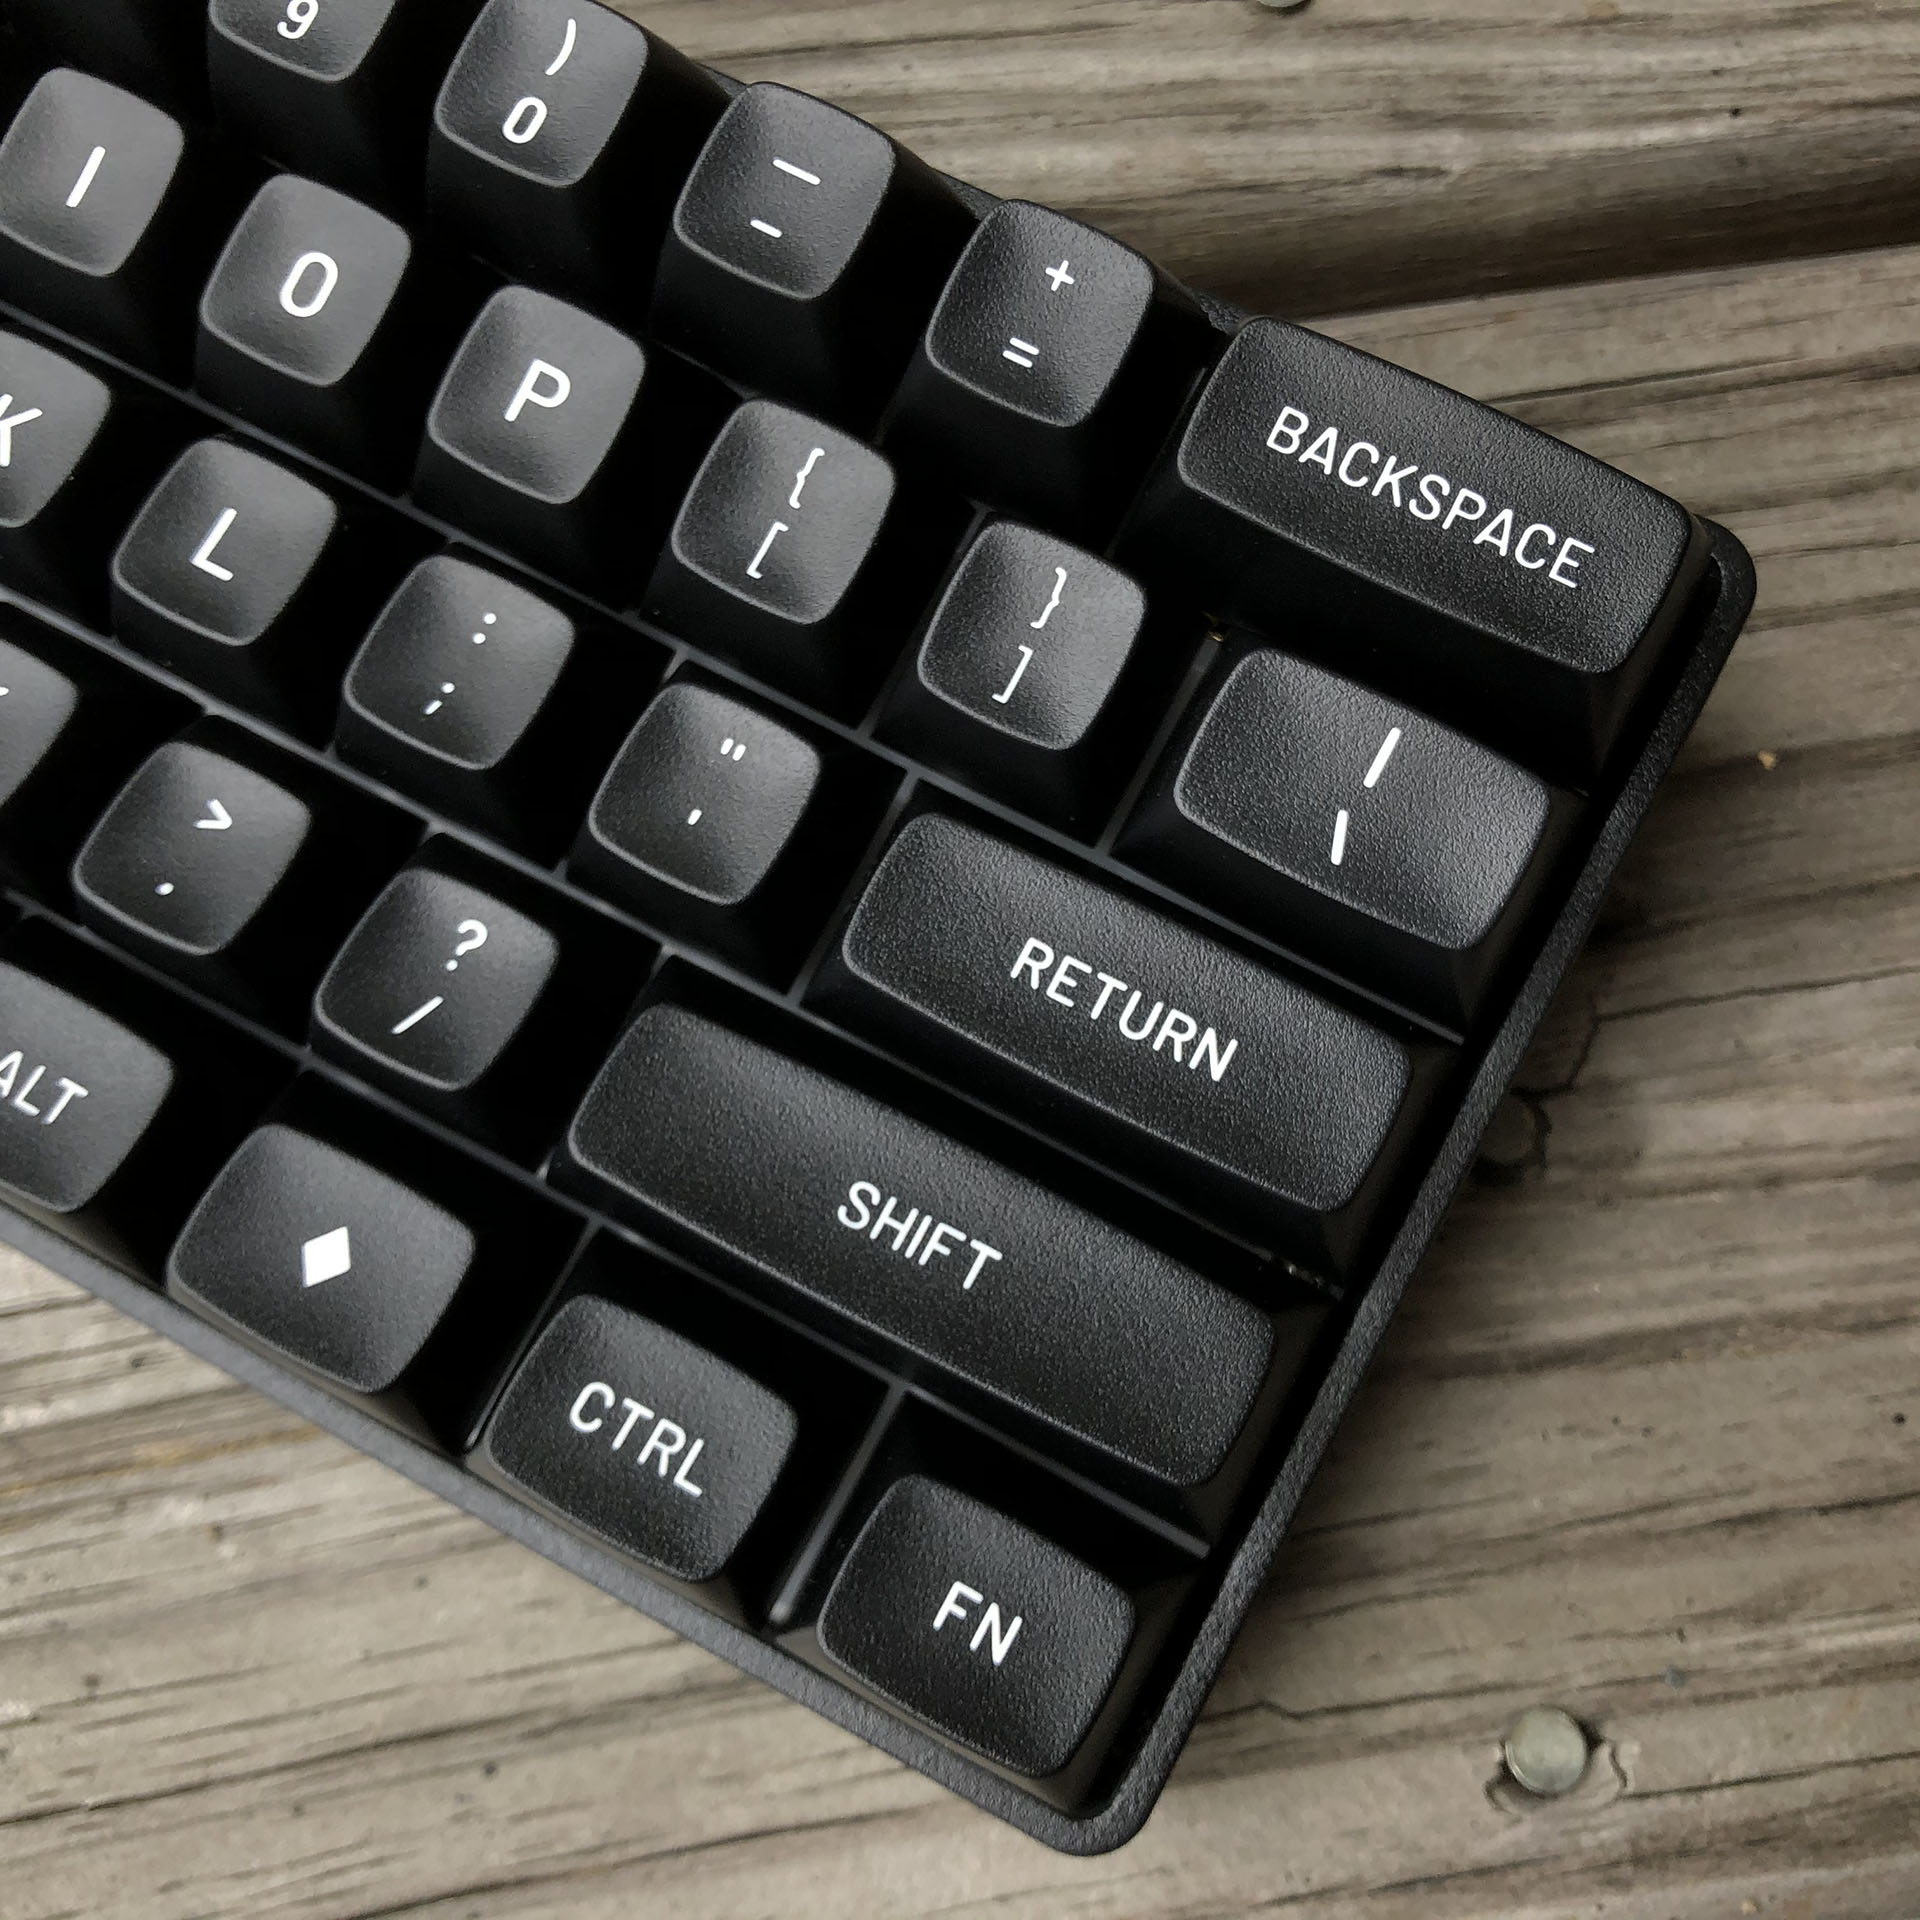
Glancing back to the budget for a moment – after everything else was set and balanced, I had enough left for a modest but nice to use keyset. When we talked about it, IT guy decided, aw heck it – let’s just go for some really nice keys. He’d been a fan of minimal black themes so far, so I showed him a handful of WOB sets in different profiles. After trying a some, he settled on MT3 for striking a good balance between being actually usable and having lots of retro flair. I agree; I’ve been daily-driving my MT3 WOB set since I got it months ago. This selection of course blew the budget by an almost comical 25%, but would you look at those DISHES?
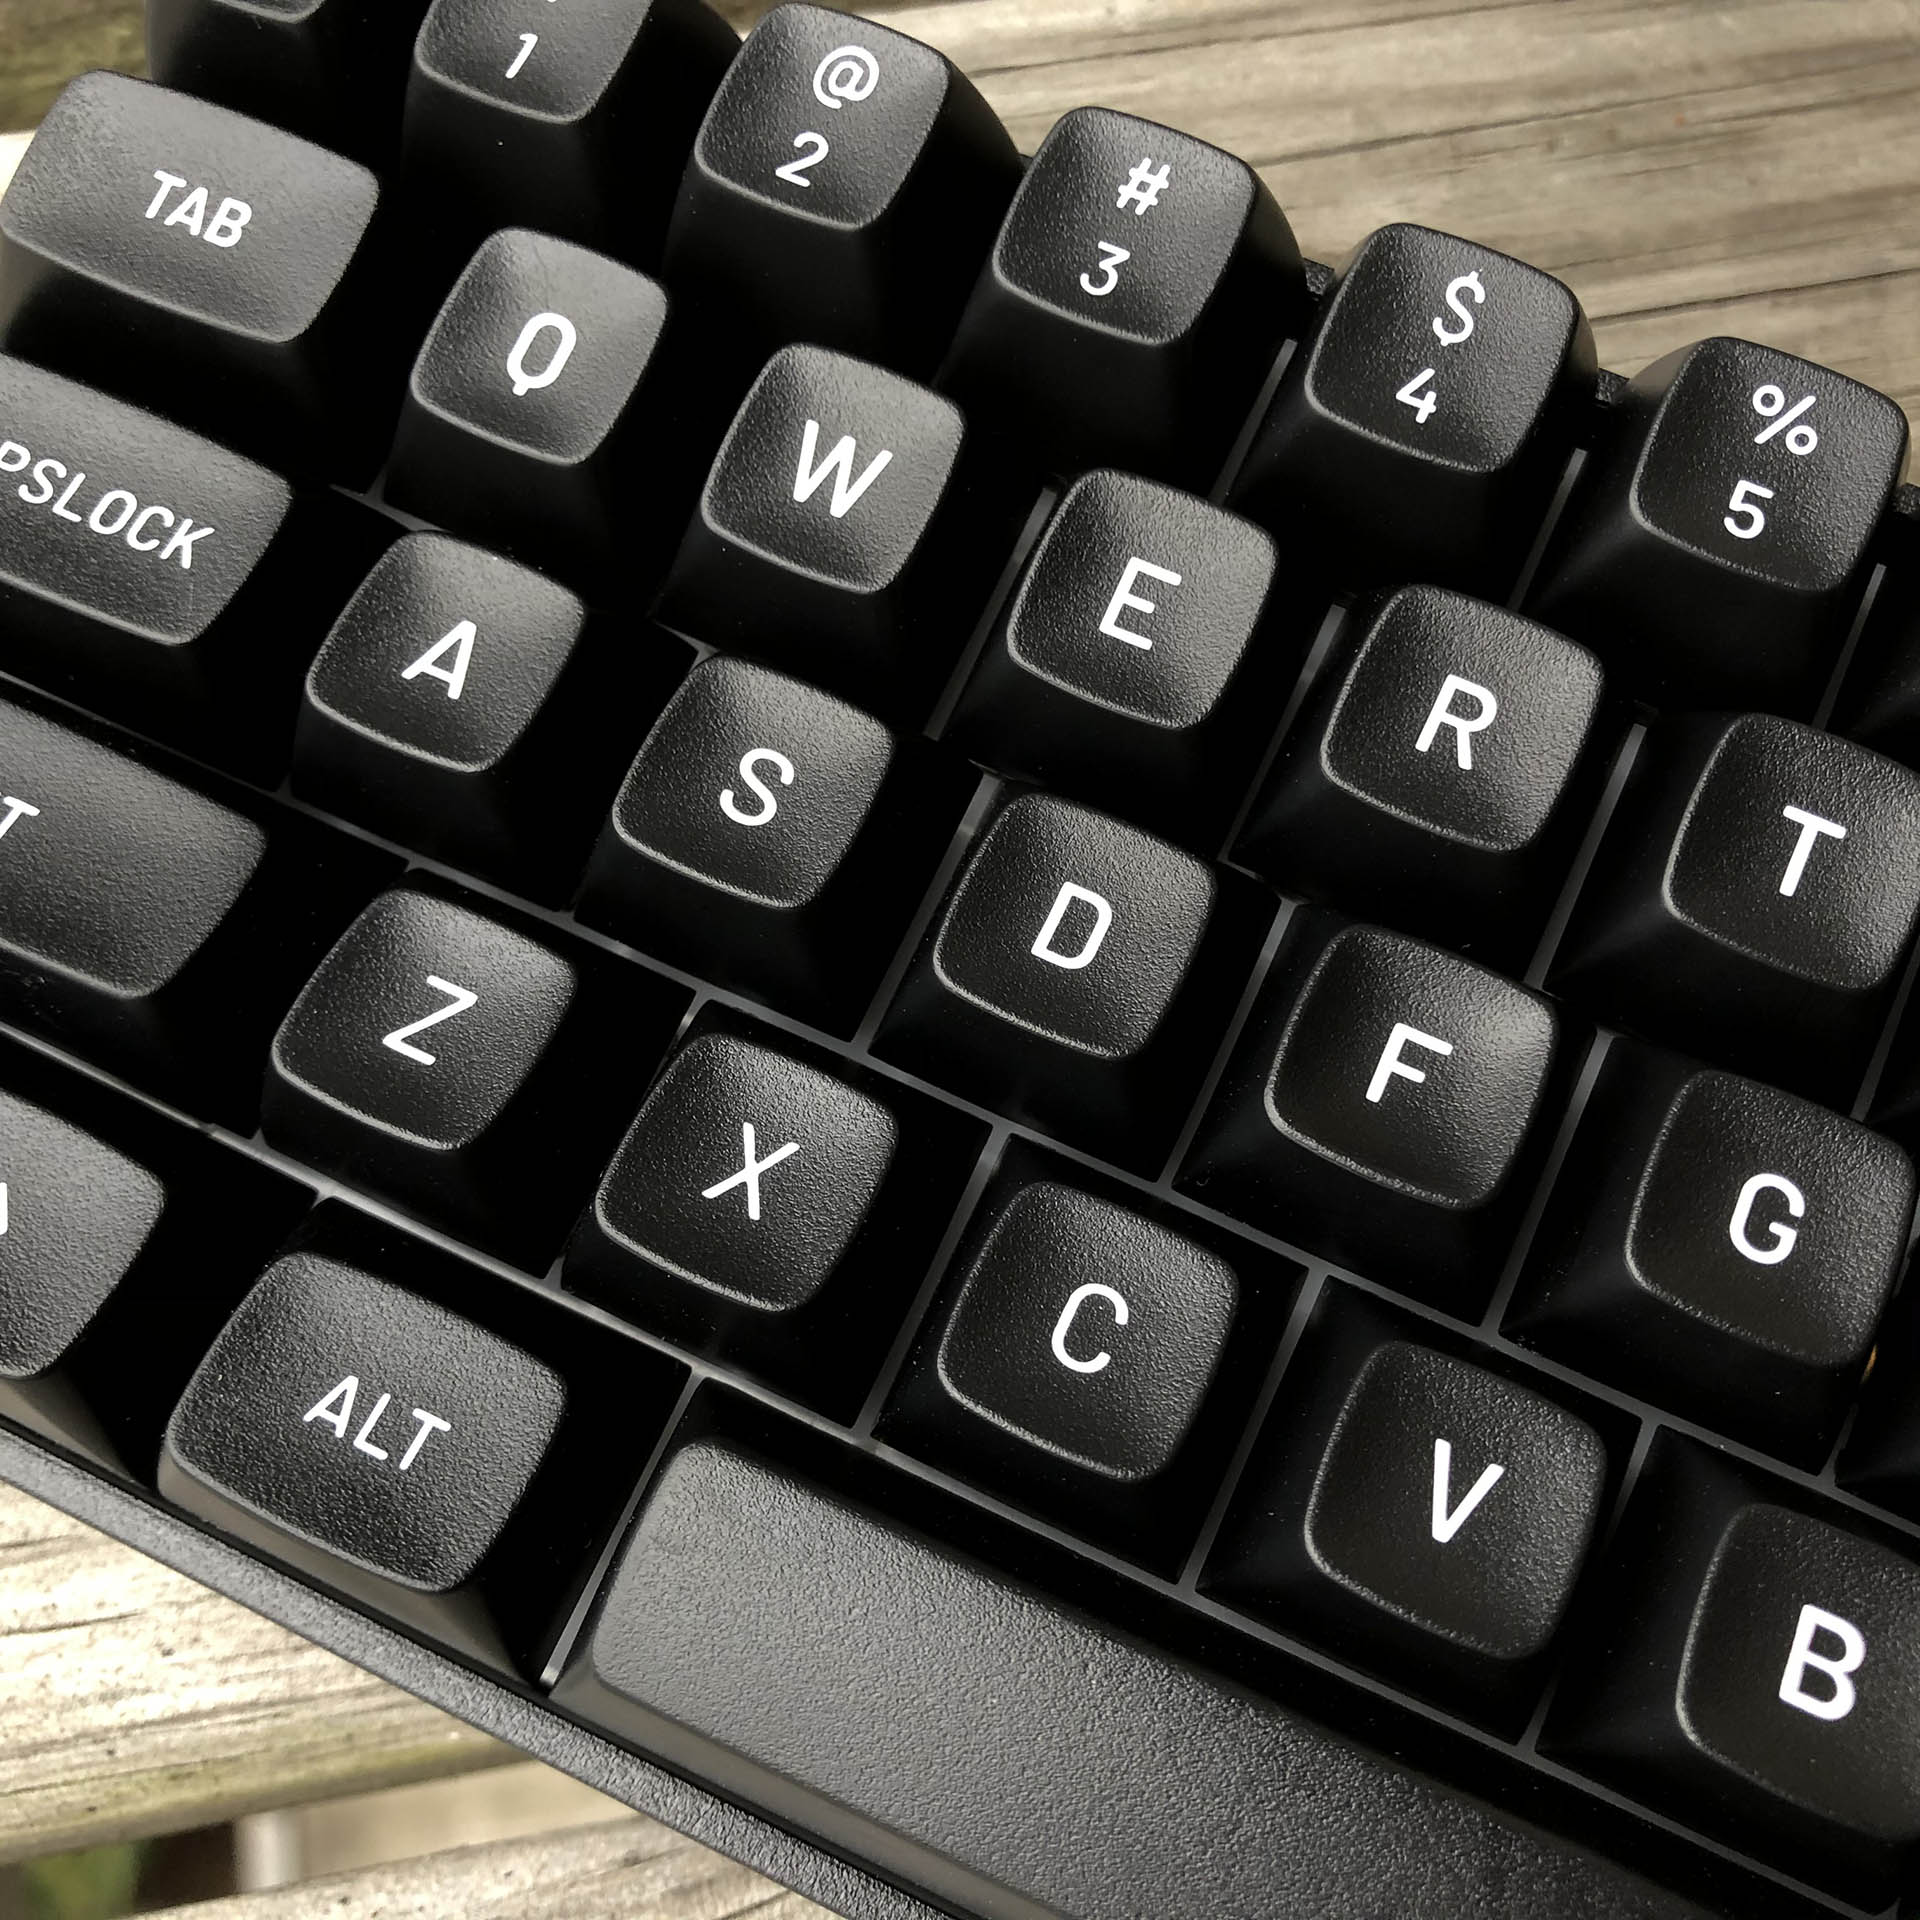
Looking past the dust I’m currently too tired to photoshop out of this image, one can see the delicious deep-dish texture of ABS MT3.
I topped-off the board with a logo sticker and some silicone bump-on feet since the included rubber pill-shaped ones didn’t fit in their assigned grooves on the case. Assembly complete (or so I thought), I handed the board over and went on with my work. The next day I asked how the keyboard was treating him, and he said, “I LOVE the switches, but with the tall keys I need more angle.” No problem, I said – and it really wasn’t – but I did make another silly goof and bought laptop-sized feet before picking up a selection of various bump-ons. He picked the largest ones, both for being the tallest, and for being the softest; made of sorbothane rather than silicone. He put those in the back and ditched the small front feet altogether.
I don’t have a good sound test, or one that includes the smooshy sorb feet, but I took one with my phone sitting on my desk at work. First, some other silent switches in the same environment for comparison, Silent Box Browns:
And here’s our build with the Black Ink U4s:
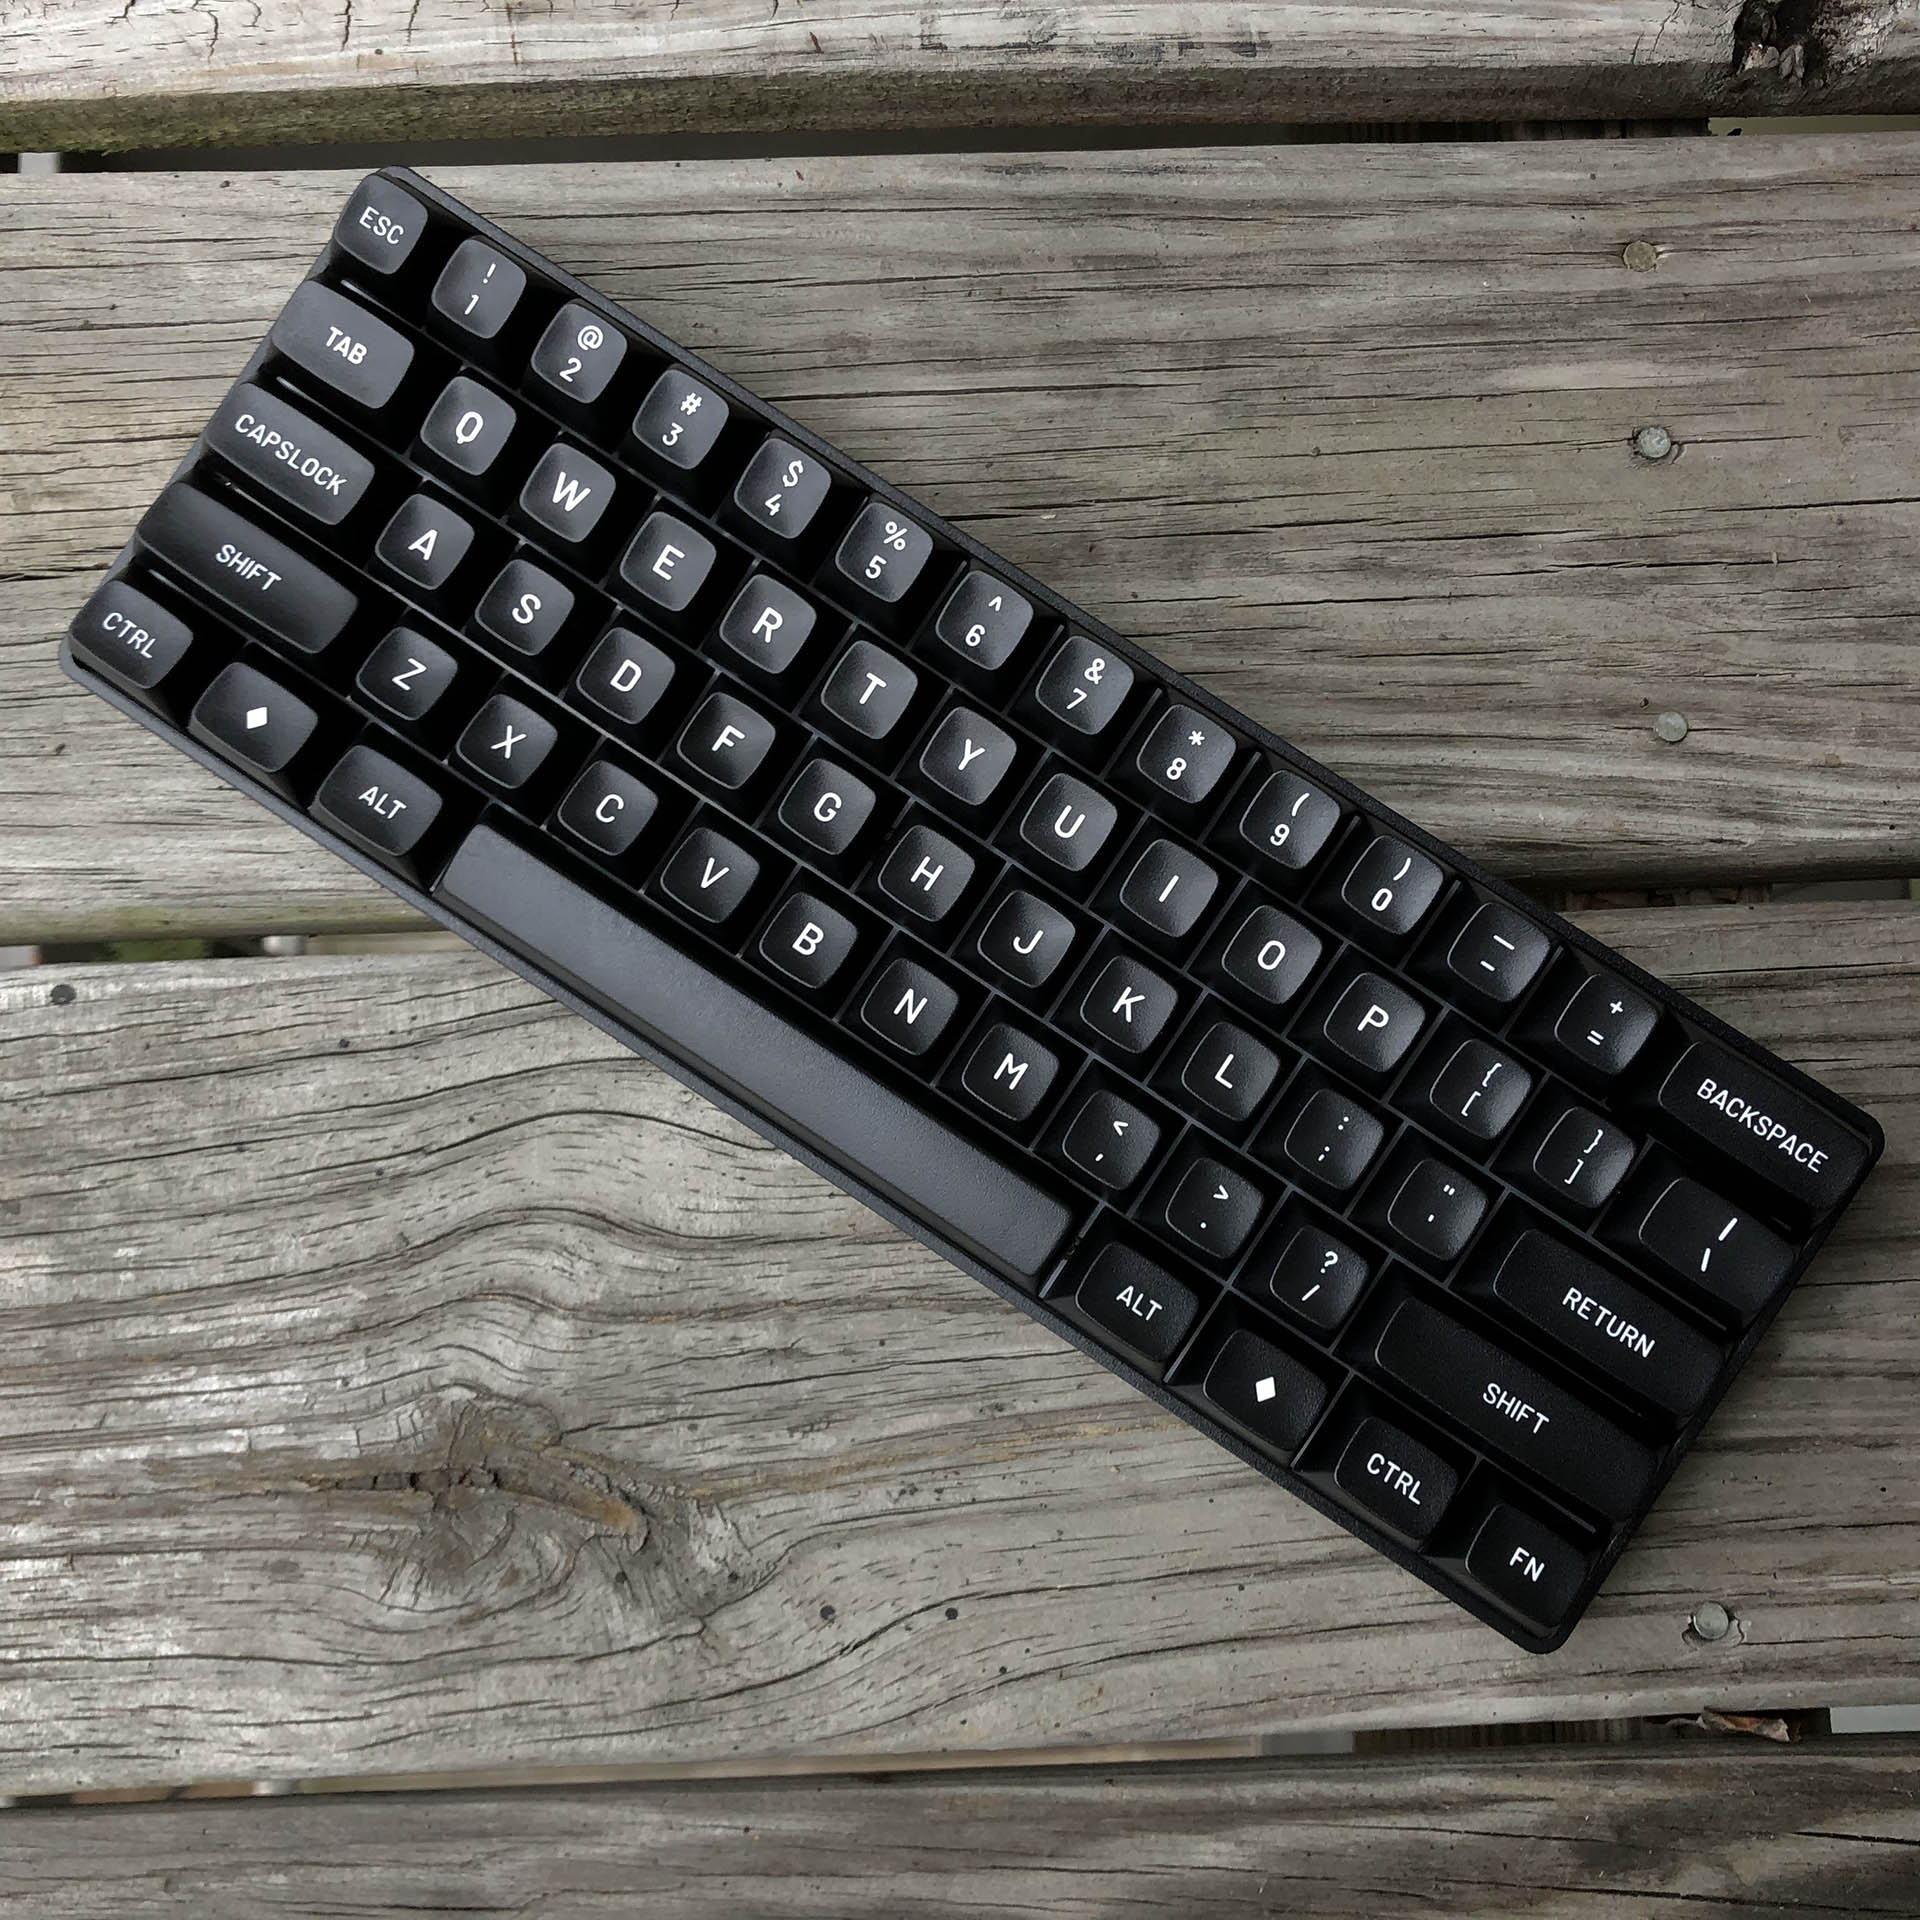
I love the sharp, clean look of a simple white-on-black build.
And with that – the board was finally complete, the customer satisfied – and I could allow some satisfaction for myself, as well.