Who is This For ep. 2 • CIY GAS67 • First Impressions Review
Introduction:
Hello and welcome to the second entry in my WiTF review series, where I focus on the question, “Who is This For?”
I include reviews in this series if I feel there’s something about the product that places it firmly in one demographic category or another – or if there’s something about the product that defies being categorized demographically. Cases where one market may see a decision as strange while another may appreciate the choice.
We have one such product on our hands today, and I intend to explore where it fits into the greater keeb-verse as well as relate my first impressions of real-world use. This is not a sponsored review; I was just curious and bought a GAS67 for the purpose of writing one. Let’s get right into it!
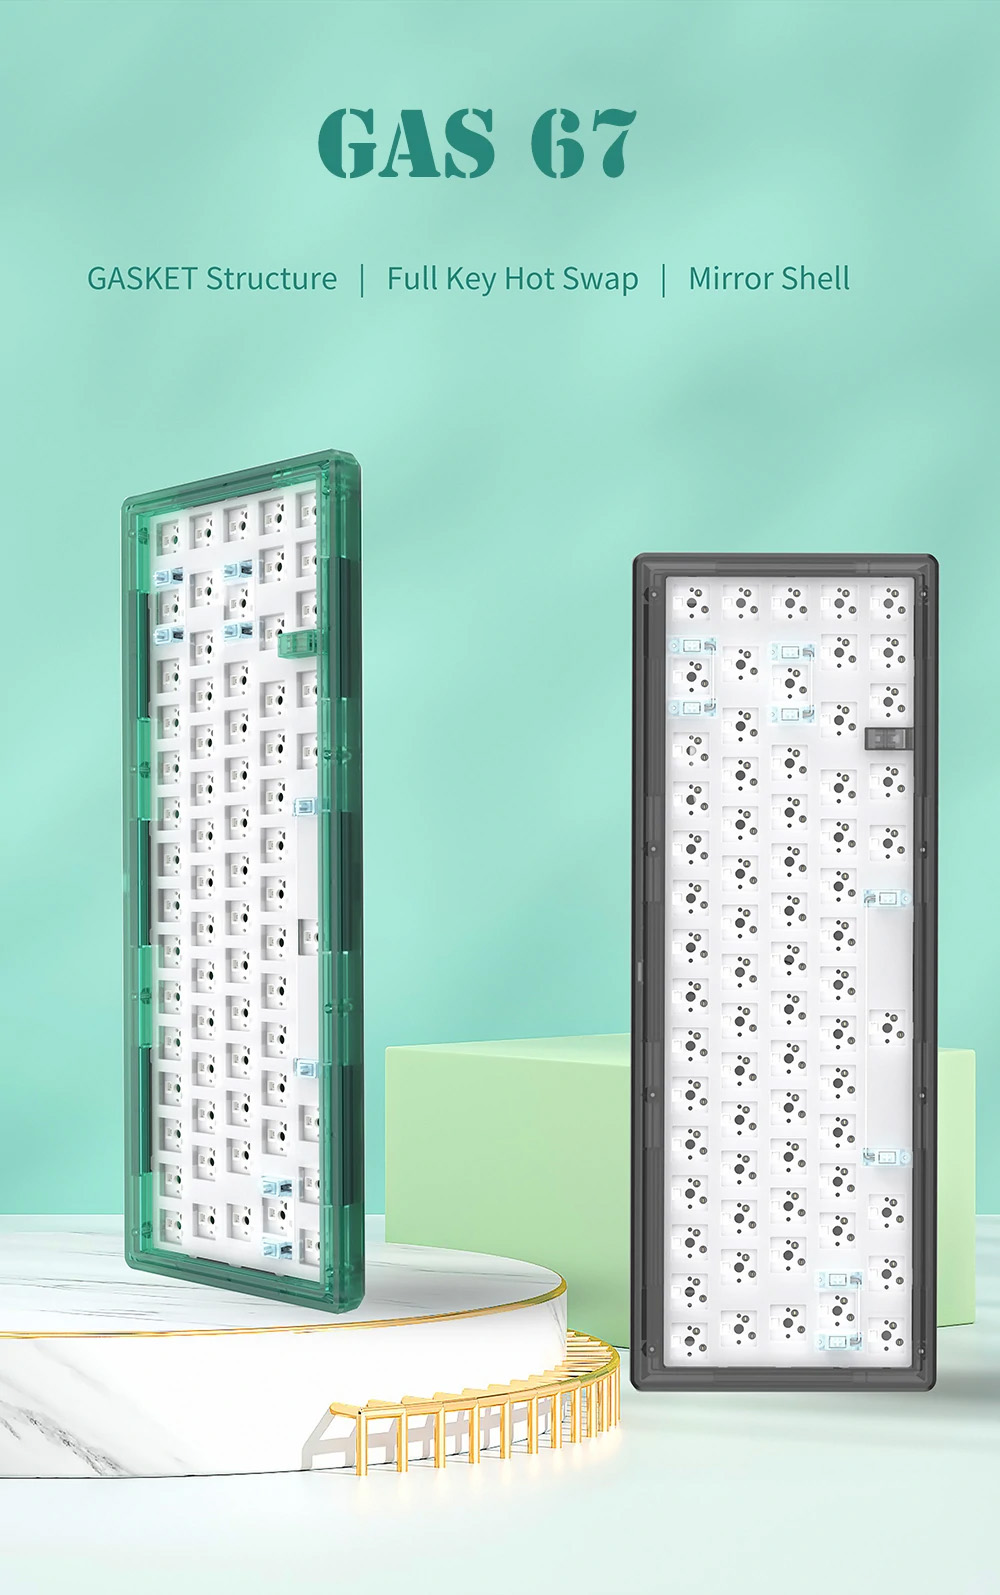
Promotional image for the GAS67 from banggood
Today we’ll be taking a look at the CIY GAS67; a budget bare-bones kit featuring a gasket mounting system.
That’s right, folks – gasket mounting has officially landed in the budget sector. Have the benefits of this innovation truly trickled down to modestly-priced keyboards? Is the middle market dead? Are customs redundant!? Hyperbolic attention-hooks aside, let’s find out.
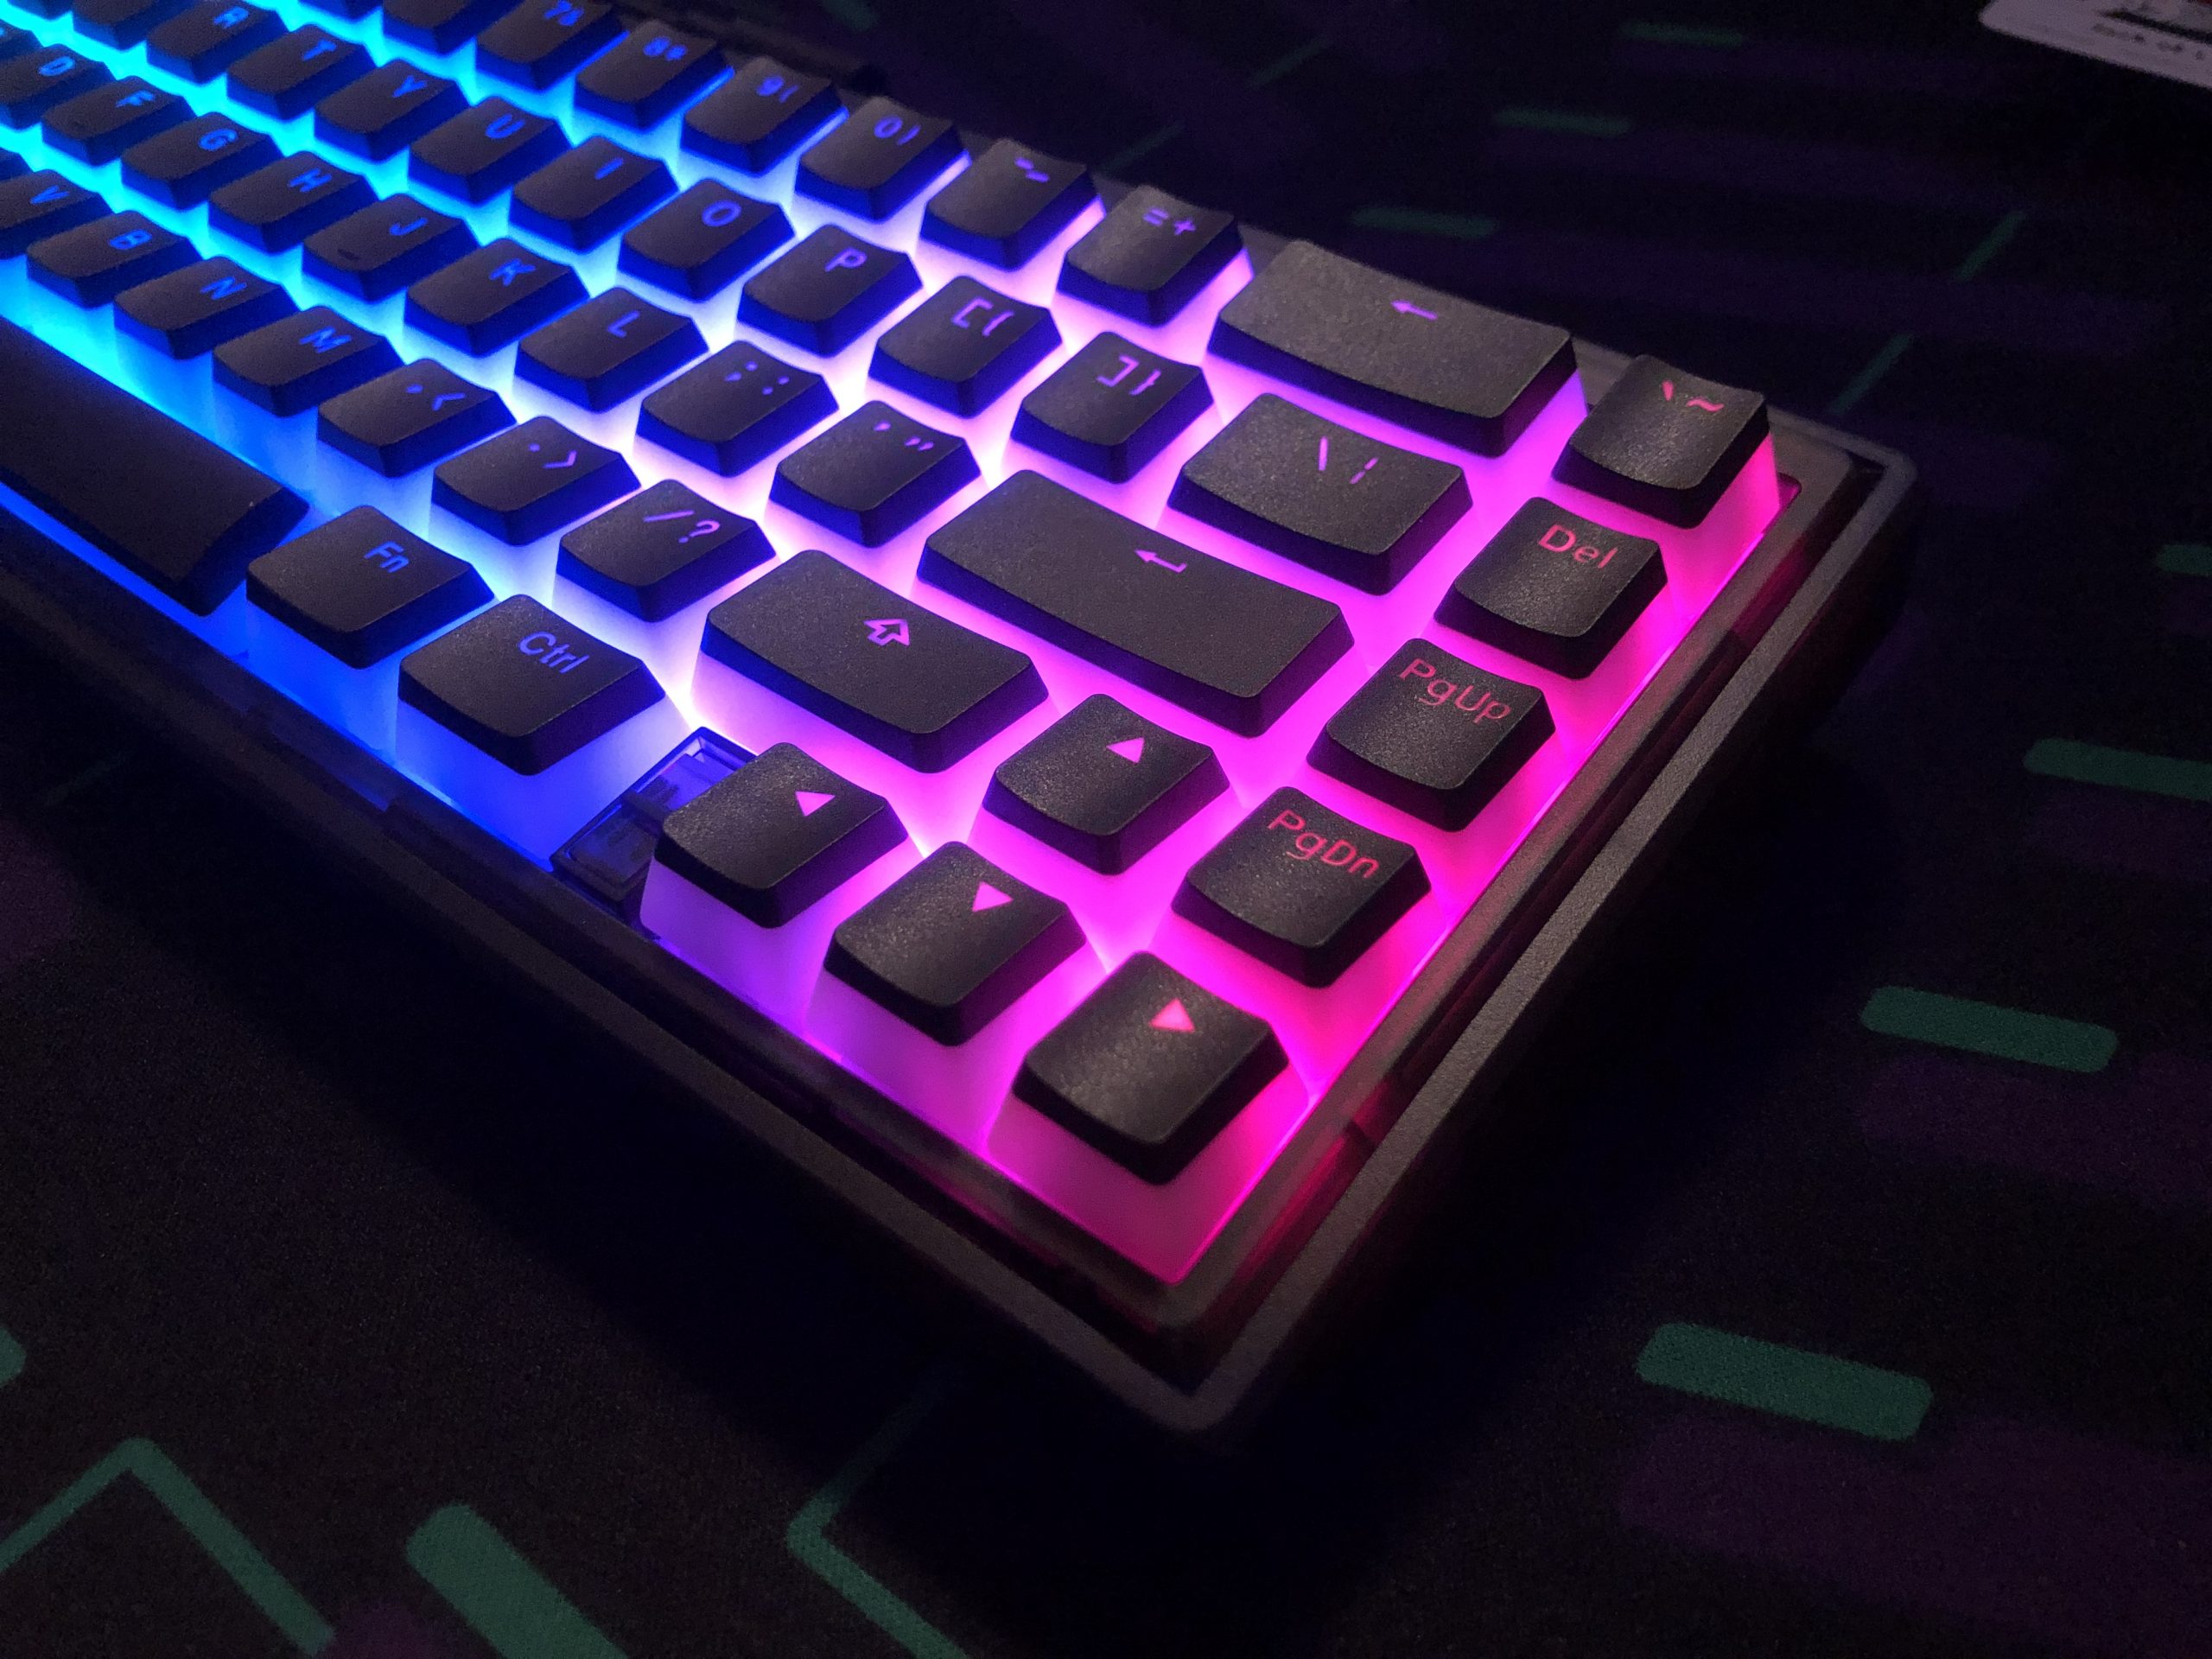
RGB go brrrrr
TL;DR bullet-points:
· Very hard to beat for the price
· Only complaint is no metal inserts for the case screws
· Otherwise a fantastic kit
Other points of interest:
· This keeb has a daughter board for the USBC; killer inclusion at this price
· The build is solder-free and tools are included
· Plate is CNC cut from a sheet
· There are no standoffs in this build
· The dampening works, and there’s even some deck flex
· The bottom “badge” is actually a solid aluminum wedge …neat
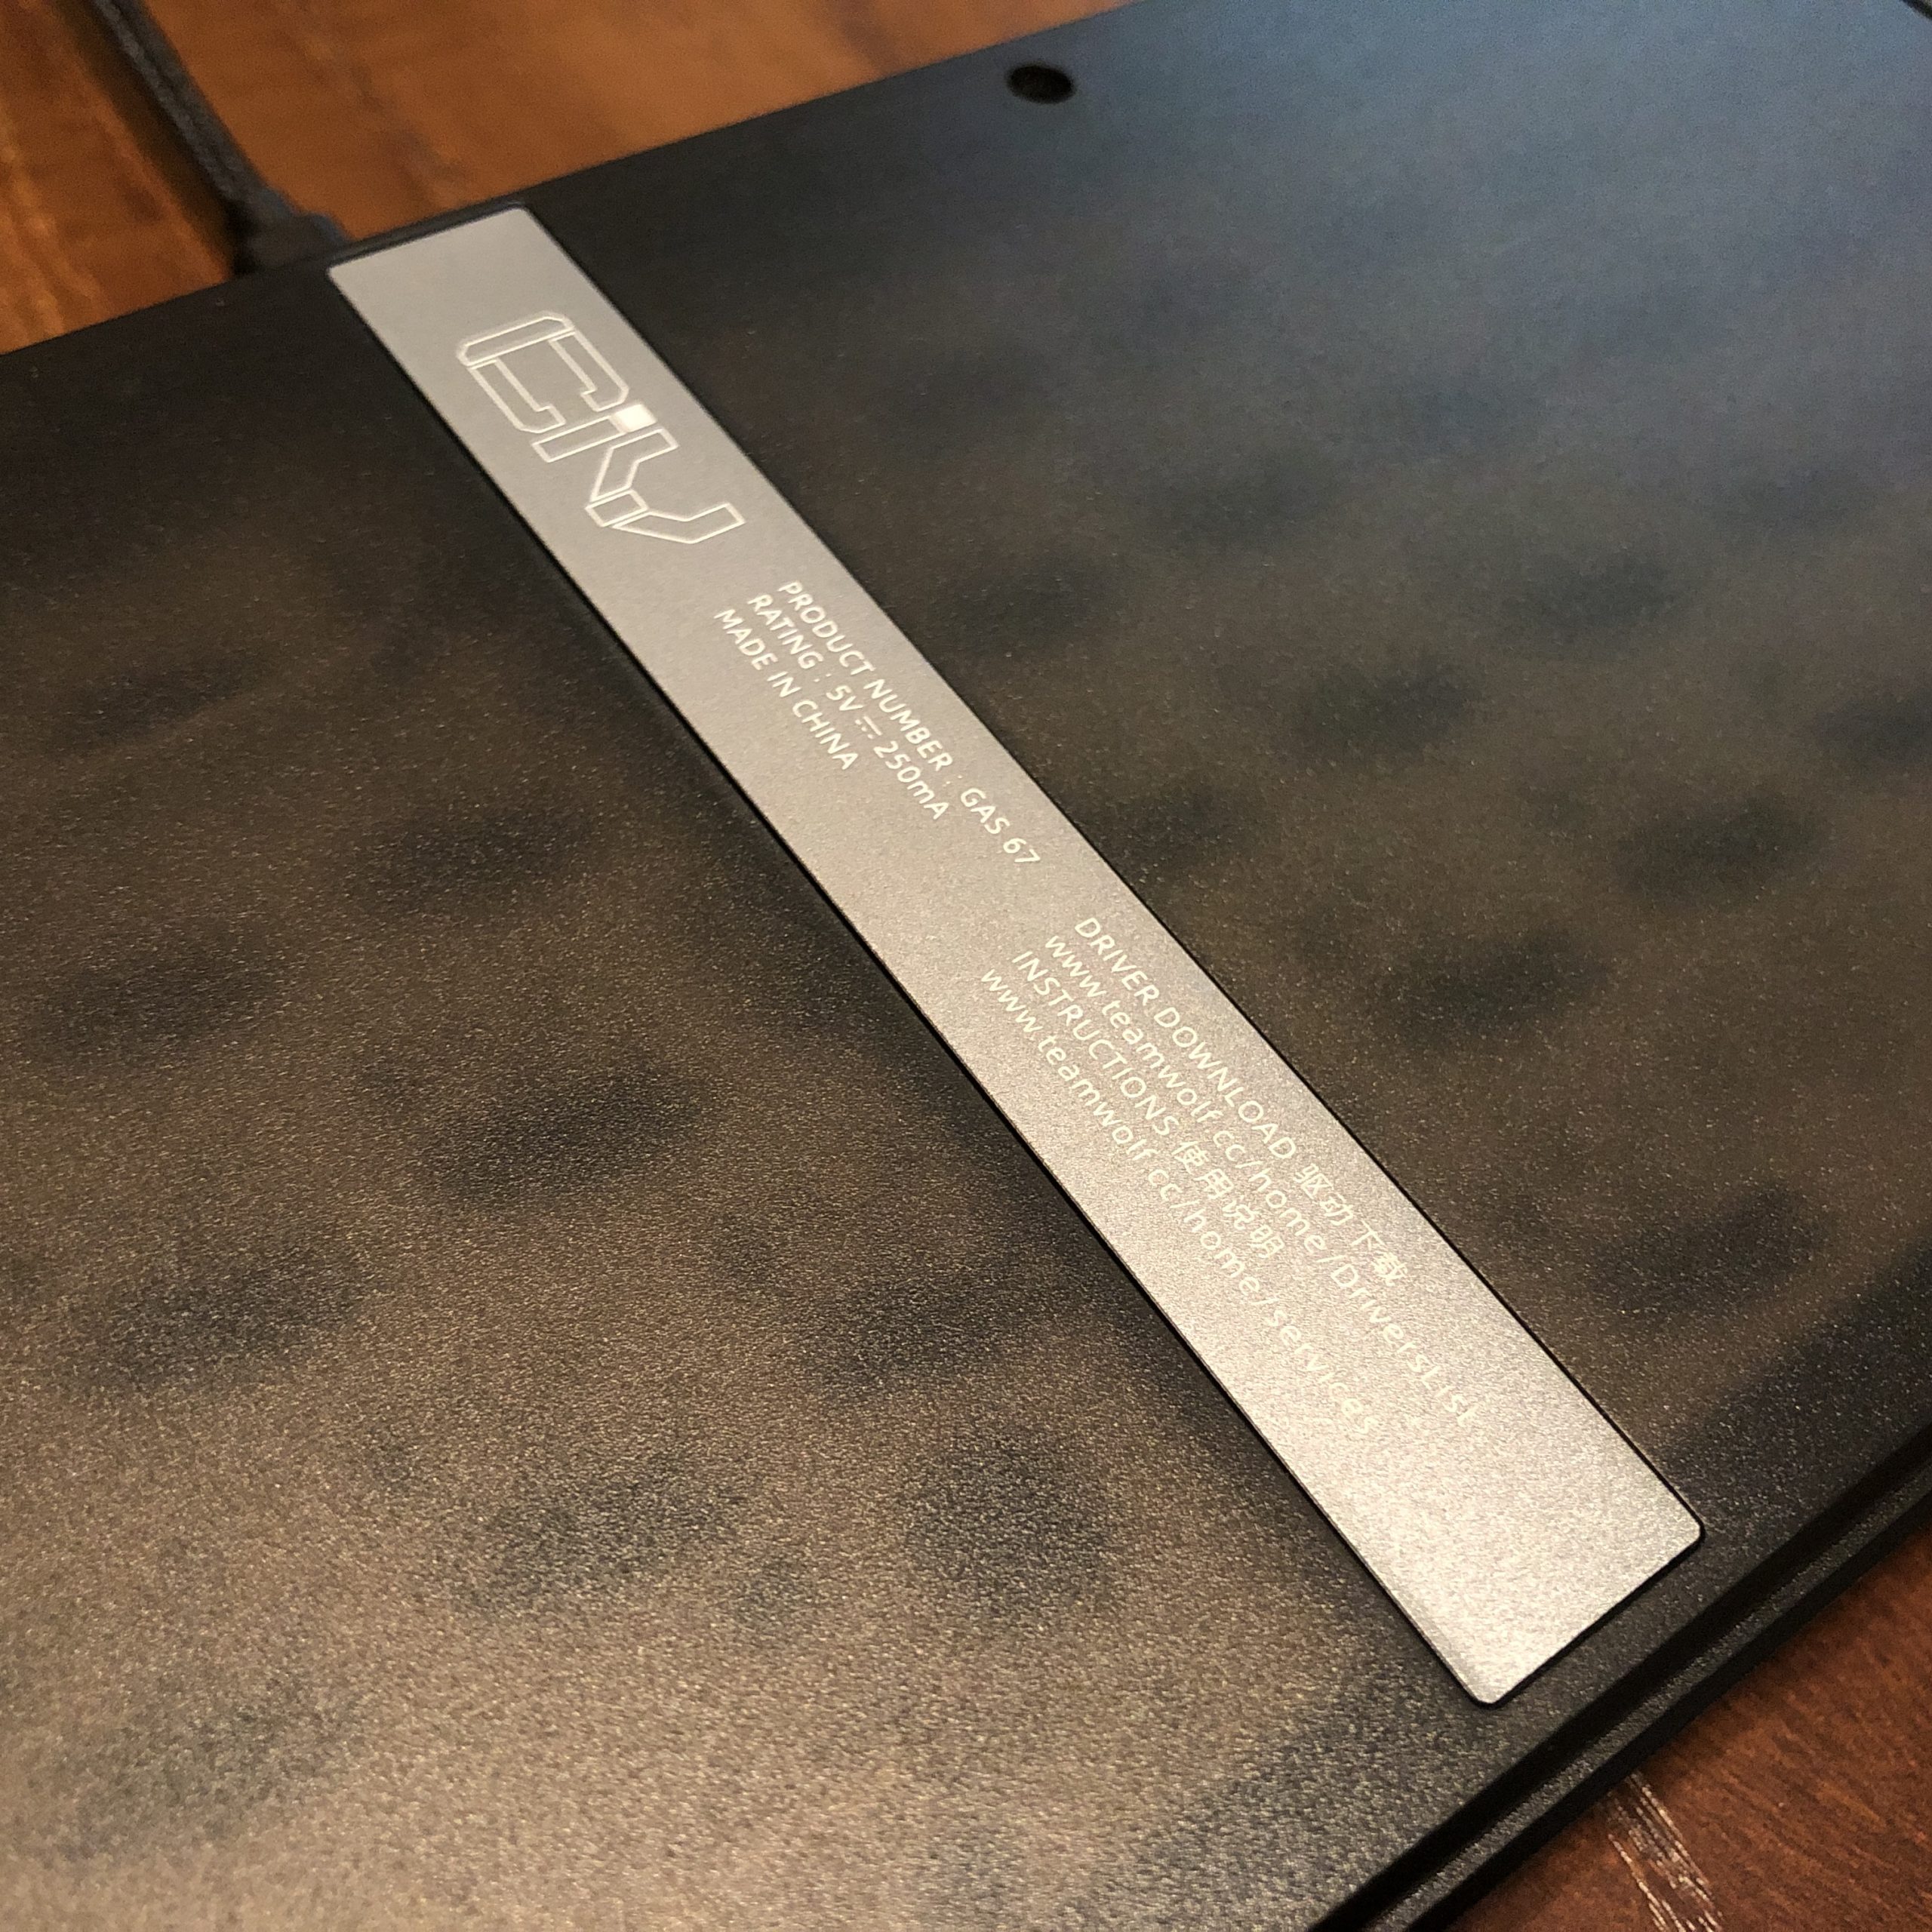
The bottom “badge”
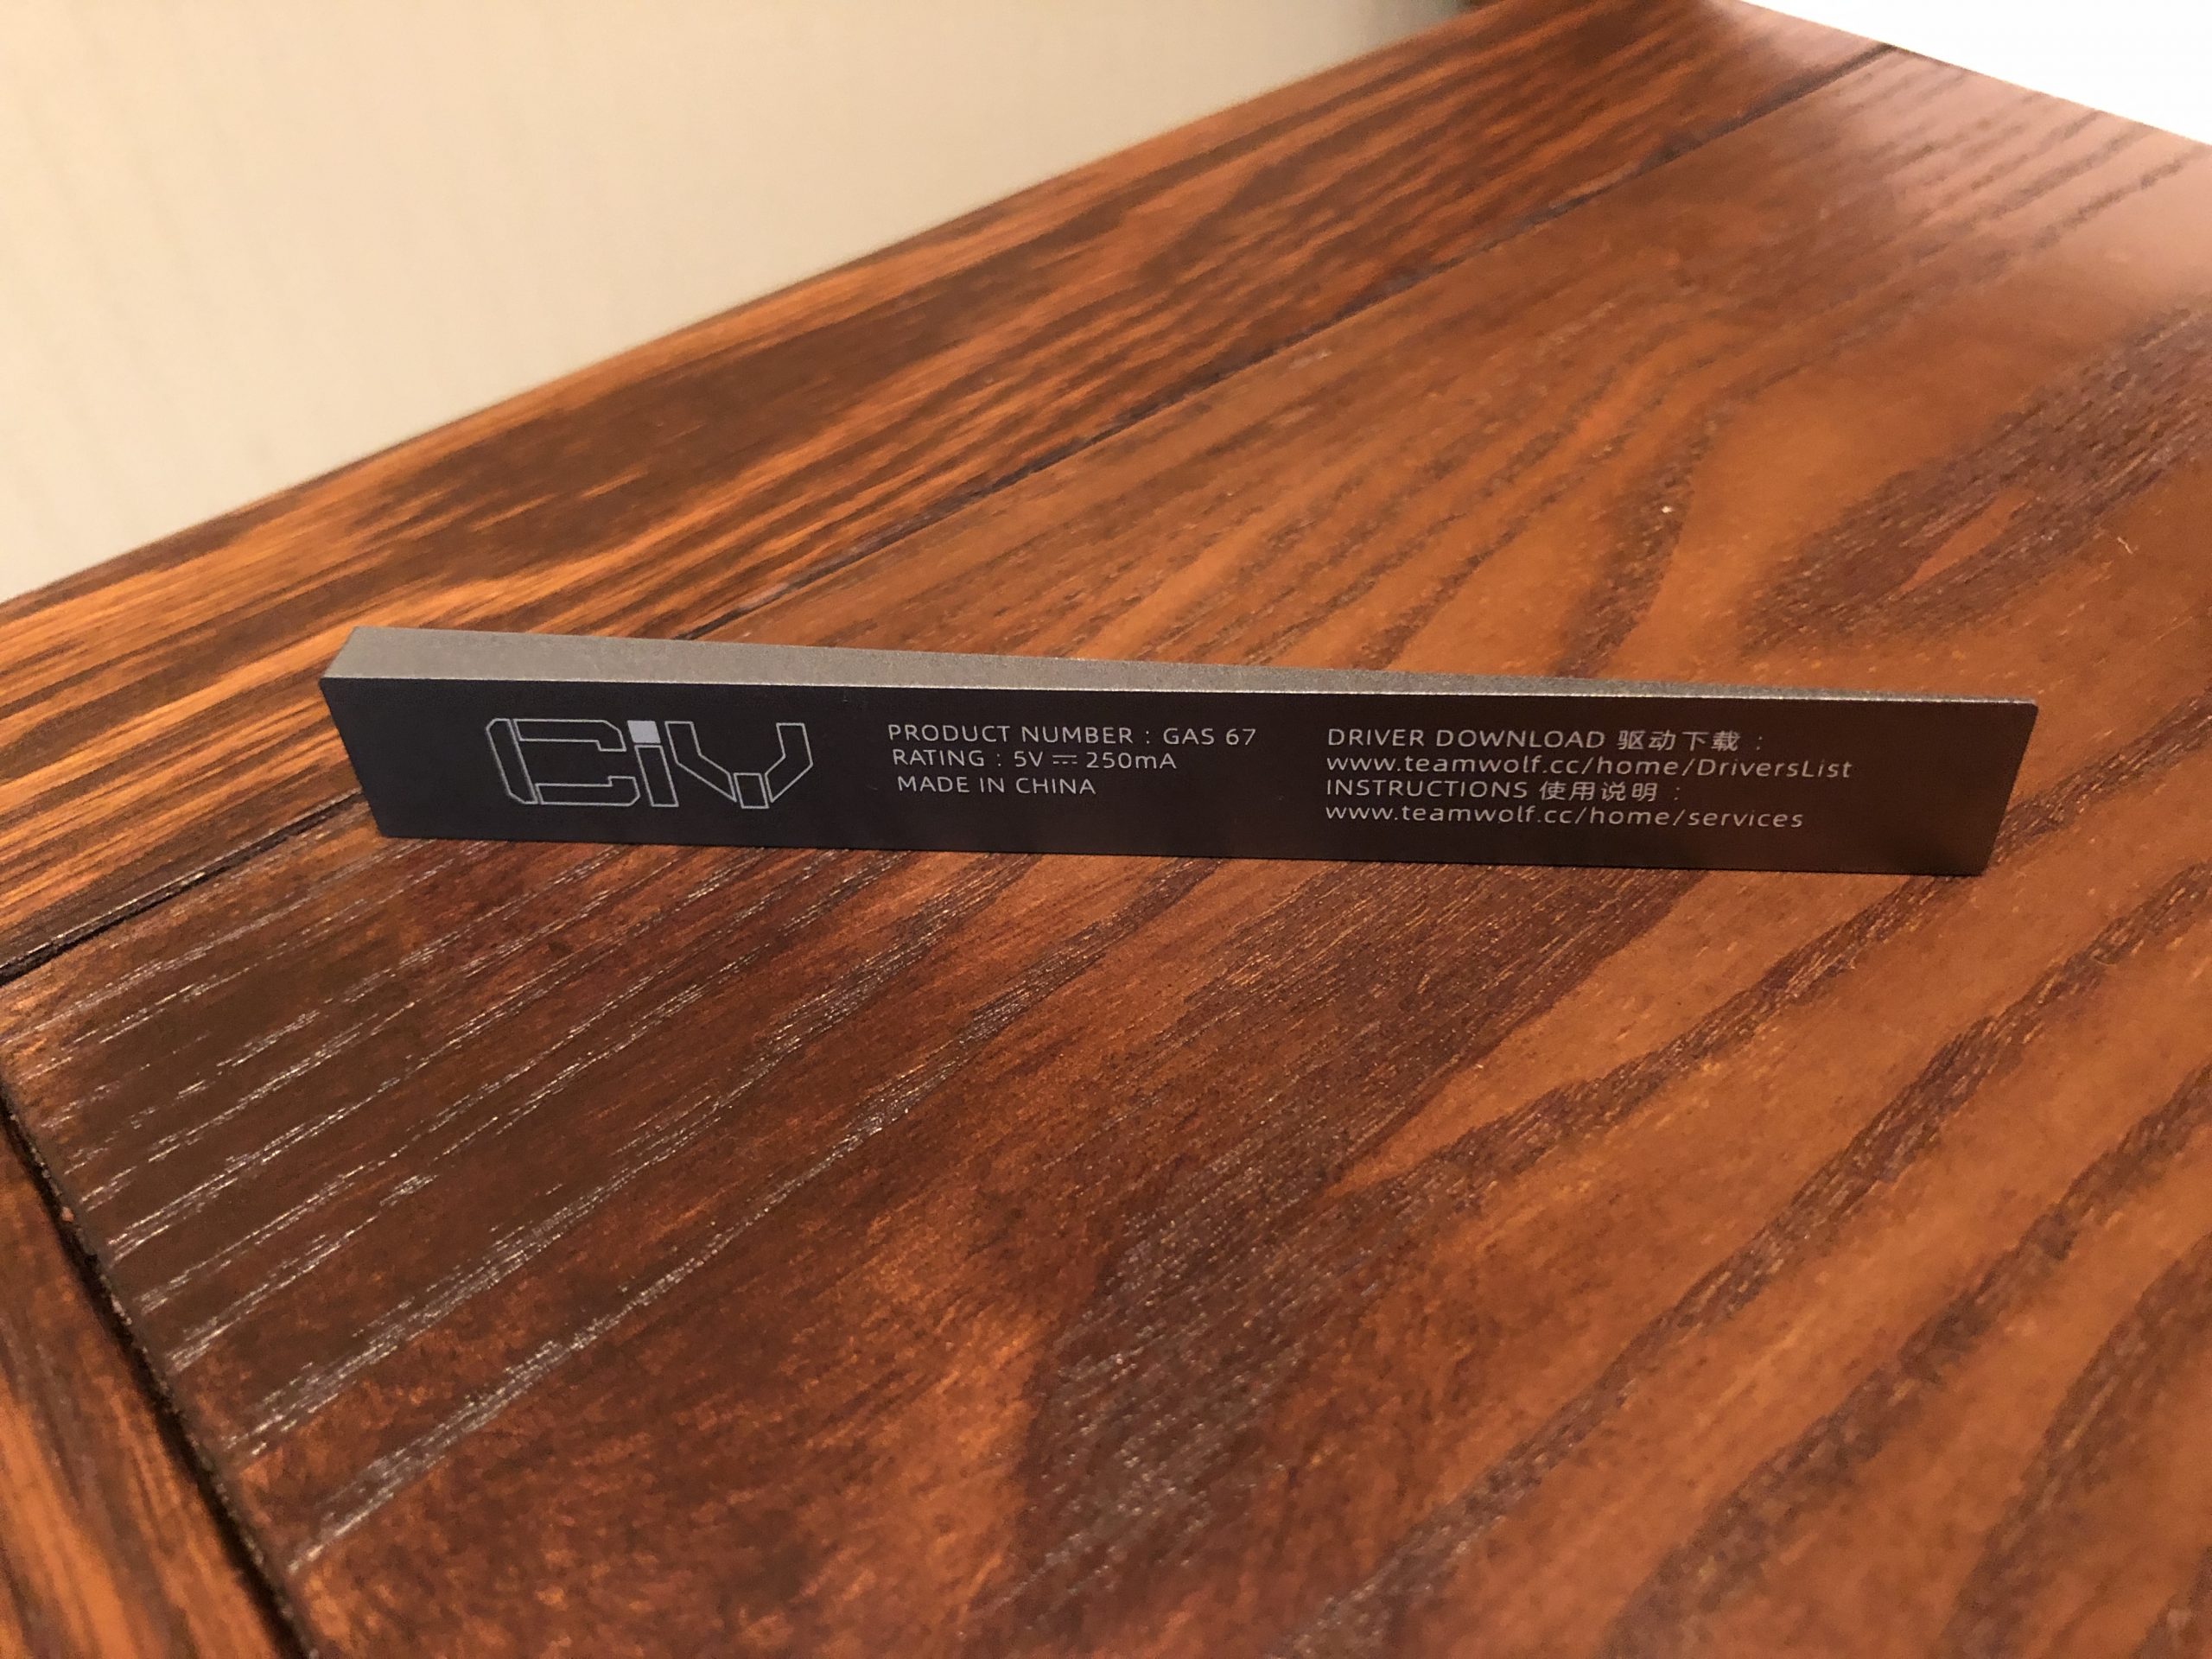
I wouldn’t call it a “weight” per-se, but it is a solid wedge of aluminum.
Context:
Without a doubt, the most special thing about this kit is the fact that it features gasket mounting at such a low price. Plenty of you are likely already familiar with what that means, but if not, here’s a brief primer:
“Gasket mounting” is an umbrella term referring to a variety of construction styles that share a specific feature; namely that the functional part of the keyboard is in some way isolated from the case by some kind of dampening material – the “gasket”. From there, you’ll find a large variety of executions with this concept – but what they all have in common is an elimination of hot-spots that would otherwise be caused by a traditional standoff mounting system. Most of them also soften high-frequency vibrations, and some of them also introduce flex and/or bounce into the typing experience.
Sometimes this comes in the form of a big rubber band that wraps around the assembly. Sometimes it’s adhesive pads in the case or on the plate. Sometimes it’s rubber or silicone inserts. In any case, these various permutations of “gasket mounting” all act to improve the consistency, sound, and feel of a given keyboard.
When first introduced, gasket mounting was exclusively found in the realm of high-end, bespoke custom keyboards. We’re talking engineers designing their own luxury products for themselves at a professional level and getting like-minded folks to buy-in on a production run – but these also acted as proofs-of-concept for other boards to follow:
The whole landscape of expectation shifted with the release of the KBD67 Lite – at the time, this was the first “gasket mount” keyboard available for the masses – though even at that it’s still mostly sold through group-buy pre-orders. This kit generally goes for around $110 bare-bones, and when it released that was the least expensive gasket option by a very wide margin. It simultaneously elevated and expanded the middle-market.
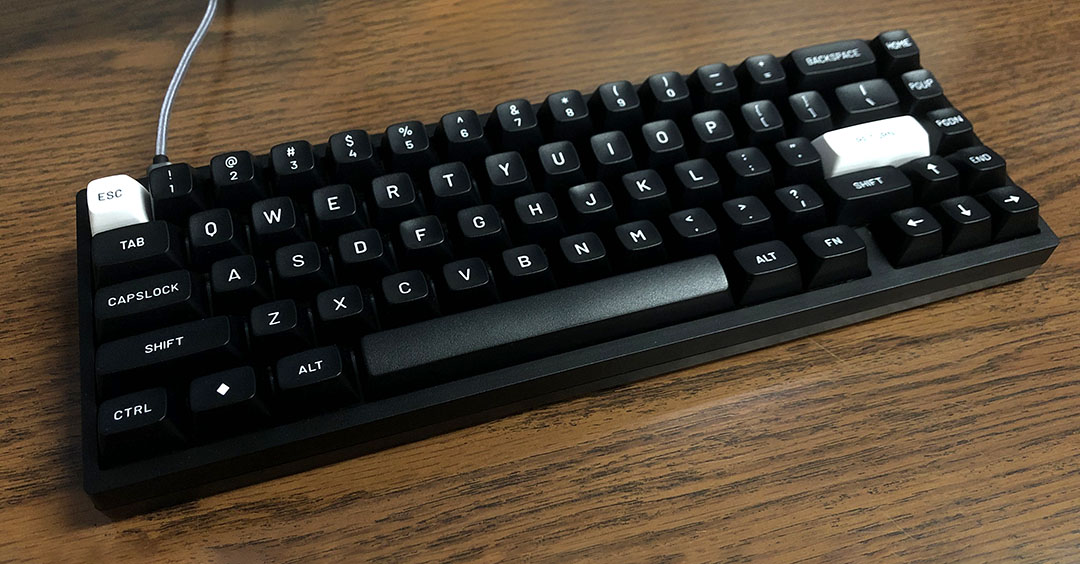
An over-exposed shot of my KBD67L at work
Fast-forward a few years and the 67L has plenty of peers, but nothing that undercuts it significantly in terms of making gasket mounting more accessible or budget friendly. That is, not until now.
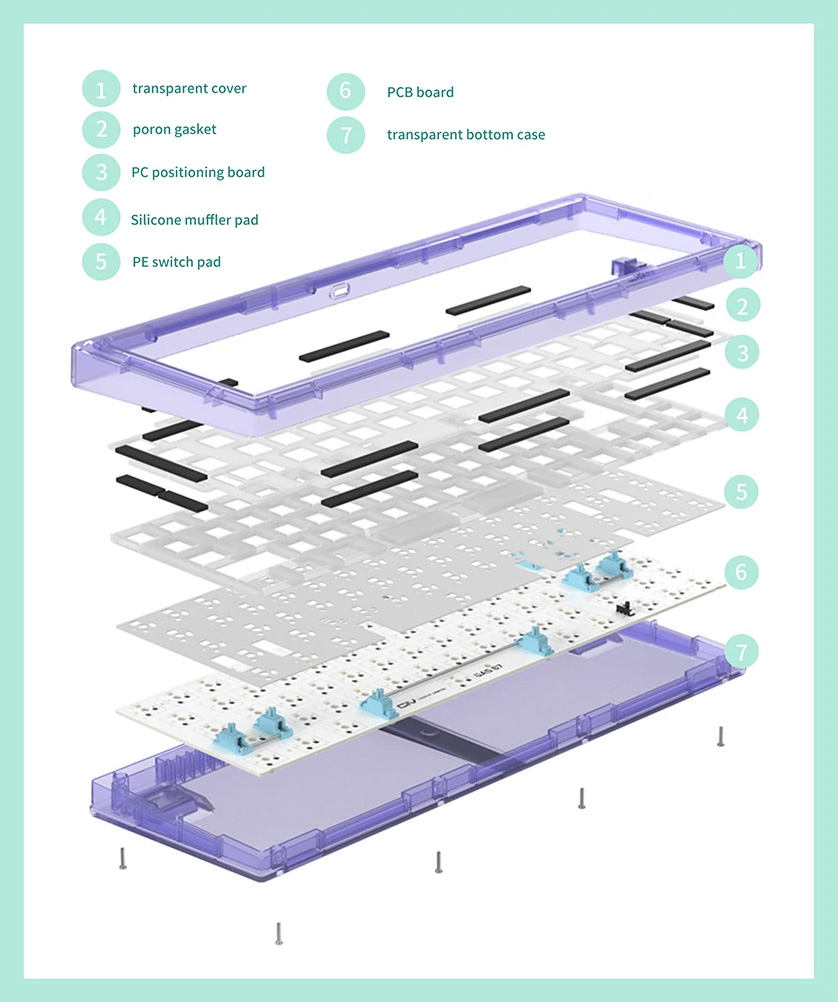
Another promo image from banggood, showing the structure of the keyboard – complete with gaskets.
The Kit:
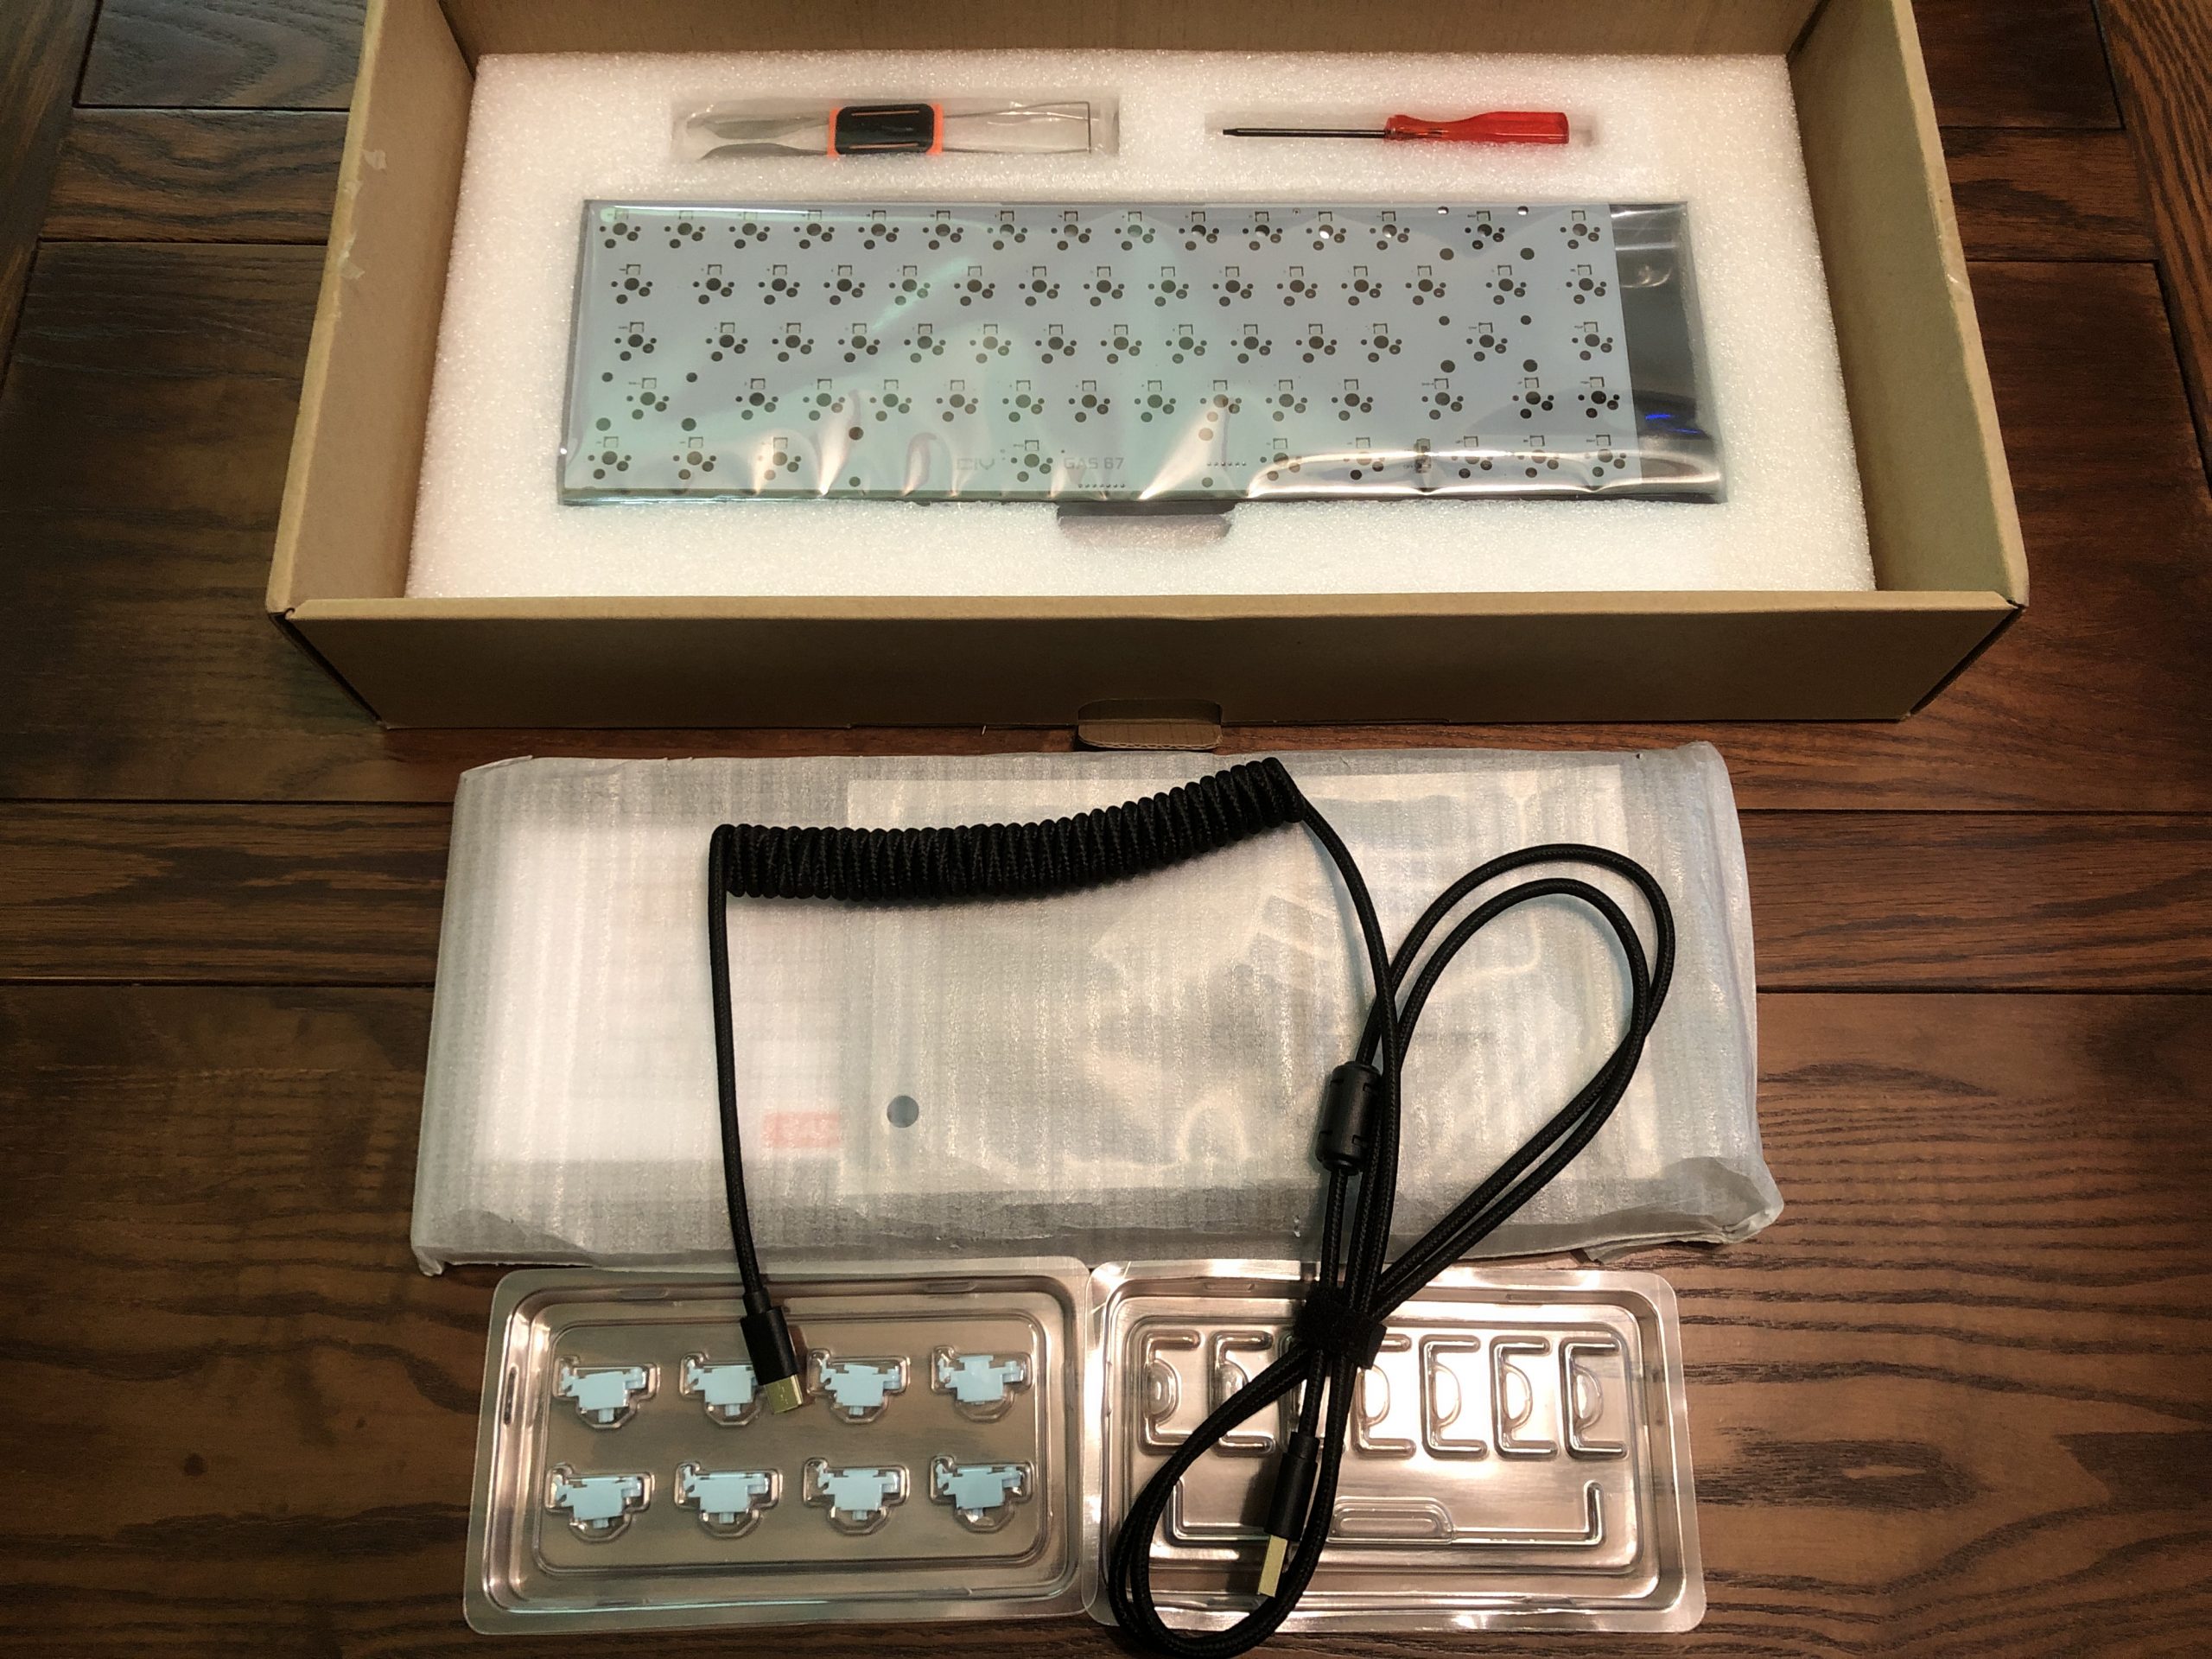
The box and everything in it.
This is a 67-key layout with a fairly traditional configuration as far as those go.
With switches and a pretty standard set of caps, the fully-assembled board weighs 608g / 1.34 lbs.
In the box, the first thing you’ll see are the blister packs containing the stabilizer parts. They’re pretty decent ones, too.
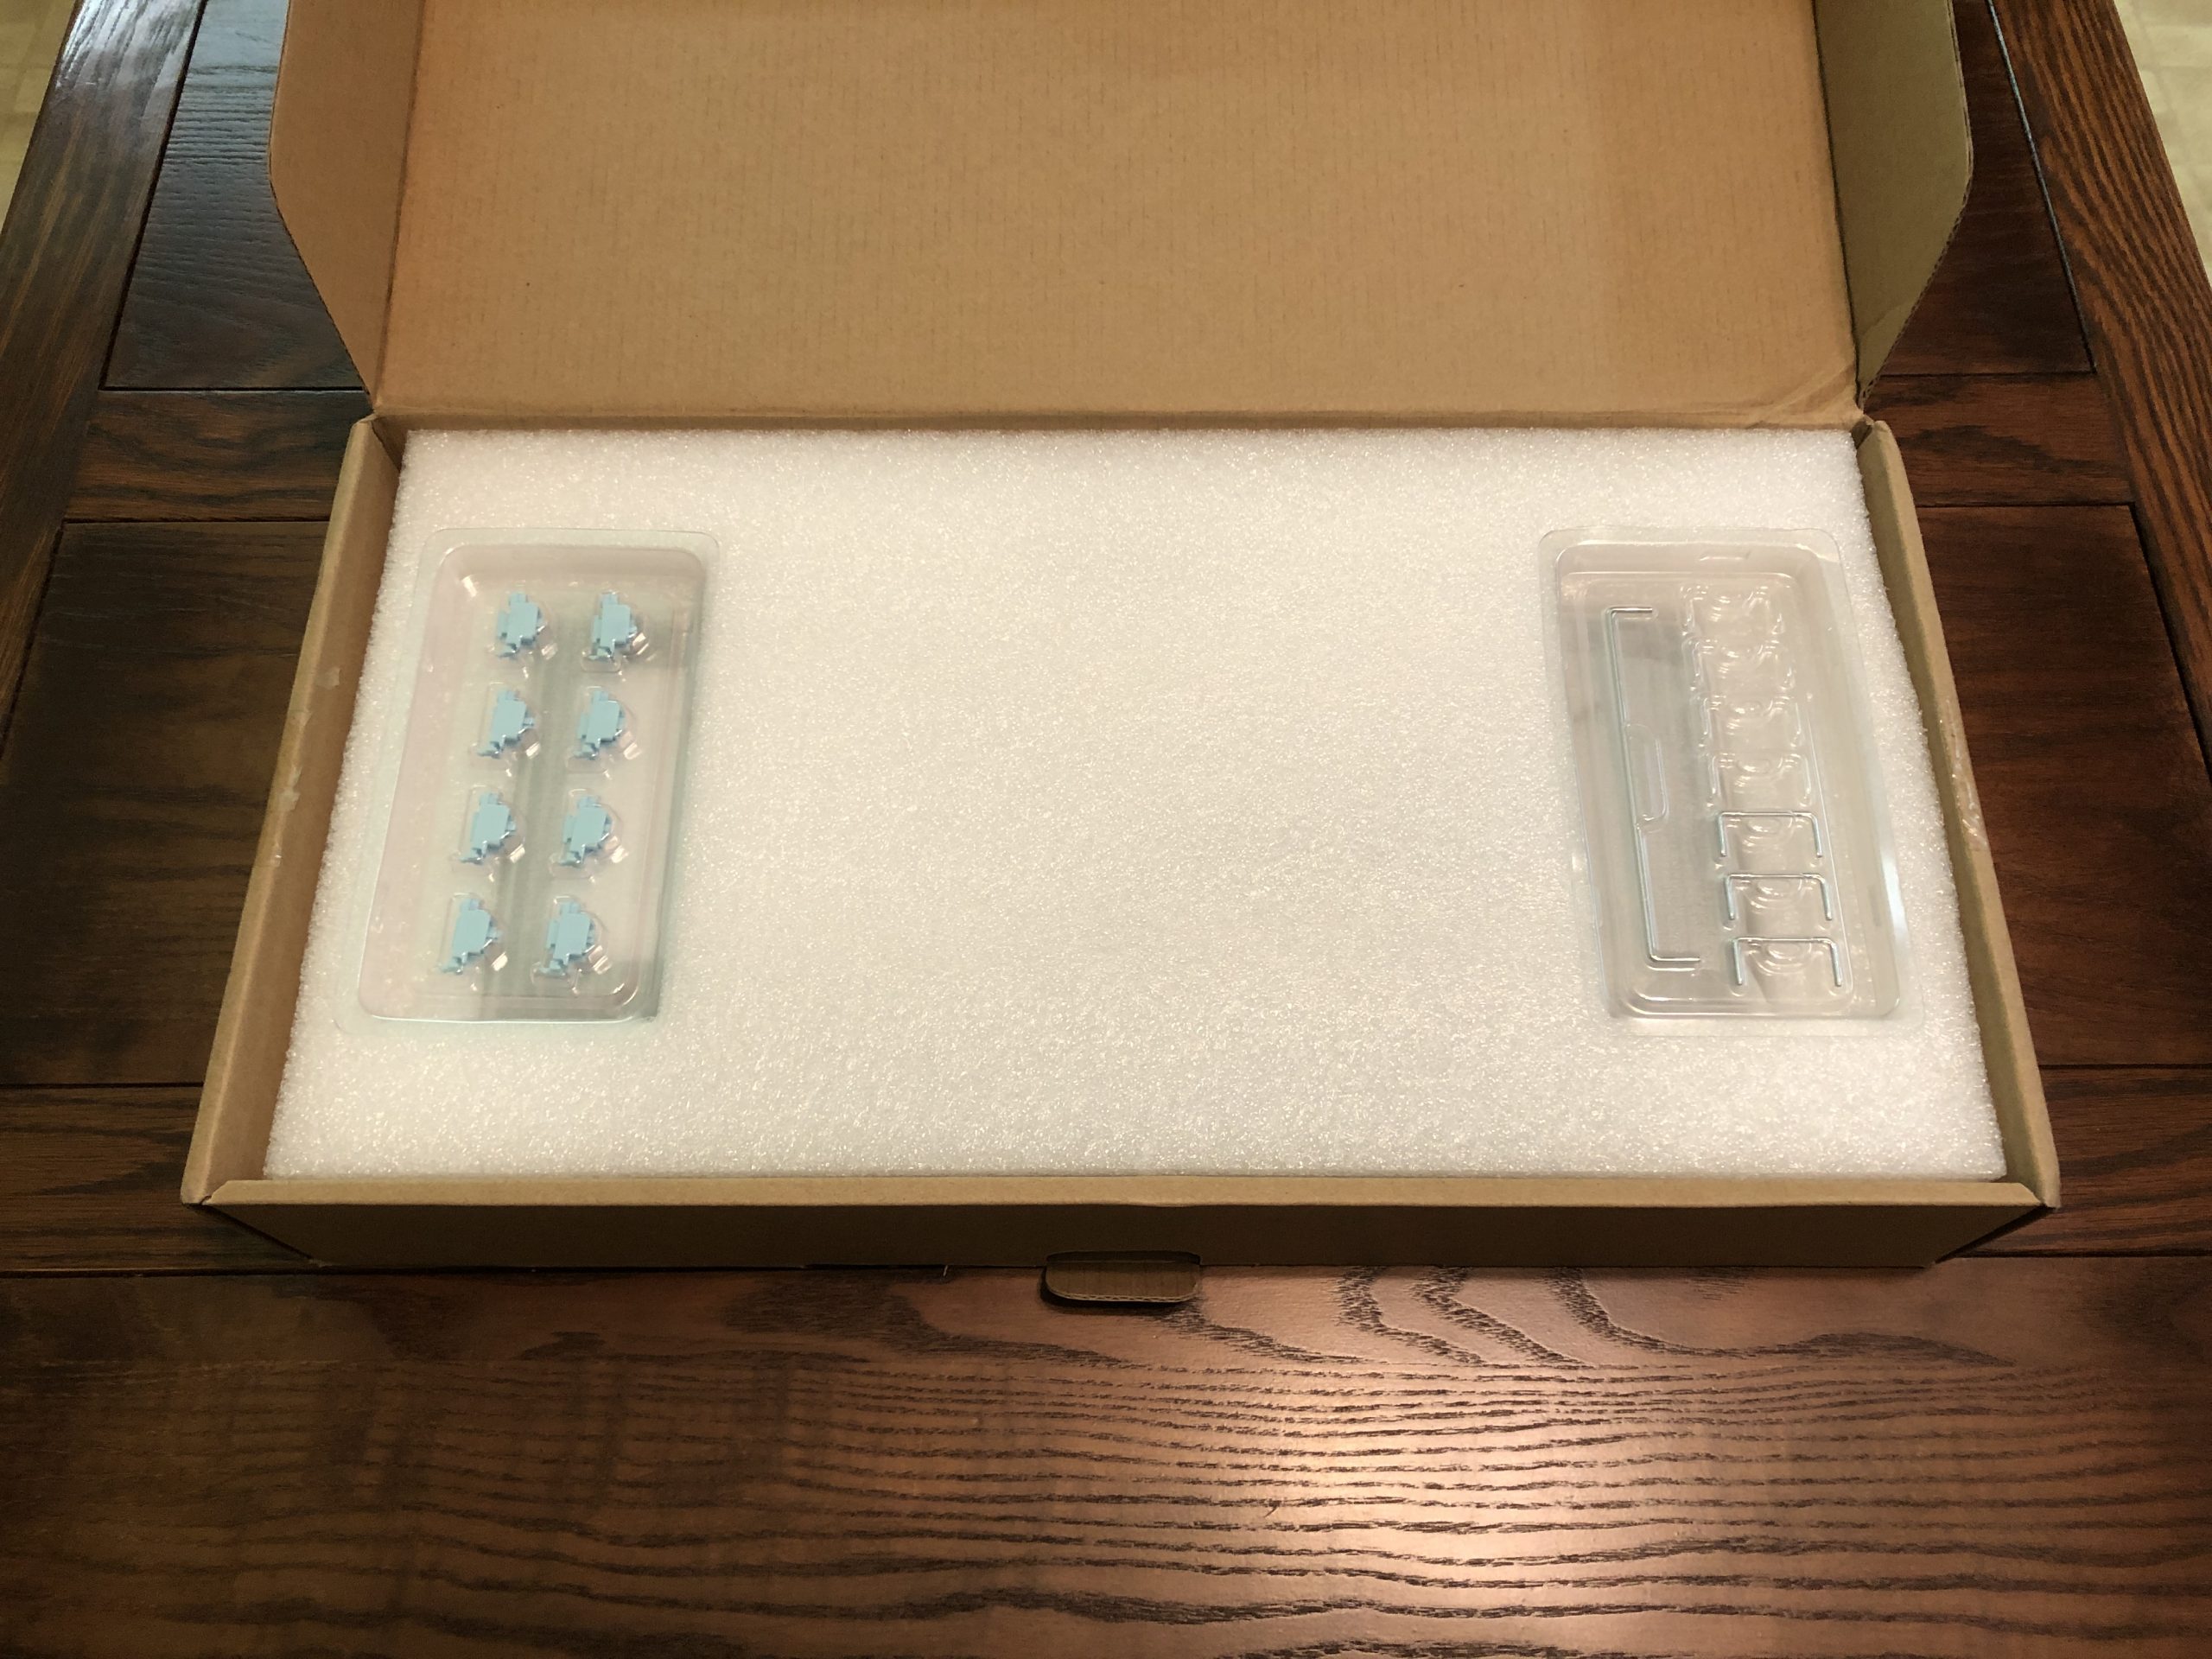
Opening the box
Below that you’ll see the rest of the parts; case, plate, PCB, hardware, pads, switch & cap puller, and of course the cable. There is software available for the PCB [ here ]; covered in more detail below.
The Cable:
The cable is pretty typical of what you’d get in one of those middle-market kits, and honestly it’s a bit nicer than at least a few of them. Considering this kit is between $40 and $60 cheaper than those, I’d say that’s a notable inclusion.
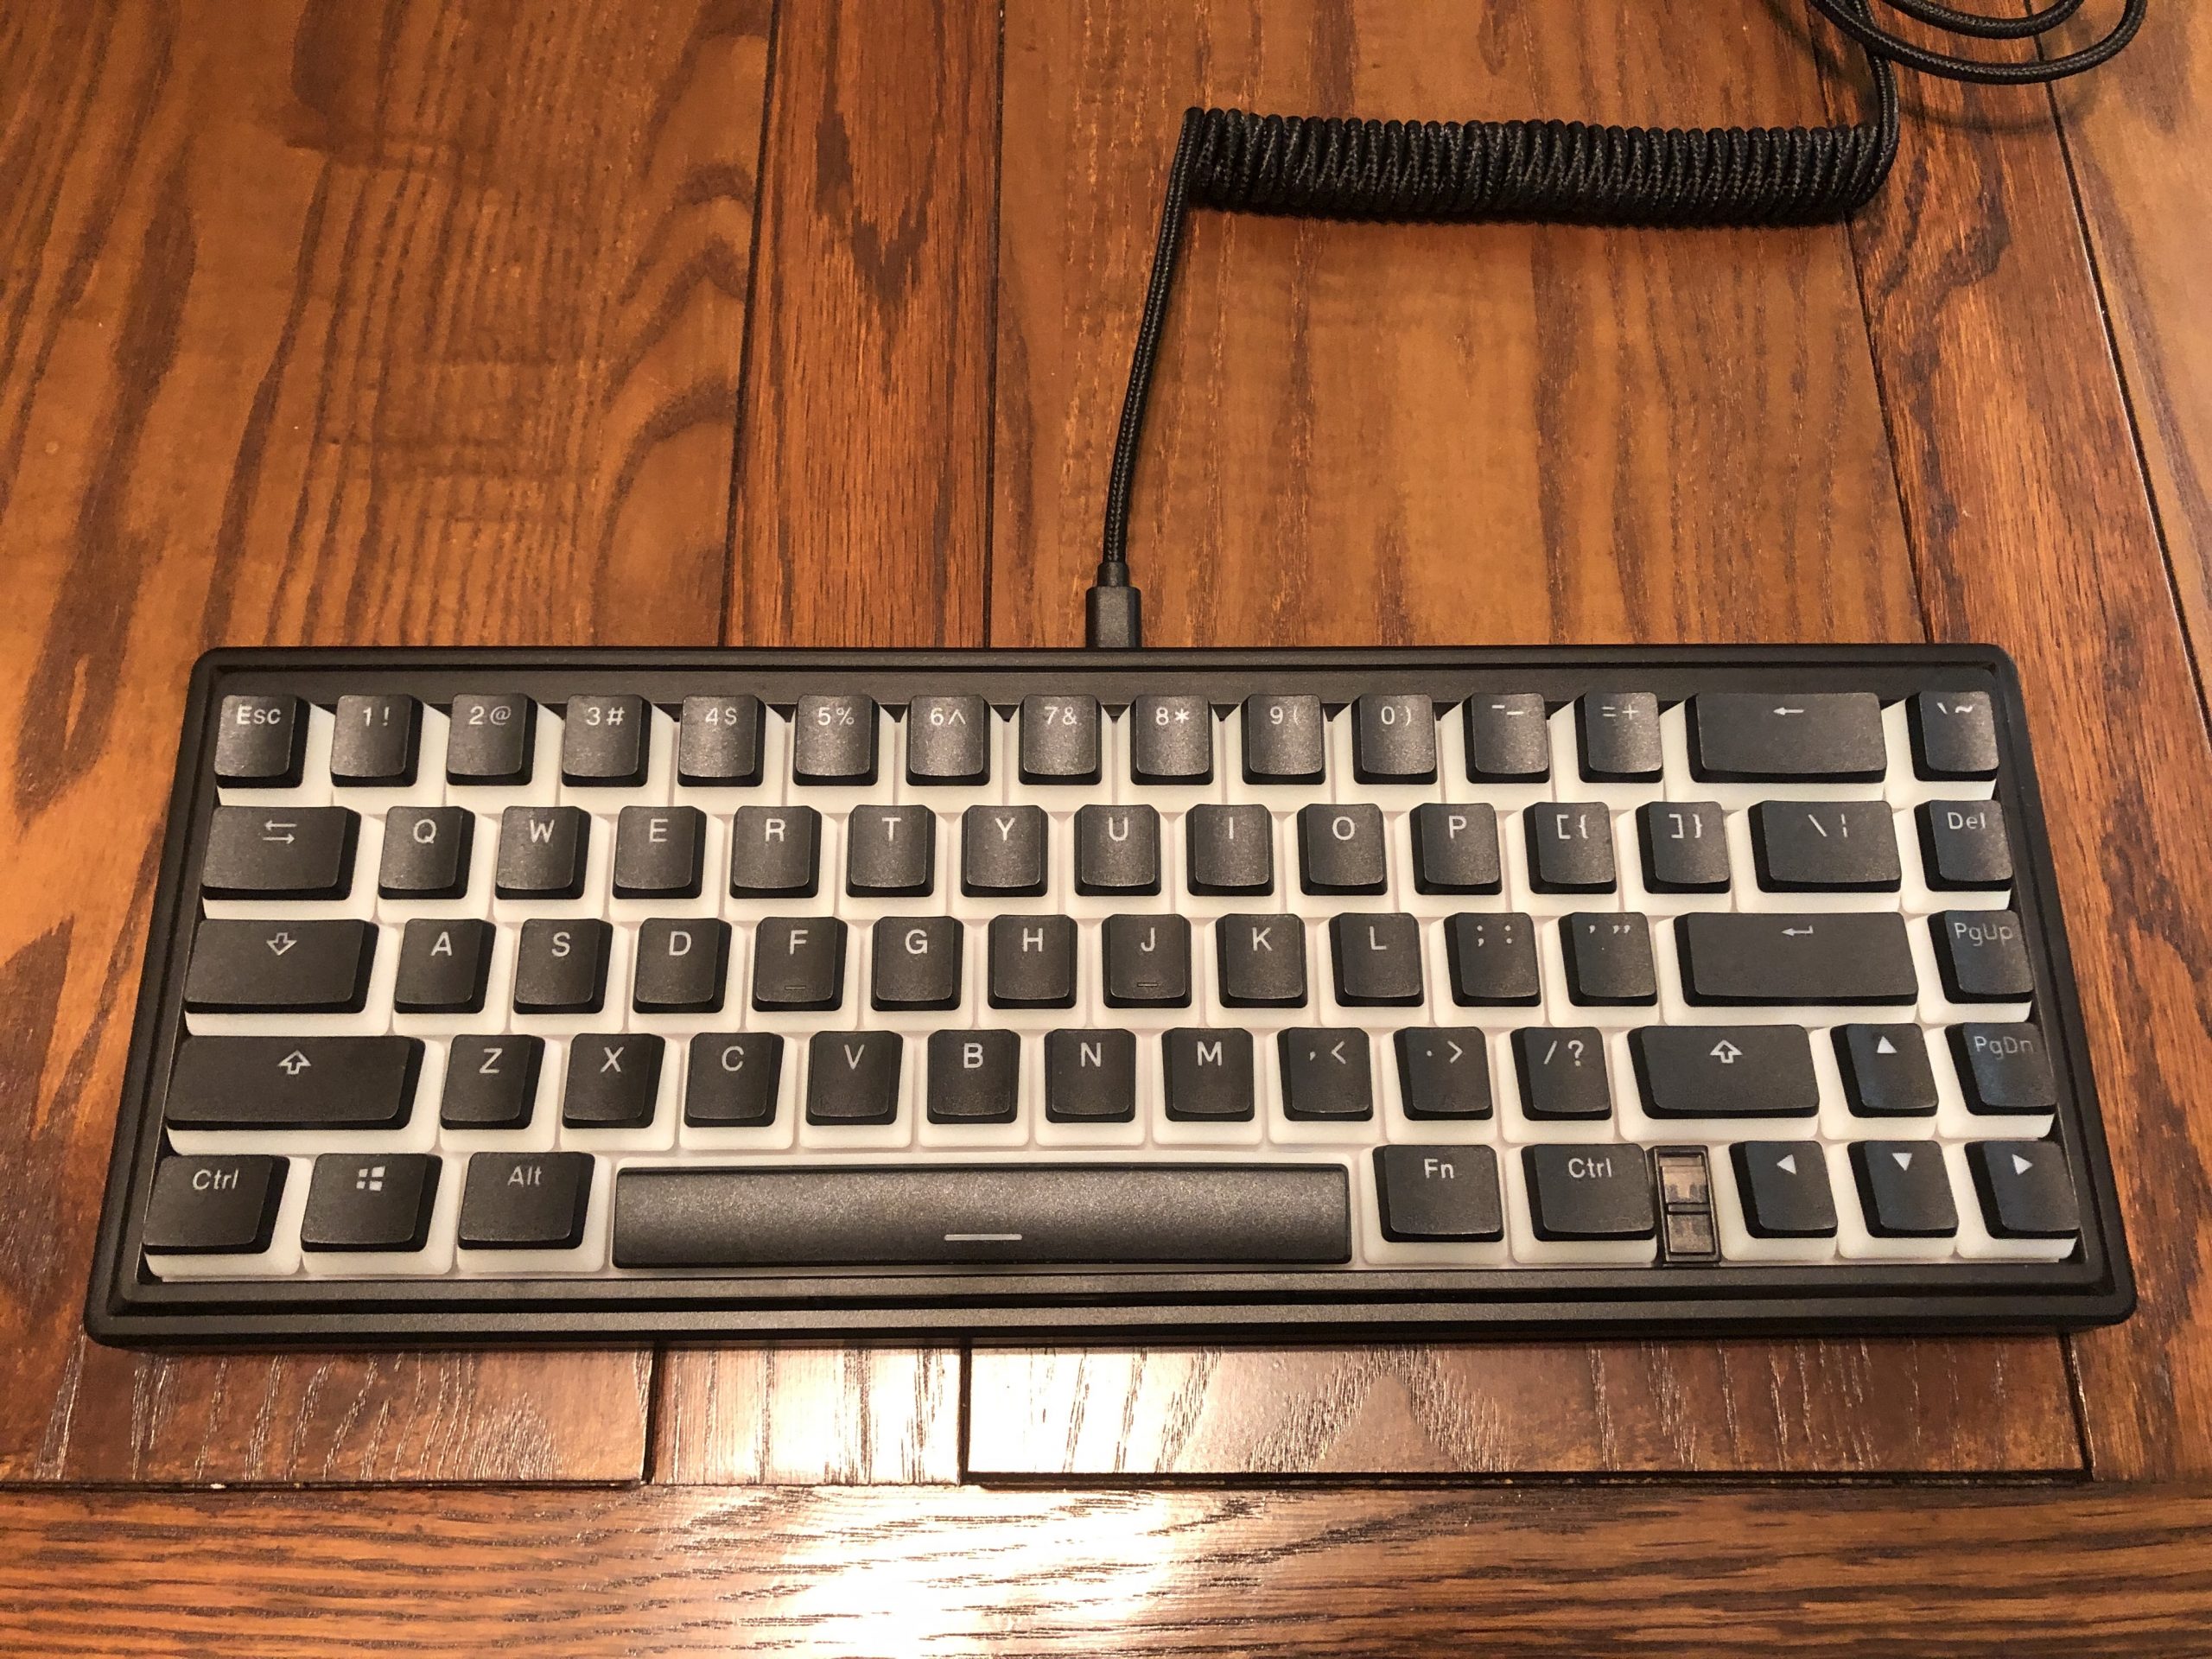
A fully-assembled GAS67 with its included stock cable. It plugs into a center-mounted USBC daughter board.
It’s got a braided sleeve and is on the firm side. It has a nice, even coil and gold-colored connectors. As pack-in cables go, this really is one of the better ones, and frankly better than this kit needed to come with; I wouldn’t change a thing about it.
The PCB:
Nothing super fancy, but it’s no slouch. We’ve got RGB LEDs for each key as well as hot-swap sockets, which I believe are CIY’s own but patterned after Kailh or Gateron ones. There are holes to accommodate fixing pins for “5-pin” switches. The LEDs are oriented North of the contacts; more on that later. There are also holes for stabilizers – that’s right – a cheap kit with PCB-mount stabs, and they don’t even suck. They’re not perfect, though – more on that later. There’s also a physical toggle switch positioned between the arrow cluster and right CTRL key.
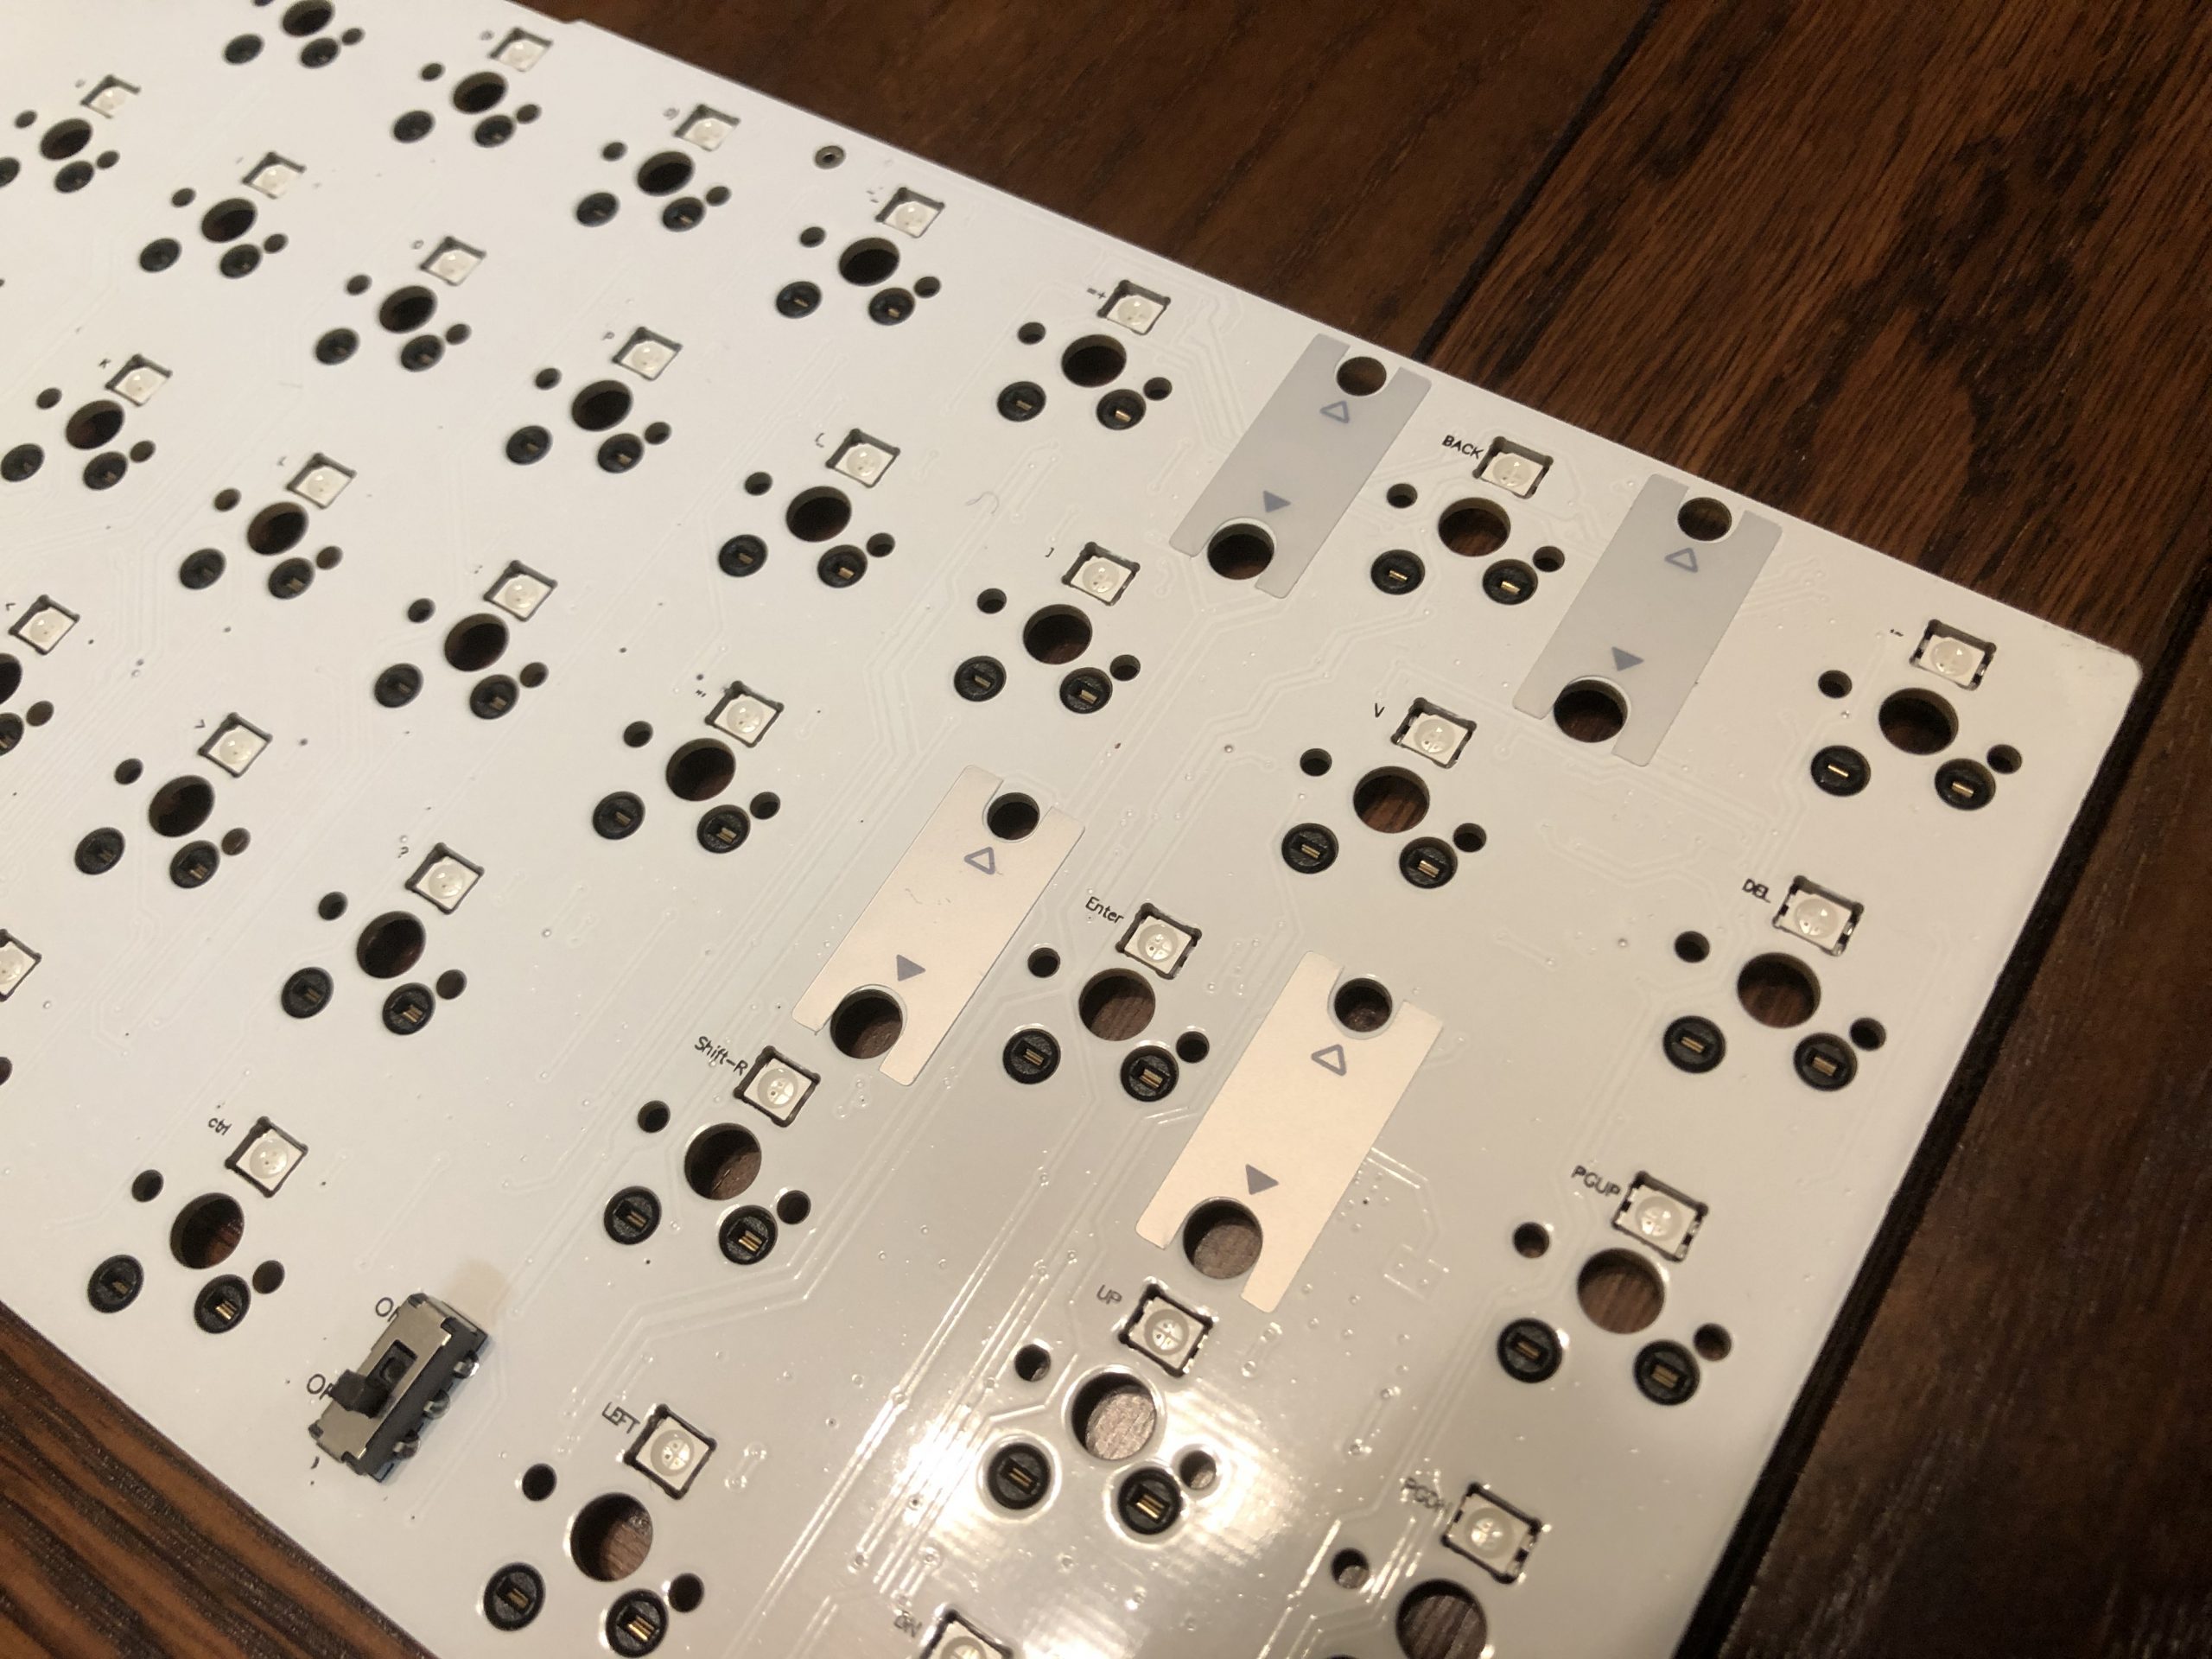
A look at the PCB, where you can see the toggle switch and shiny stab dampening stickers.
The most notable thing about this PCB, especially at this price point, is the fact that I/O is handled through a daughter board. Probably not that expensive to execute given how many pre-builts rely on it, but for whatever reason this feature has been notably absent on almost every budget and middle-market kit, despite being objectively better for gasket-mount boards, or any board with a somewhat mobile assembly. We’ve got it here, though – and that’s a very welcome feature.
The Stabs:
As far as I can tell, these are CIY’s own screw-in PCB-mount stabilizers. They’re shaped pretty similarly to KBDfans’ polycarb ones, but I believe these are POM. They also don’t have metal inserts, more like GMK screw-ins. They’re made without the dampening legs that most prefer to clip-off anyway.
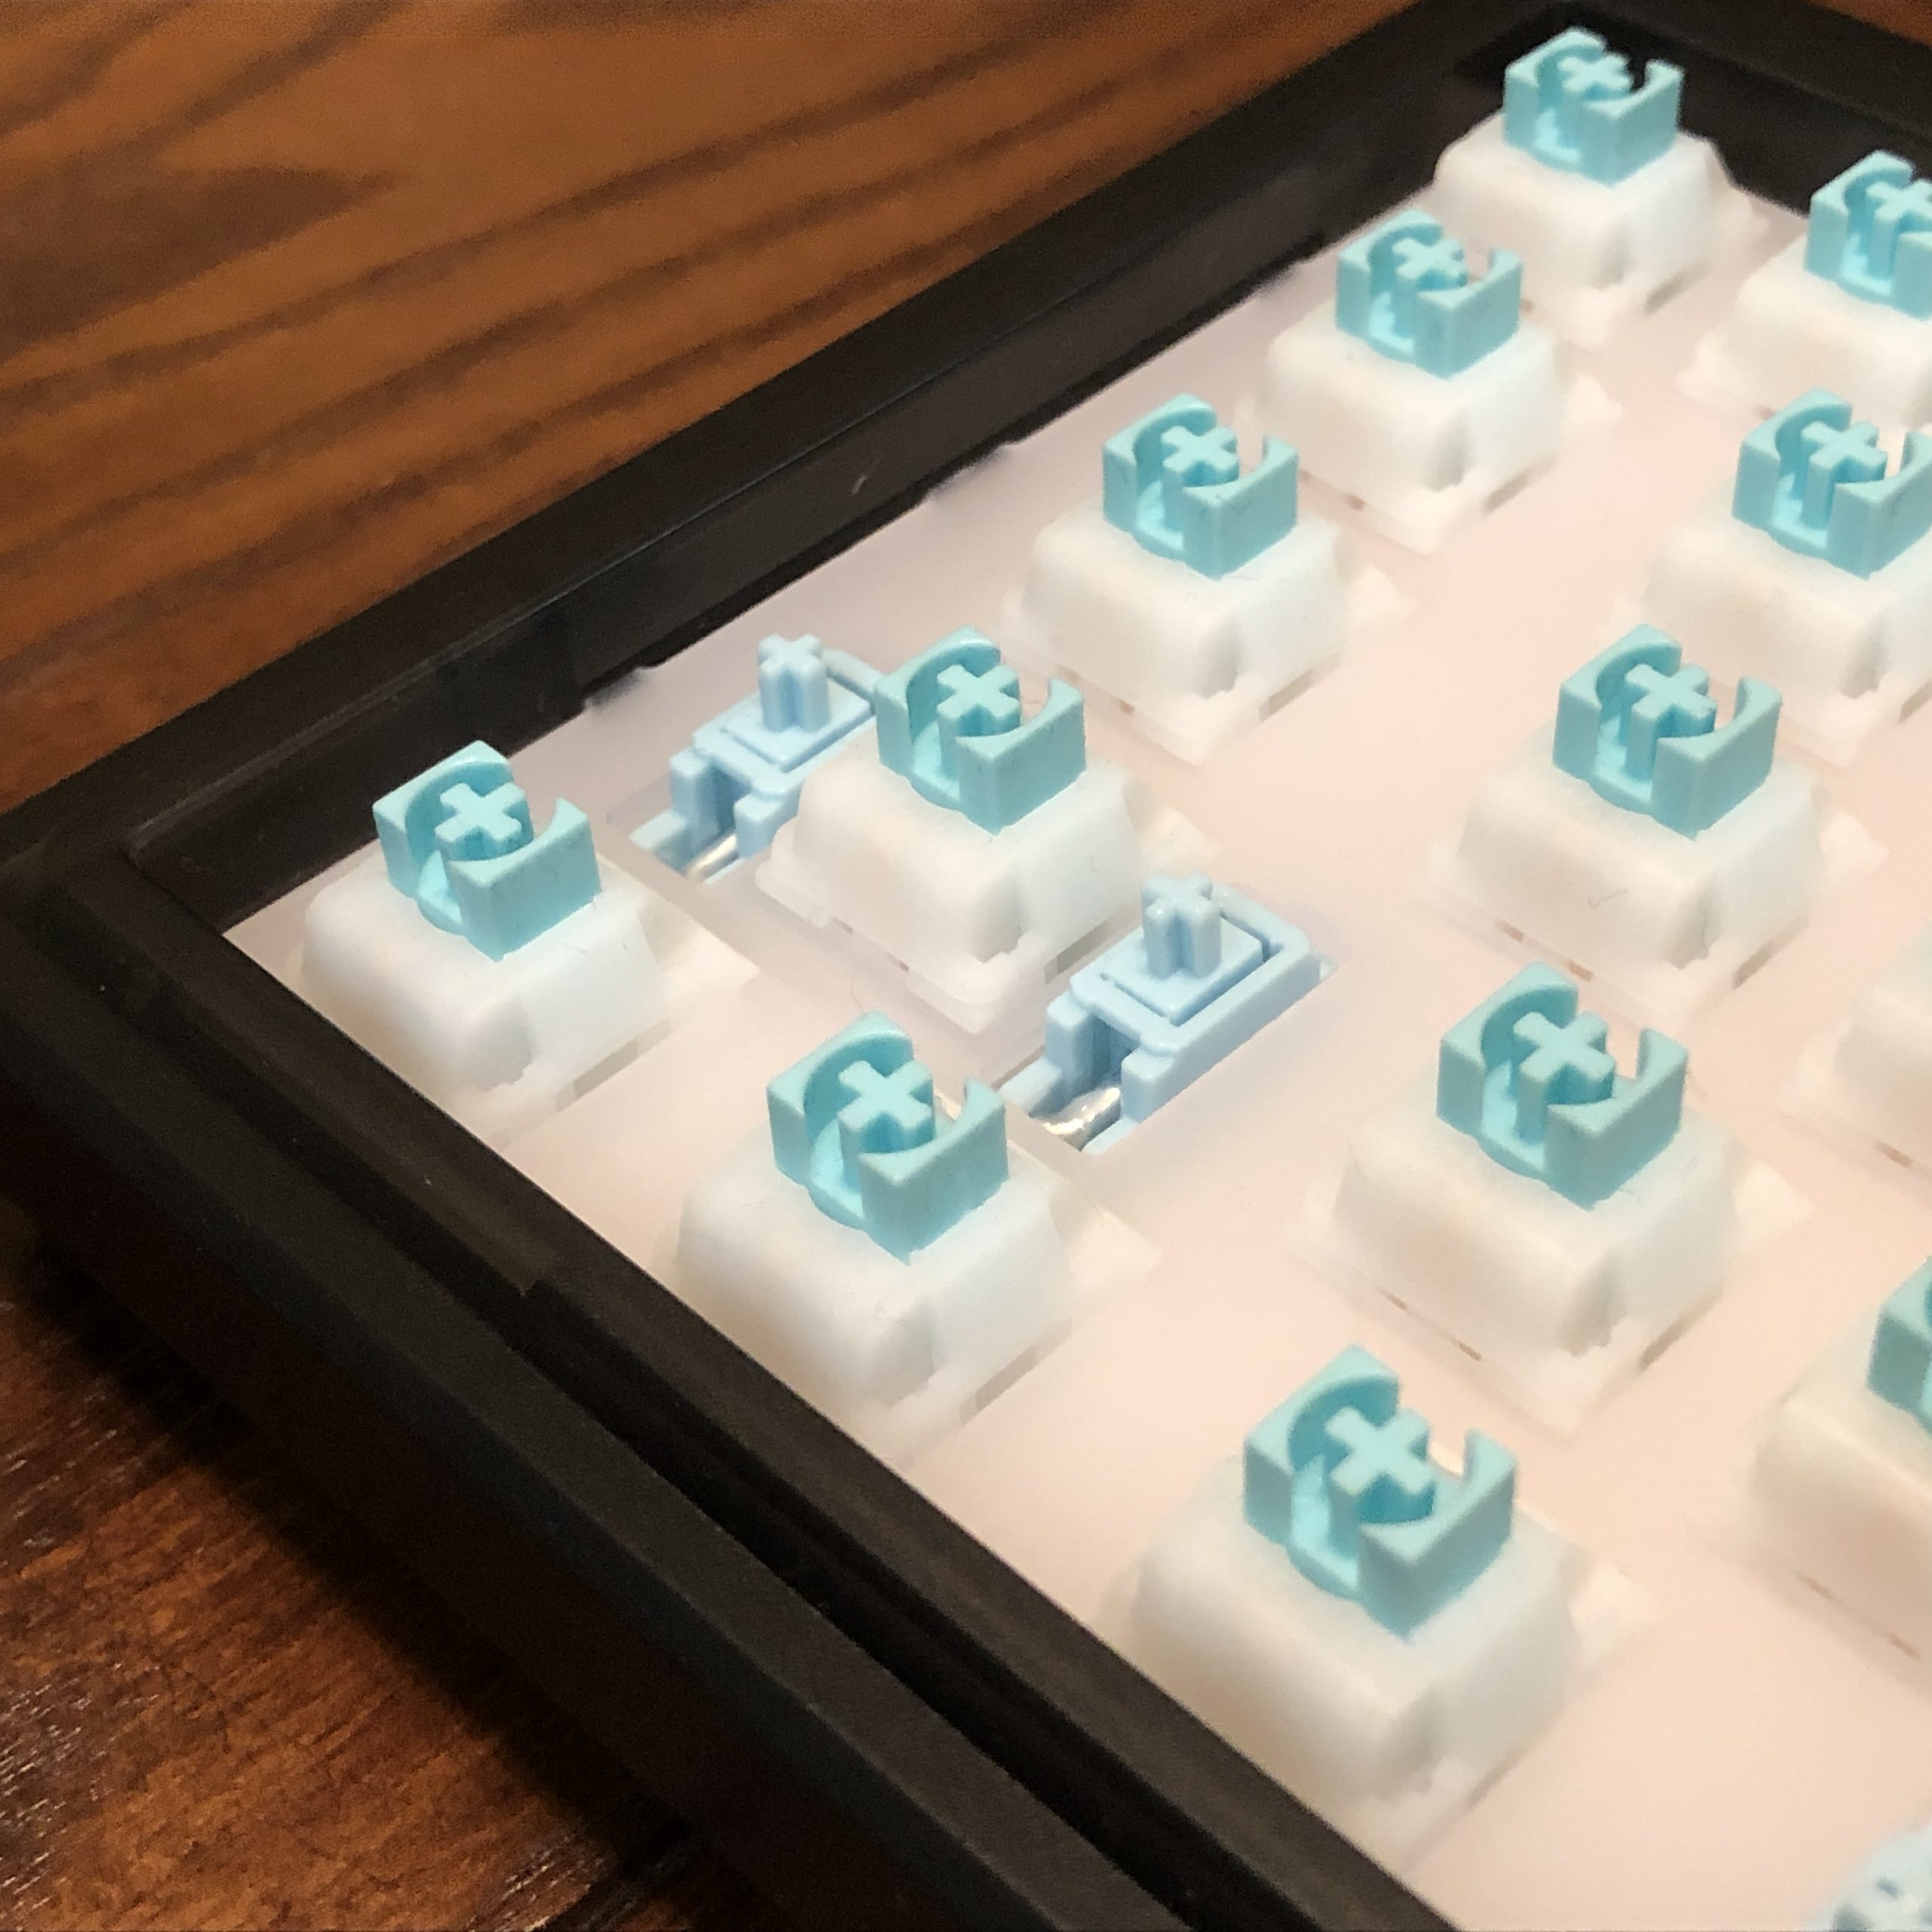
A close look at the stabs installed in a complete build. They almost match the FLCMMK Ice Mint stems – almost.
They’re a baby-blue color with a glossy finish and generally seem well-made. I lubed them with a mix of 205g0 and 206g2, and I don’t have a complaint about them.
The Case:
Pretty simple sandwich style design; the top and bottom halves carry the gasket pads, and those hold onto tabs on the sides of the plate. The case is available in three colors; bluish-green, light-purple, and smoky grey. All three are translucent. I think the plastic quality is surprisingly high for being a budget kit – not bad at all.
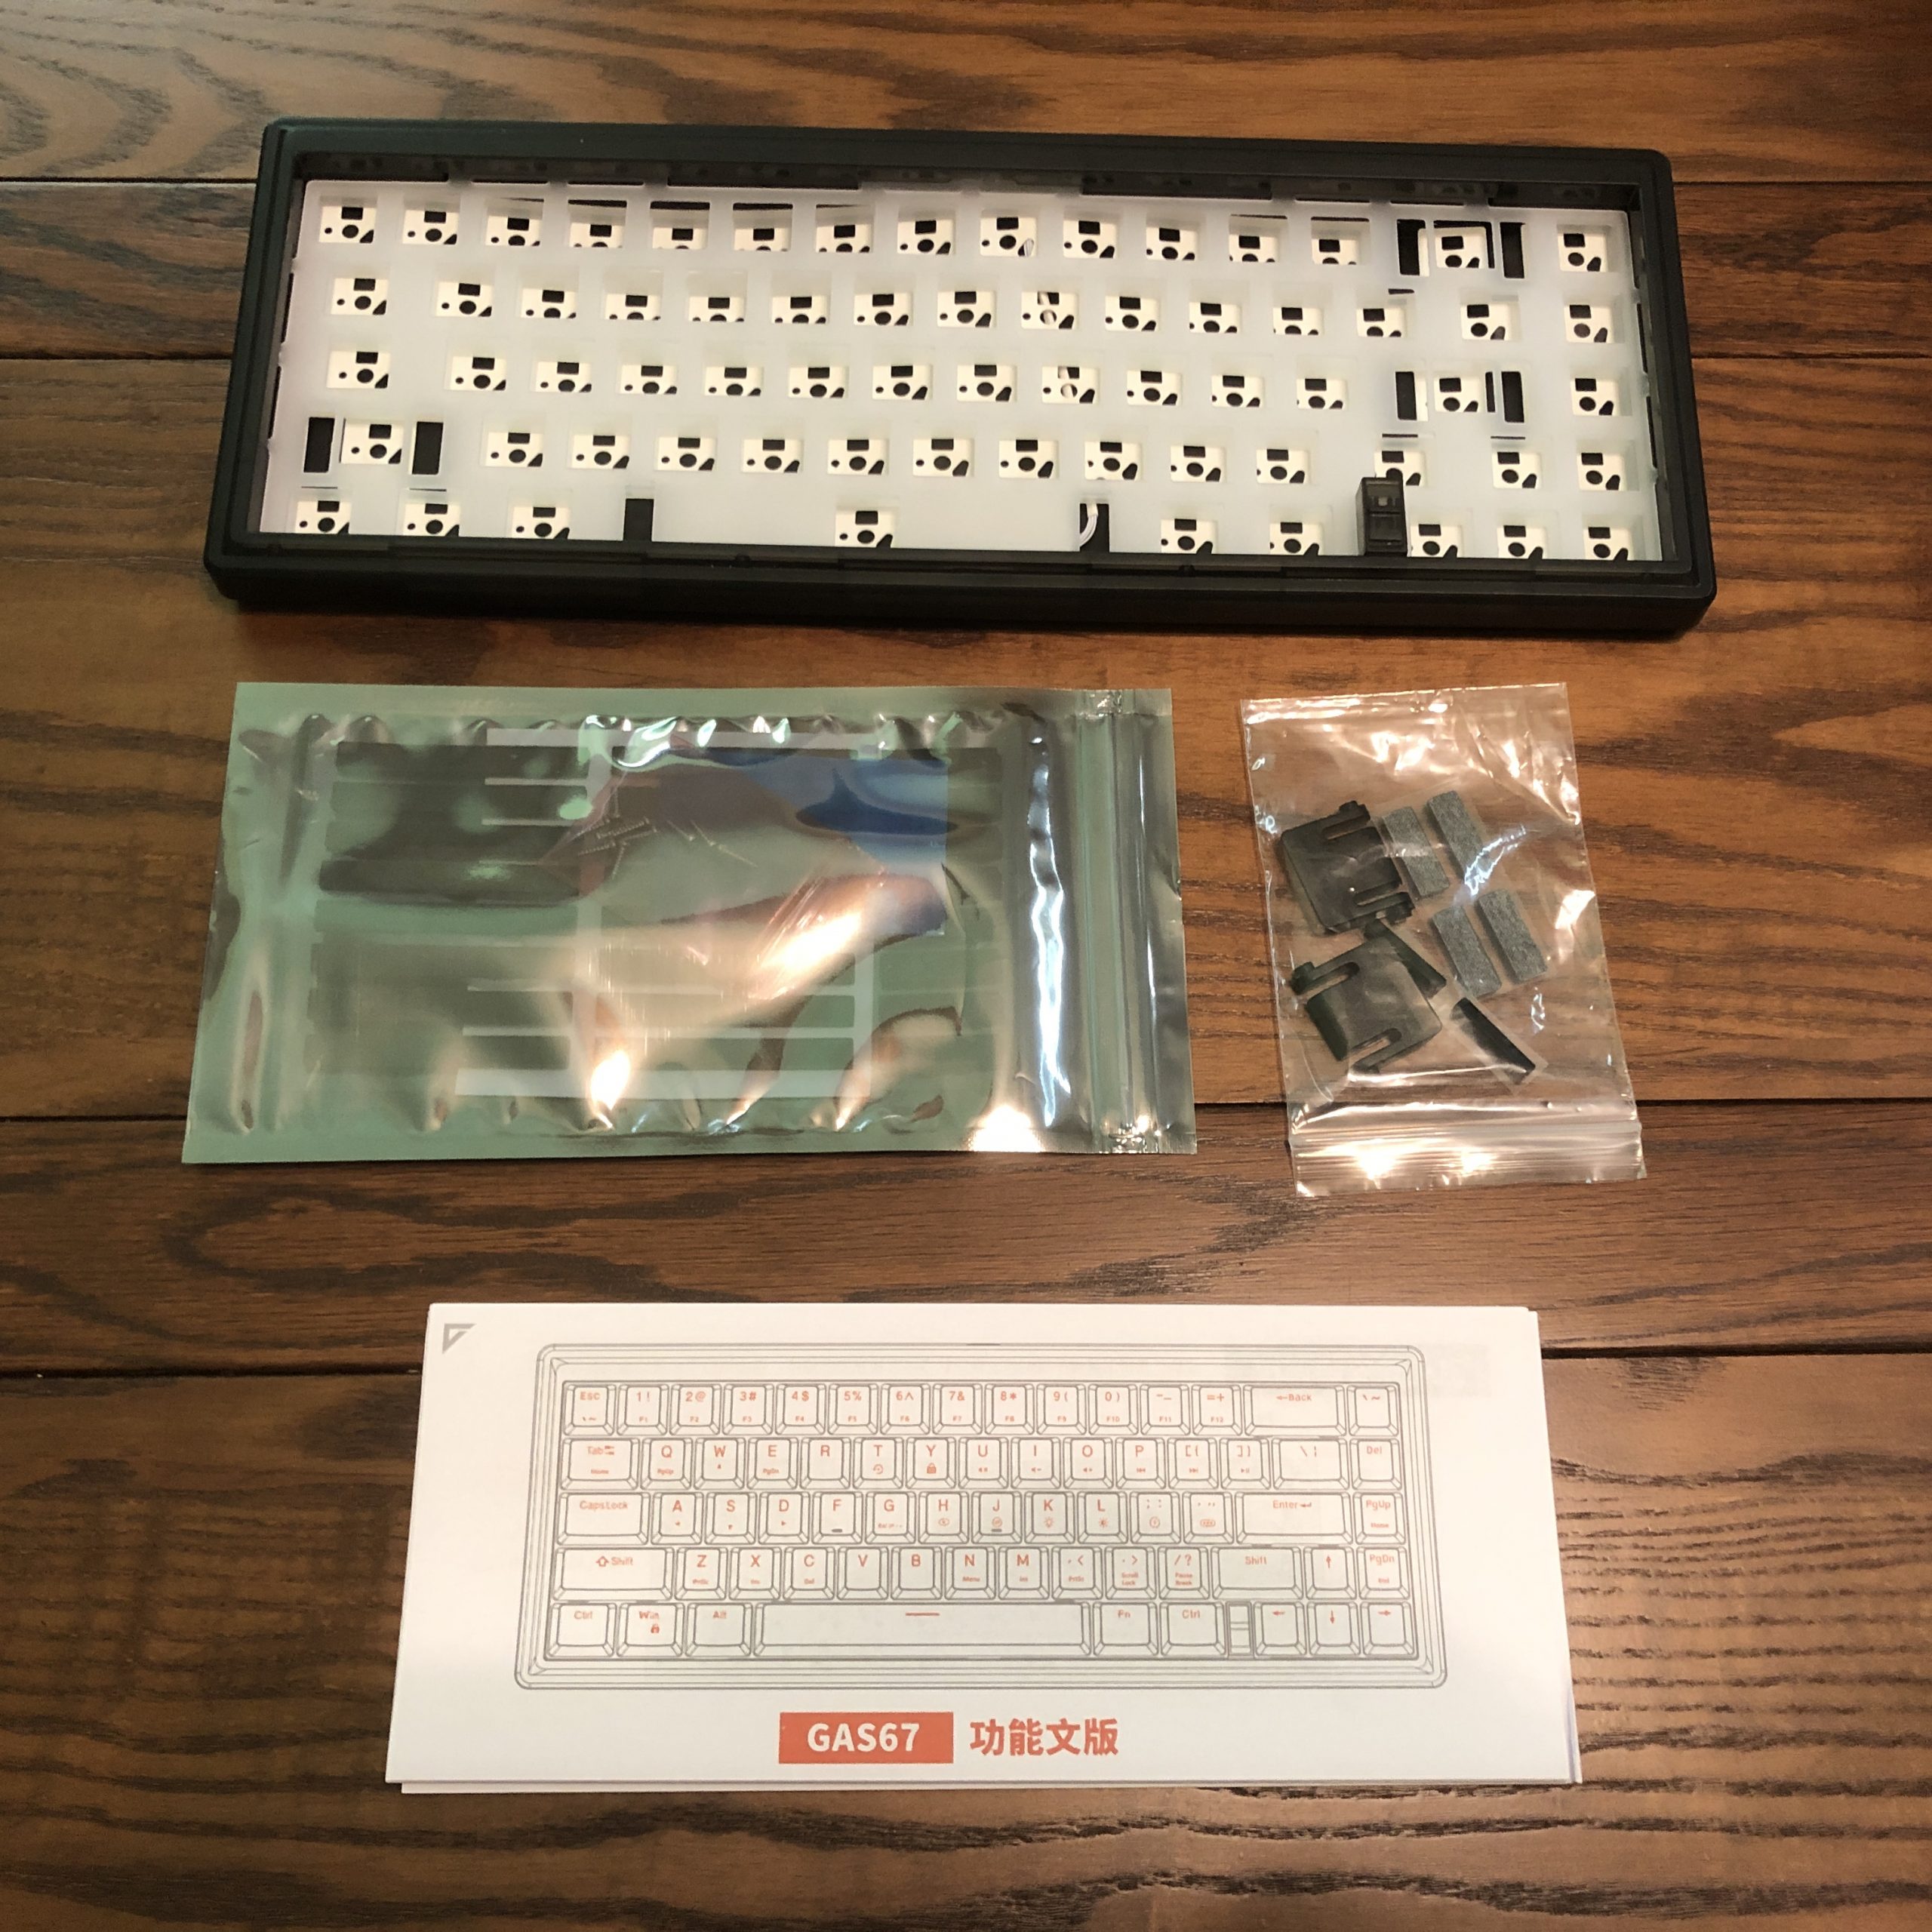
Case, foam, silicone, adhesive bits, hardware, manual.
My one and only real complaint about this case is also my one and only real complaint about the entire kit: the case is held together with screws, and those wood-style screws carve their own threads into plastic holes. With no metal inserts, those threads will get chewed-up with repeated use, which is not great for a keyboard that’s otherwise supposed to be “hot-swap”. More on this later.
The case features areas to place the gaskets, as well as a slider built into the blocker that meshes with the toggle switch on the PCB. There are a pair of guide posts that the plate slots onto, one on each side.
The Gaskets:
I don’t know if these would technically qualify as “gaskets” or not in the traditional engineering sense, but in terms of our use-case here, that’s the function served by these little pads.
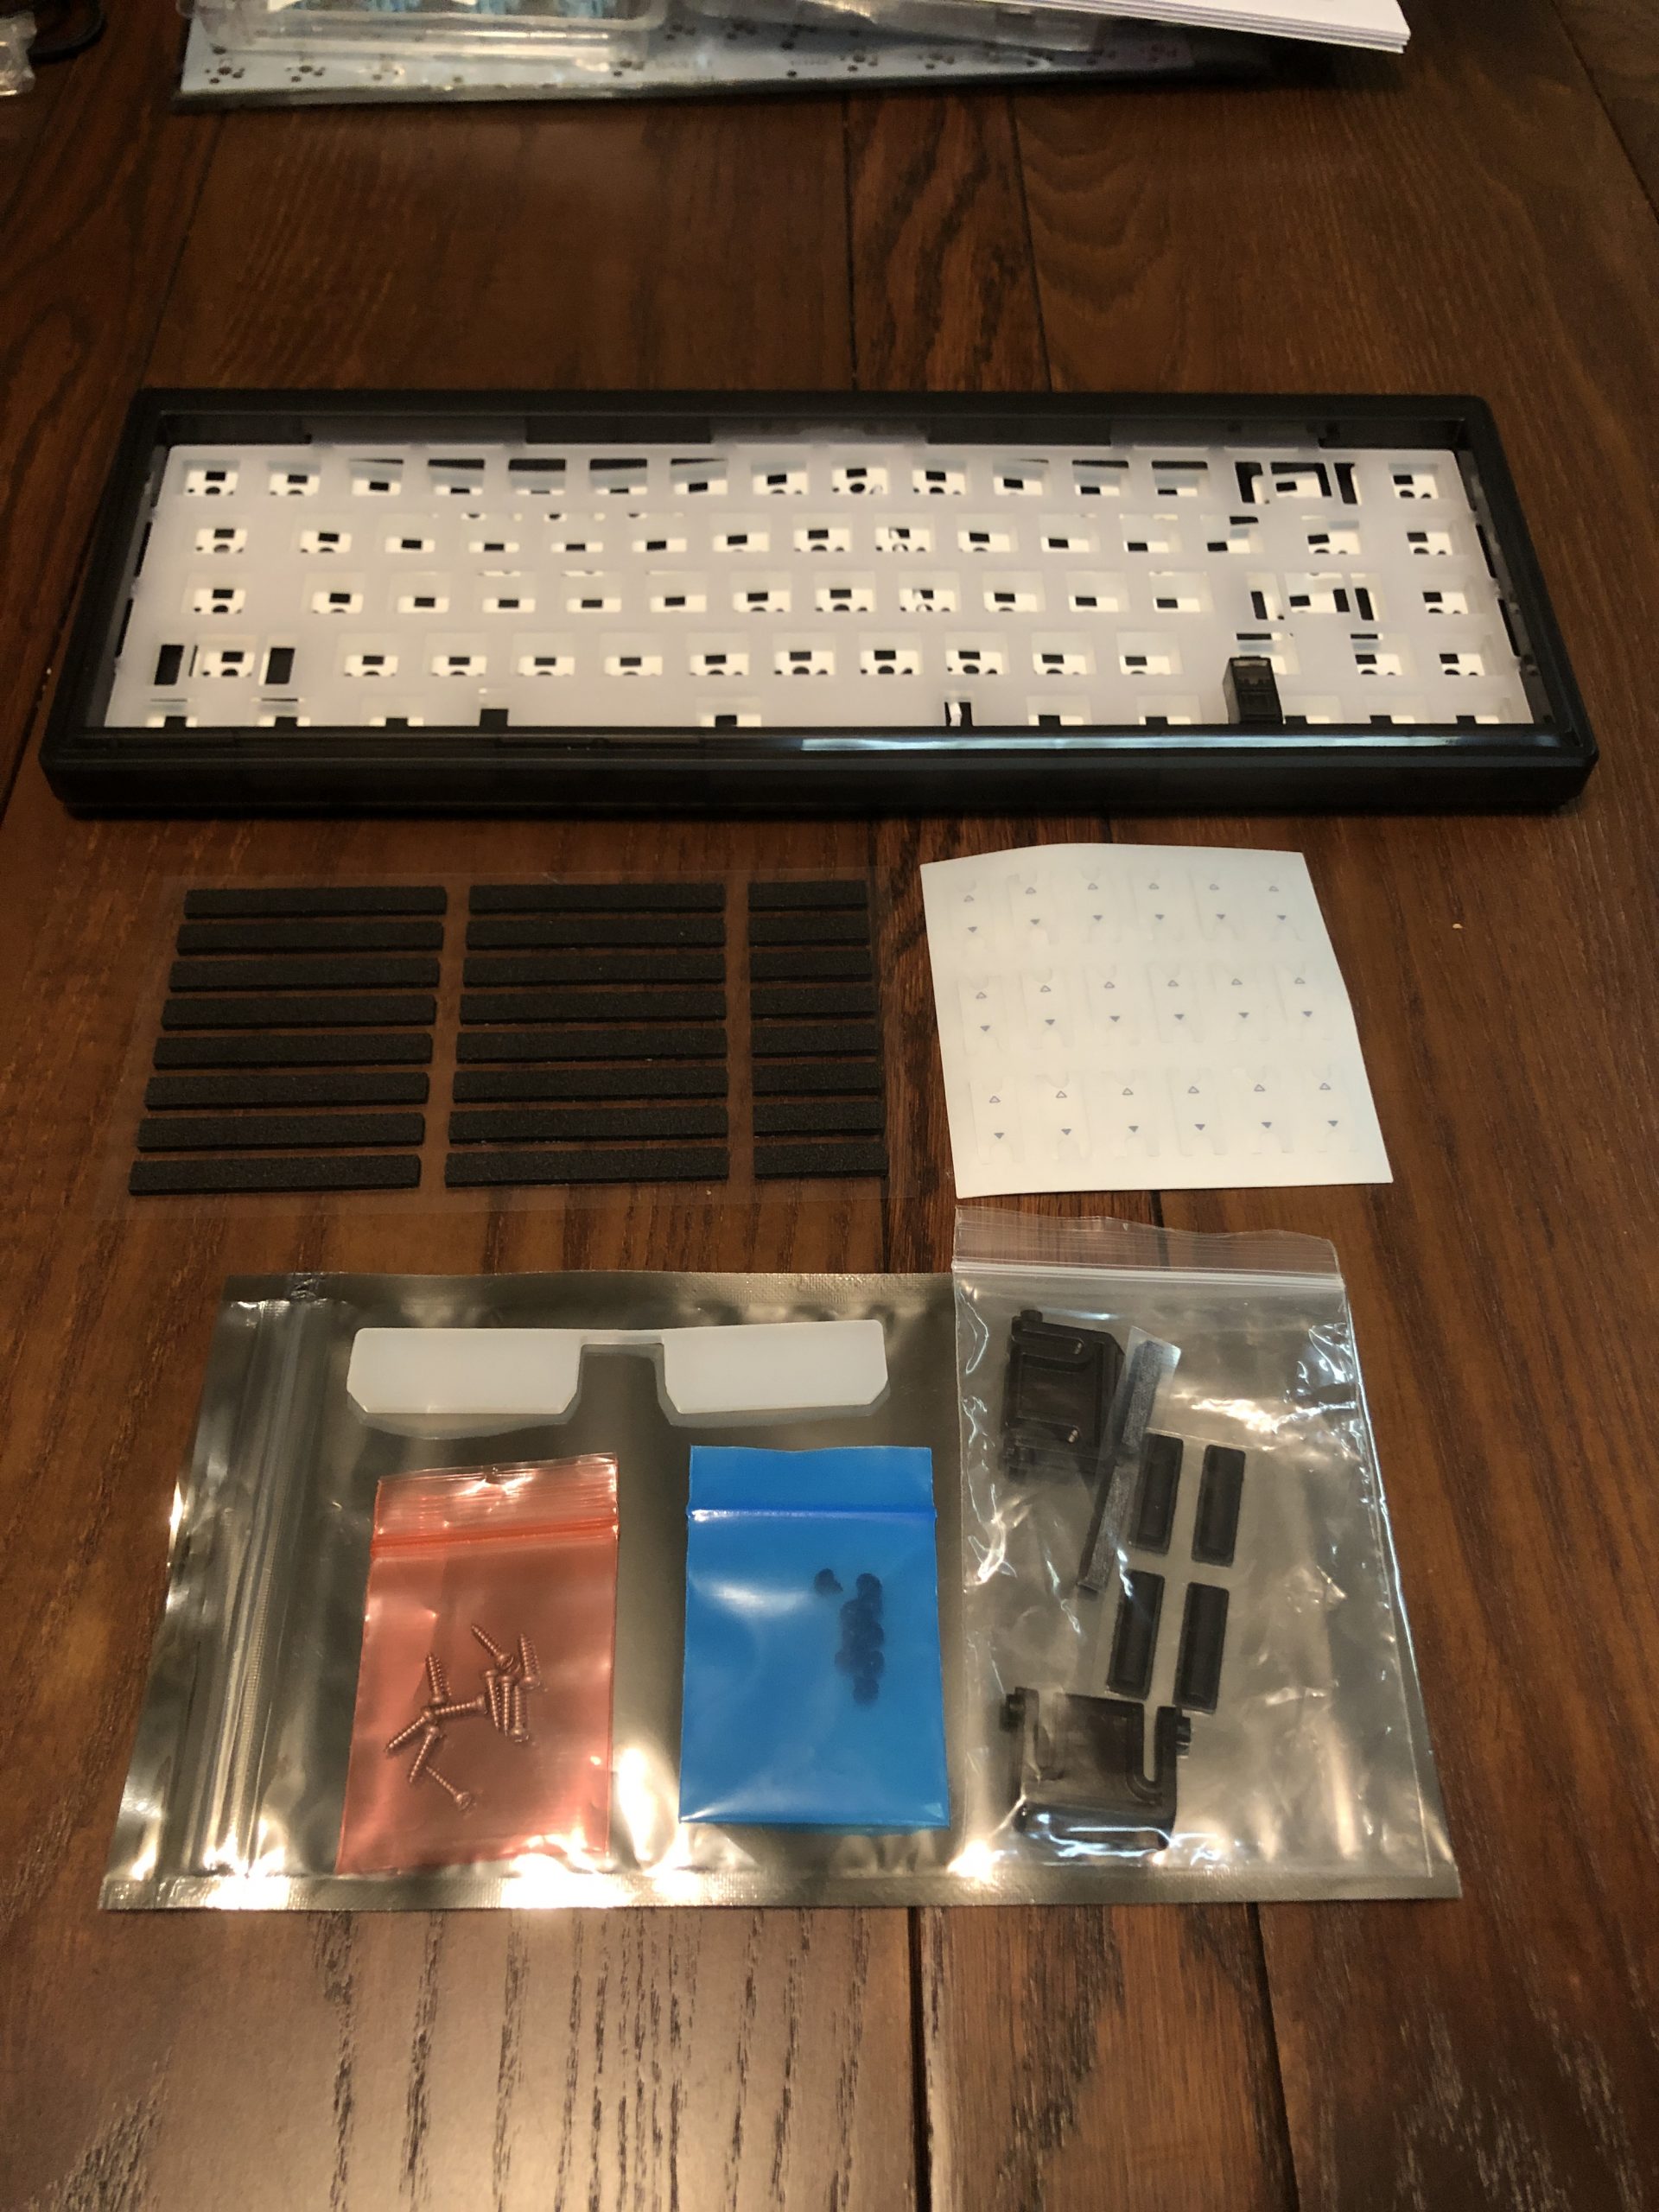
Gaskets on the clear sheet. Stab stickers on the white shiny one. Case screws in the red bag, stab screws in the blue one.
Nothing fancy but they do the job: simple Poron foam rectangles with adhesive on one side. Simply install them into the similarly-shaped slots in the case and you’re good to go.
Other Goodies:
Also included is a thin layer of dense foam for the PCB, and some minimal dampening stickers for the stabs. They’re shiny!
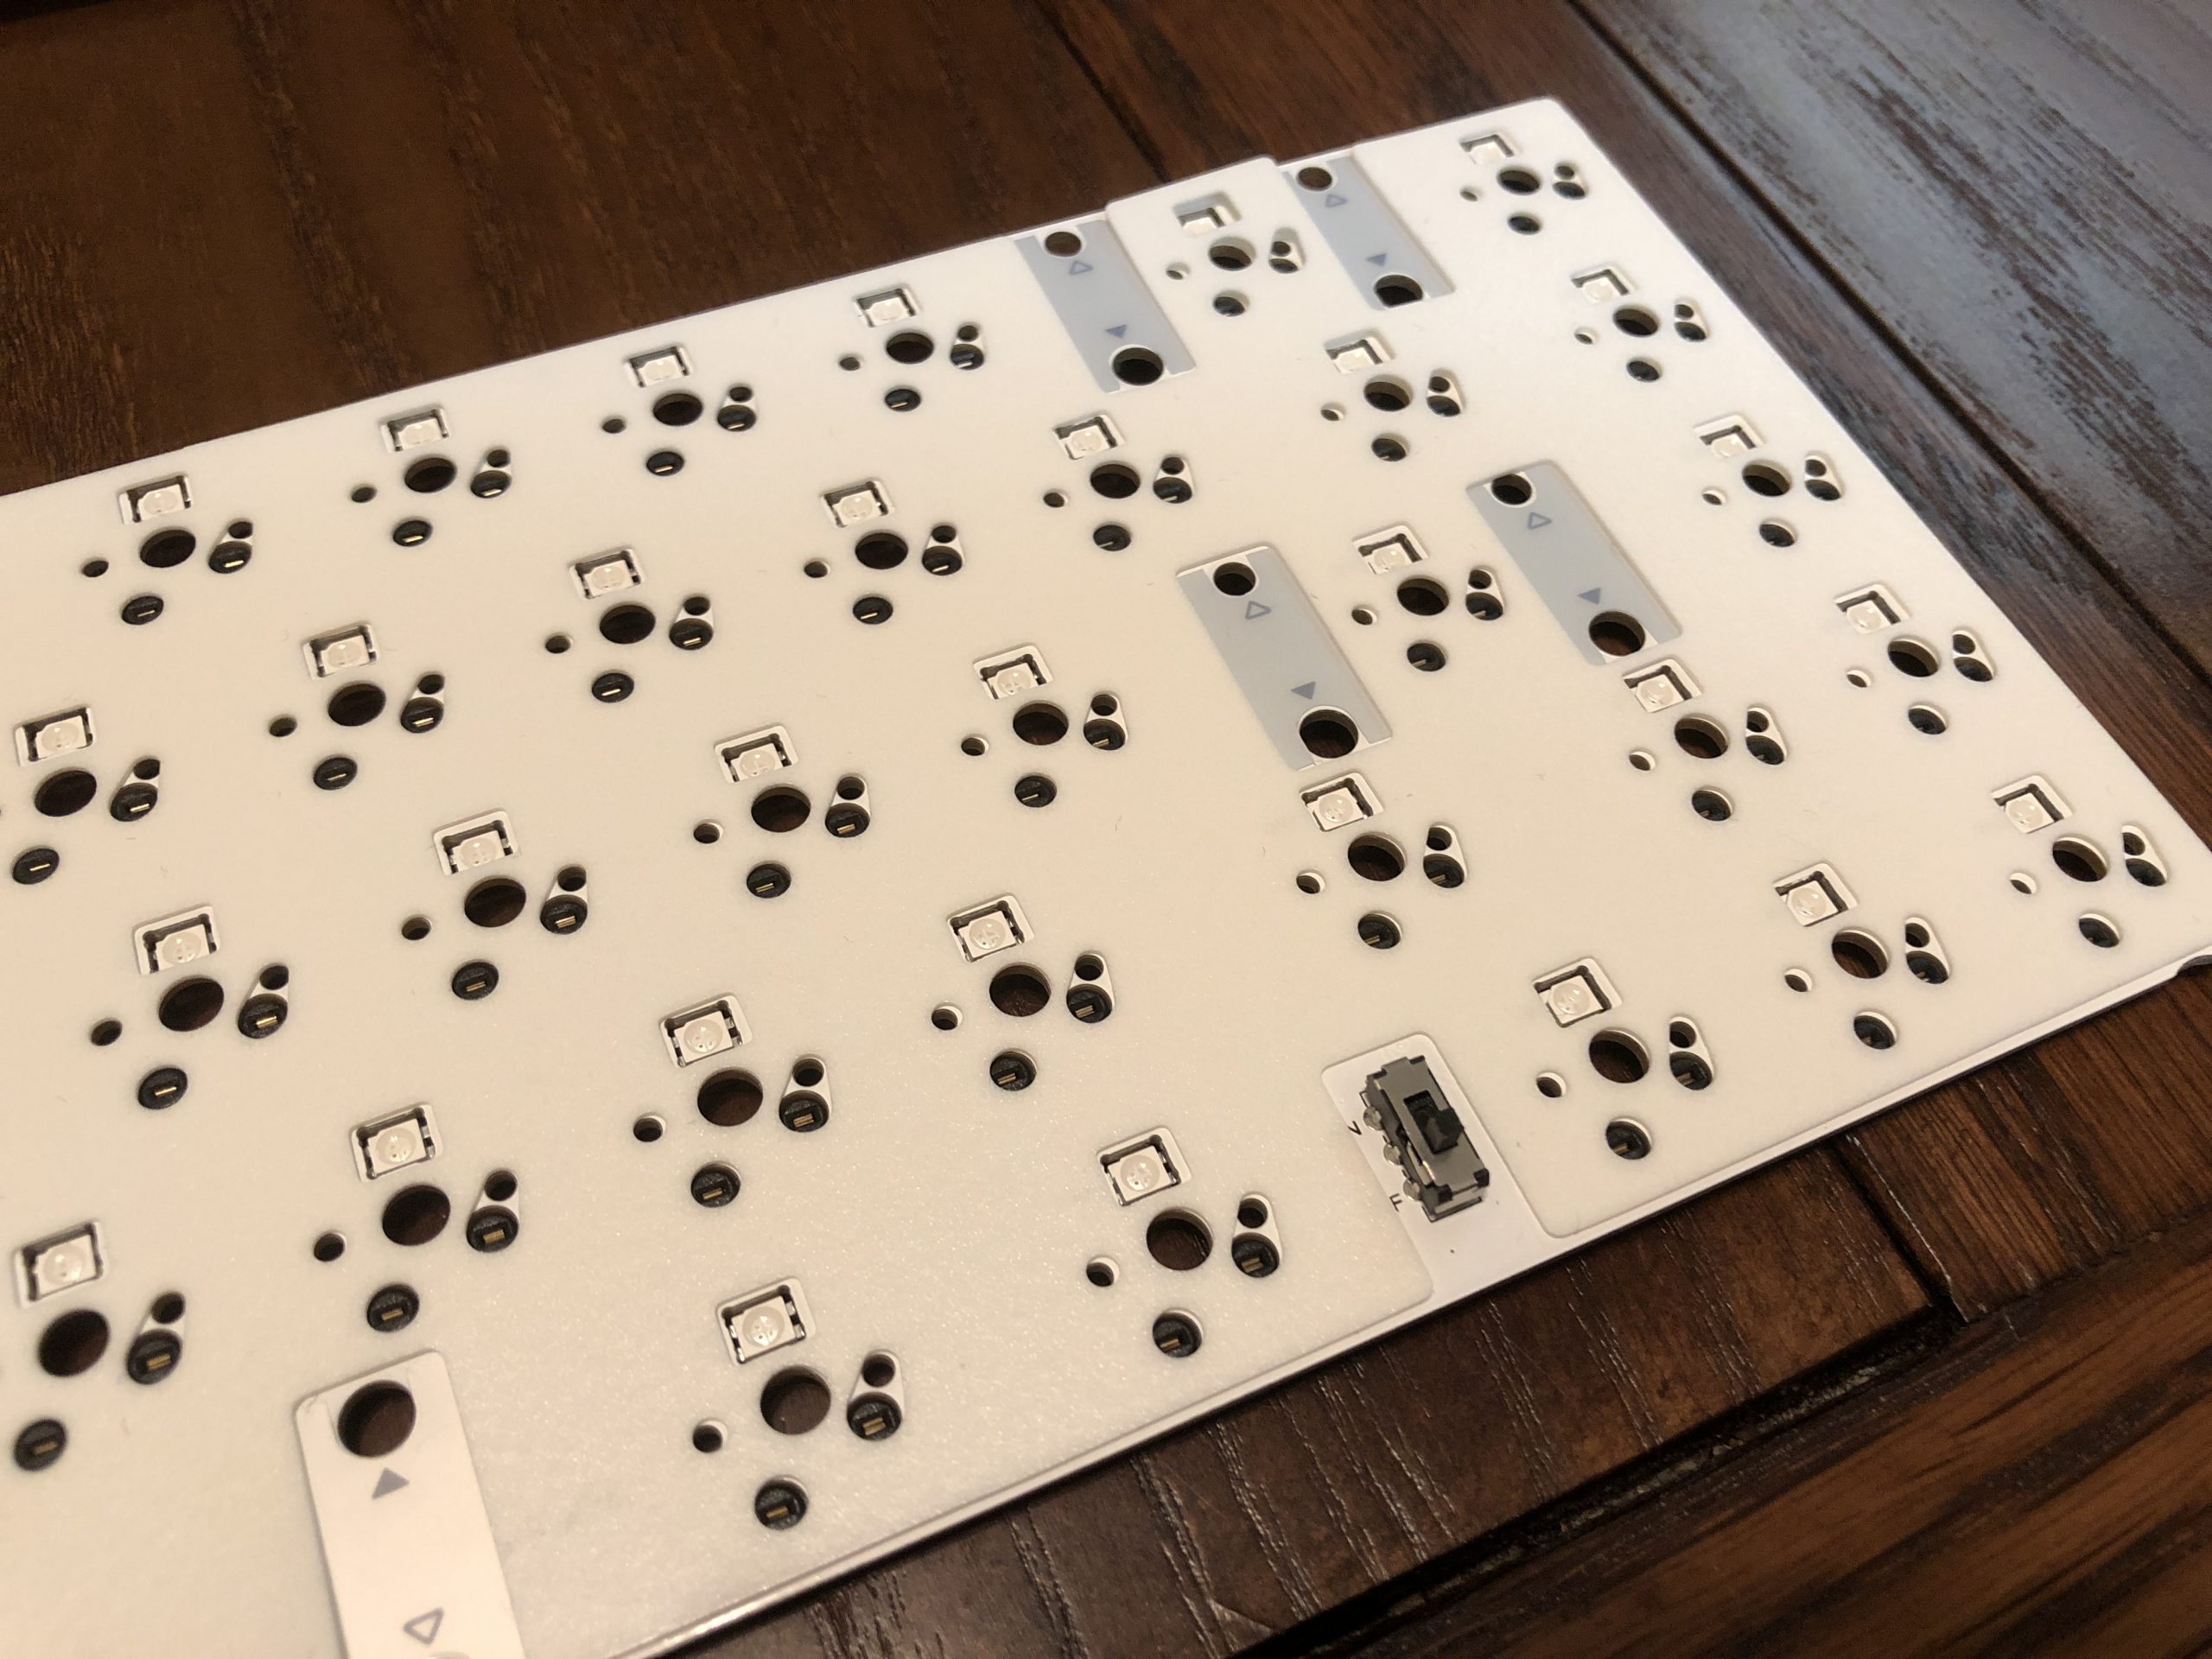
Here you can see the PCB foam, toggle switch, and shiny stab stickers.
The Plate:
This right here is the star of the show, isn’t it? Very simple when it comes to material and manufacture, but the design is refreshingly thoughtful. In general that’s something I think this kit does really well: making excellent economic use of material and design to perform otherwise high-end functions with modest materials and manufacturing methods.
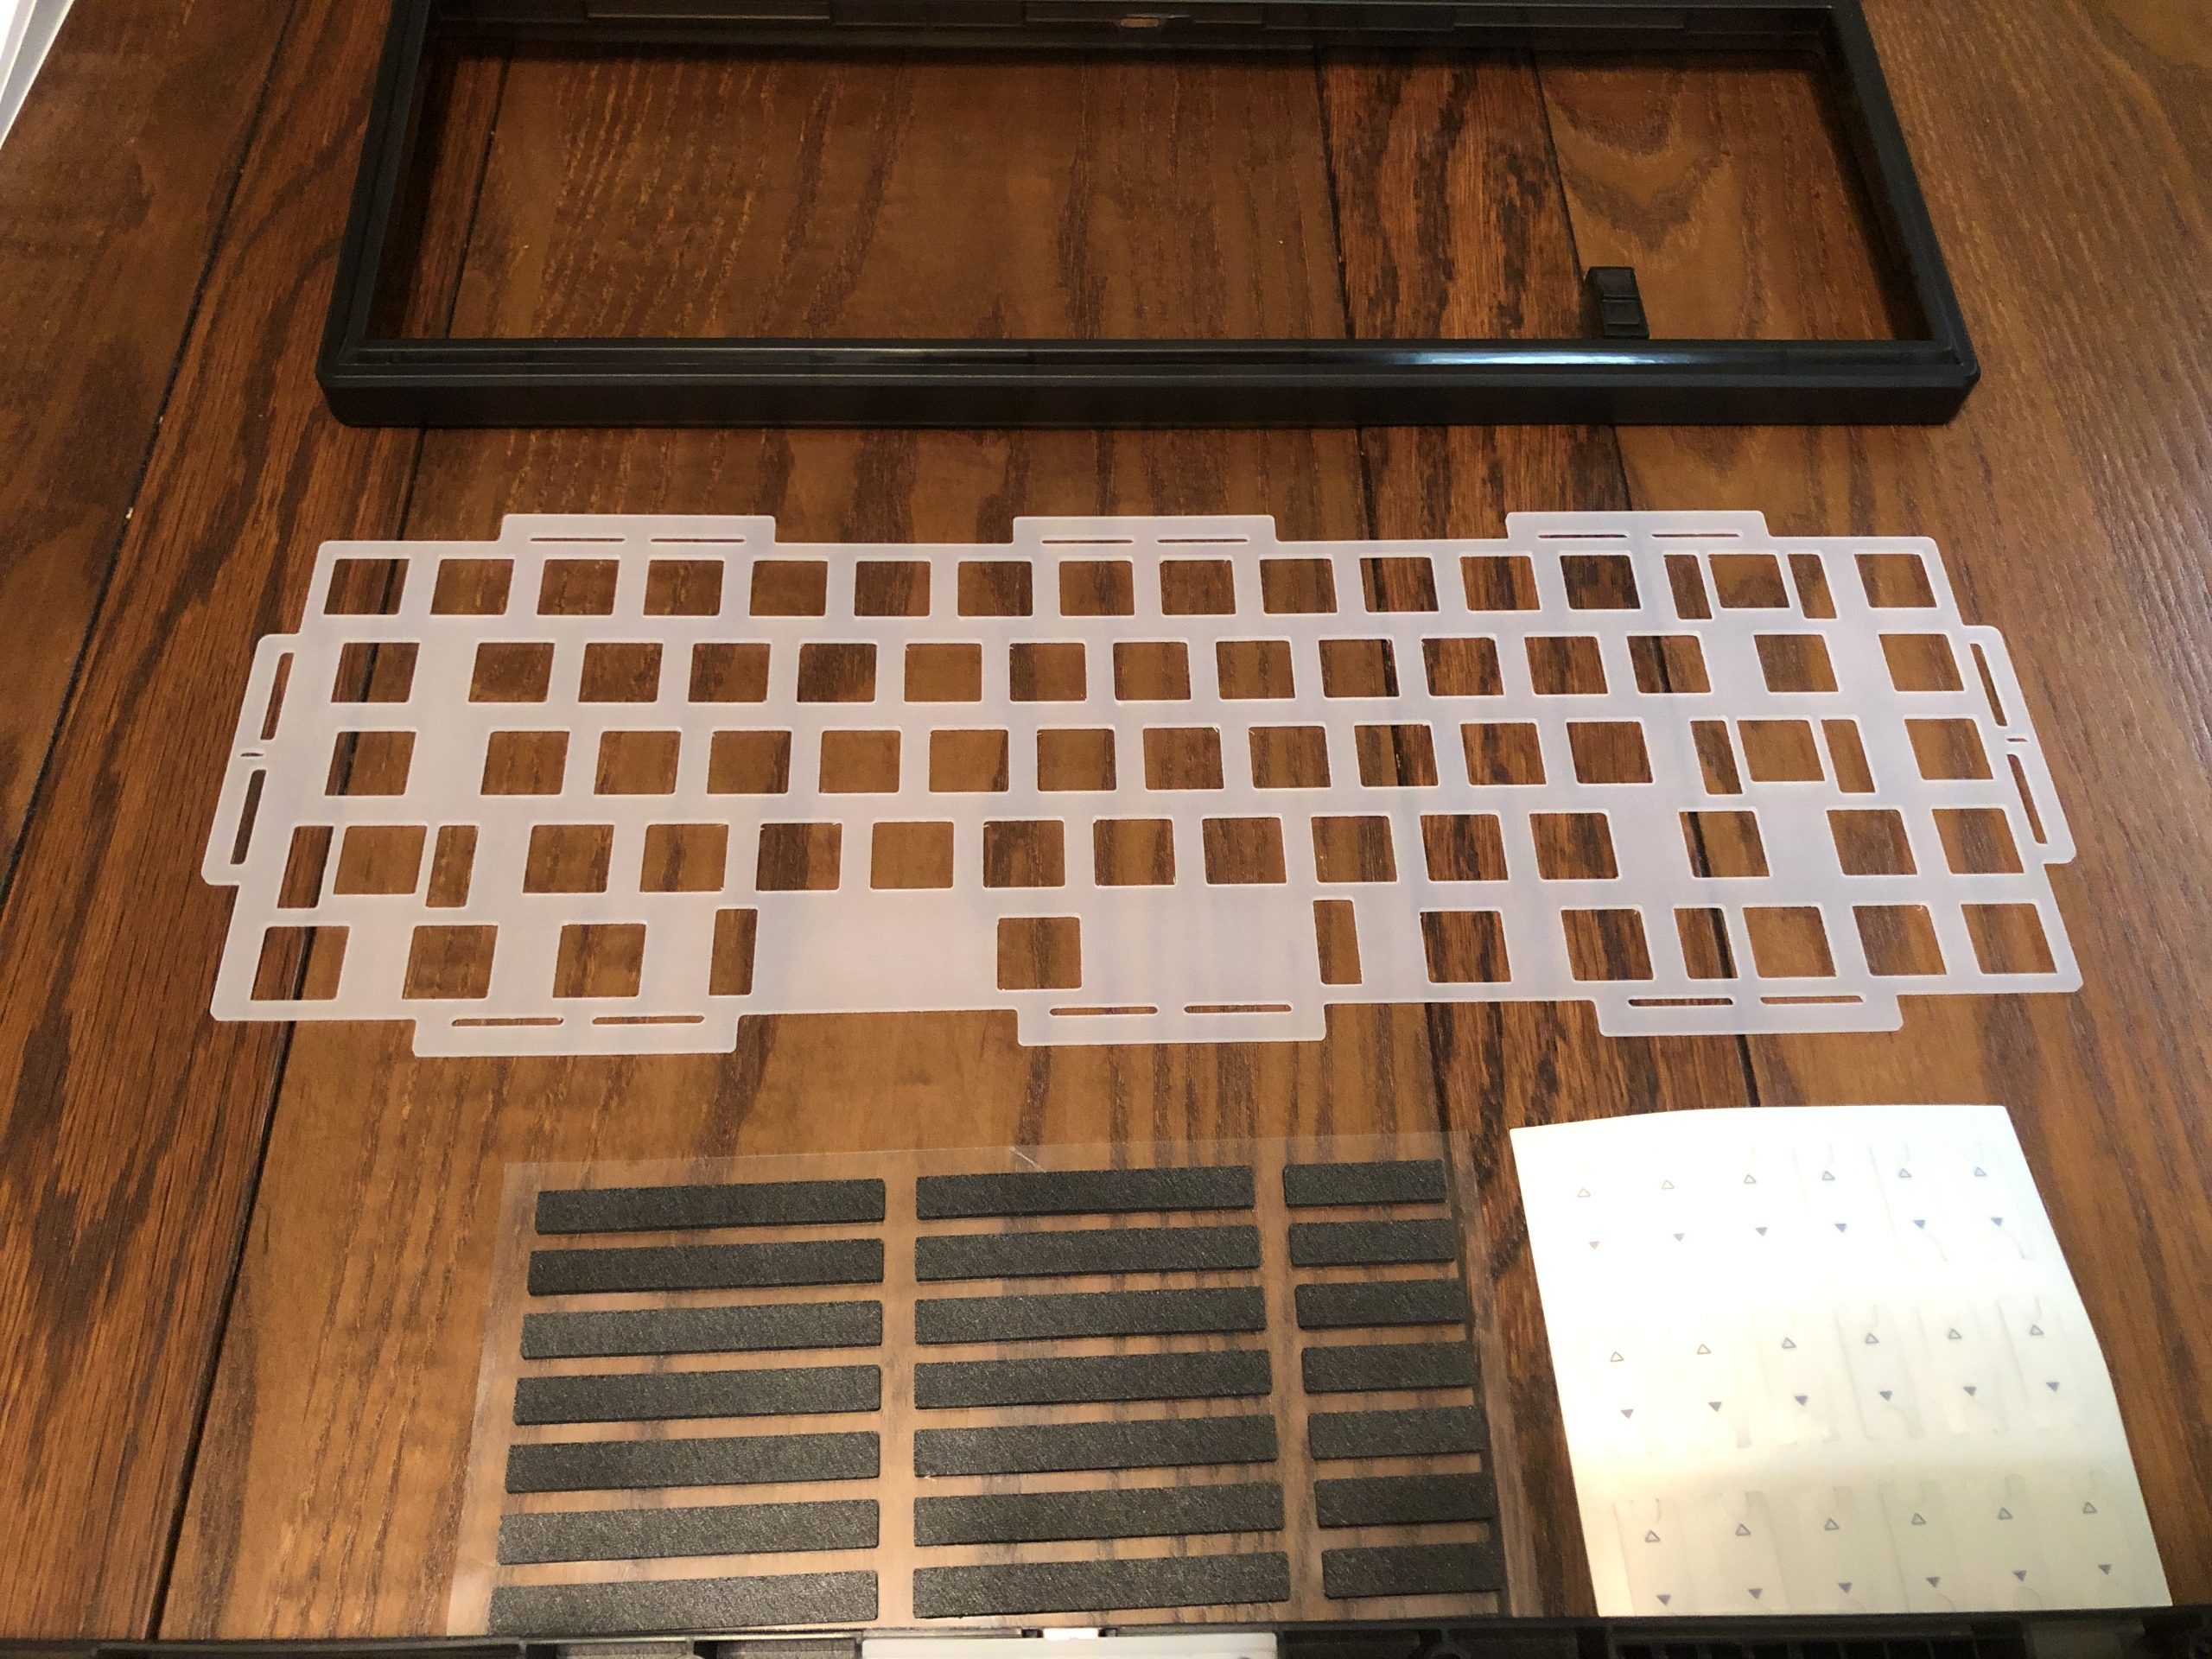
Plate in the middle; top shell above, gaskets and stickers below.
What we have here is a simple sheet of plastic cut with a CNC router – just like the KBD67L had in its first run. Unlike that plate, however, this one has a smooth surface and is made of a milky polycarbonate, which makes it perfect for diffusing RGB light.
The eight winglets sticking out around the periphery are the mounting tabs; these are what interact with the gaskets and generally what supports the internals of the keyboard. The flexibility of the plate material as well as the flexibility imparted by the shape and size of these tabs play into the final product of typing quality. In this case, we have plenty of dampening, a little bounce, and even some deck flex despite the absence of any flex cuts on the PCB or plate interior:
Lastly – this build features zero standoffs – this means that the PCB is held by the switches, themselves being held by the plate. This may add a tiny bit of complication to installing or changing switches, but I actually prefer this execution to using standoffs to hold the “sandwich” together. Even though they’re not nearly as bad as support standoffs, sandwich standoffs can still create their own hot-spots, and aren’t strictly necessary. I think electing to skip them here was a good call; both for the lower cost and for the quality of end-user experience.
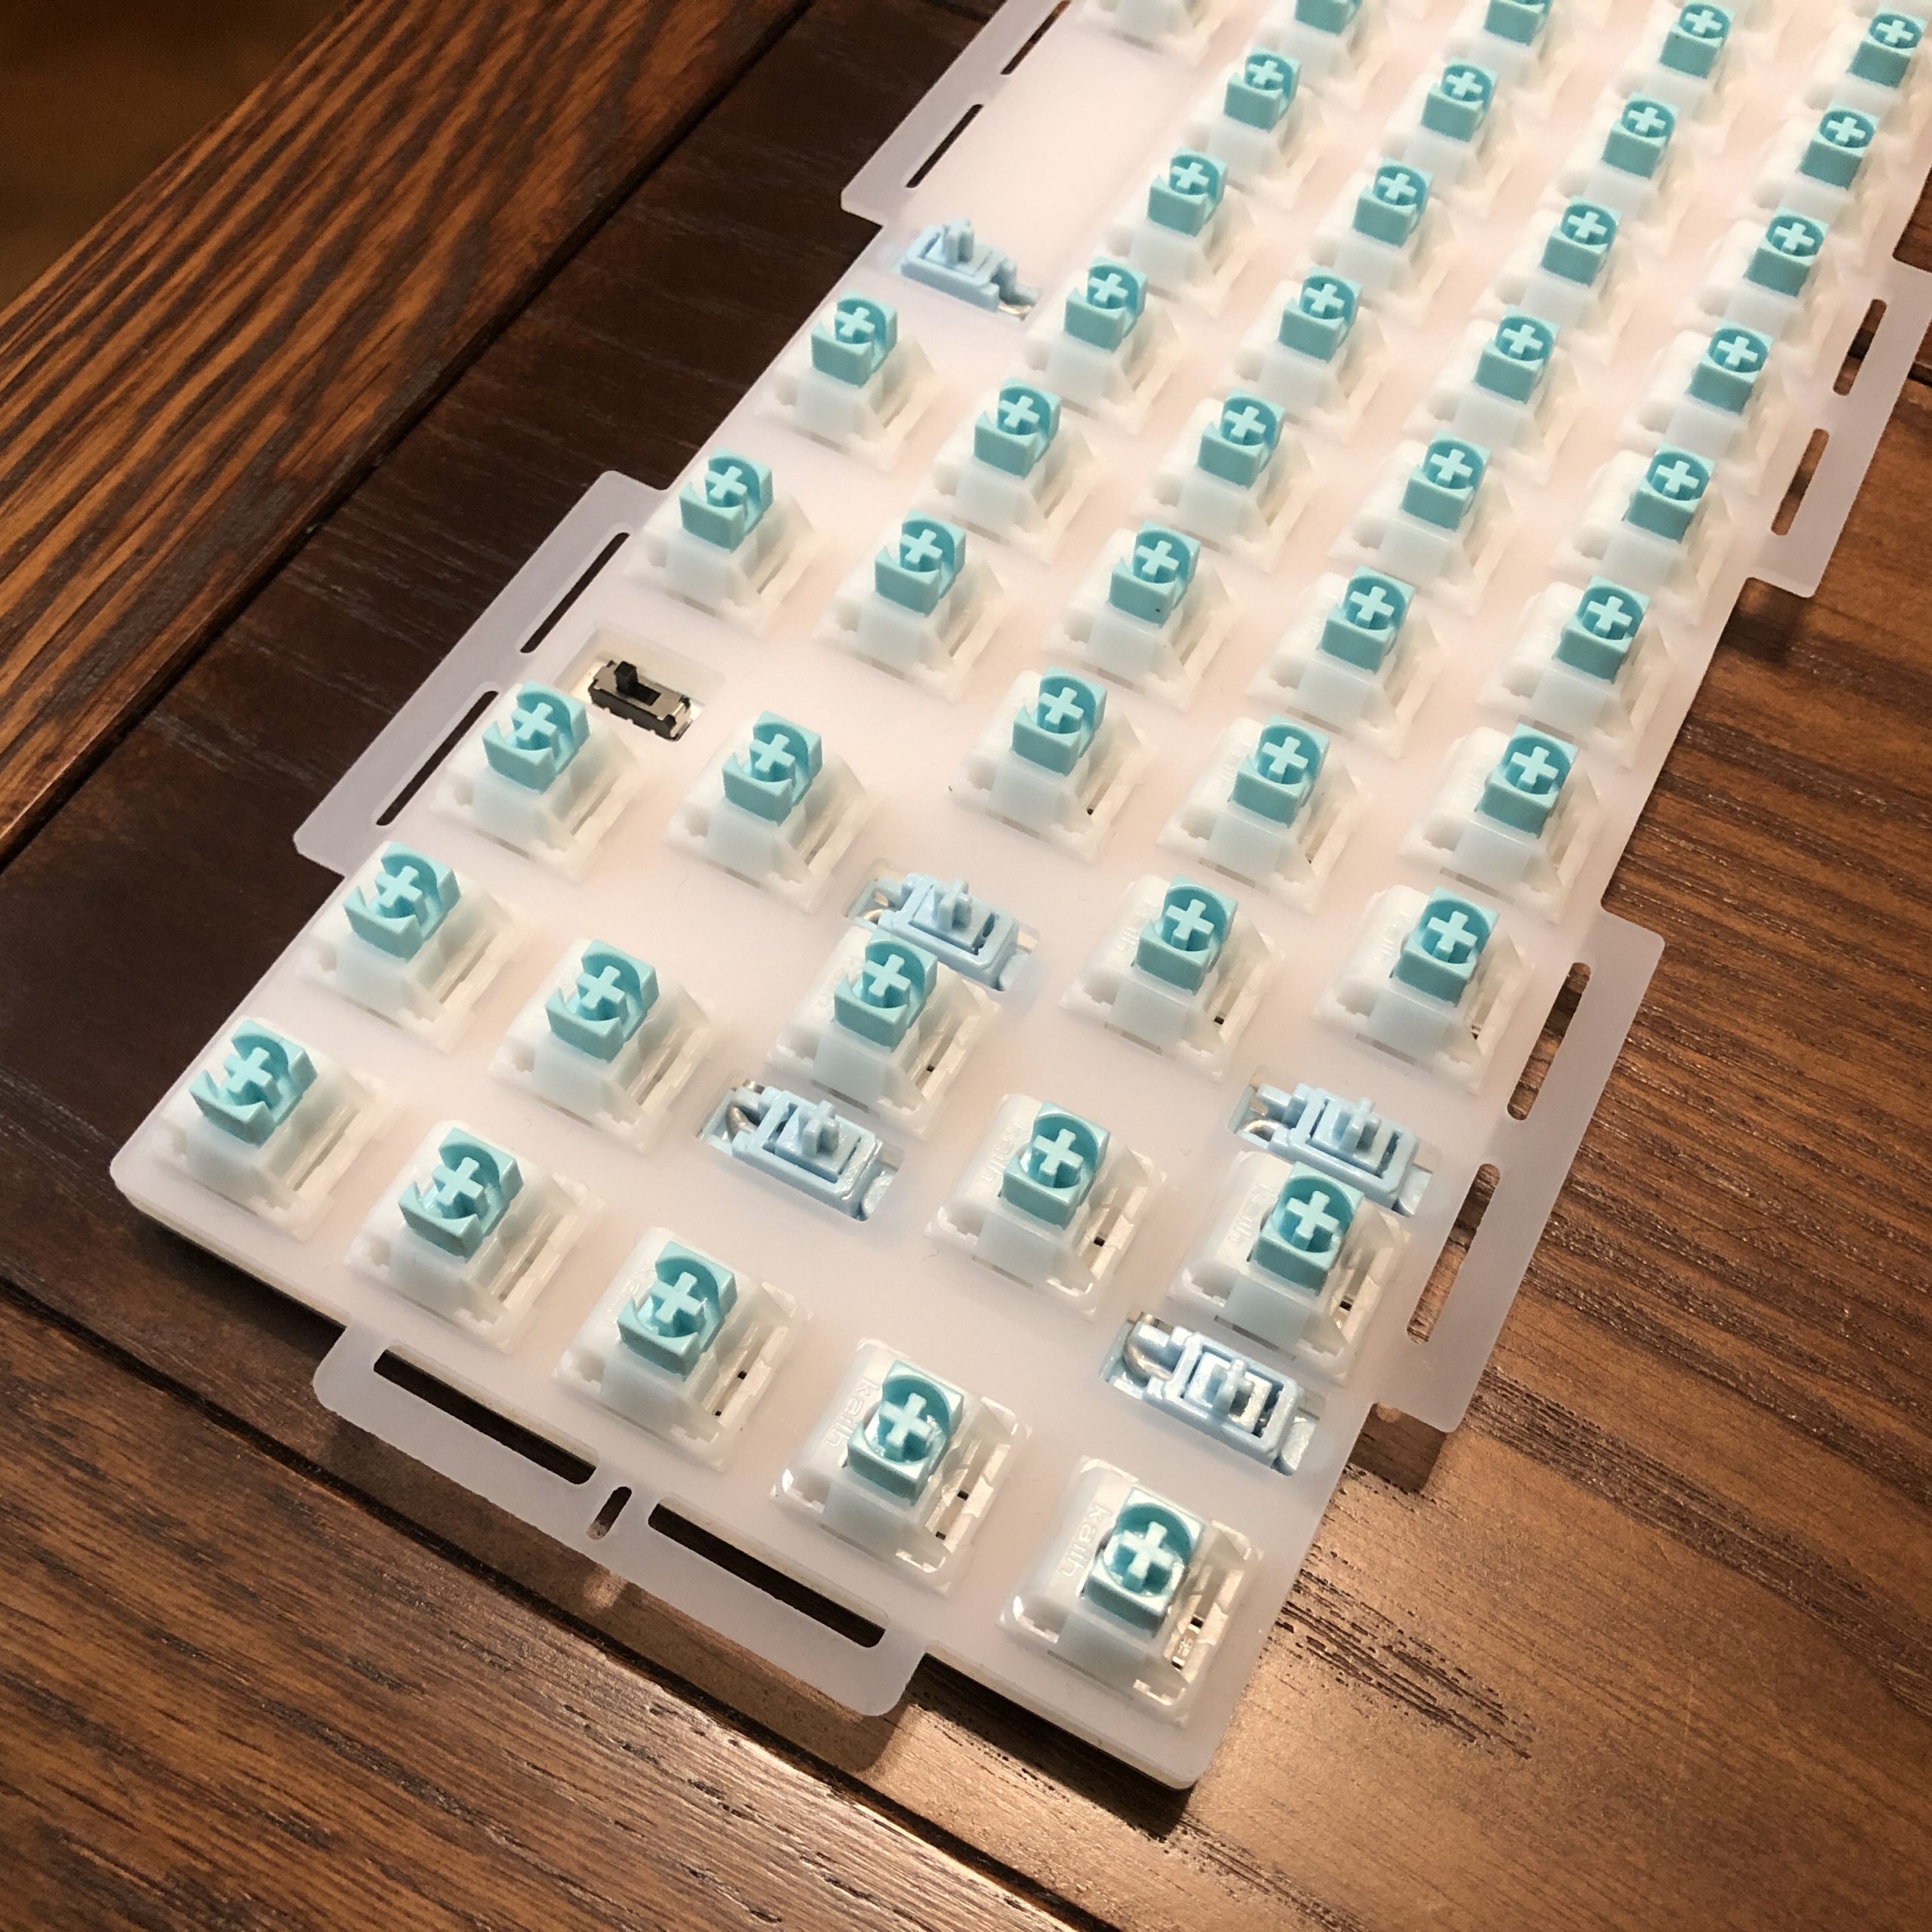
A shot of the full “sandwich”, featuring the blocker toggle switch.
Assembly:
As mentioned before, this is a kit – that means it’s a collection of parts you get to assemble yourself! As far as keyboard kits go, this one is fun and easy – I’d definitely consider this one beginner friendly. One tool is required, and it comes in the box.
First thing’s first, tune and assemble your stabs. I won’t go over that here, but if you aren’t familiar with the process here’s a fantastic guide. With the stabilizers tuned and assembled, install them into the PCB using the included screws (blue bag).
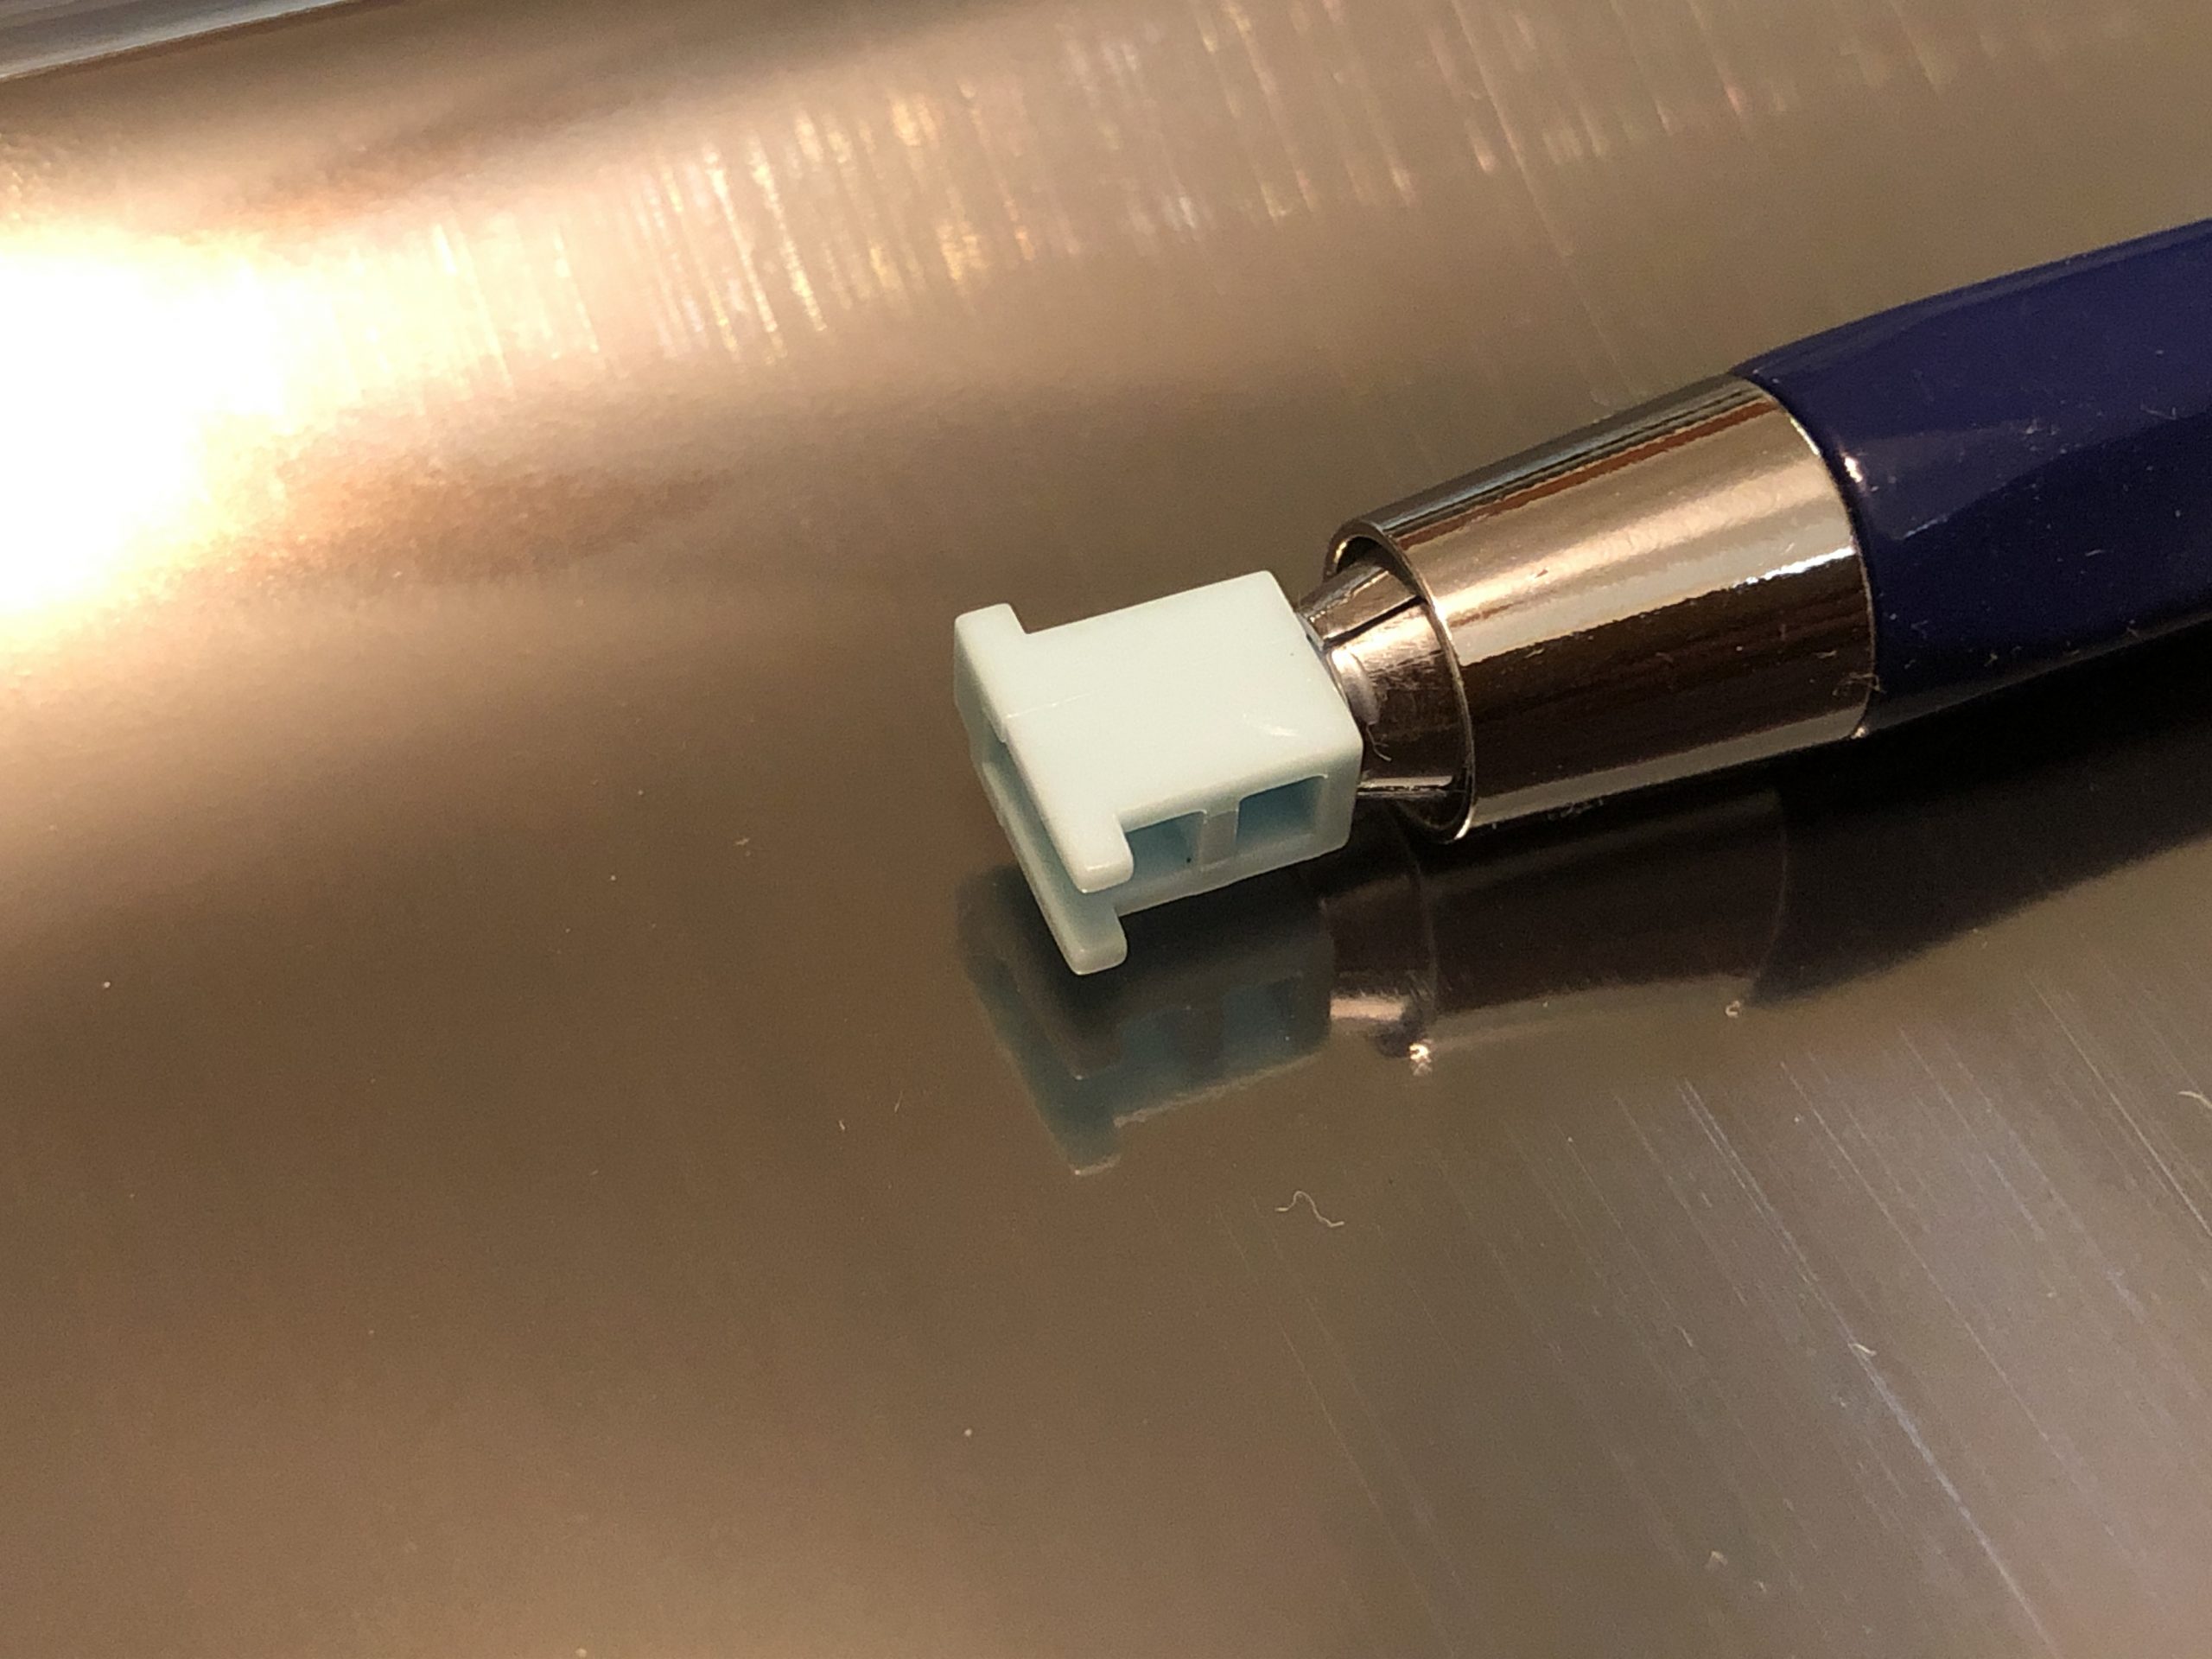
These 4mm led clutch pencils are pretty helpful with stabs.
Now – here’s where the one obvious weakness of these becomes apparent: the clip side is quite loose with this PCB. Still, I do think that’s preferable to being too tight – you can add shims if you really want to, but since these are screw-in, I don’t think it’s necessary. Just be mindful the housings can twist a little bit because of the play on the clip side.
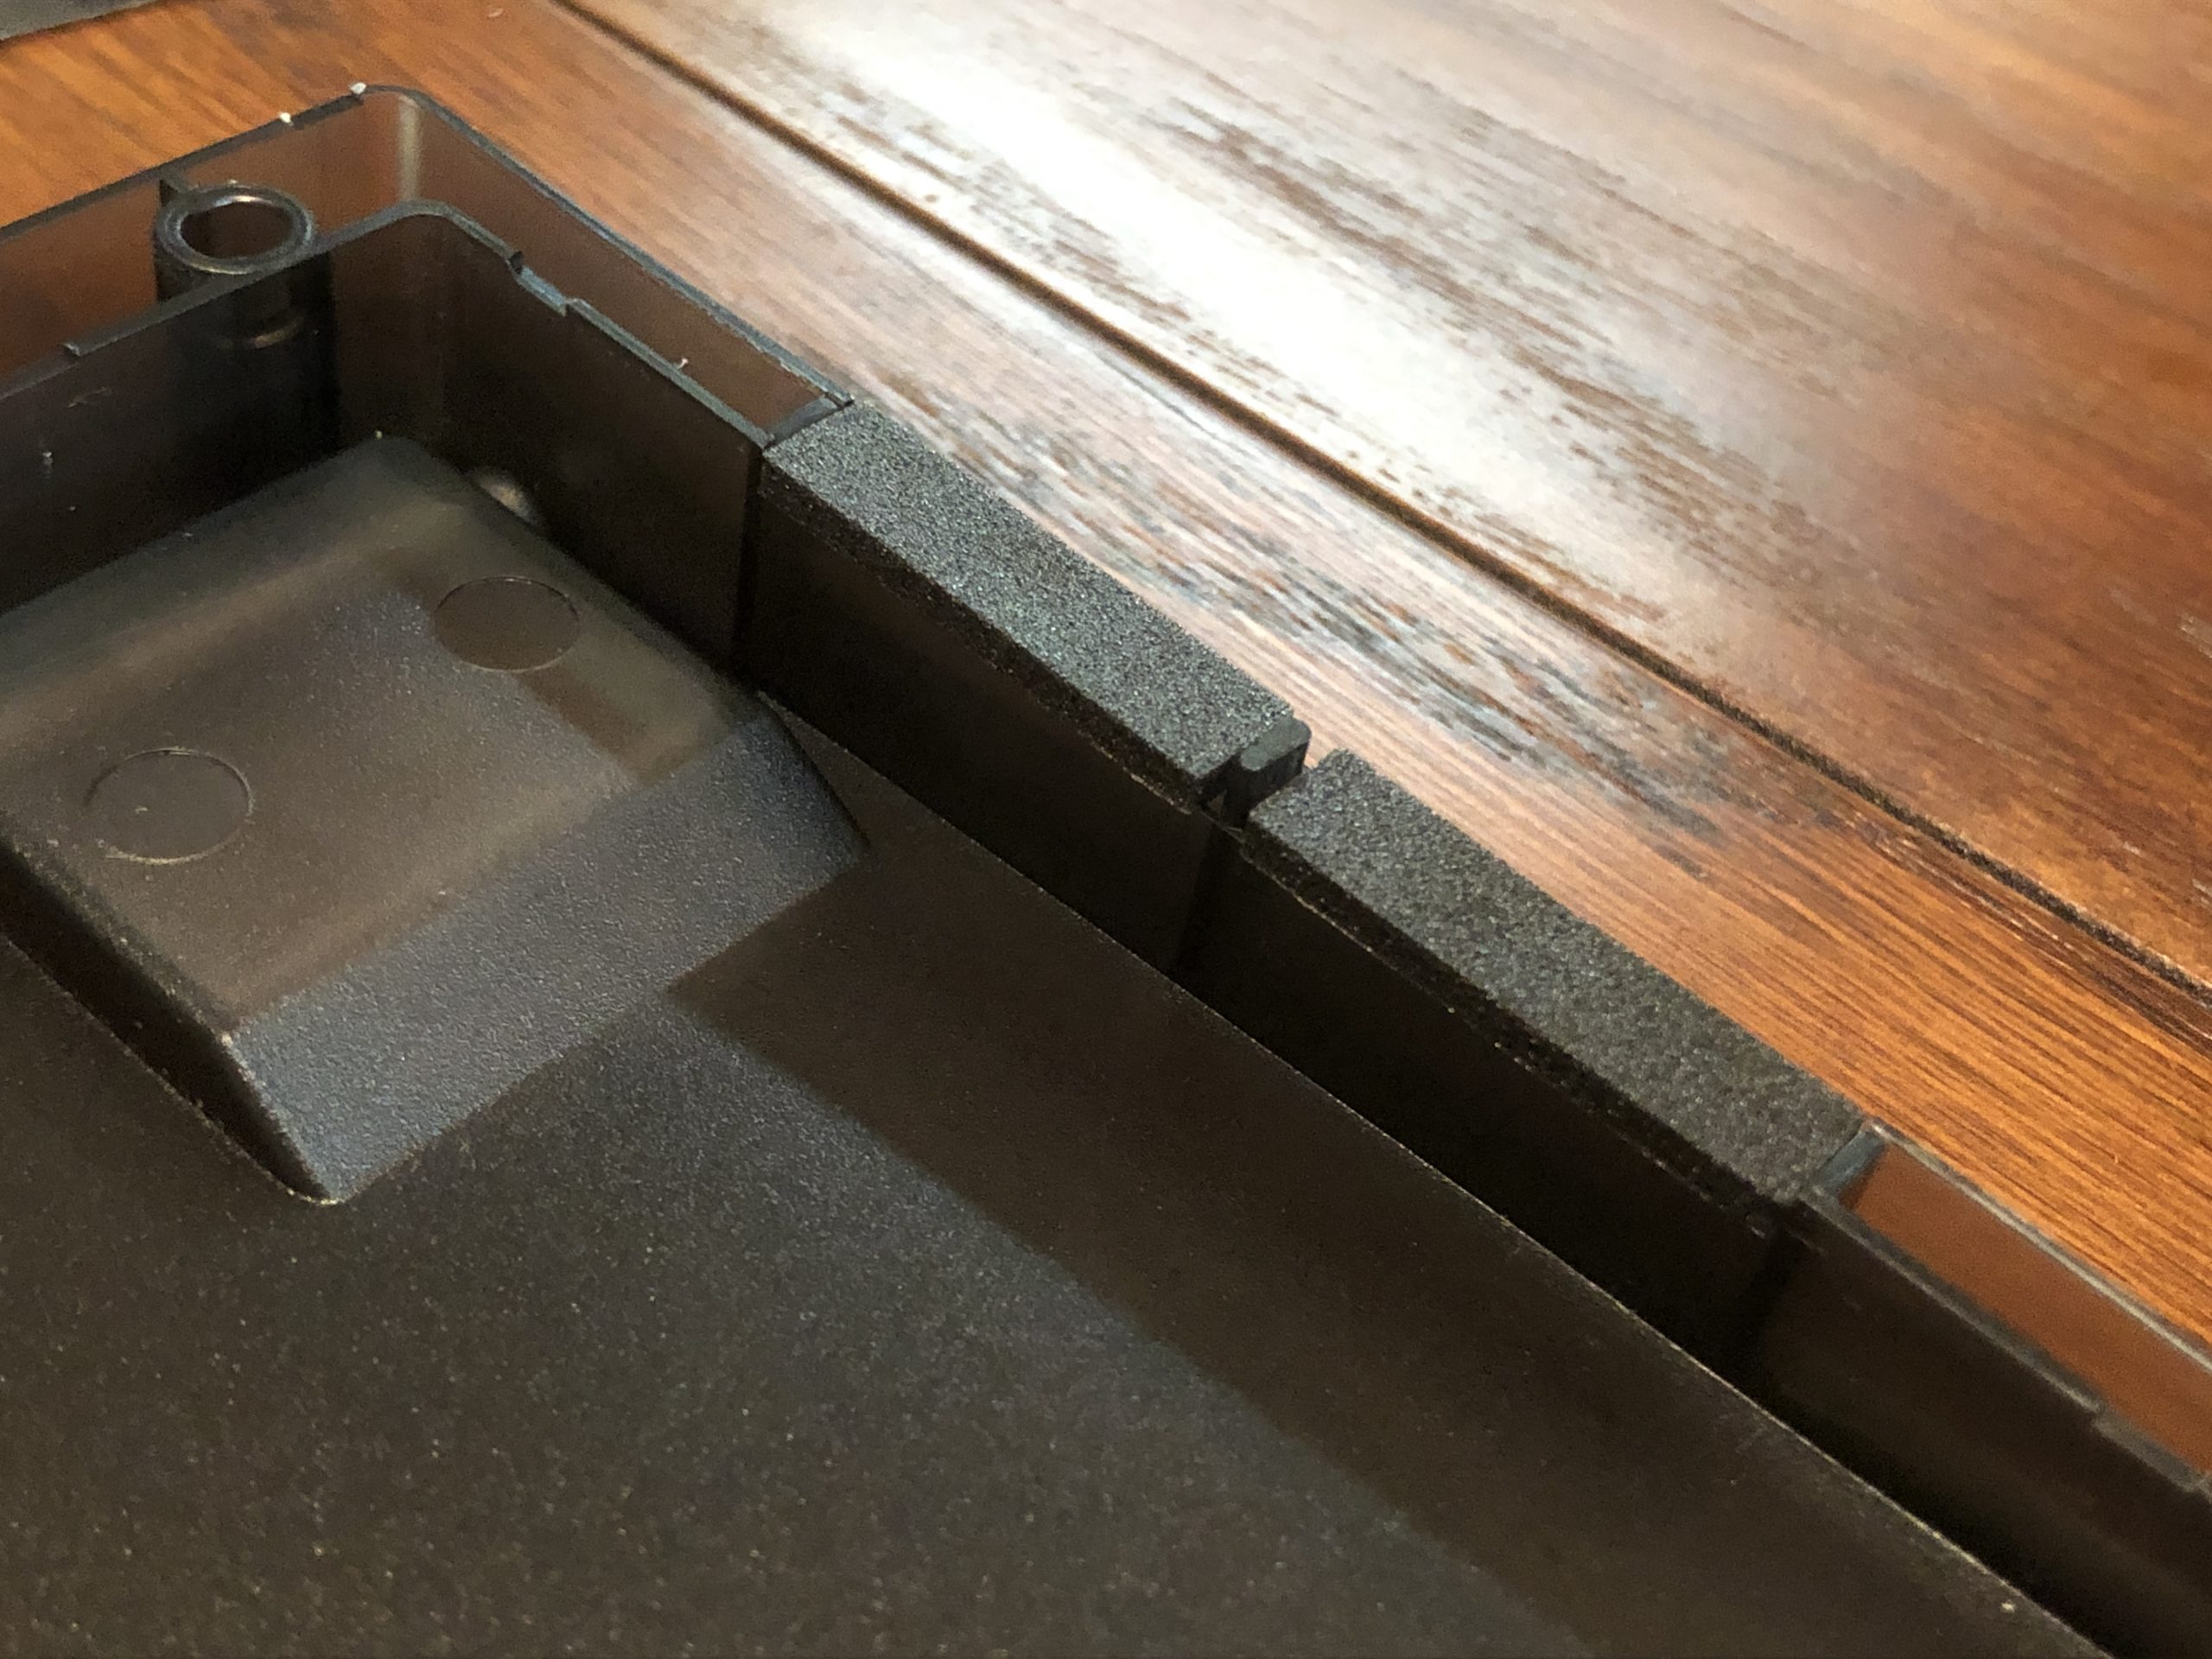
Installing the gasket pads; these are the short ones with the alignment post in the middle.
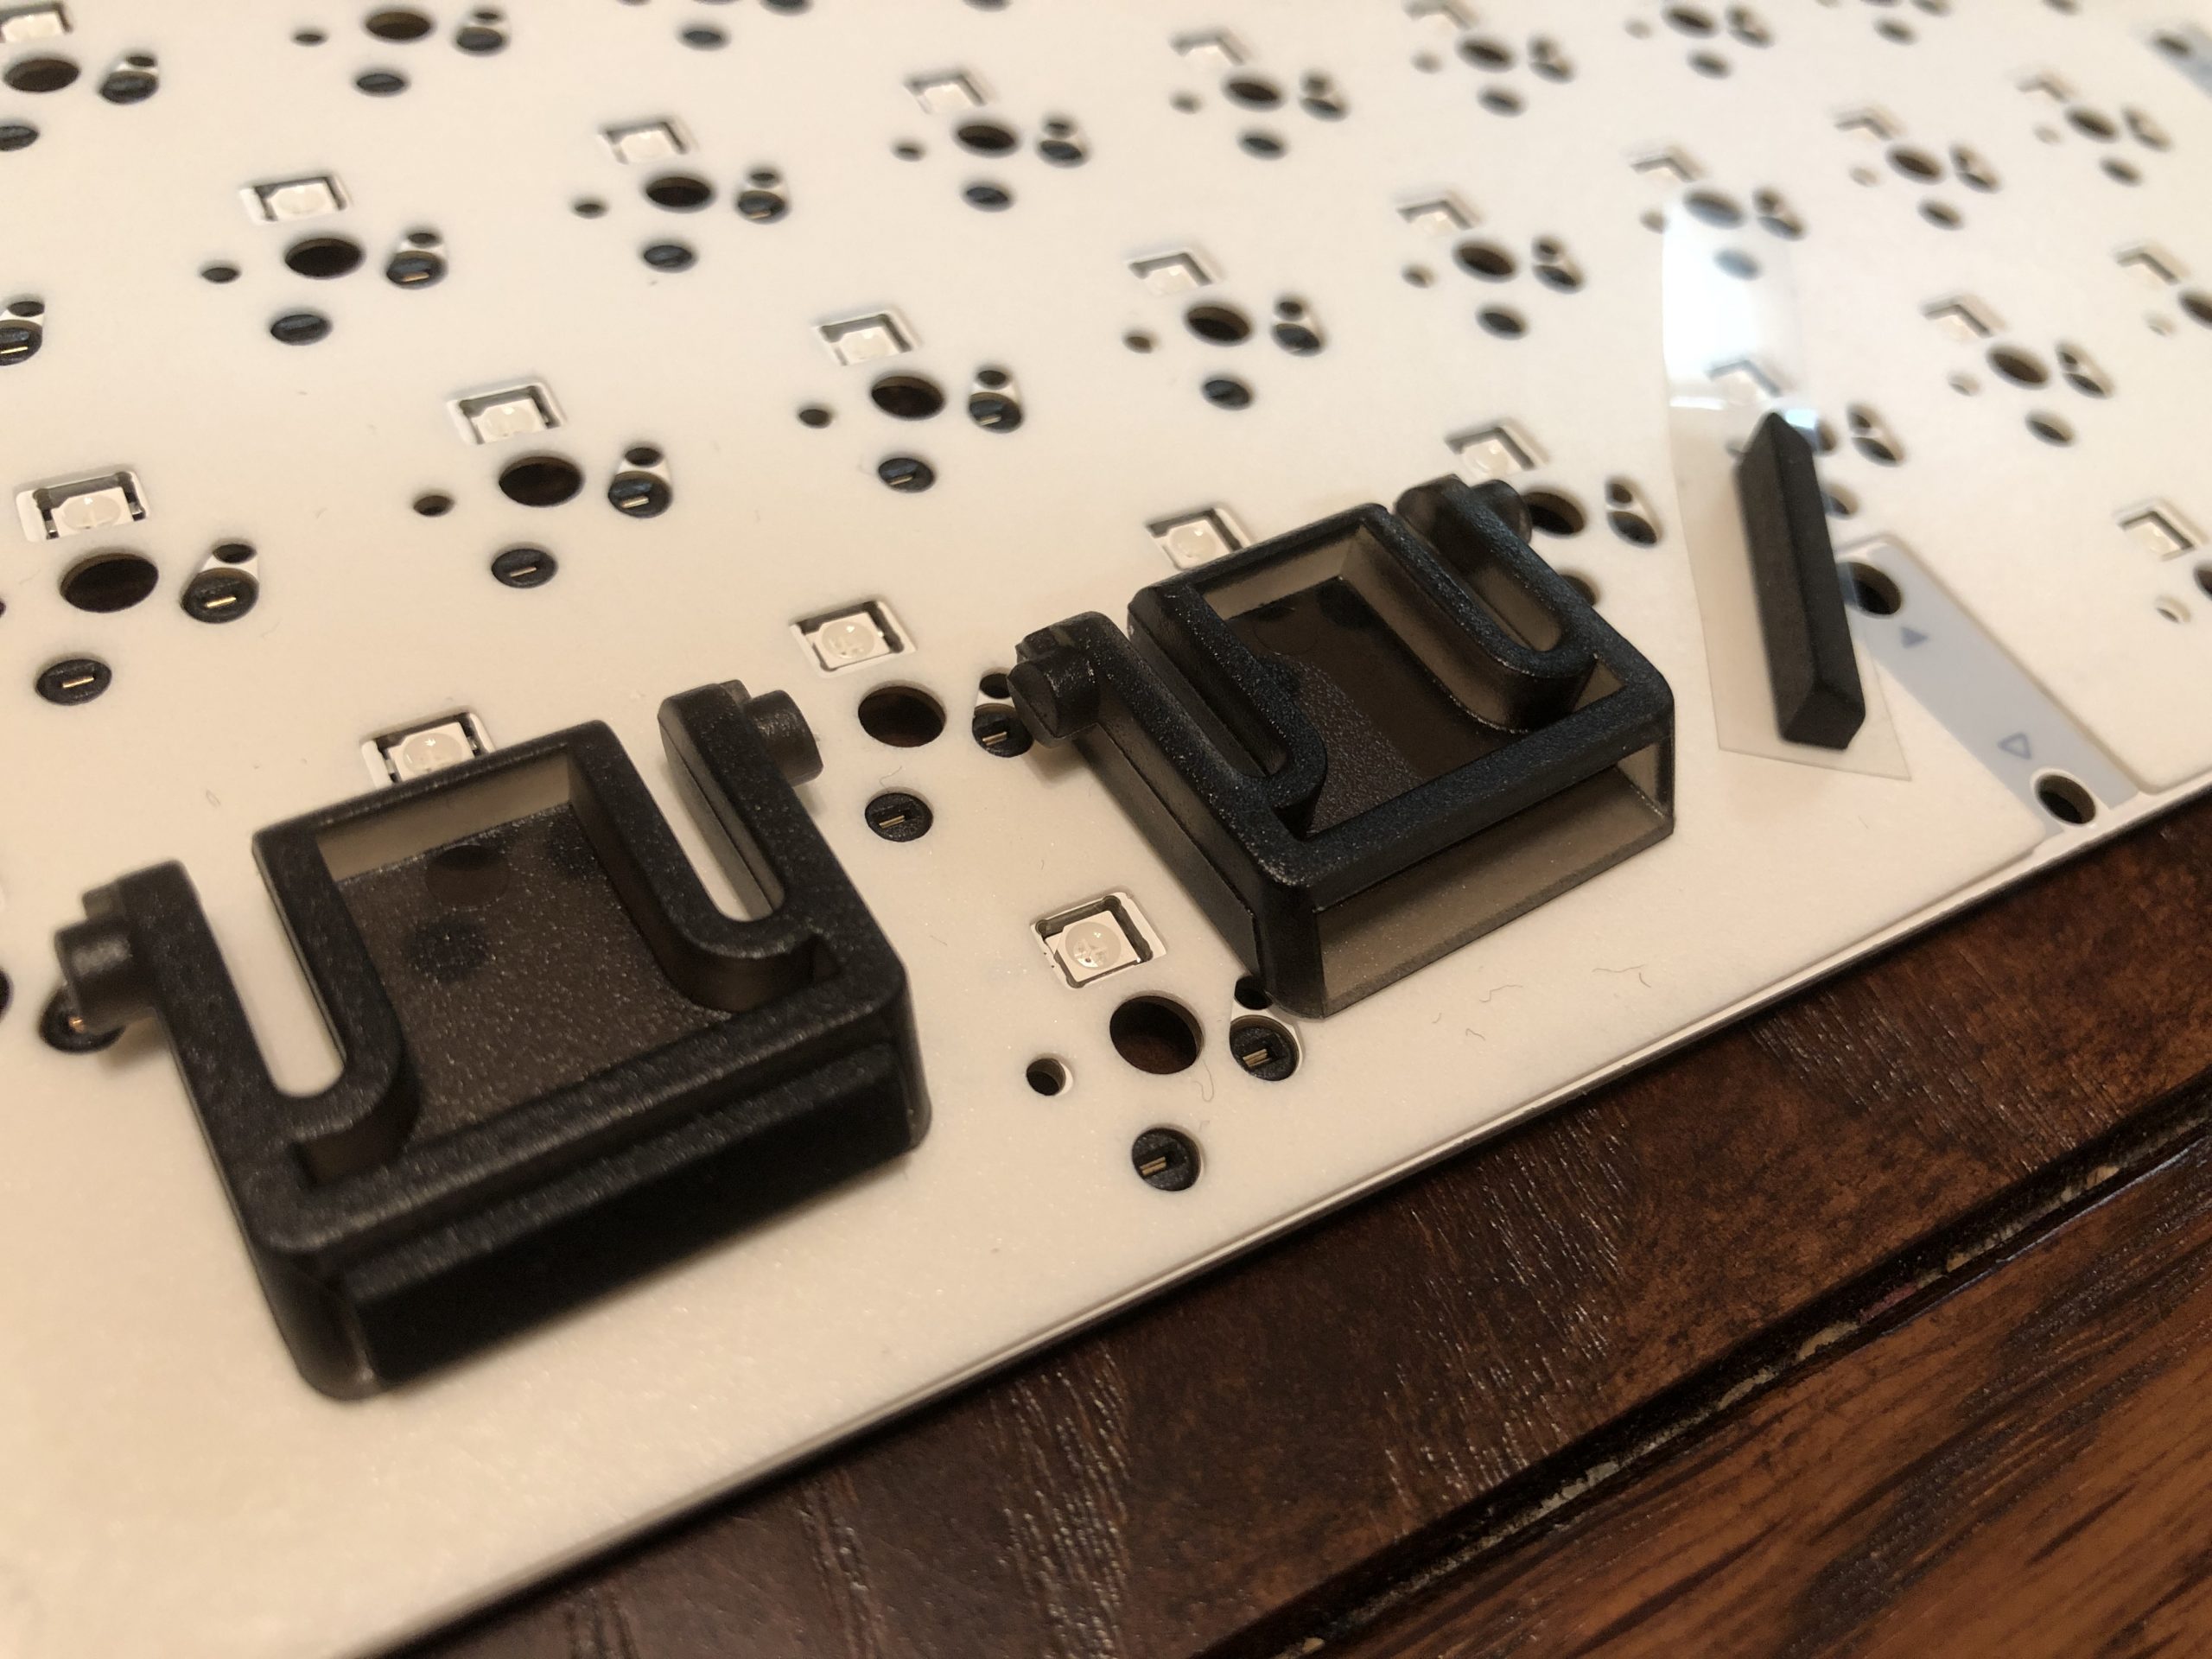
Adding the rubber to the flip-out feet.
Now add the adhesive Poron pads into their slots on the case; the smaller ones go on the short sides, with the guide posts in between them. All the other ones are the same size. The tallest two rubber pads go on the included plastic flip-out feet; just match the angle in terms of orientation and you should have an easy time. The other four black rubber pads go on the bottom case, in the similarly shaped recessed areas at the four corners. Pop the flip-out feet into their respective recesses on the case, and flip it back over.
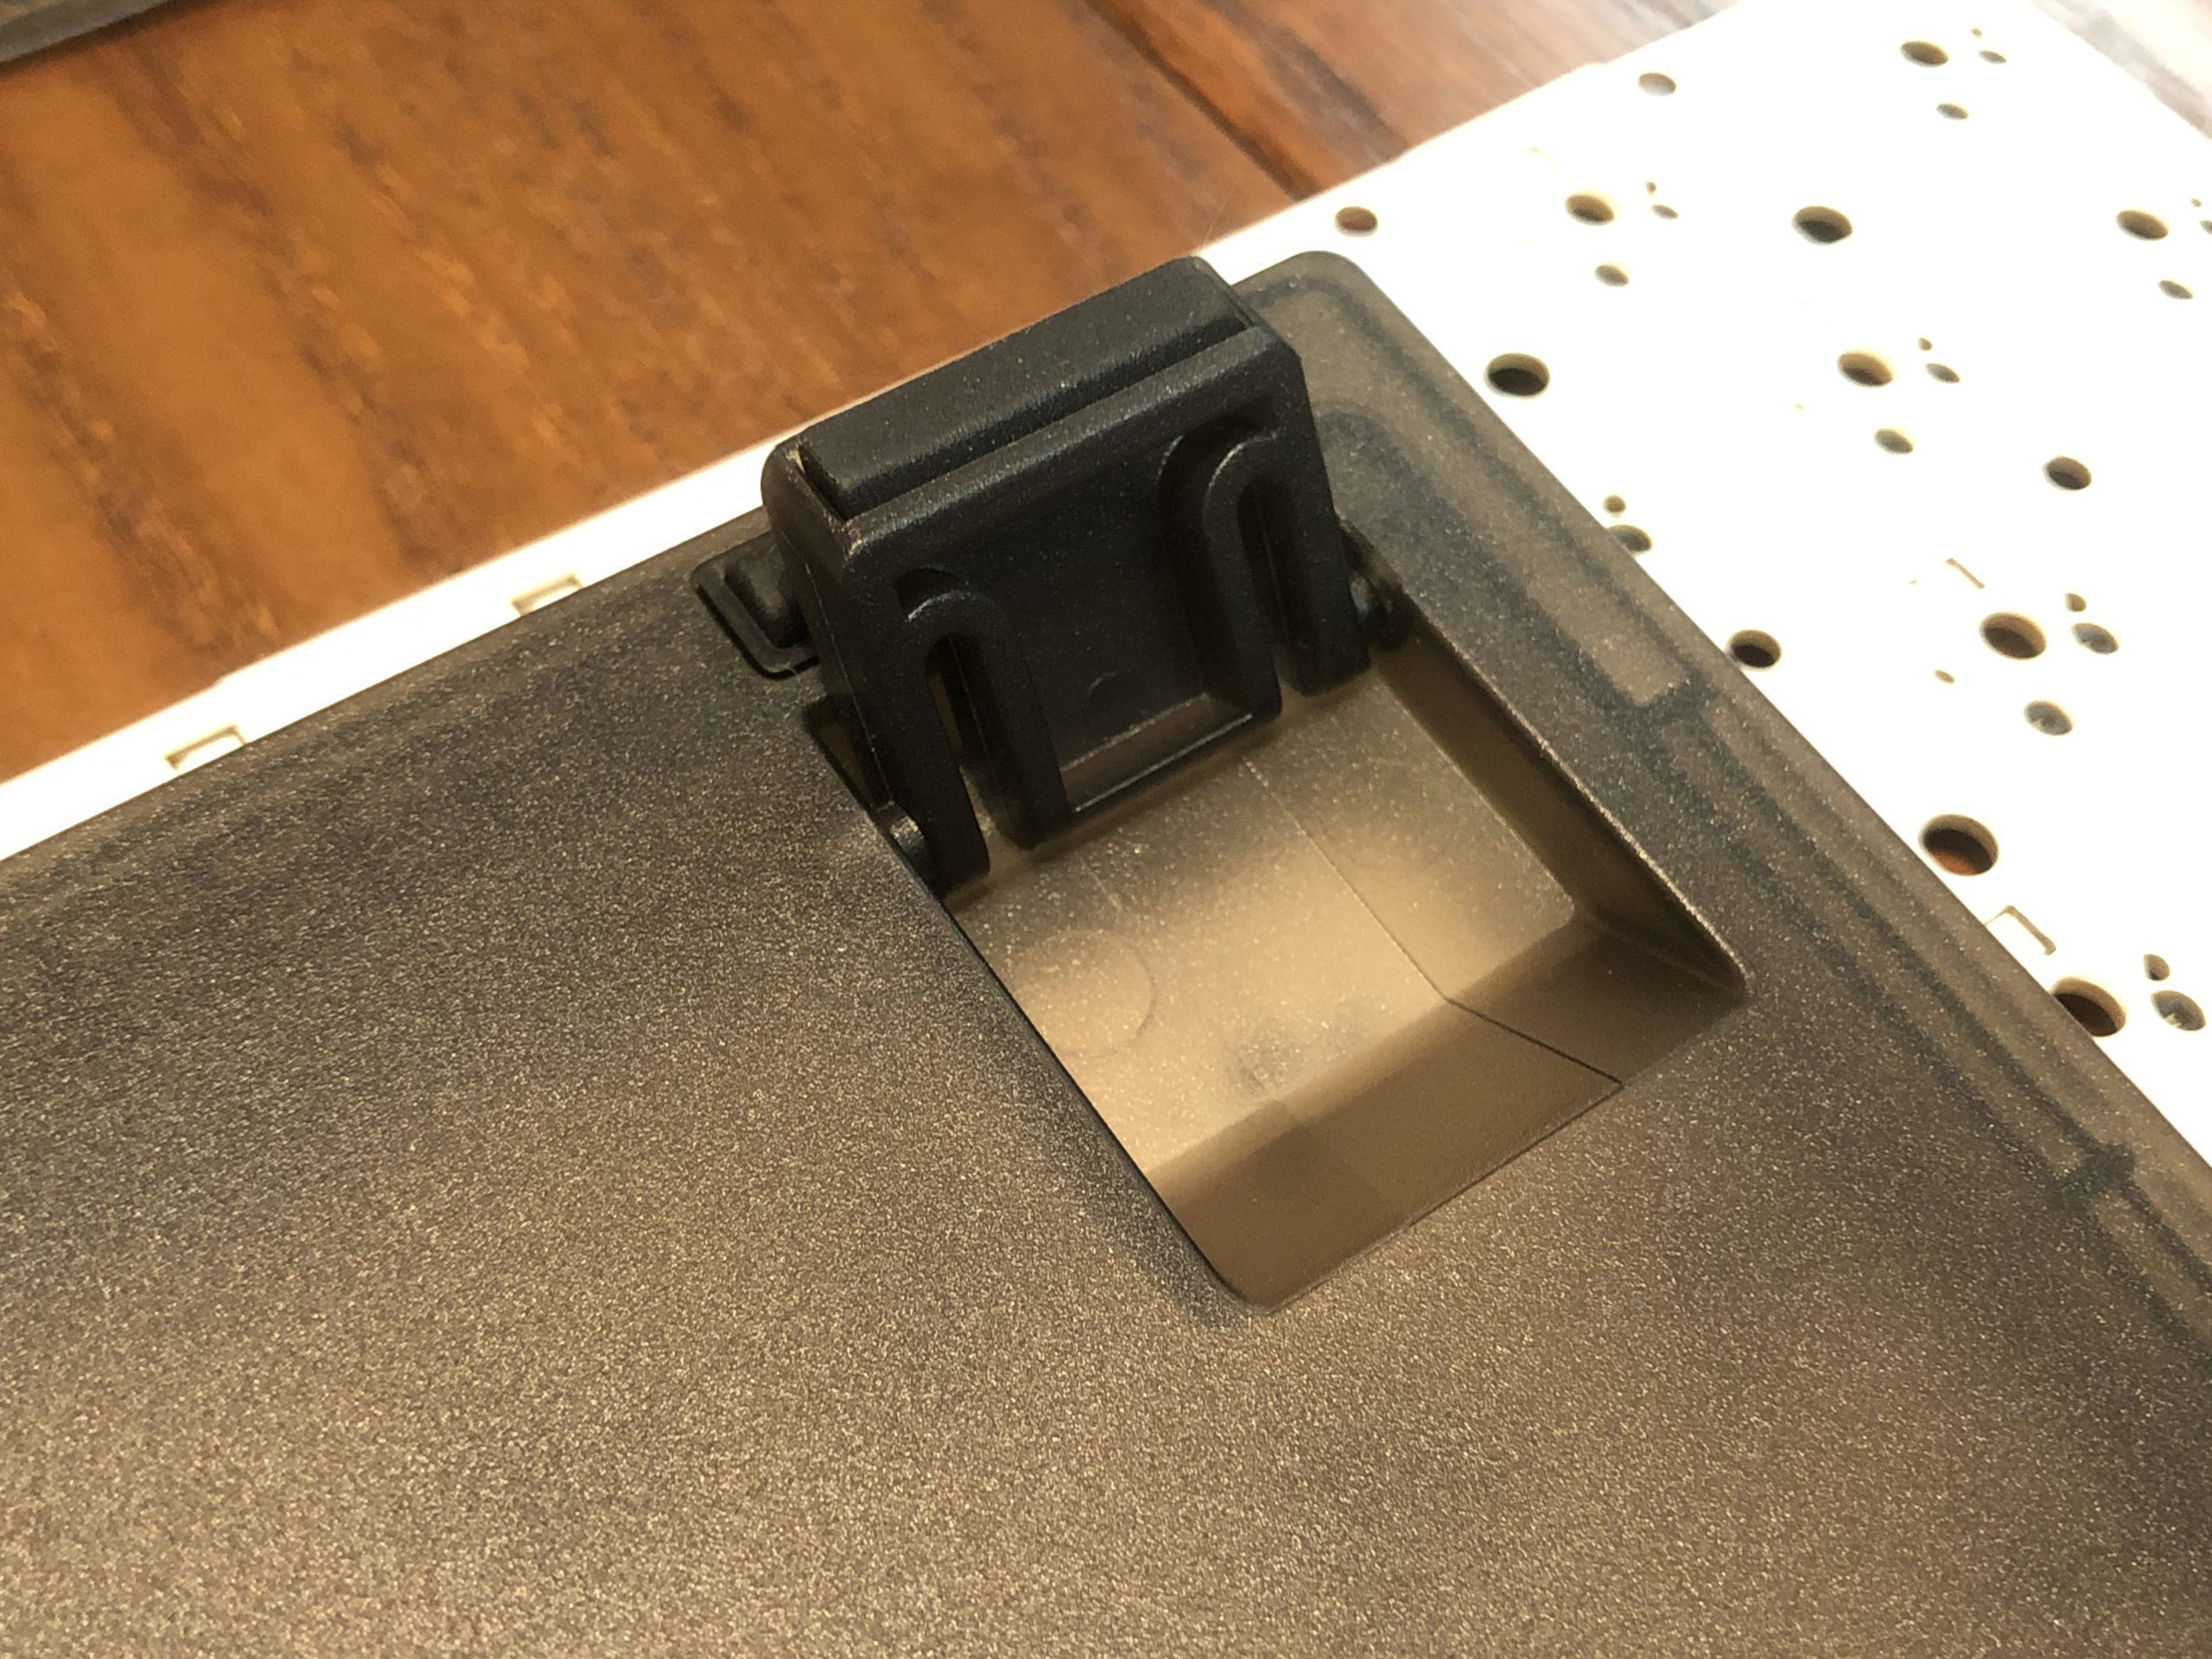
The flip-out foot in-place.
Place the silicone dampeners on top of the PCB, and then the plate on top of that. The holes should line up with the sockets, so let that be your guide for orientation. The silicone has one big part and one small part; the small one goes on the outer side of the space bar area. Holding the “sandwich” together, begin to snap the switches into place, starting at the outer corners.
When installing switches, first make sure the pins are straight, and gently line them up with the sockets. Supporting the socket from the other side, push the switch into the socket – you’ll likely hear and feel a click from the clips grasping the plate.
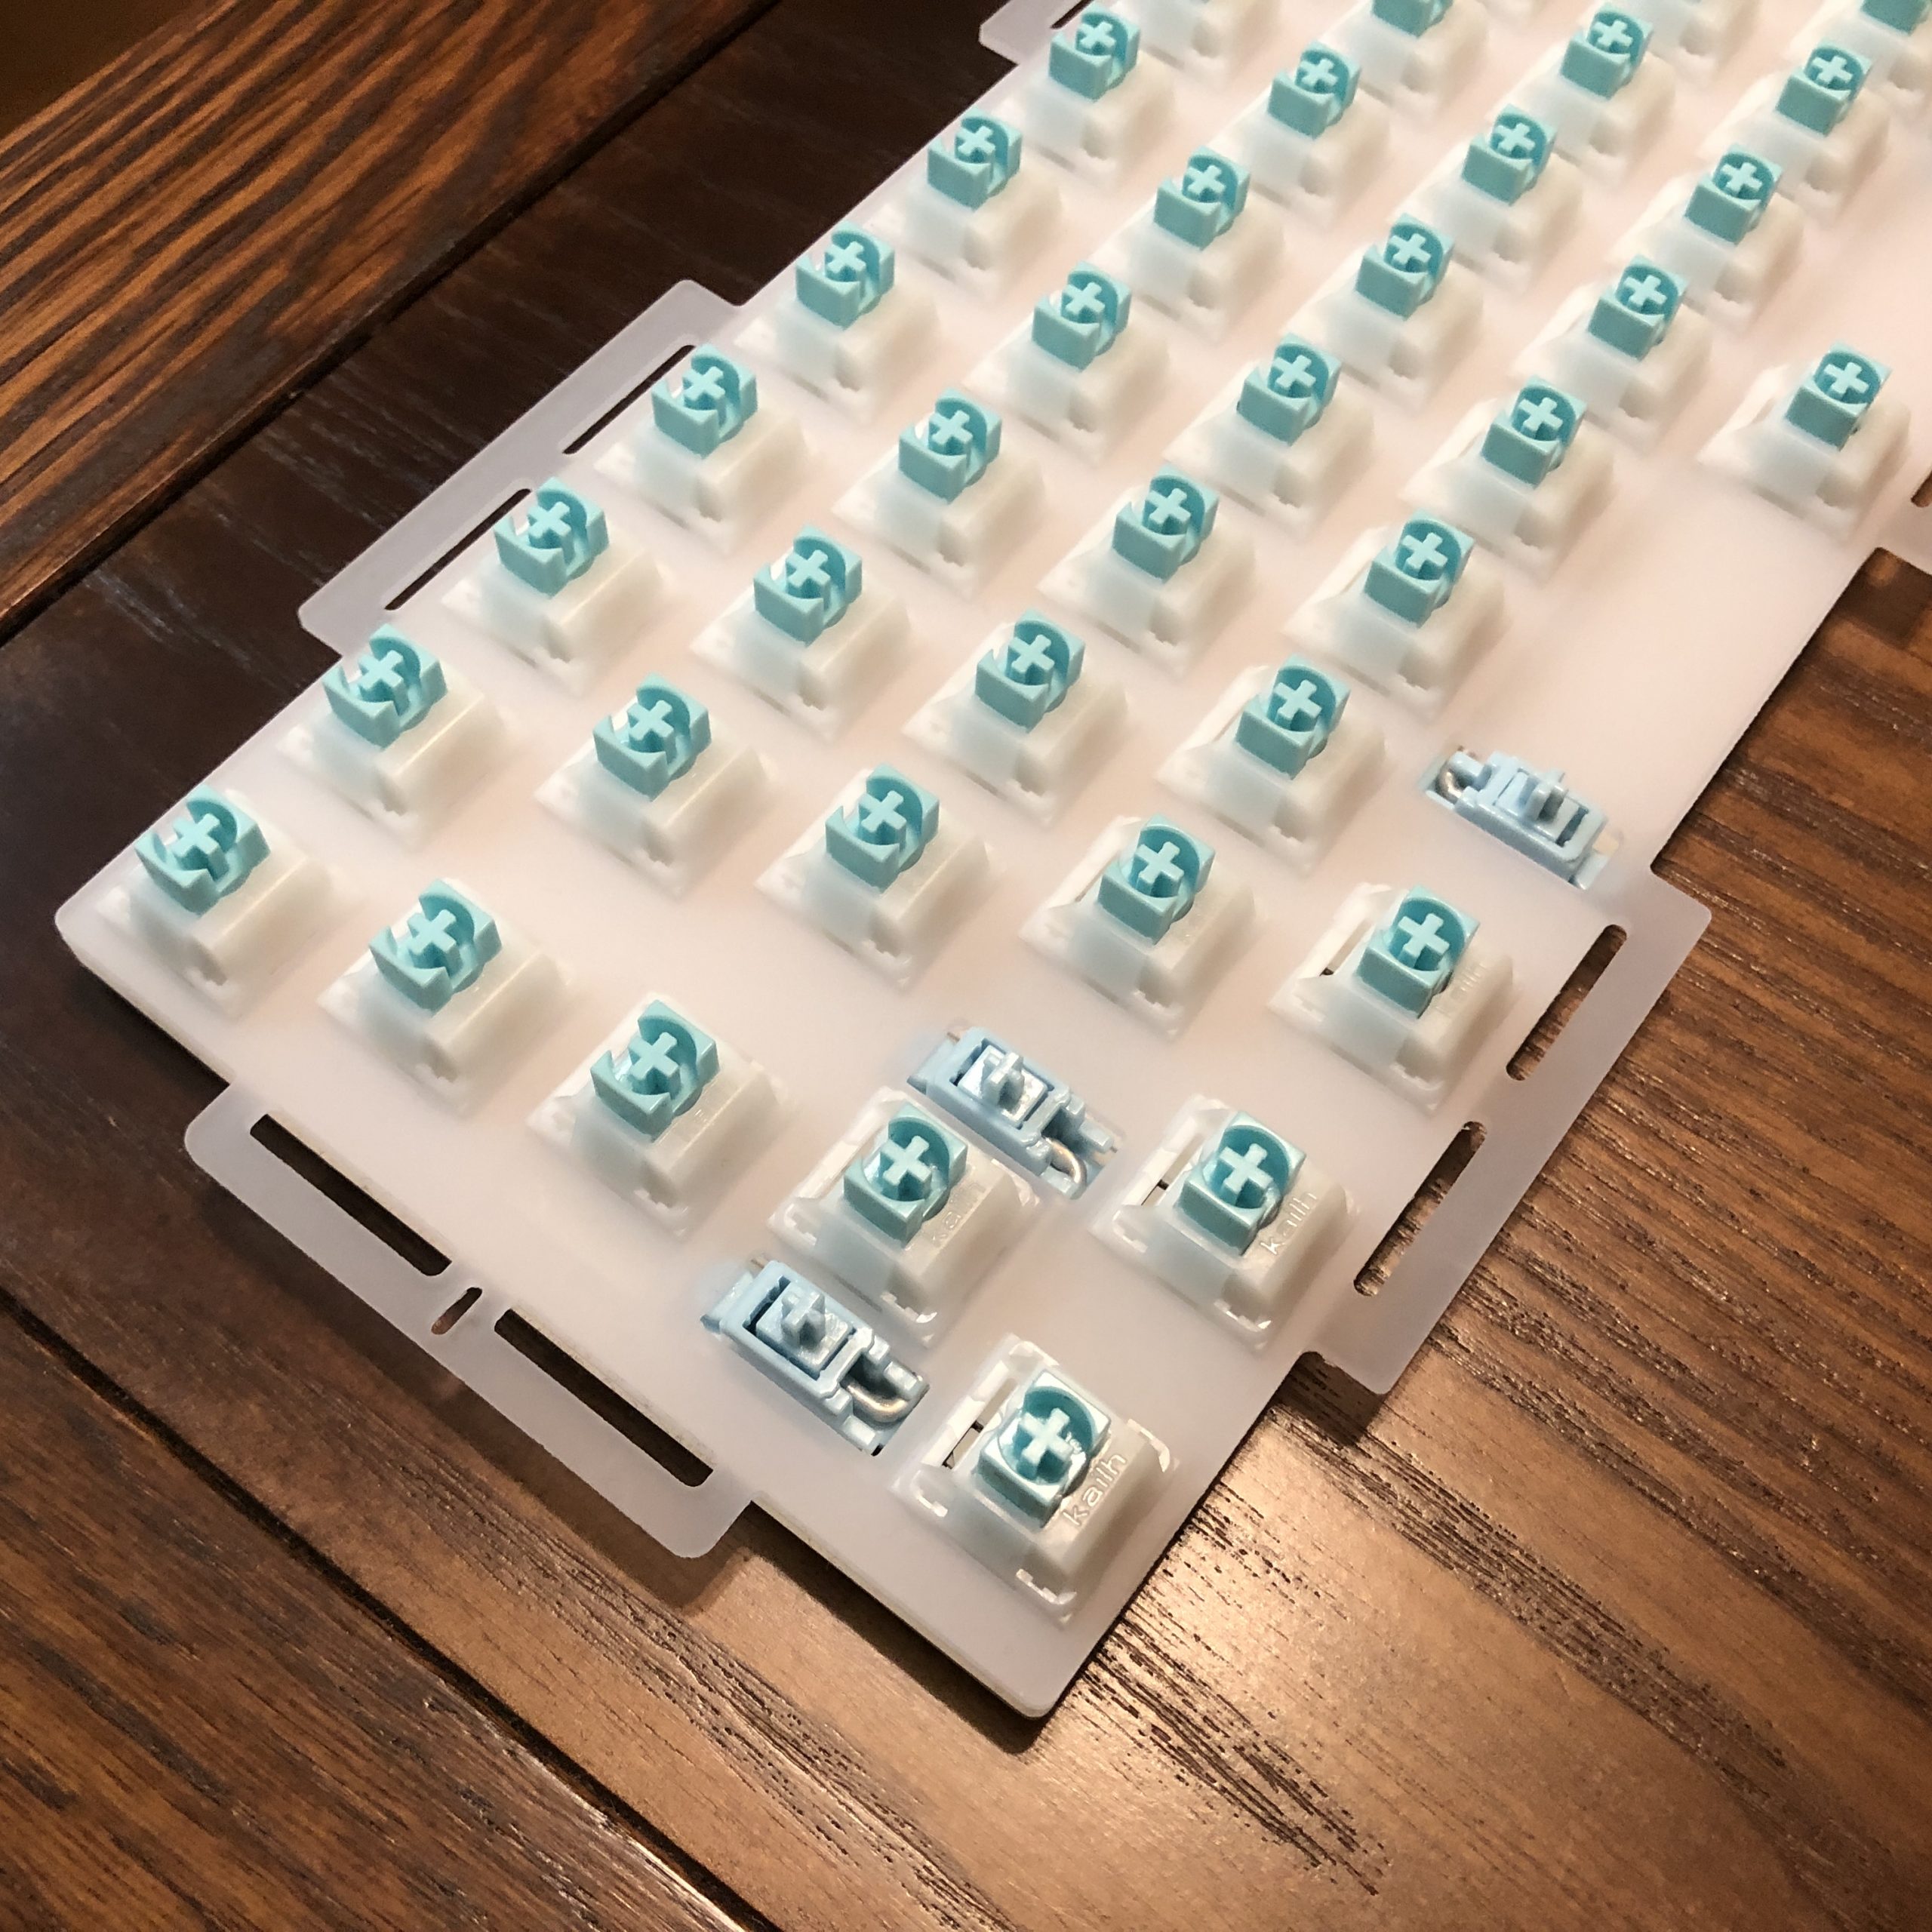
Another angle of the assembled “sandwich” – complete with FLCMMK Ice Mint switches made by Kailh. You can also see here the baby-blue stabs that come with the kit.
Once all the switches are installed, place the sandwich assembly near the bottom case, and carefully connect the cable from the daughter board to the PCB. With this connected, place the sandwich atop the pads, with the guide-post on each side interacting with the associated slots in the plate.
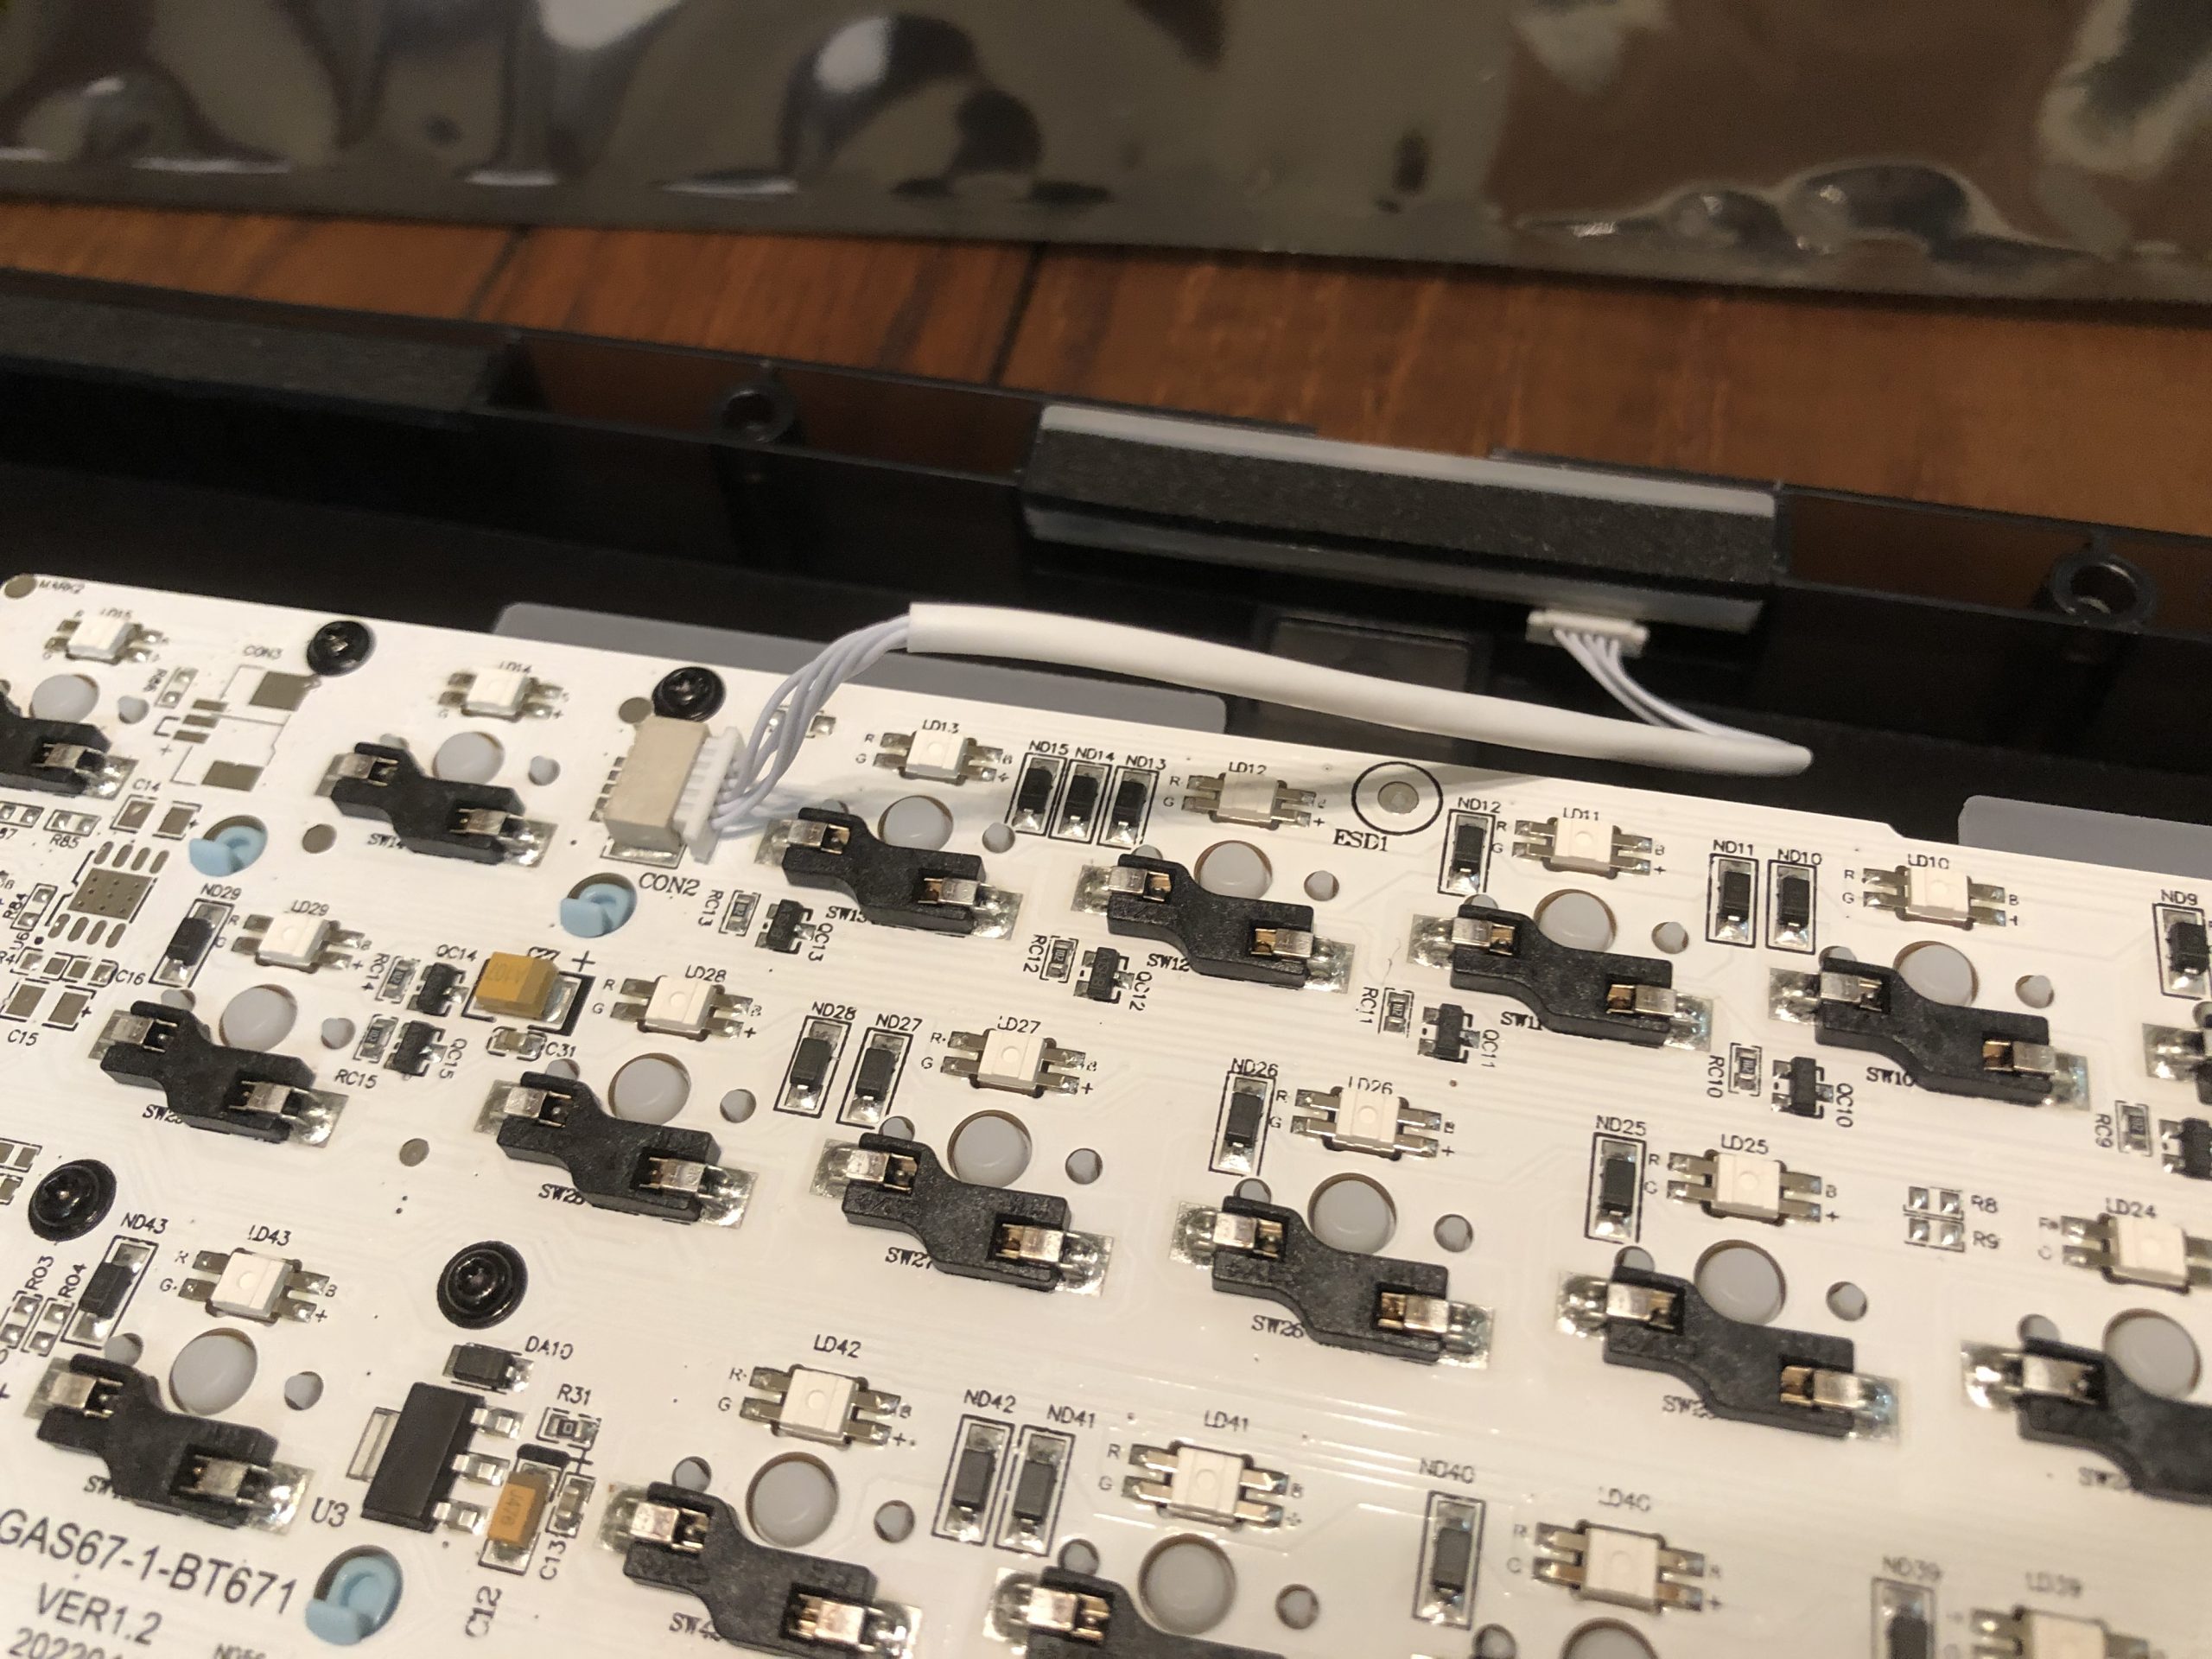
Daughter board connection
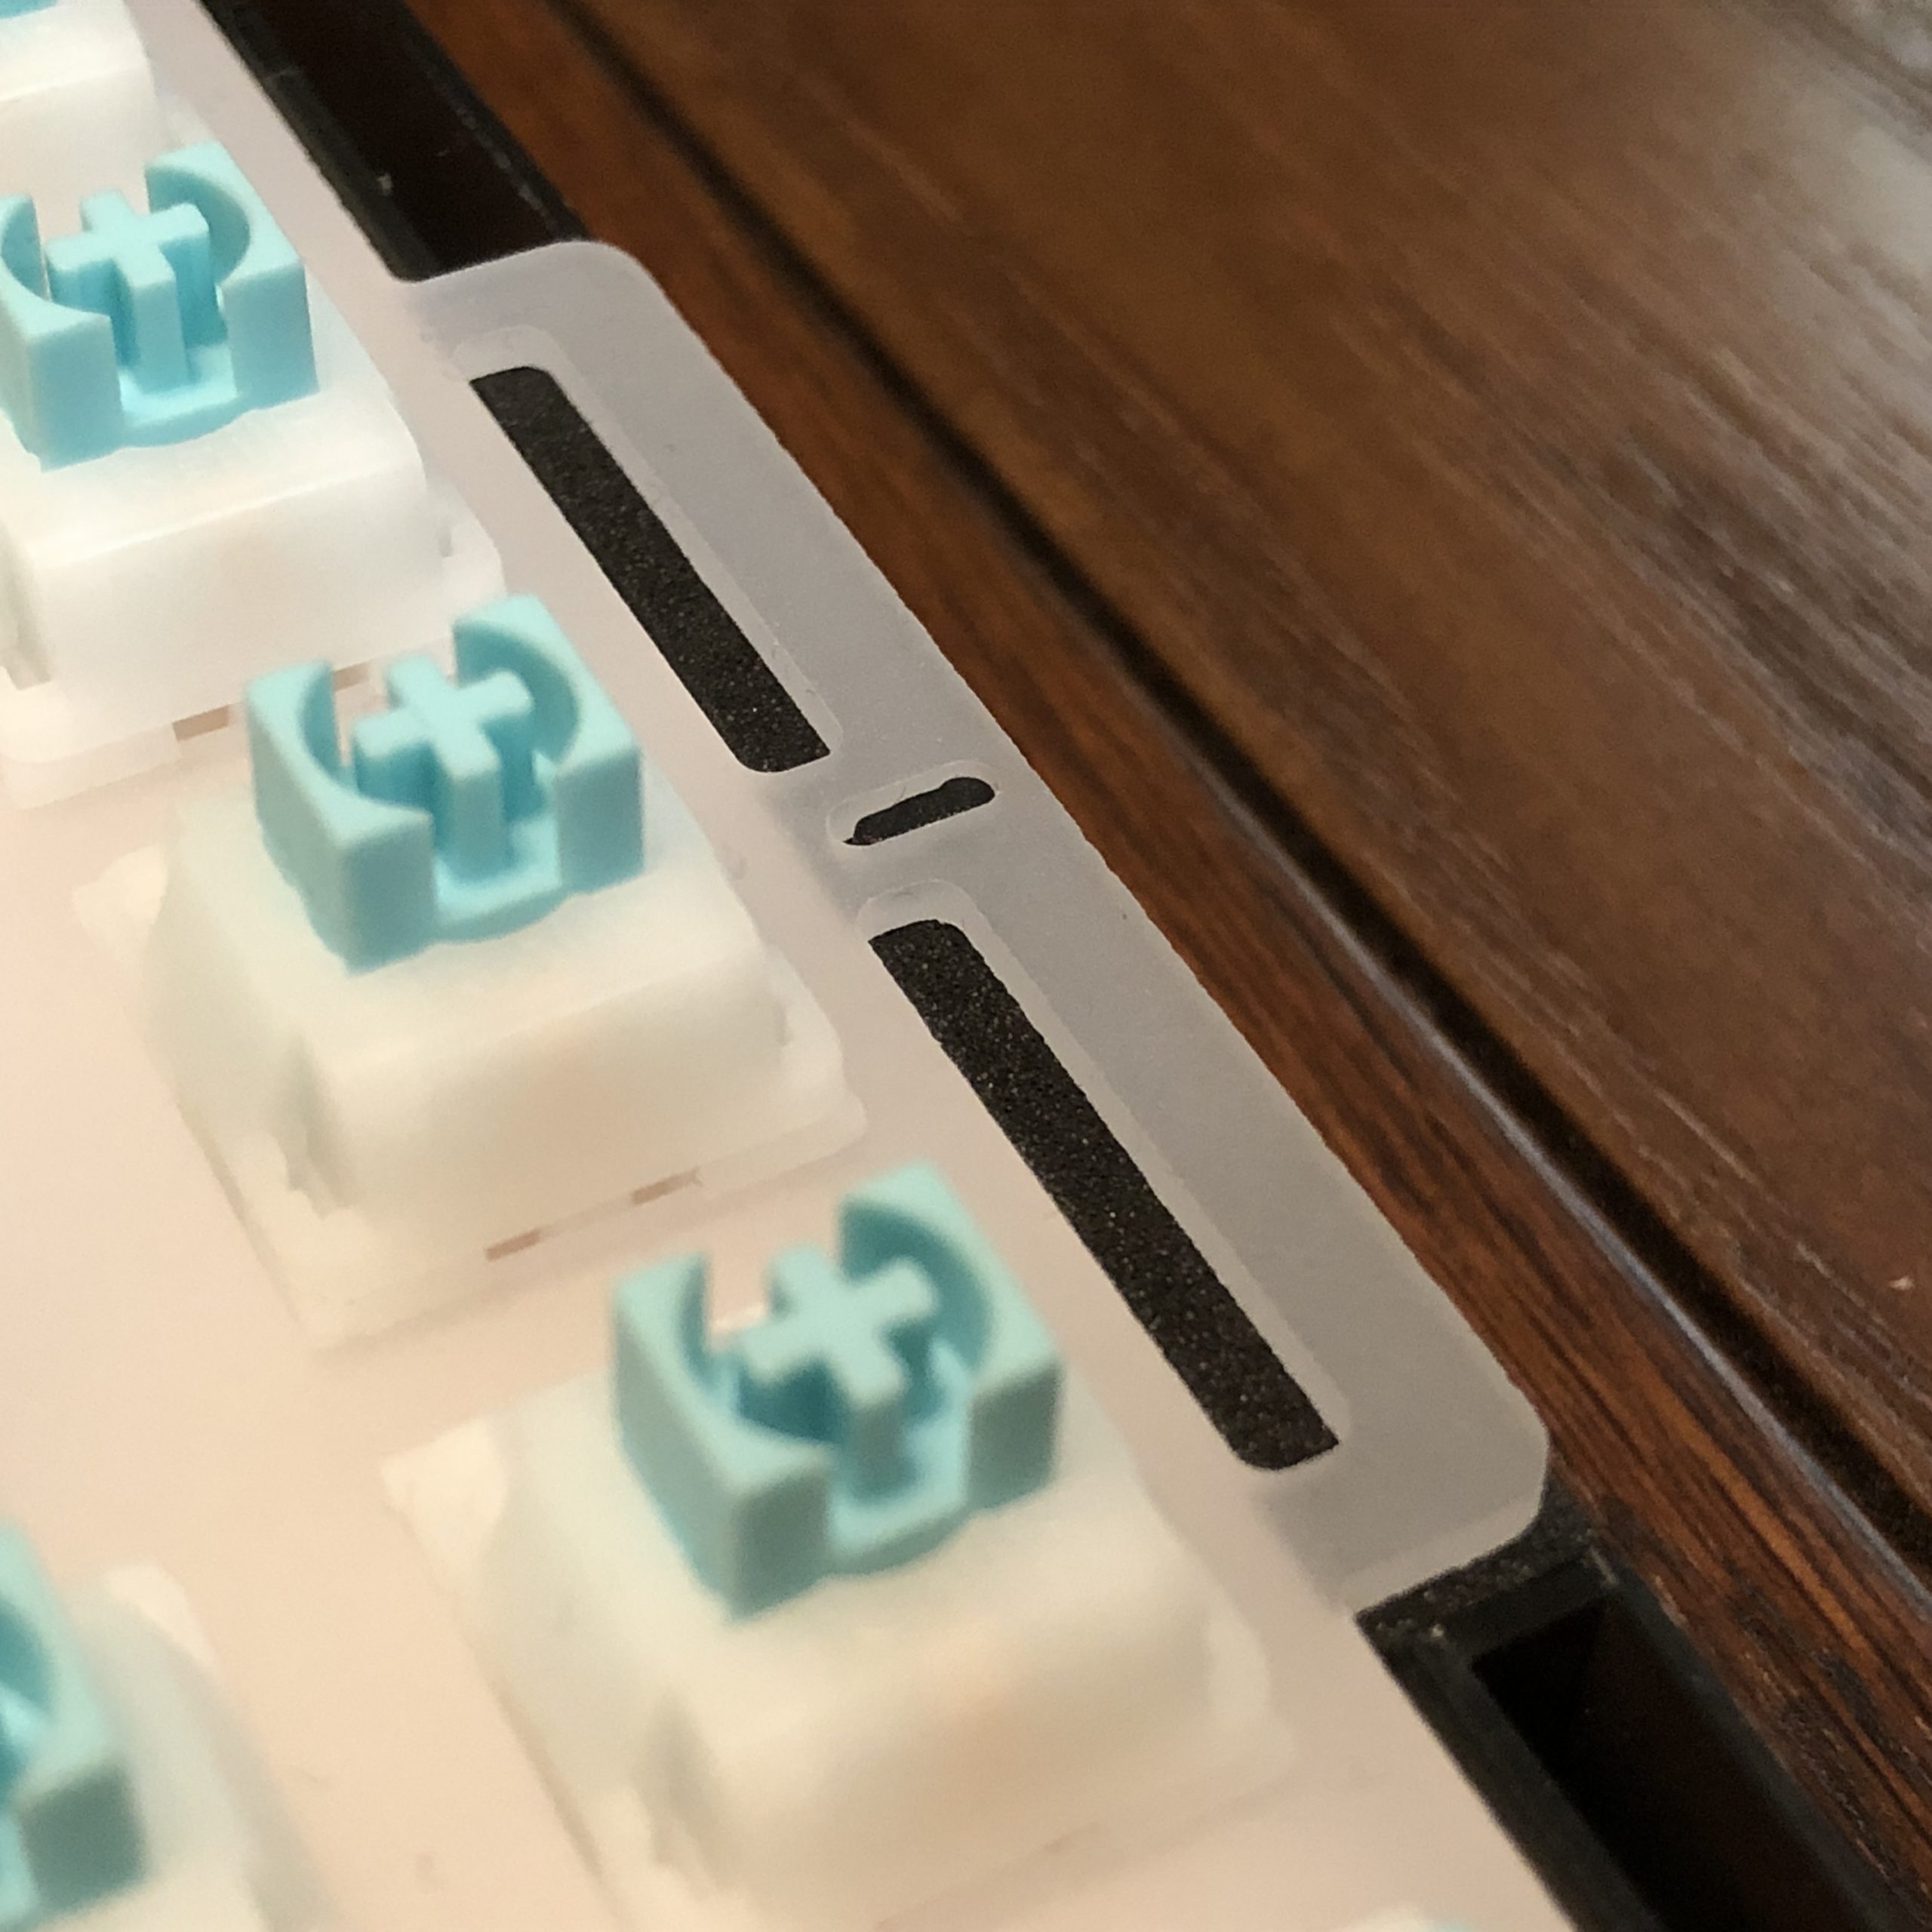
Alignment post
Next, place the top shell, taking care that the toggle switch slots-into the slider built into the blocker. Flip the keyboard over, and install the case screws (red bag), starting with one corner and alternating opposite remaining corners. Tighten these screws gently, as they cut their own threads into bare plastic and can easily strip those threads out.
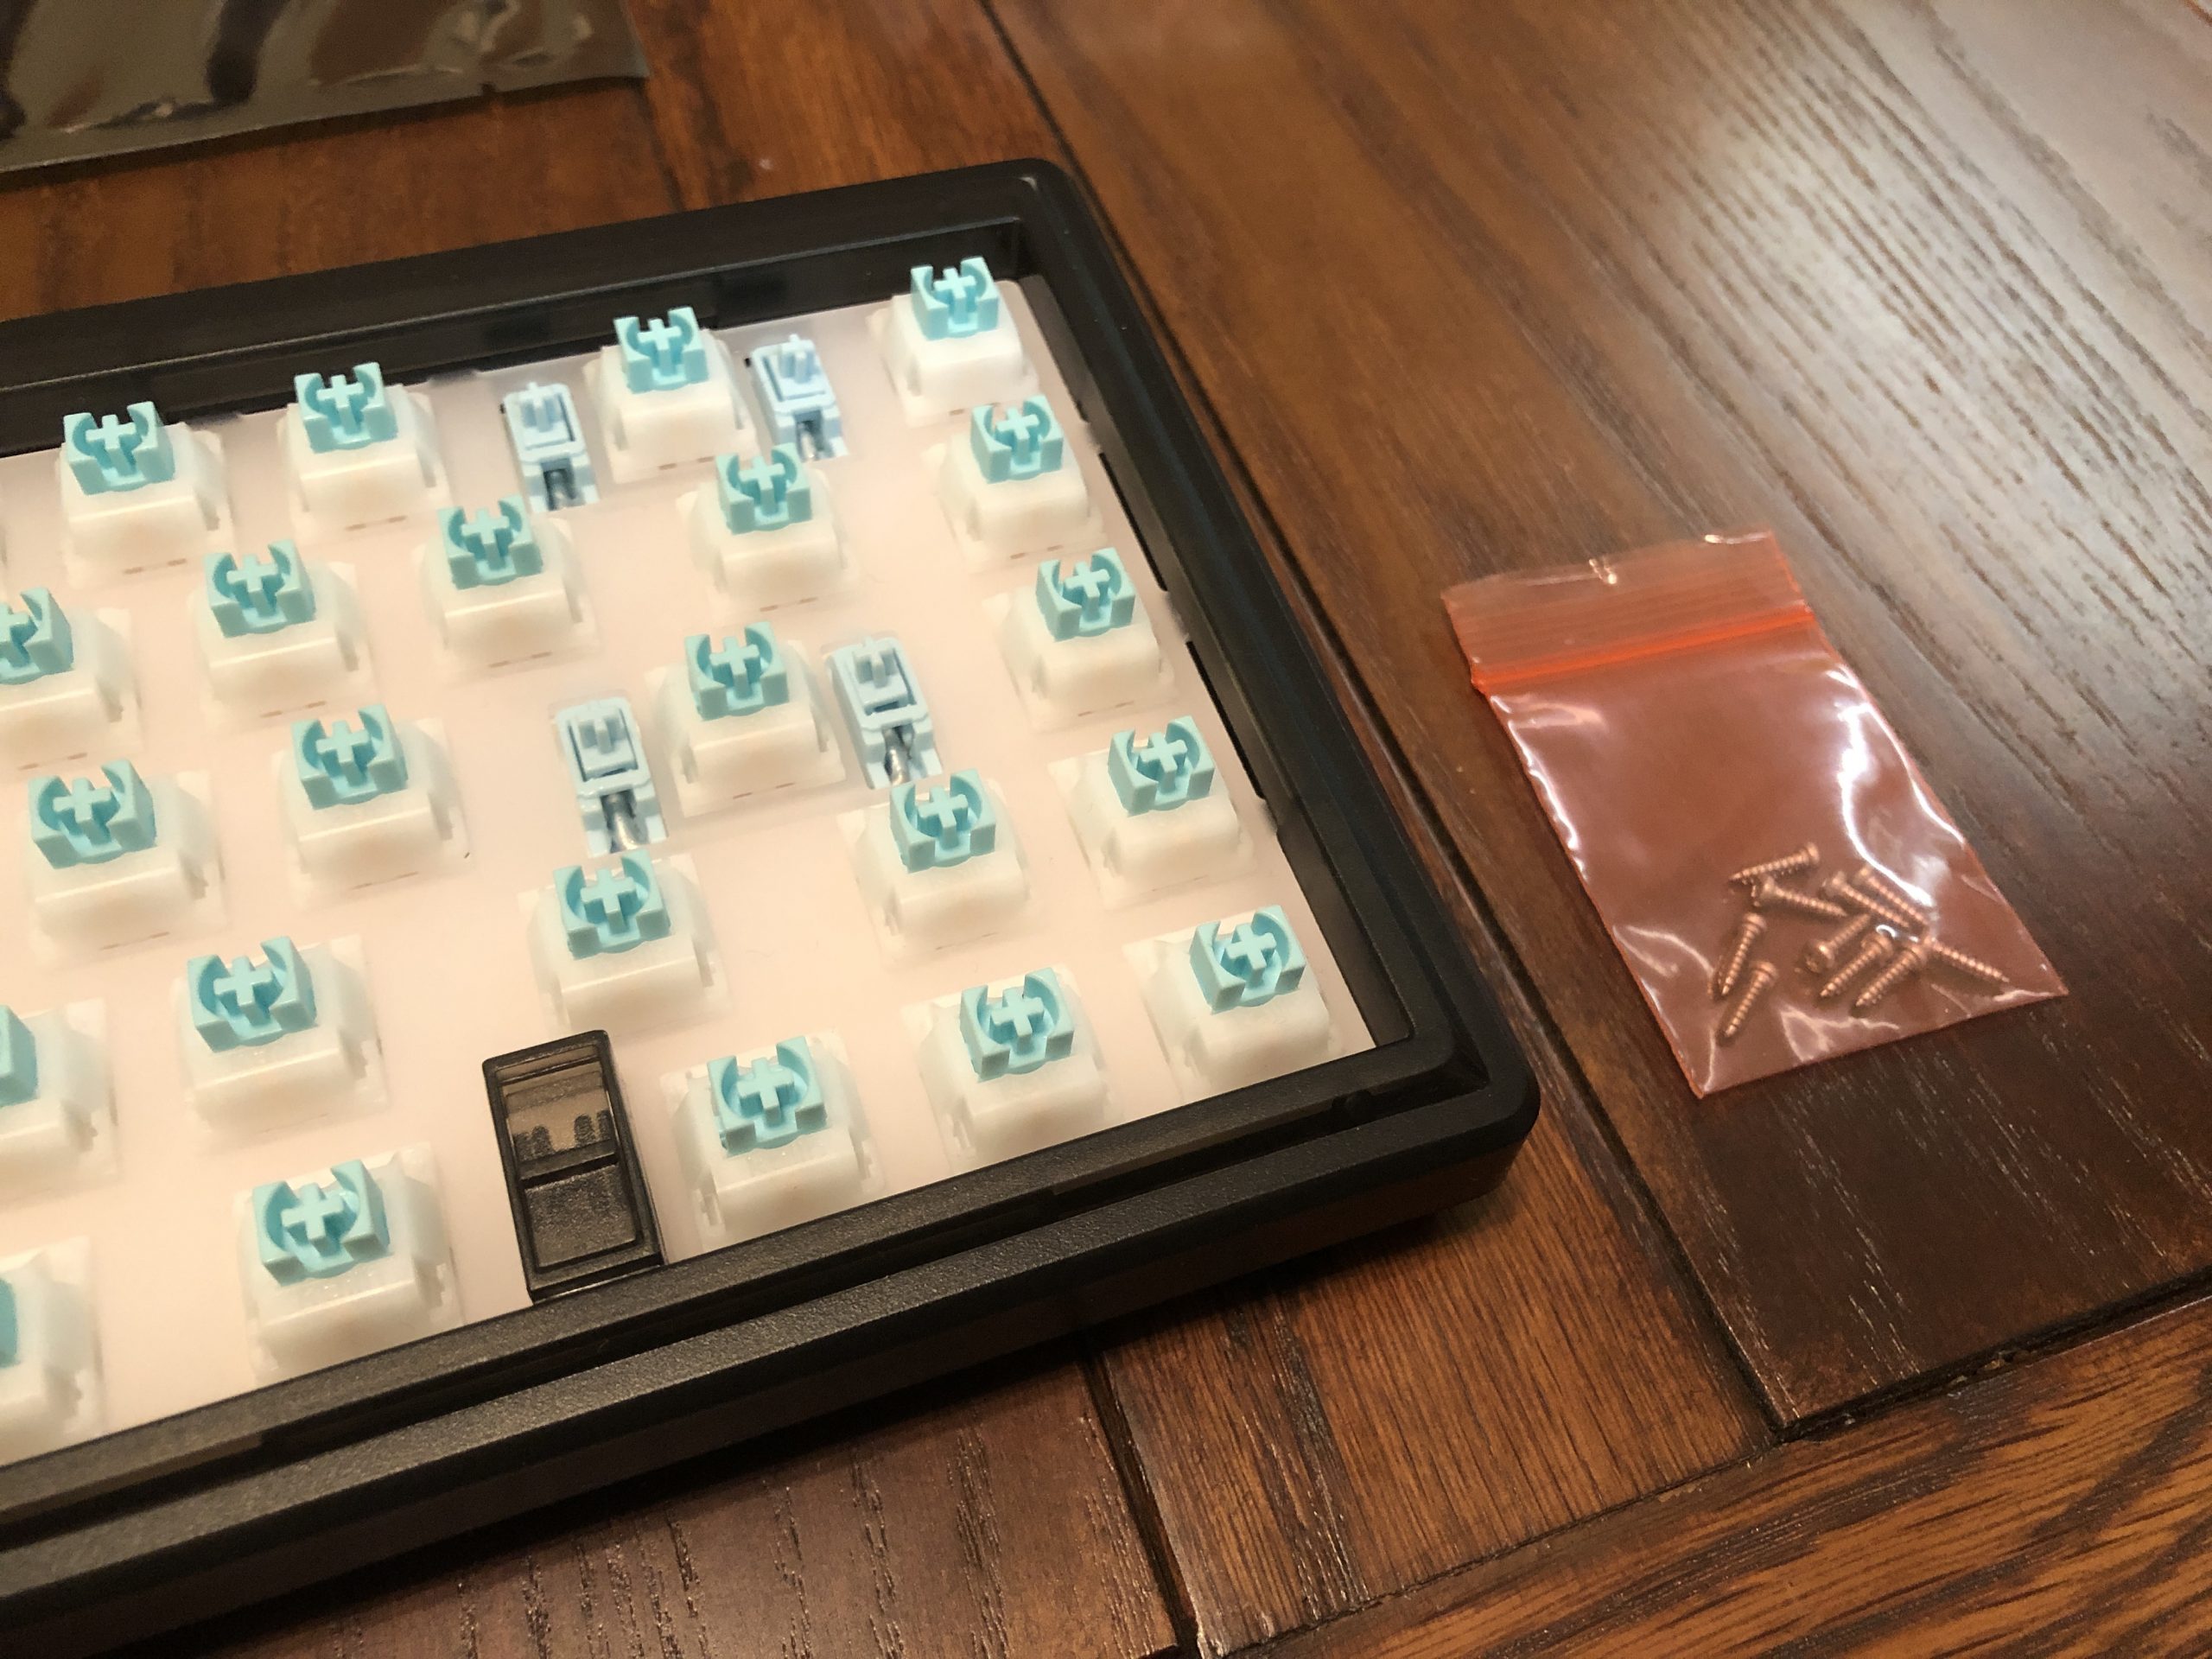
Case, screws.
That’s it! Install some keycaps, plug it in, and start enjoying your keyboard.
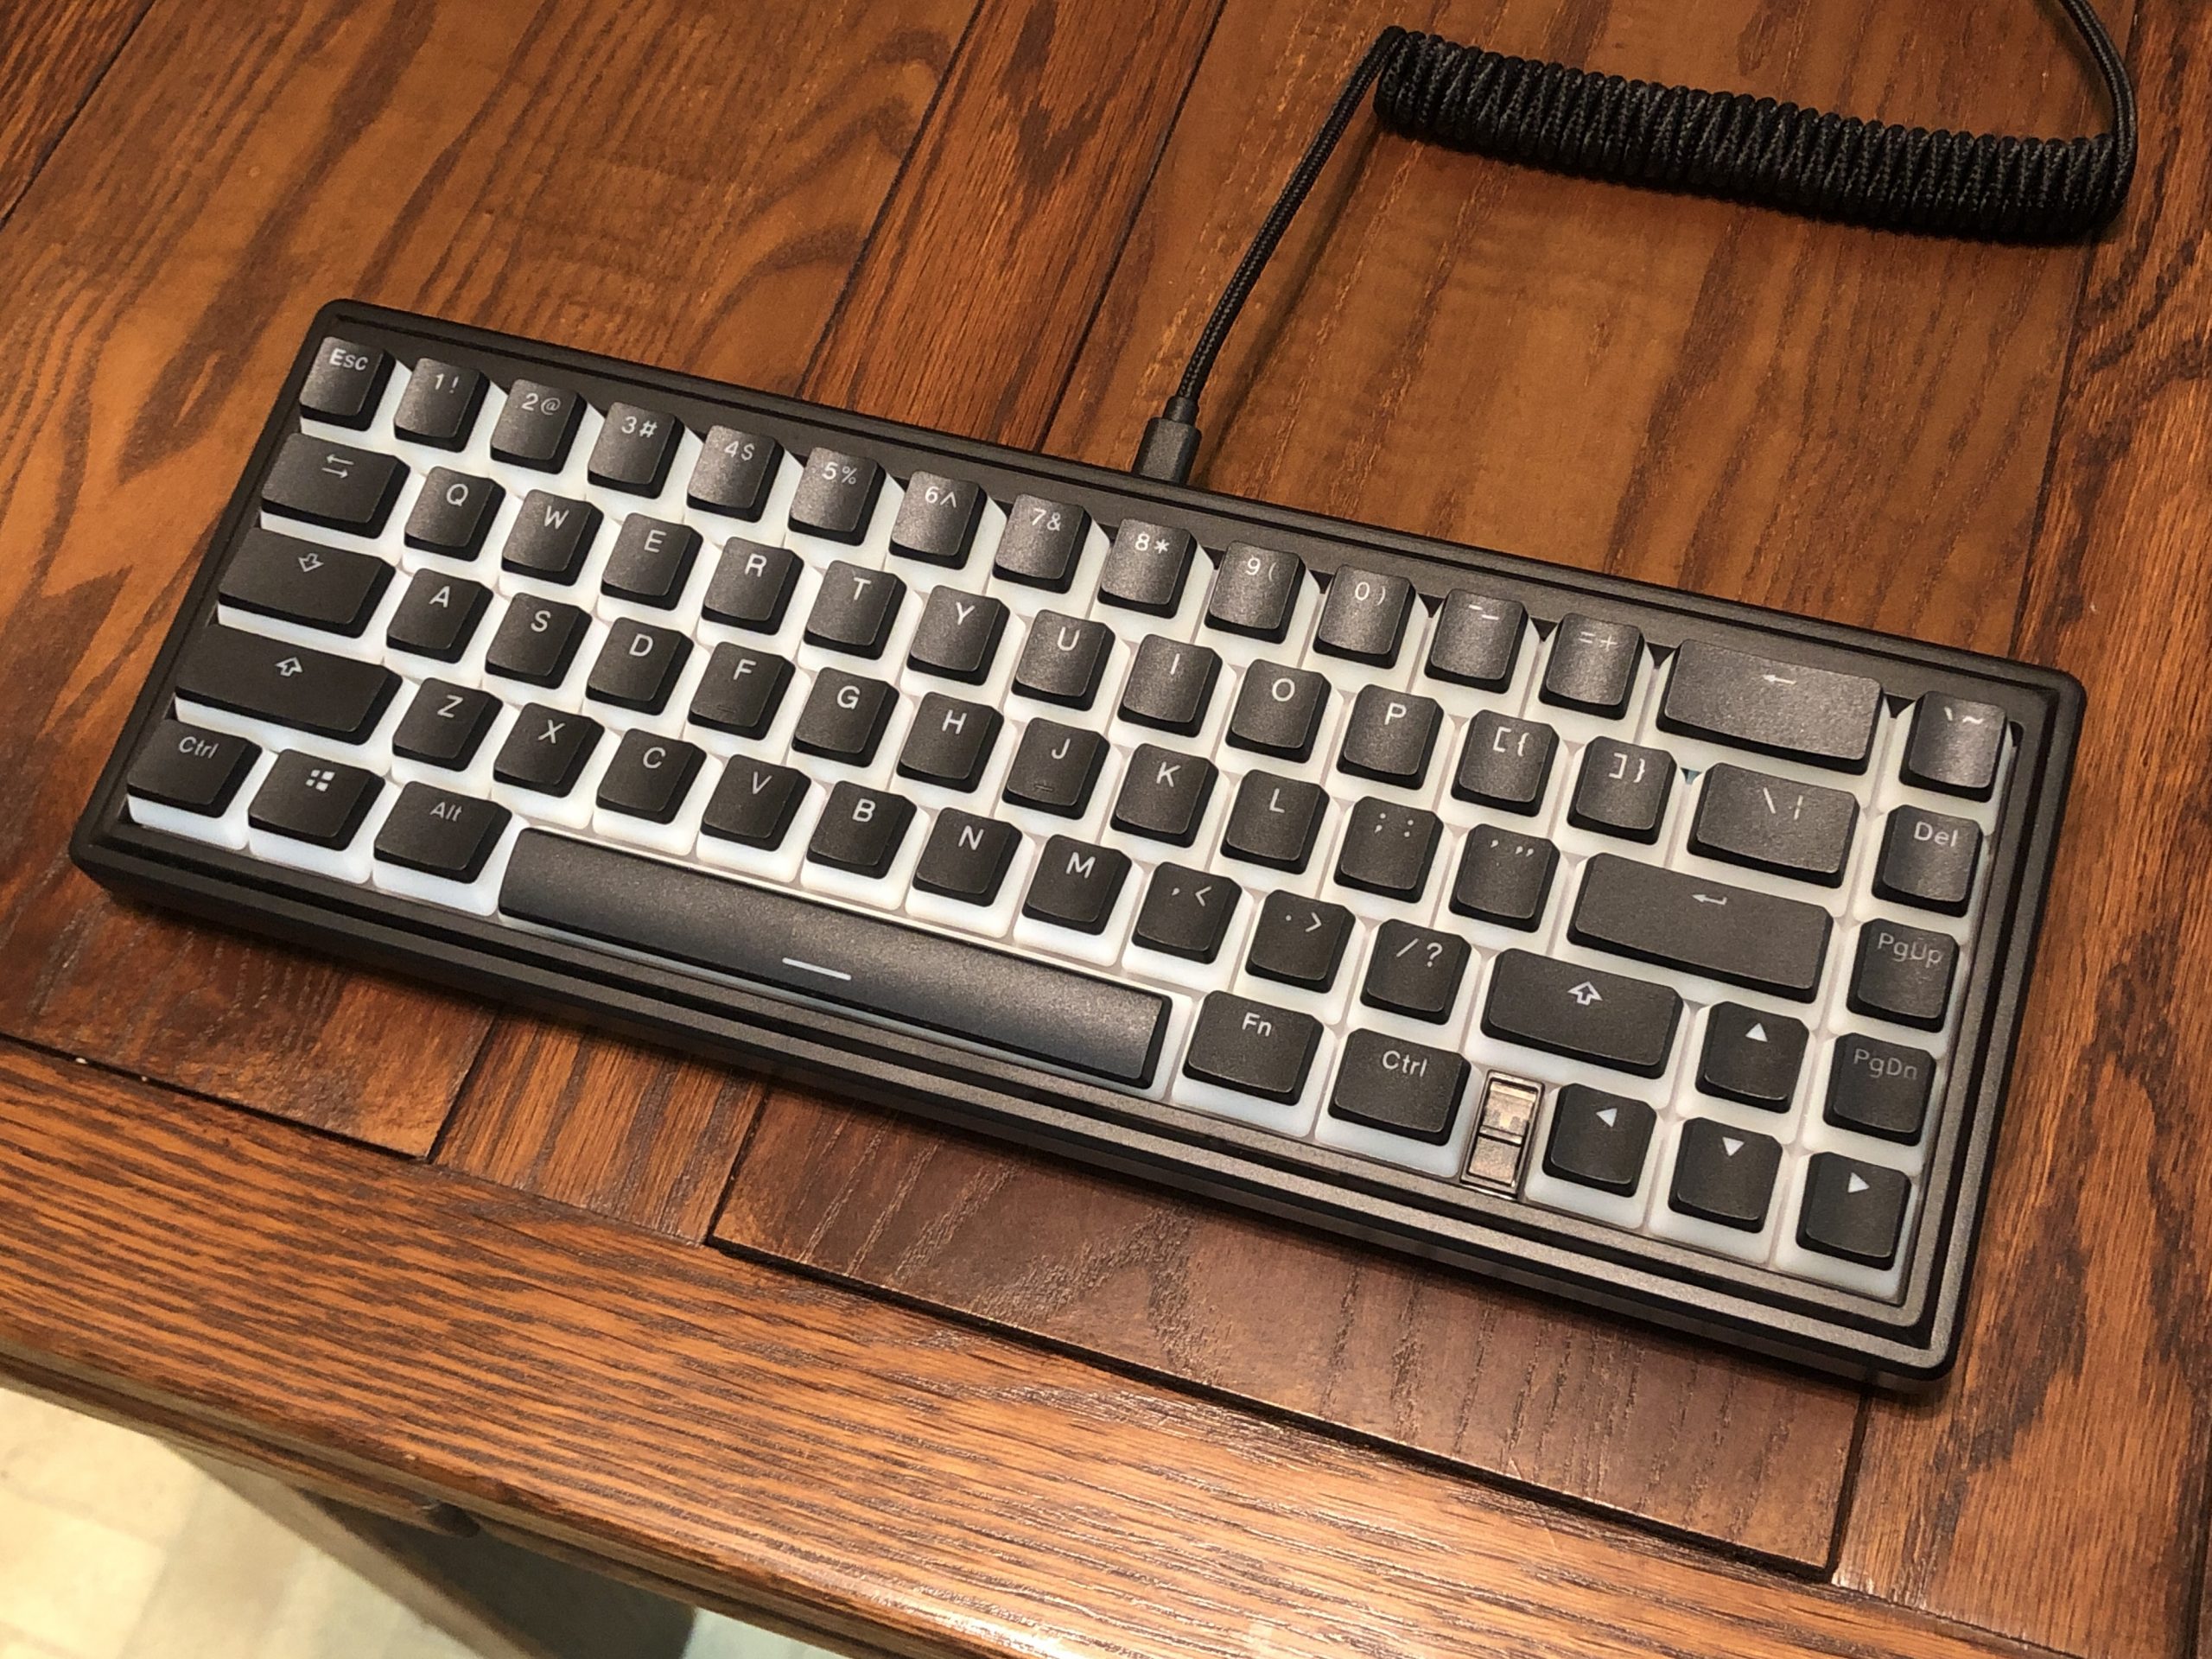
Fully-built CIY GAS67 with pudding caps
Features & Performance:
Alright – now we can get into what this keyboard can do and what it’s like to use.
As mentioned before, this is a 67-key layout in a fairly standard configuration by default. The biggest variable with these tends to be the right column, and in this case it starts from the top with Tilde, Delete, Page Up, and Page Down. These can be re-defined through the available software, which you can download [ here ].
There is a toggle-switch situated in the blocker to the left of the arrow cluster, and this switch changes the Windows / Command key into a second FN (function layer) key. This acts as a “gamer mode” since striking the key accidentally while in this mode won’t call-up the start menu and tab-out of your game – though it does still have a function in combination with other keys, which is pretty neat.
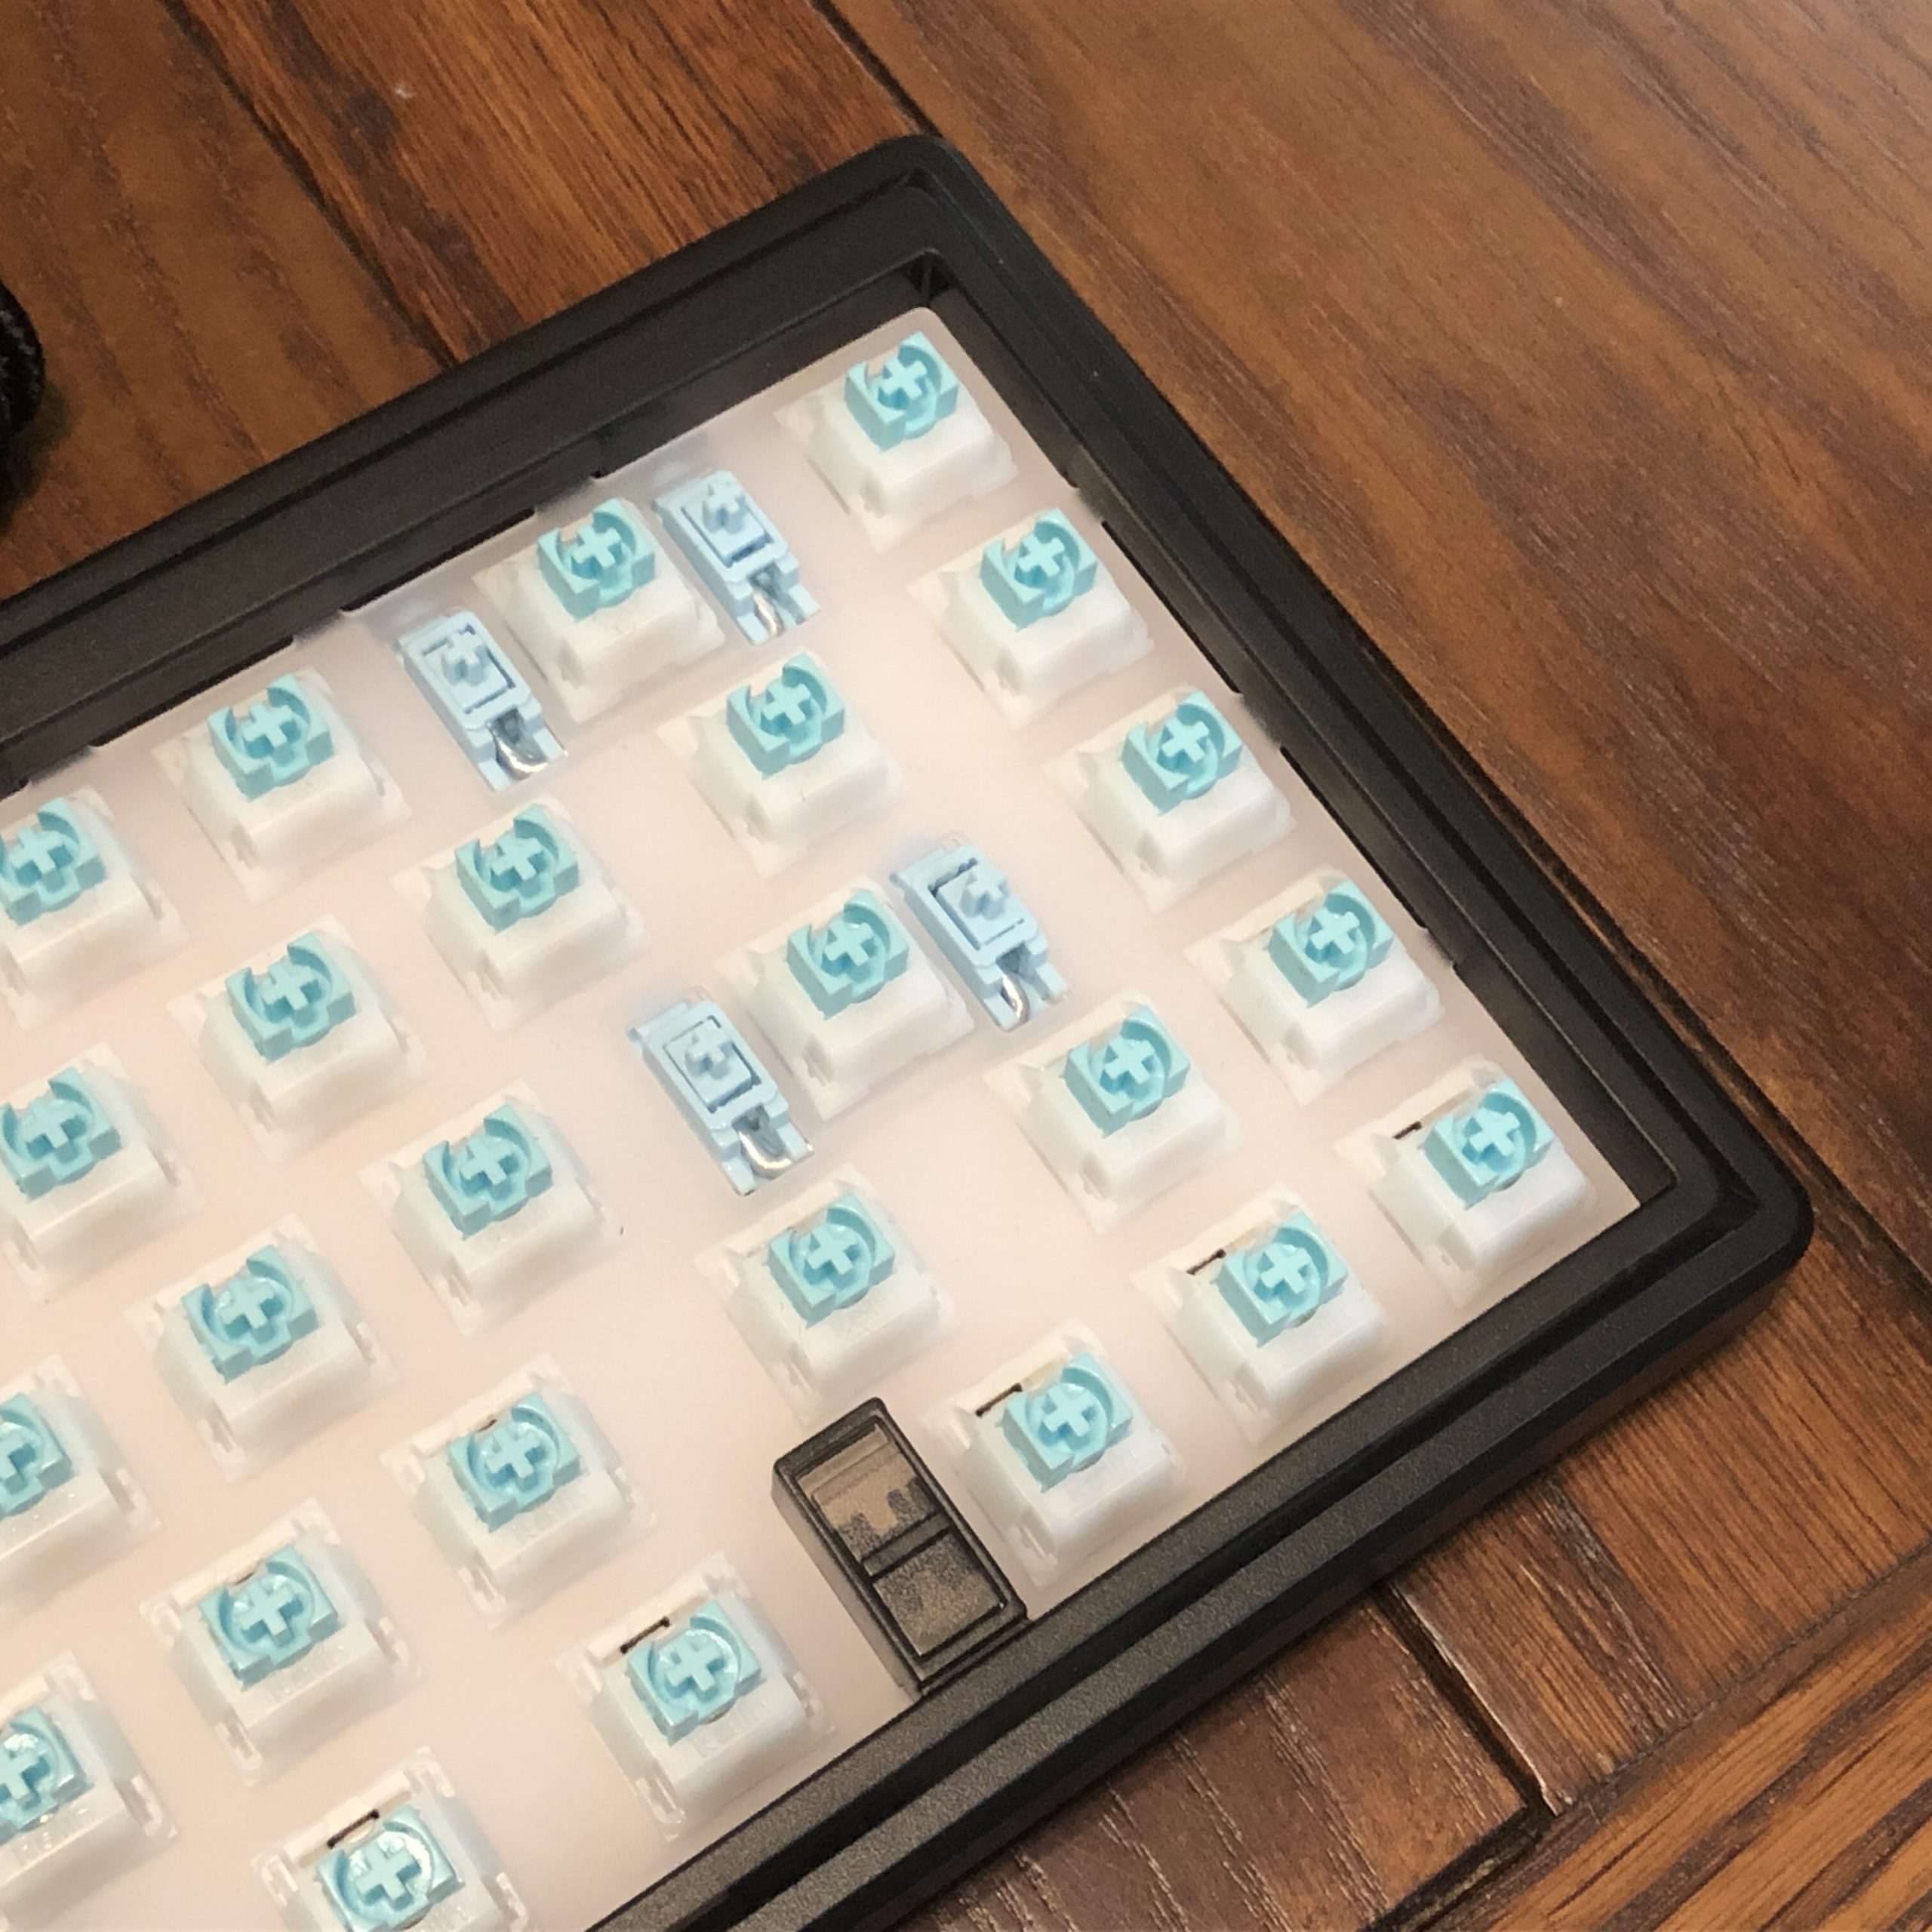
A right-side view that shows the toggle-blocker.
We’ve got a USBC connection on the aforementioned daughter board, which powers some respectably-bright RGB lights. RGB lights positioned to fire straight into shine-through legends. I *know* – trust me – we’re getting there. The PCB accommodates (but of course does not require) 5-pin switches, which is always nice.
There’s the aforementioned function layer, accessible through the FN key(s). This layer gives the user access to all the keys otherwise not included in the layout, and also controls some on-board functions such as all the RGB options as well as toggling a full key-lock. Here’s the default keymap, including the function layer:
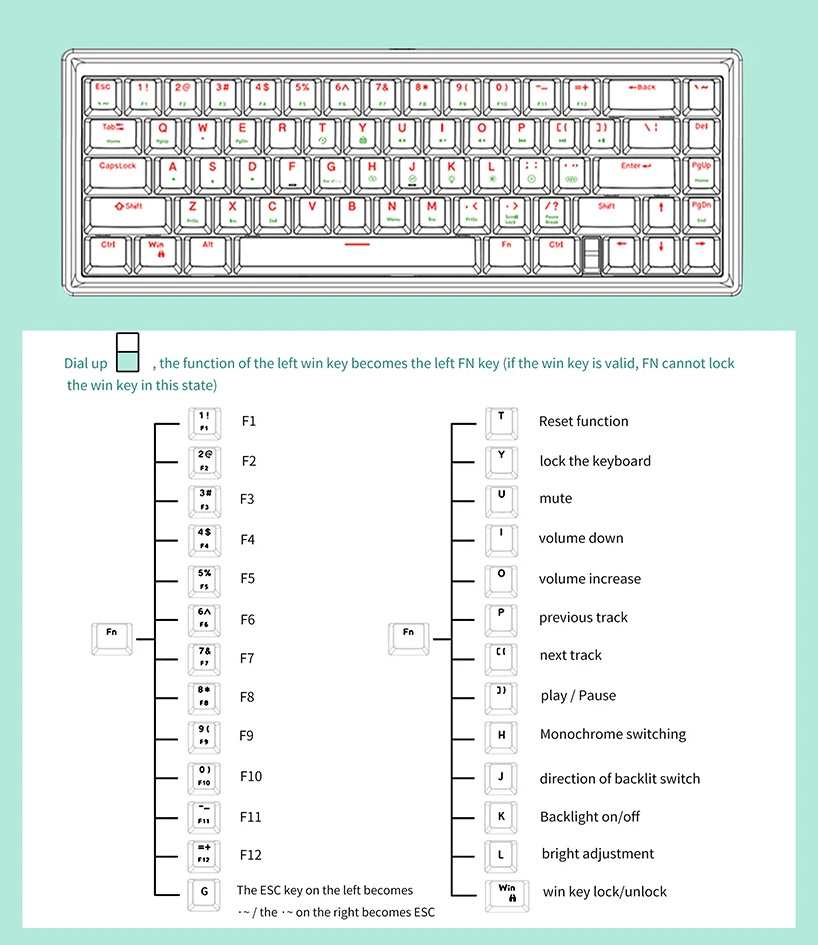
Image from banggood
Speaking of RGB, it’s nice and bright here. It diffuses well through the frosty / milky polycarb plate, (and the milky POM switches and pudding caps I have installed). It has a typical handful of modes and four brightness settings.
Aesthetics:
It’s nothing fancy, and I’m not particularly a fan of the stepped-bevel on the top shell, but I also have no real complaints about the look of this keyboard. It’s simple and minimal, and I think the toggle-switch placement is actually pretty clever and works well with the intention of the keyboard. ~more on that laterrr~
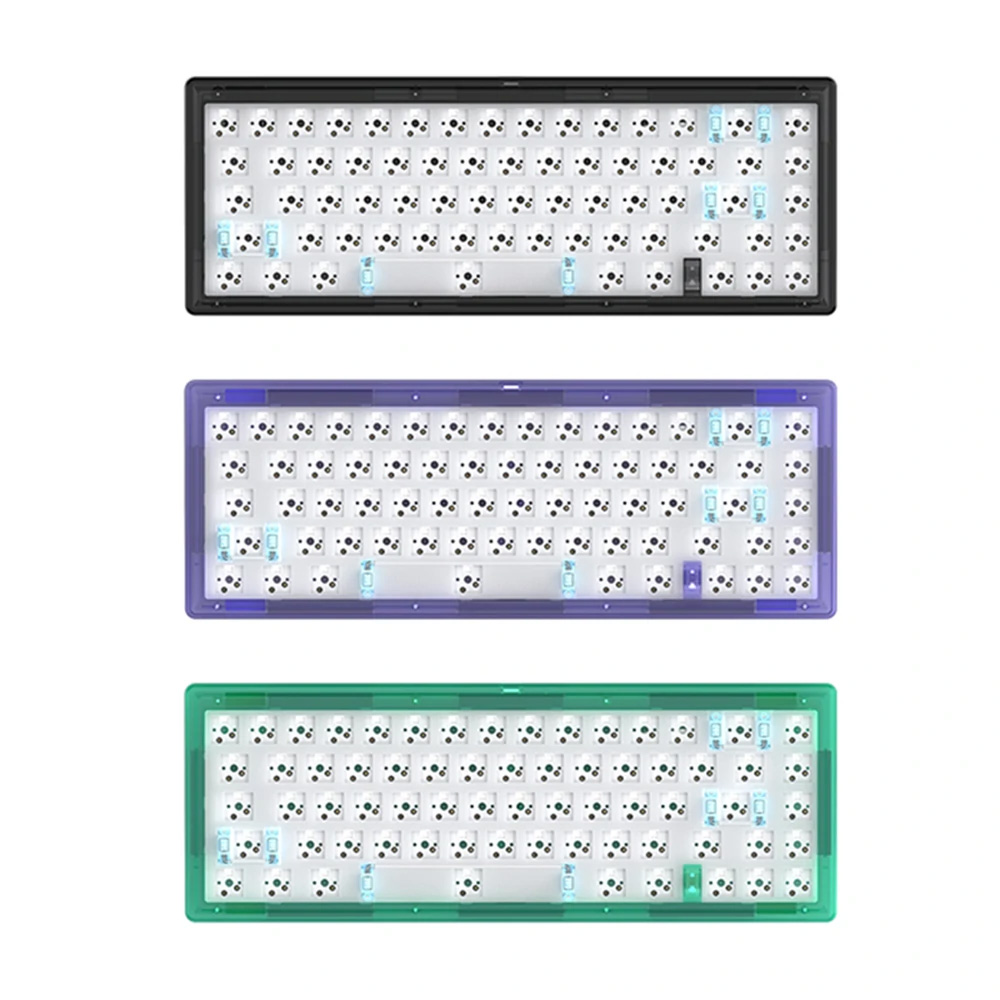
The three currently available colors; image from banggood
The frosty translucent case lets some light through, but the black version I have more or less looks solid at first glance. The bezel is a little chunky compared to your typical minimal design, but it’s not super thick. When looking from above, the thickness it does have is uniform on the front and sides with a little more at the back. Looking at the side, there’s a slight wedge shape to the case. Typing angle is adjustable with the flip-out feet, which have a nice snap-action.
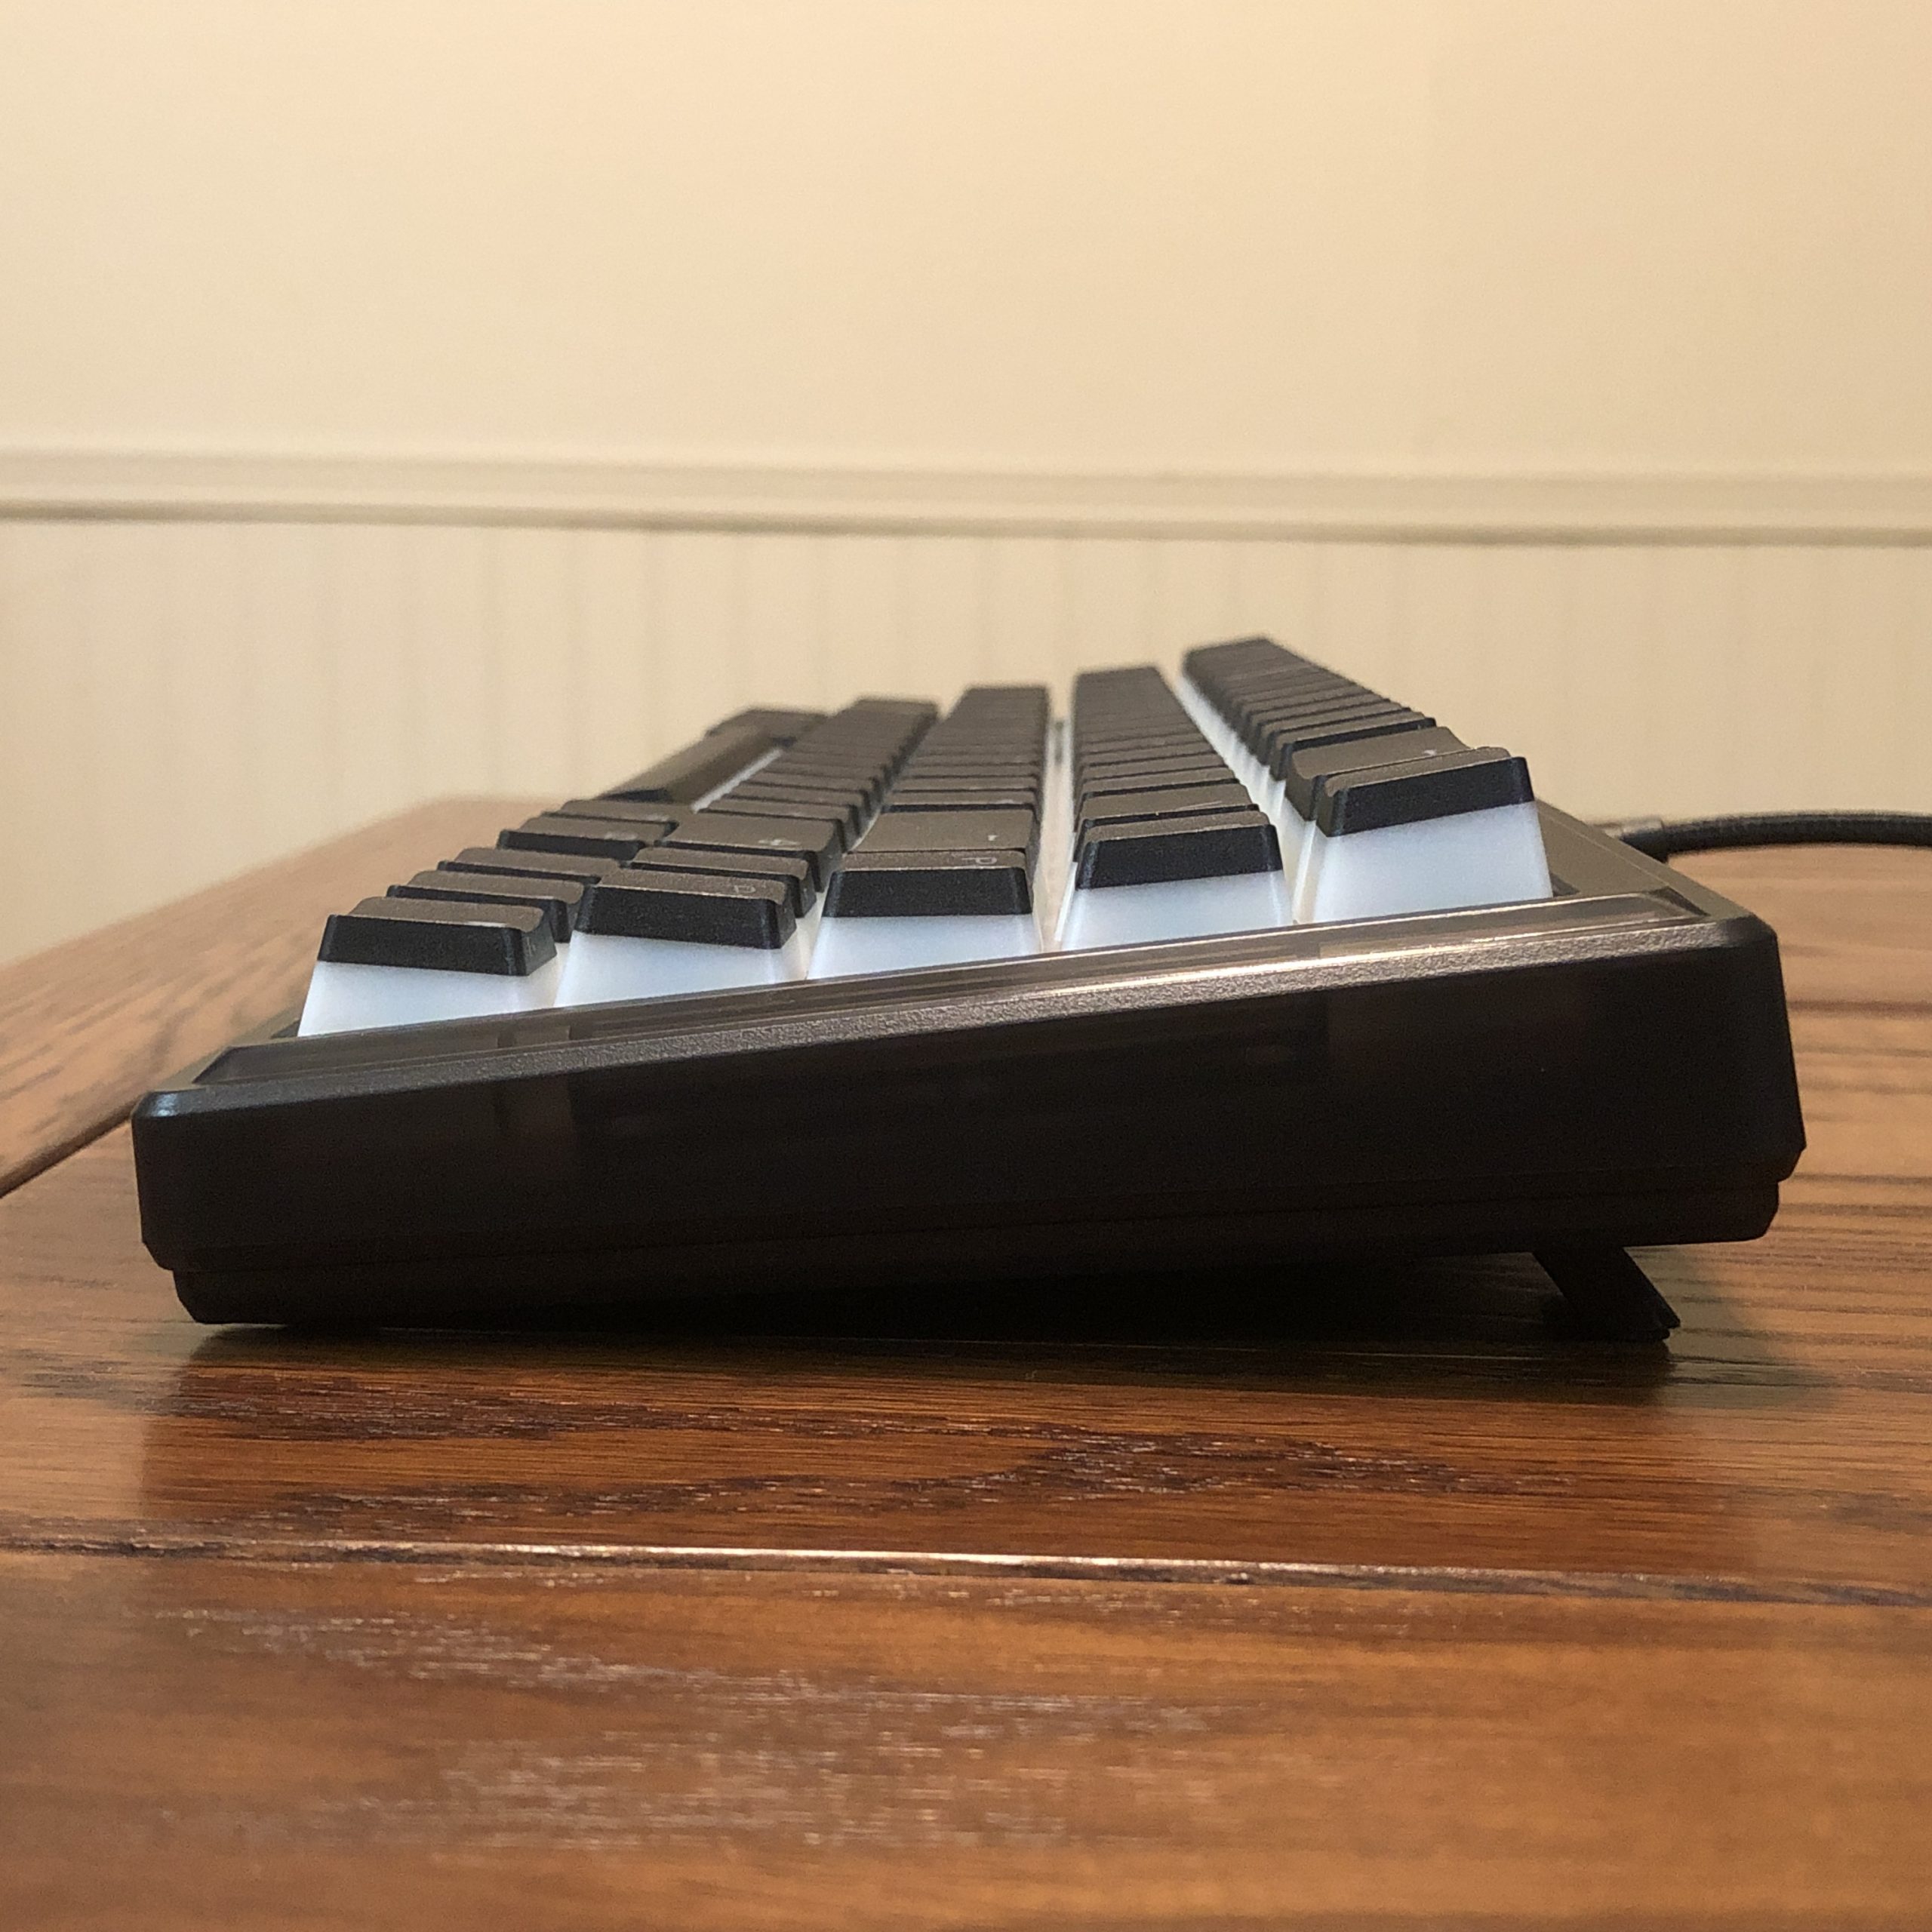
A view from the side; note the slight wedge shape, moderately chunky bezel, and extended flip-out feet.
Functionality:
It works, no complaints. It’s a wired keyboard with RGB, and I haven’t observed any reliability issues. I’ve tested it with one set of switches so far, and haven’t gotten into the software yet – this first impressions review will get an update that includes more information on the software among other aspects of living with the keyboard.
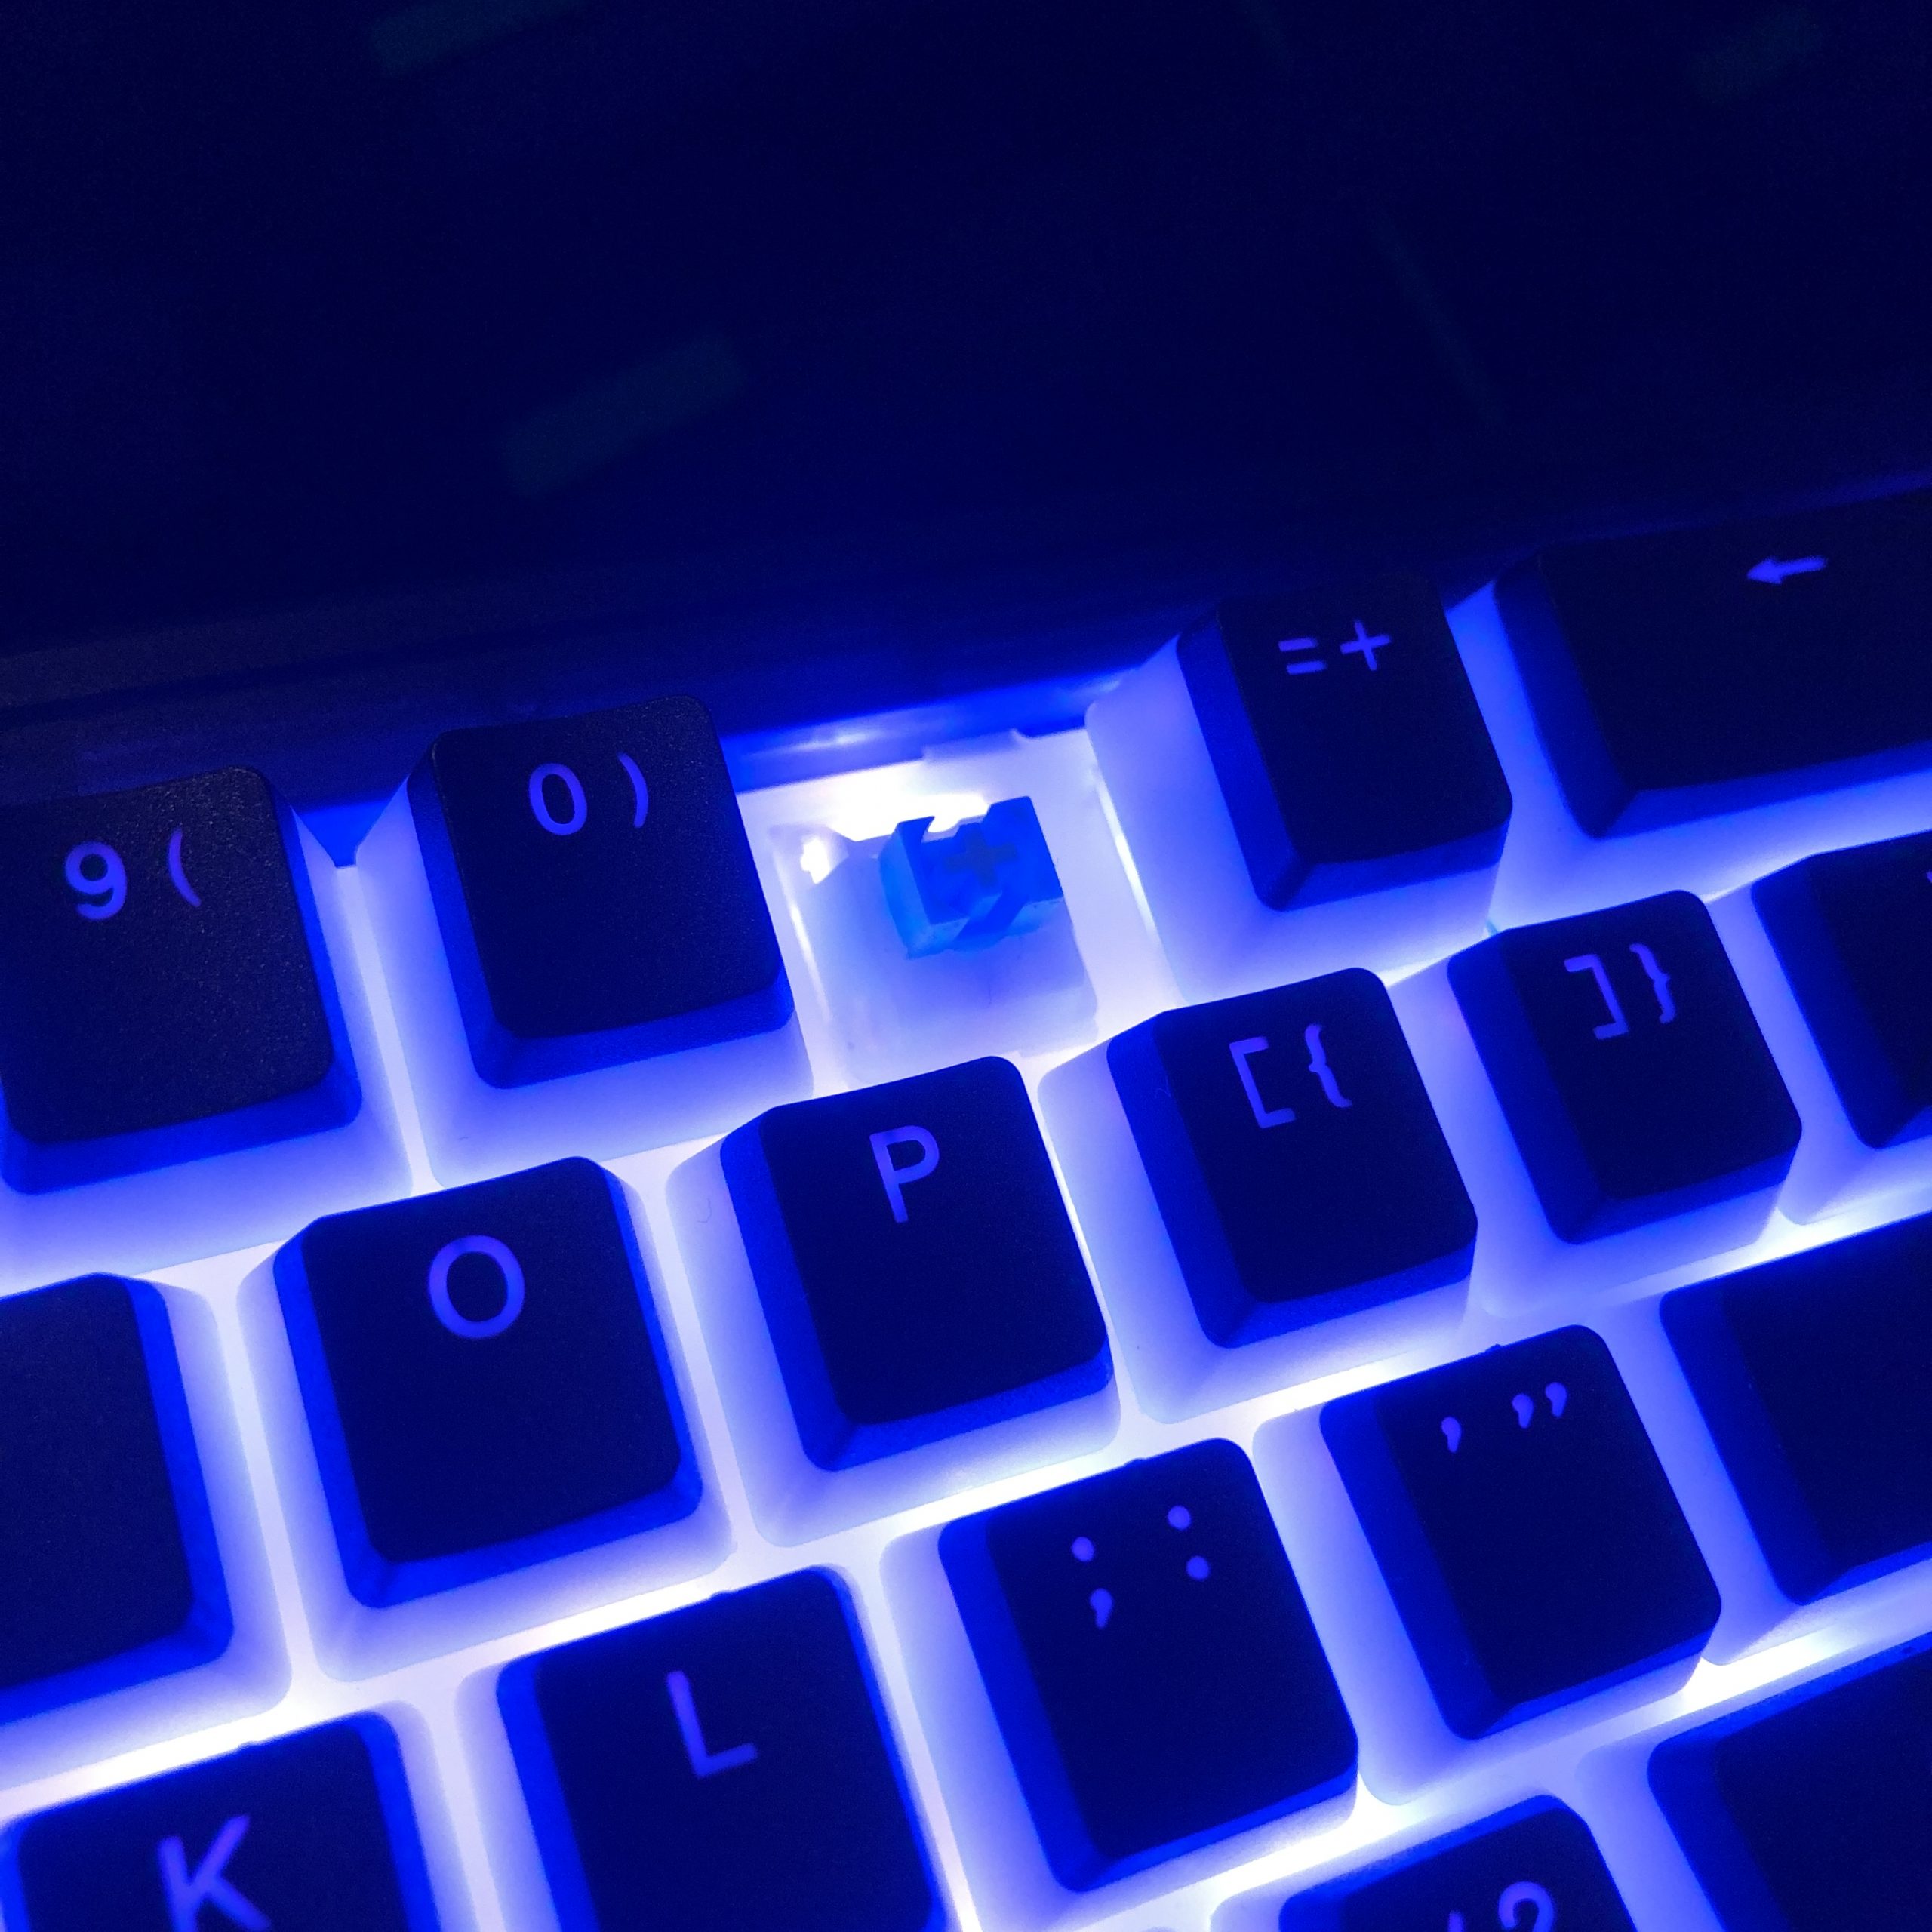
The RGB is pretty darn bright. Seen here glowing its way through a bunch of milky plastic.
Sound:
This is going to depend heavily on the switches and caps installed and I’ve so far only tried one set each with this board, but I can tell you that the plate material, mounting style, and dampening elements do their job when it comes to consistency across the rows and mitigating harsh vibrations.
The all-POM switches and half-POM caps I’m using are on the high-pitched side themselves so it’s hard for me to comment so far on how the chassis affects that; the caps aren’t new to me but the switches are. All that considered I’d say it’s a fairly typical timbre that’s also consistent and relatively free of harshness.
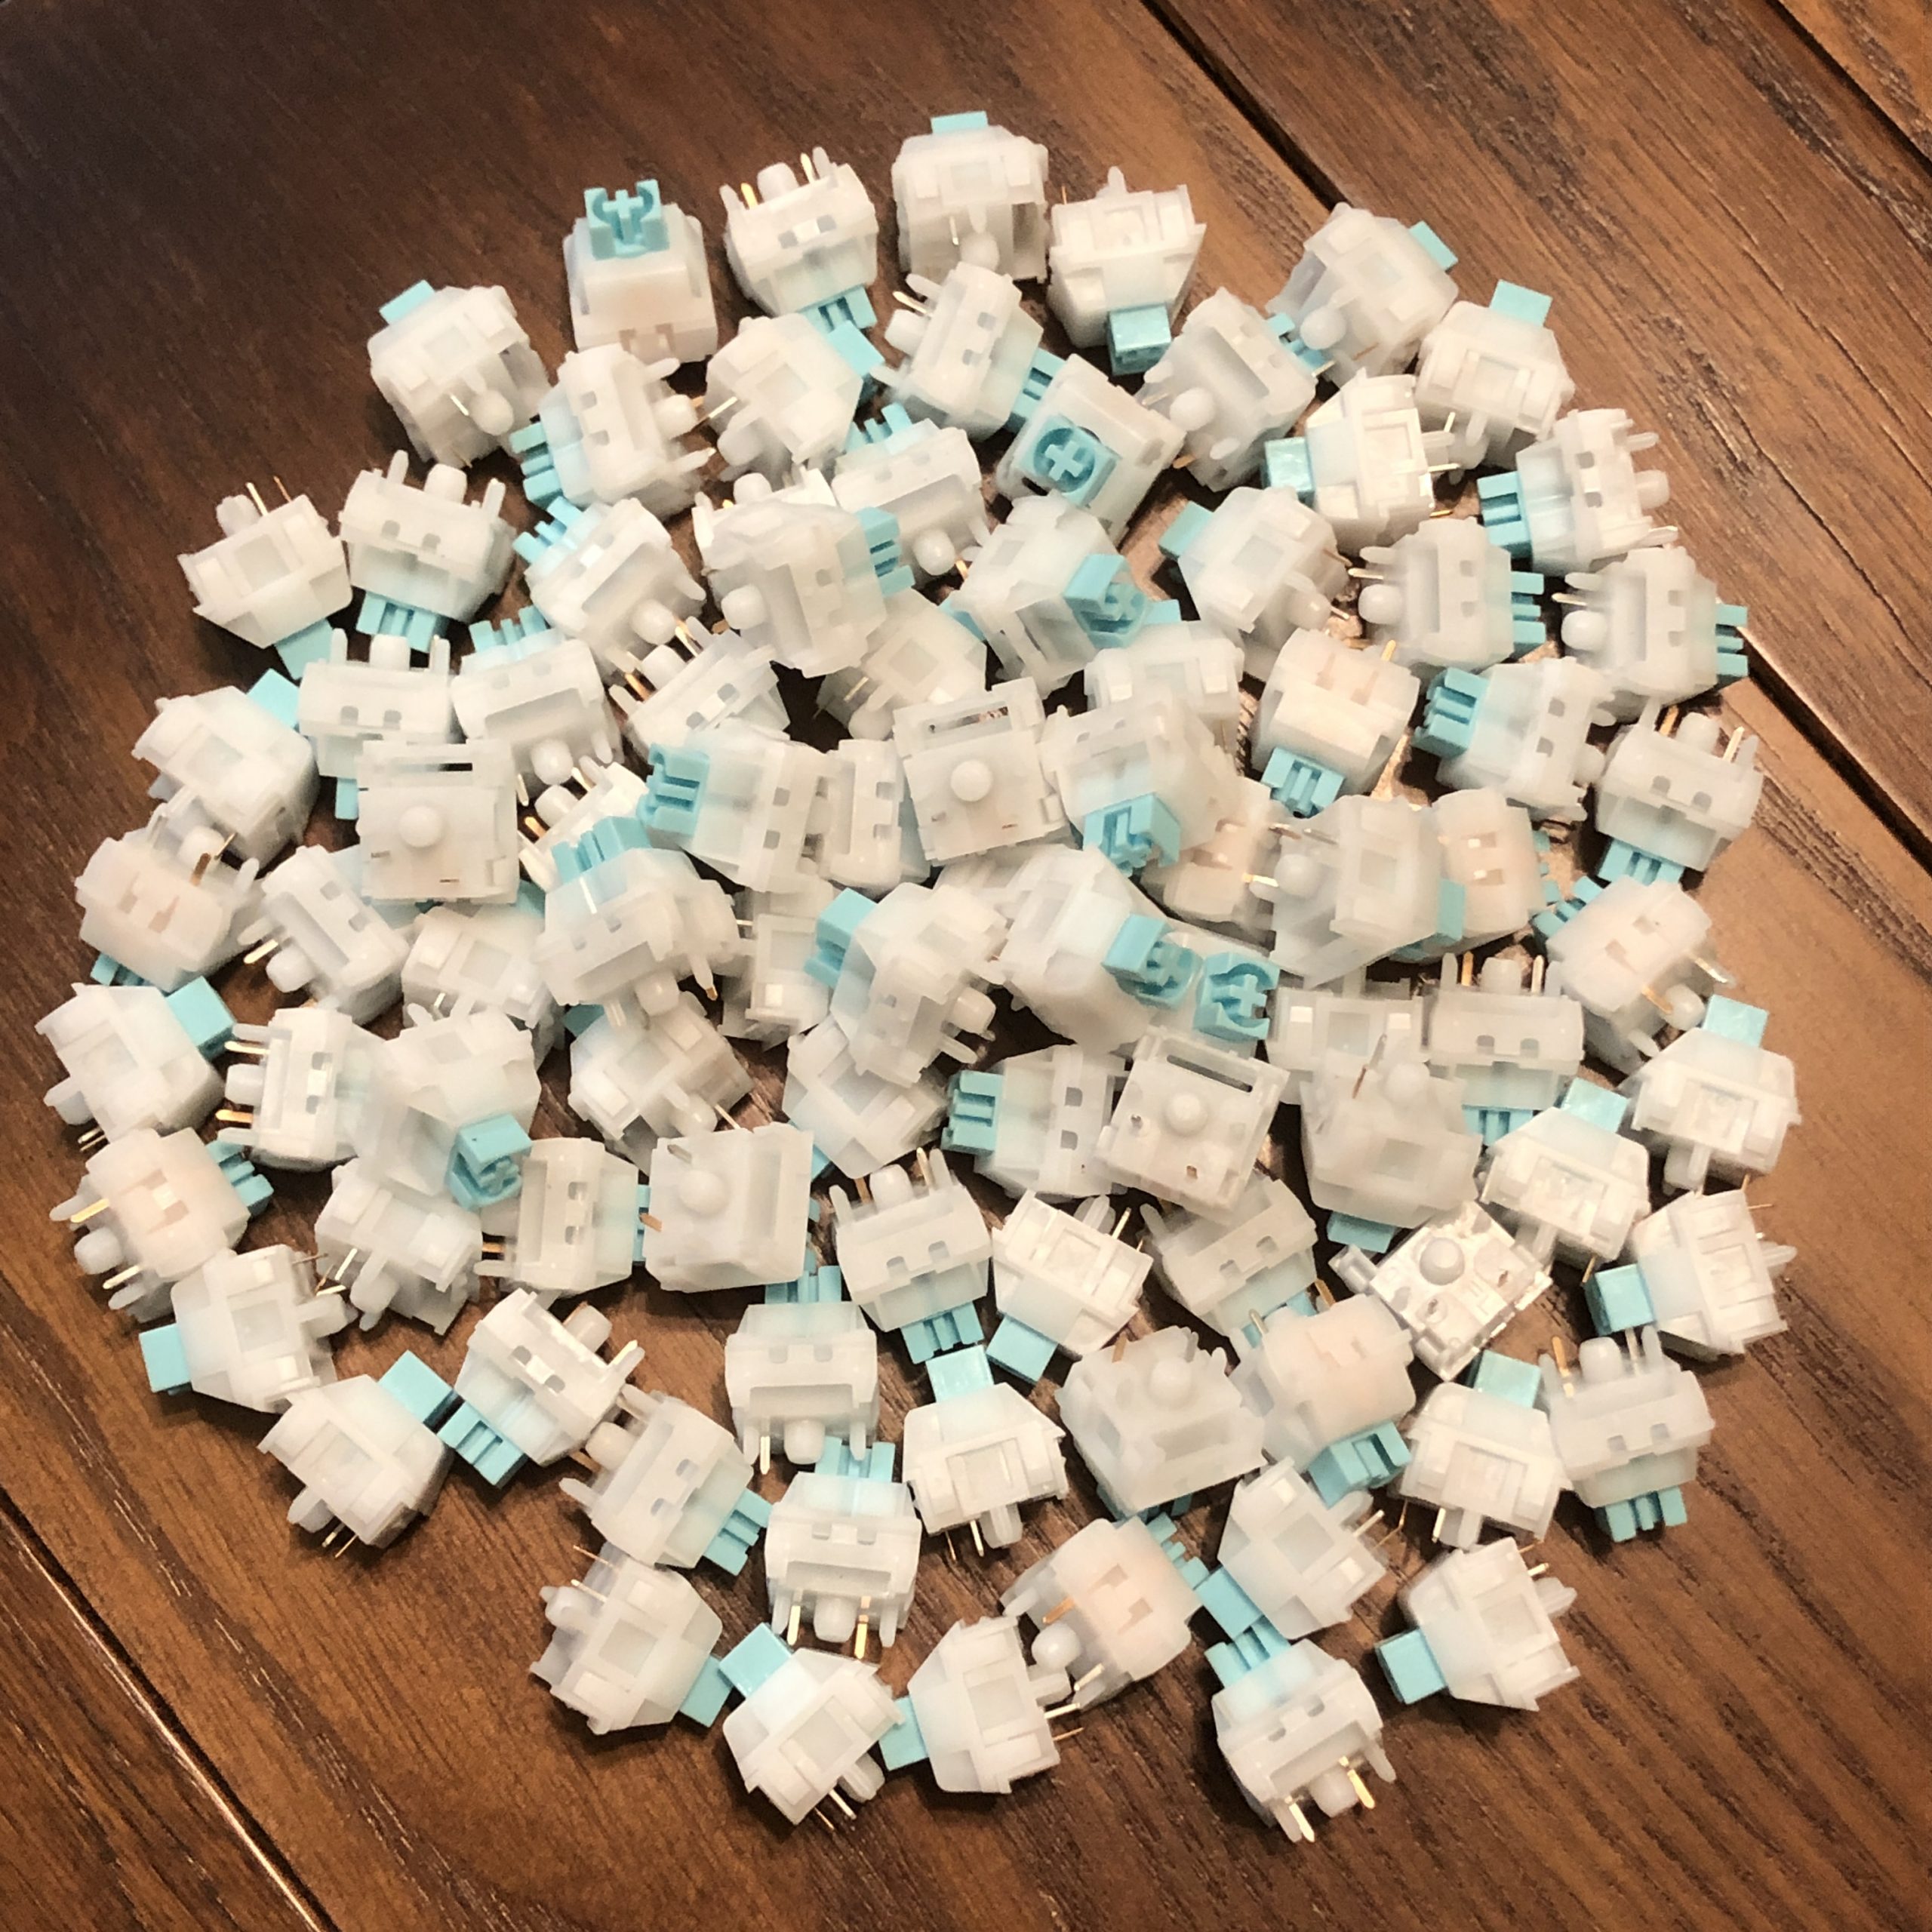
Another look at the all-POM switches I’m using today; Kailh FLCMMK Ice Mints. Smooth, stable, and clacky.
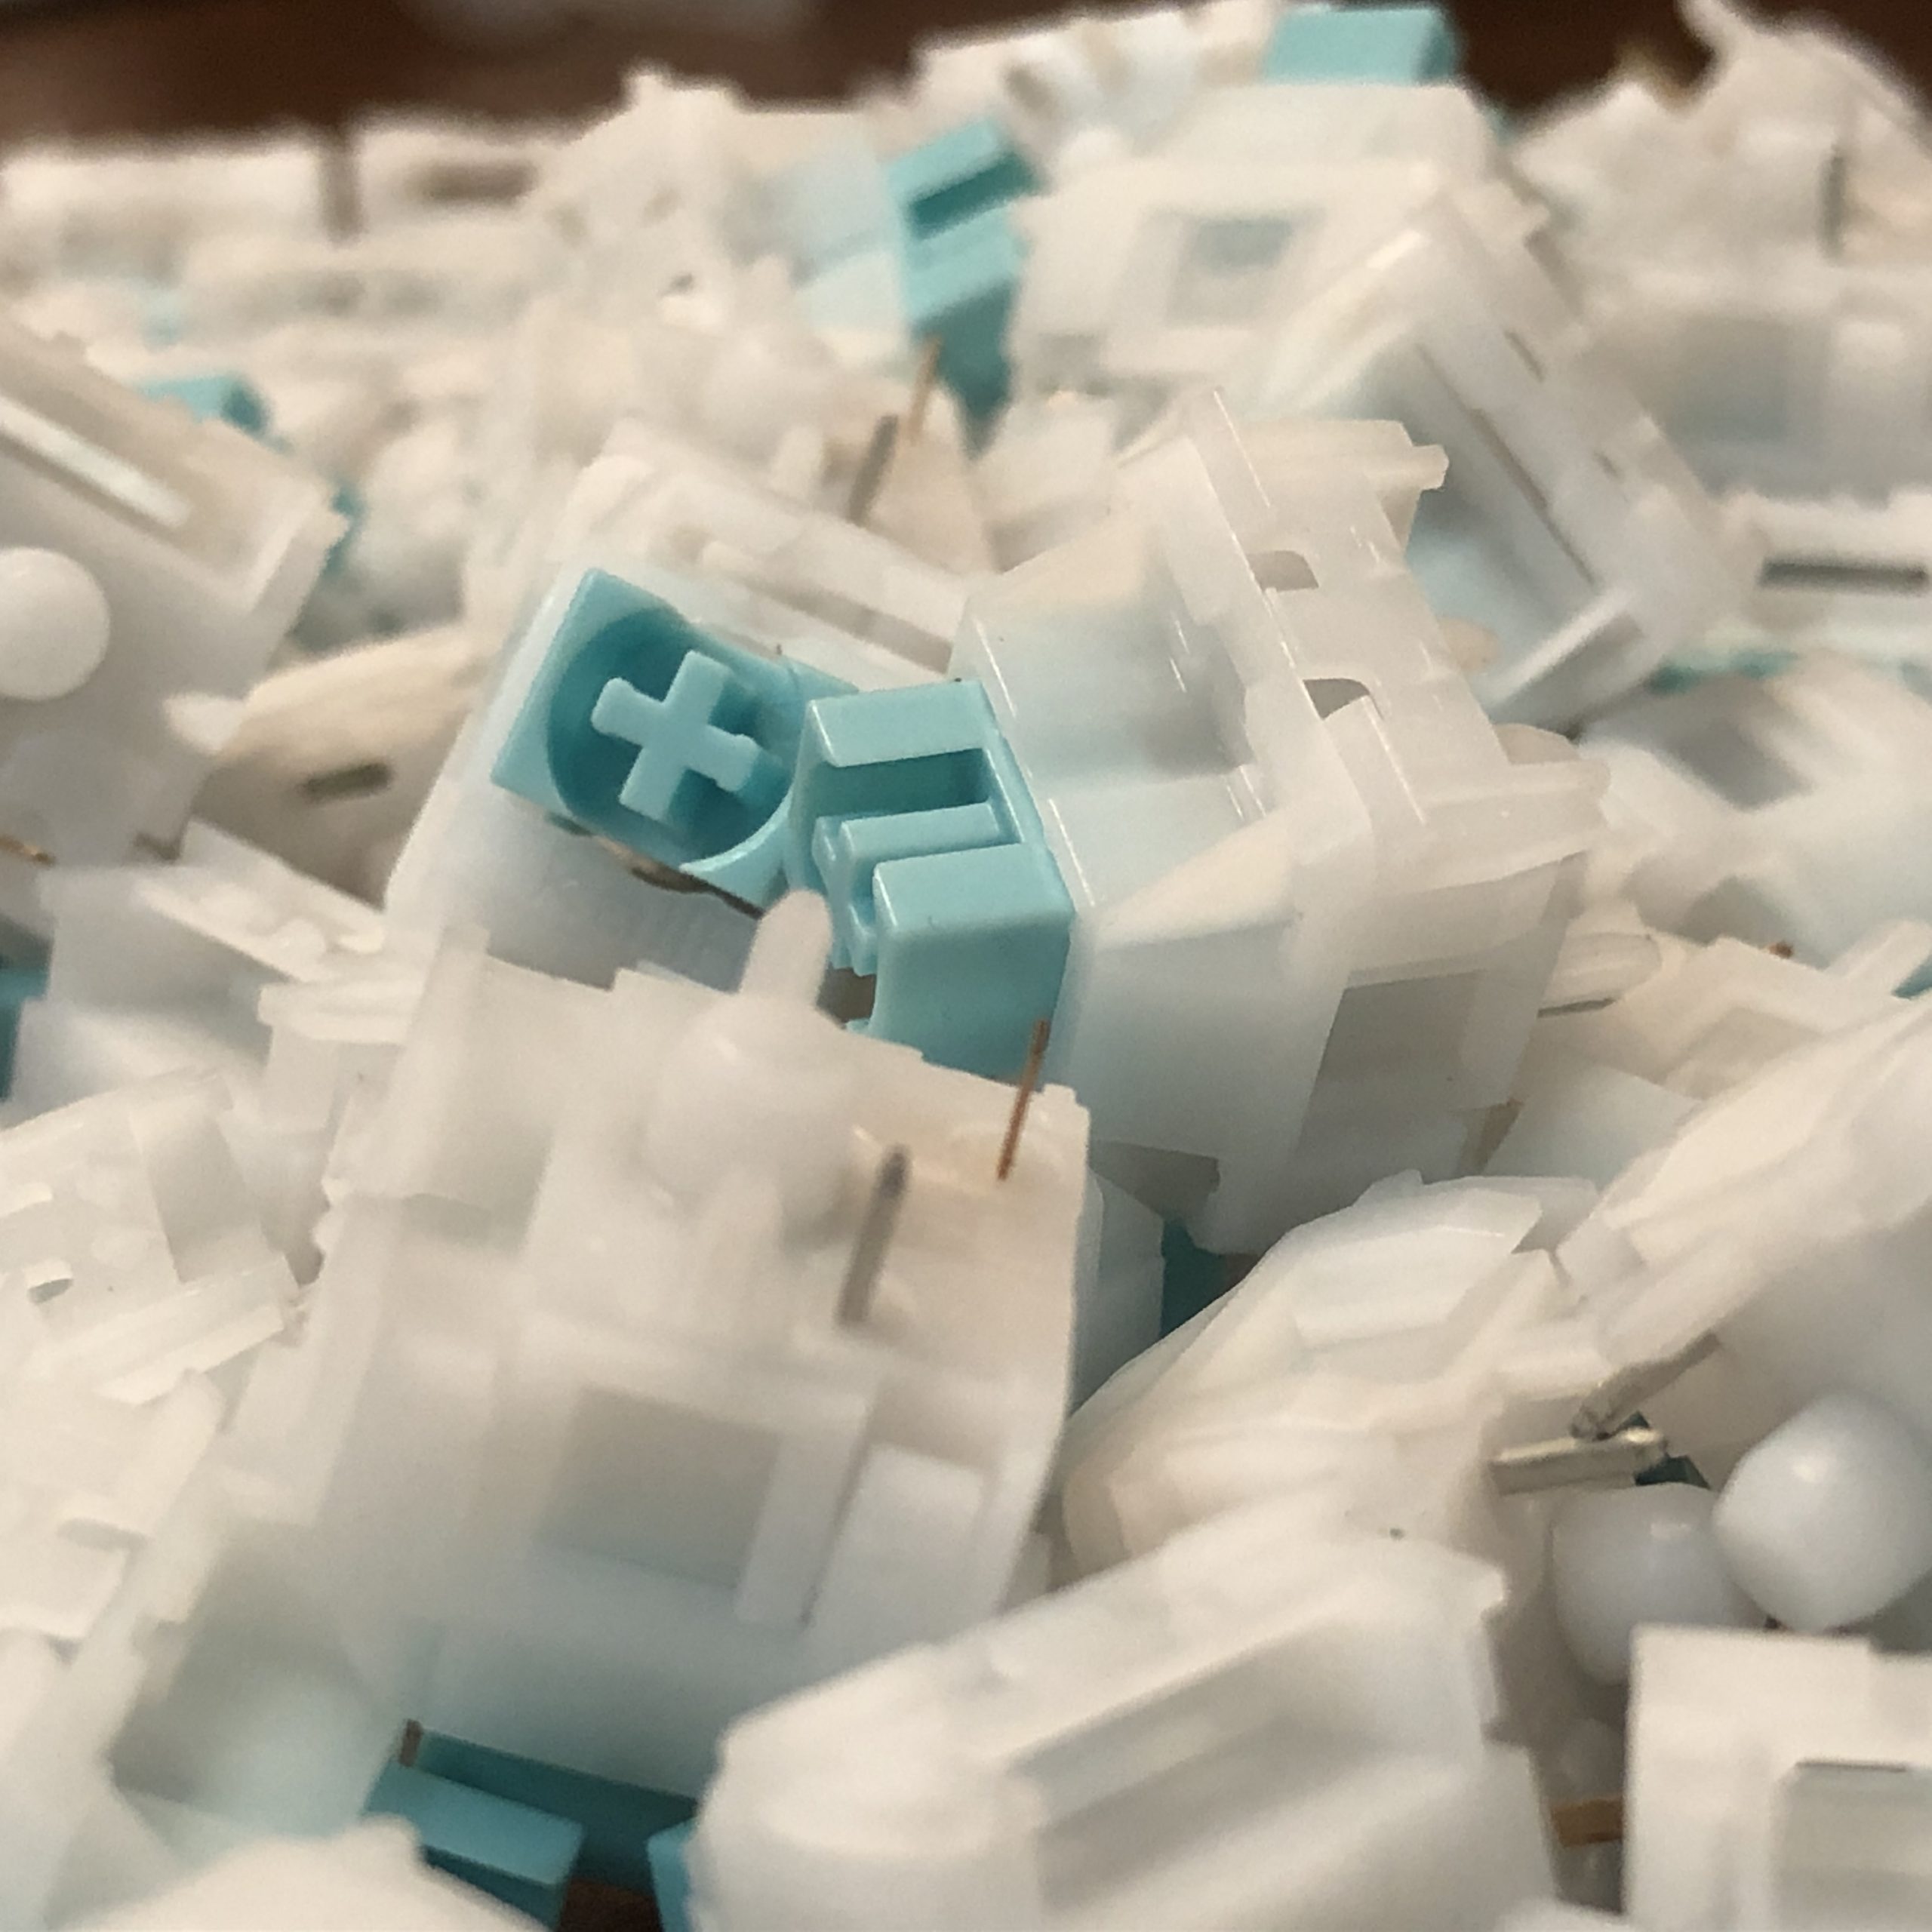
I think they really do match the plate quite well.
Feel:
If the mounting style & plate are the selling points of this keyboard, this is where it really has to perform beyond the aforementioned consistency and cleanliness in sound. This is the make or break performance point for this build – so does it bring home the bacon or swing and miss?
Well, I think it’s pretty good!
After a week or so of being positively spoiled by the Portico68 Black Label, a keyboard that costs around 5x what this one does if we’re comparing the barebones kits, I’m impressed with how well this budget keeb stacks up when it comes to feel. (I don’t think it can compete as much with sound, but at this price point it’s impressive how much it does.)
Specifically: the mounting has been executed successfully.
The polycarb plate does its job, and so does the gasket mounting. Impacts are dampened, and have a slight bouncy reverb to them. As mentioned before there’s a bit of deck flex; maybe not a ton but hey, more than any version of the KBD67 or Portico! The gaskets aren’t the fanciest or most nuanced – but they do work, and that’s pretty awesome.
Value:
That’s right, folks – it’s legit.
You can get a gasket-mounted keyboard for less than a hundo all-in. Price ranges from a little over $50 to around $70 with some people trying to hawk them for just under $100 on ebay. At $70 this is the least expensive competently-executed gasket keeb kit I know of (at time of writing, of course), and represents a major shift foward in the budget landscape. At $50 it’s a straight game-changer, no less than the KBD67L before it.
I’ve haven’t had a ton of time with it yet, but I don’t have any trouble telling my fine readers that I think this kit is a great value in general. If you’re still considering whether or not the kit is right for your use-case, the next section is here to help you off the fence into the greener pastures of yay or nay.
Who is This For?
As much as sharing this keeb with folks in general, this question is the biggest reason I wanted to write this review sooner rather than later.
Yep, it’s finally time to talk about the North-facing sockets, and come-around to why this keyboard is included in the WiTF series.
Who is this keyboard for? I think that’s a genuinely important question to ask when assessing its value for an individual buyer. While I think it’s an objectively good deal, generally speaking, it still might not be a good choice depending on what one is looking for; so let’s hone-in on that.
Two things I think make this a gaming-focused keyboard:
1. RGB (and specifically shine-through performance) is prioritized over custom keycap compatibility; this is dialed for pudding and other shine-thru caps, not GMK, and that’s a concious choice with its target market in-mind
2. The dedicated switch sitting in the blocker has one job: turn the Windows key into a second FN key. Like a win-key lock, but with a little more utility. The only user-group in particular I know of that prioritizes disabling the OS key would be keyboard-and-mouse gamers, and this feature is given priority for them.
If you’re looking to dip your toes into the custom keyboard market, this might be one of the cheapest and best for buck options out there right now no matter how you slice it – but I think who this is really for is the gamer who wants to enjoy some of the benefits offered by custom keyboards without sacrificing great RGB.
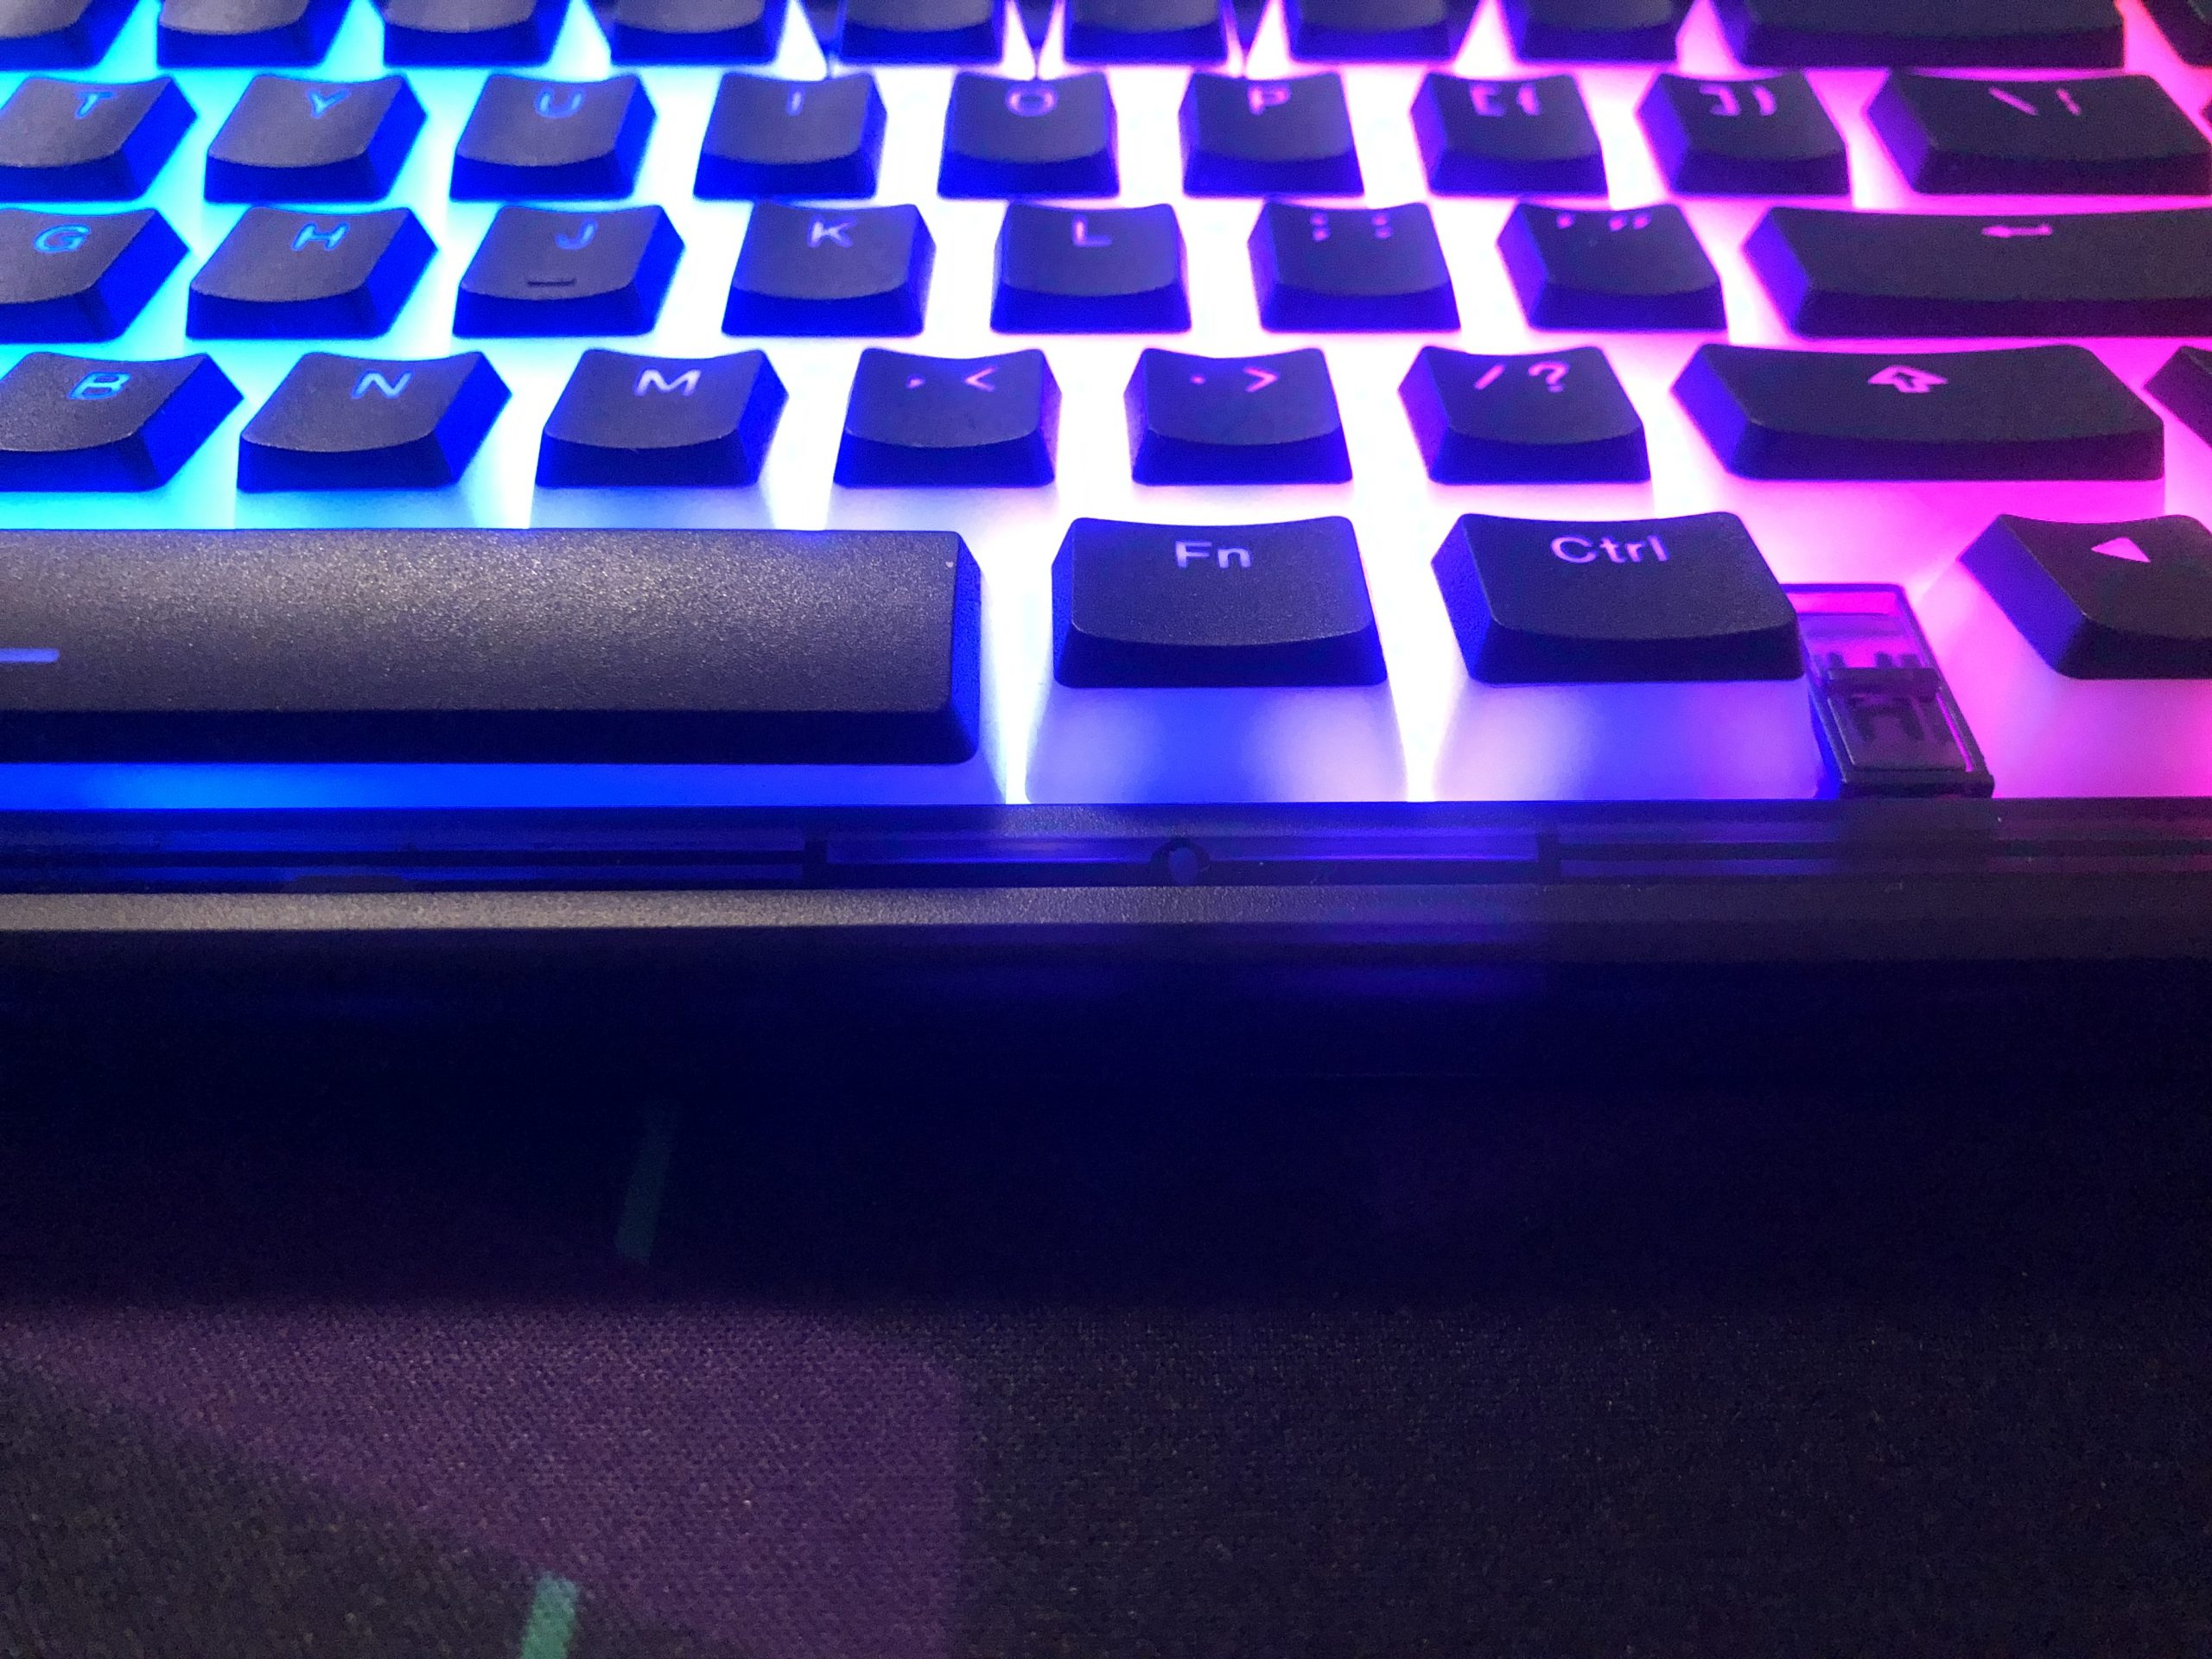
It’s bright! Here you can see it peeking through the case as well.
I think one reviewer I happen to be a fan of said this keyboard’s “fatal flaw” is that it has North-facing switch sockets (meaning this keyboard won’t play nice with popular expensive keycap brand GMK, whose caps are patterned from Cherry’s original standard). I don’t really think that’s a flaw for this keyboard, as much as I’d personally appreciate GMK compatibility.
As a fairly budget-oriented gaming keyboard, I think North-facing sockets is exactly what it should have.
No – I think this keyboard’s actual “fatal flaw” is that the case has plastic screw-holes and self-threading screws. In one swoop that pretty much kicks this keeb out of what I’d consider the “hot-swap” category and firmly into what I call the “solder-free” category.
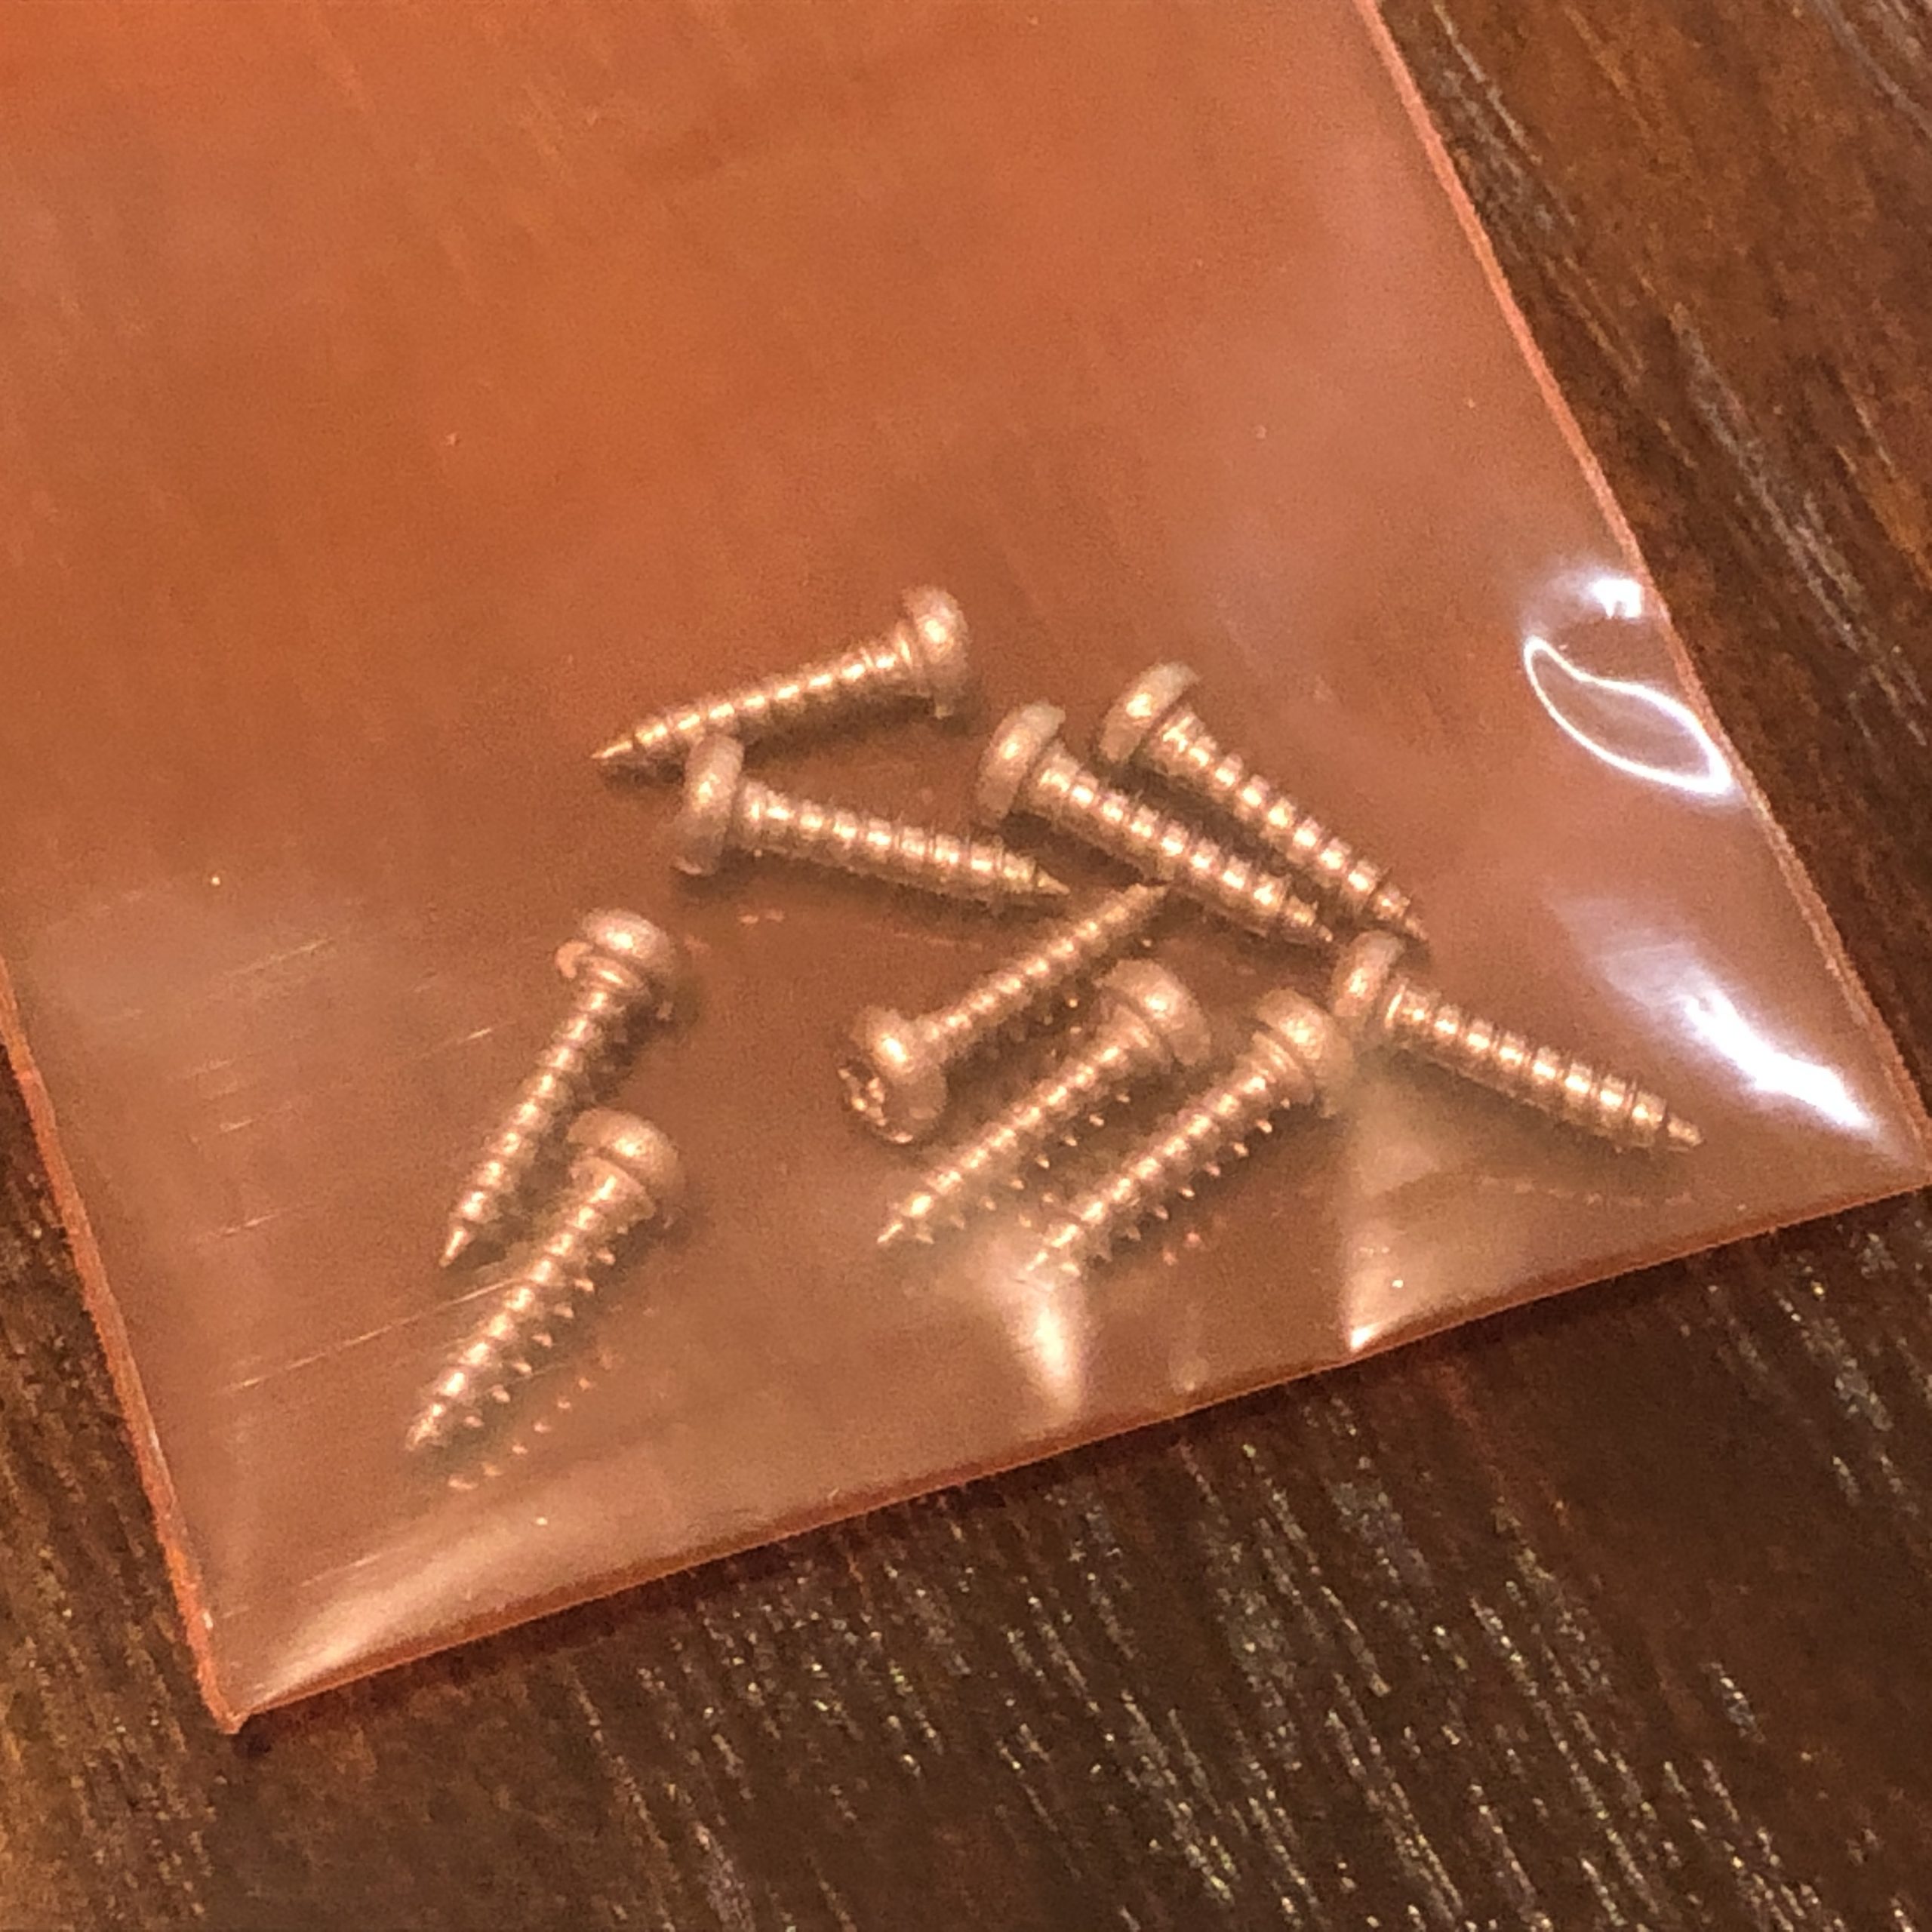
The real “fatal flaw” – self-tapping screws and soft plastic holes to thread them in.
That is, this keeb is not suitable for frequent switch swapping – but – you also don’t need a soldering iron to assemble it.
You can change the switches a few times without major consequence – but much more than that and the threads will start to give out. Adding metal inserts here would literally be the only thing I’d change about this board. CIY if you ever see this – revise the case to include those and make that case available as its own product as well, for those of us who already own the GAS67 but want to turn it into a switch testing platform without chewing up the case!
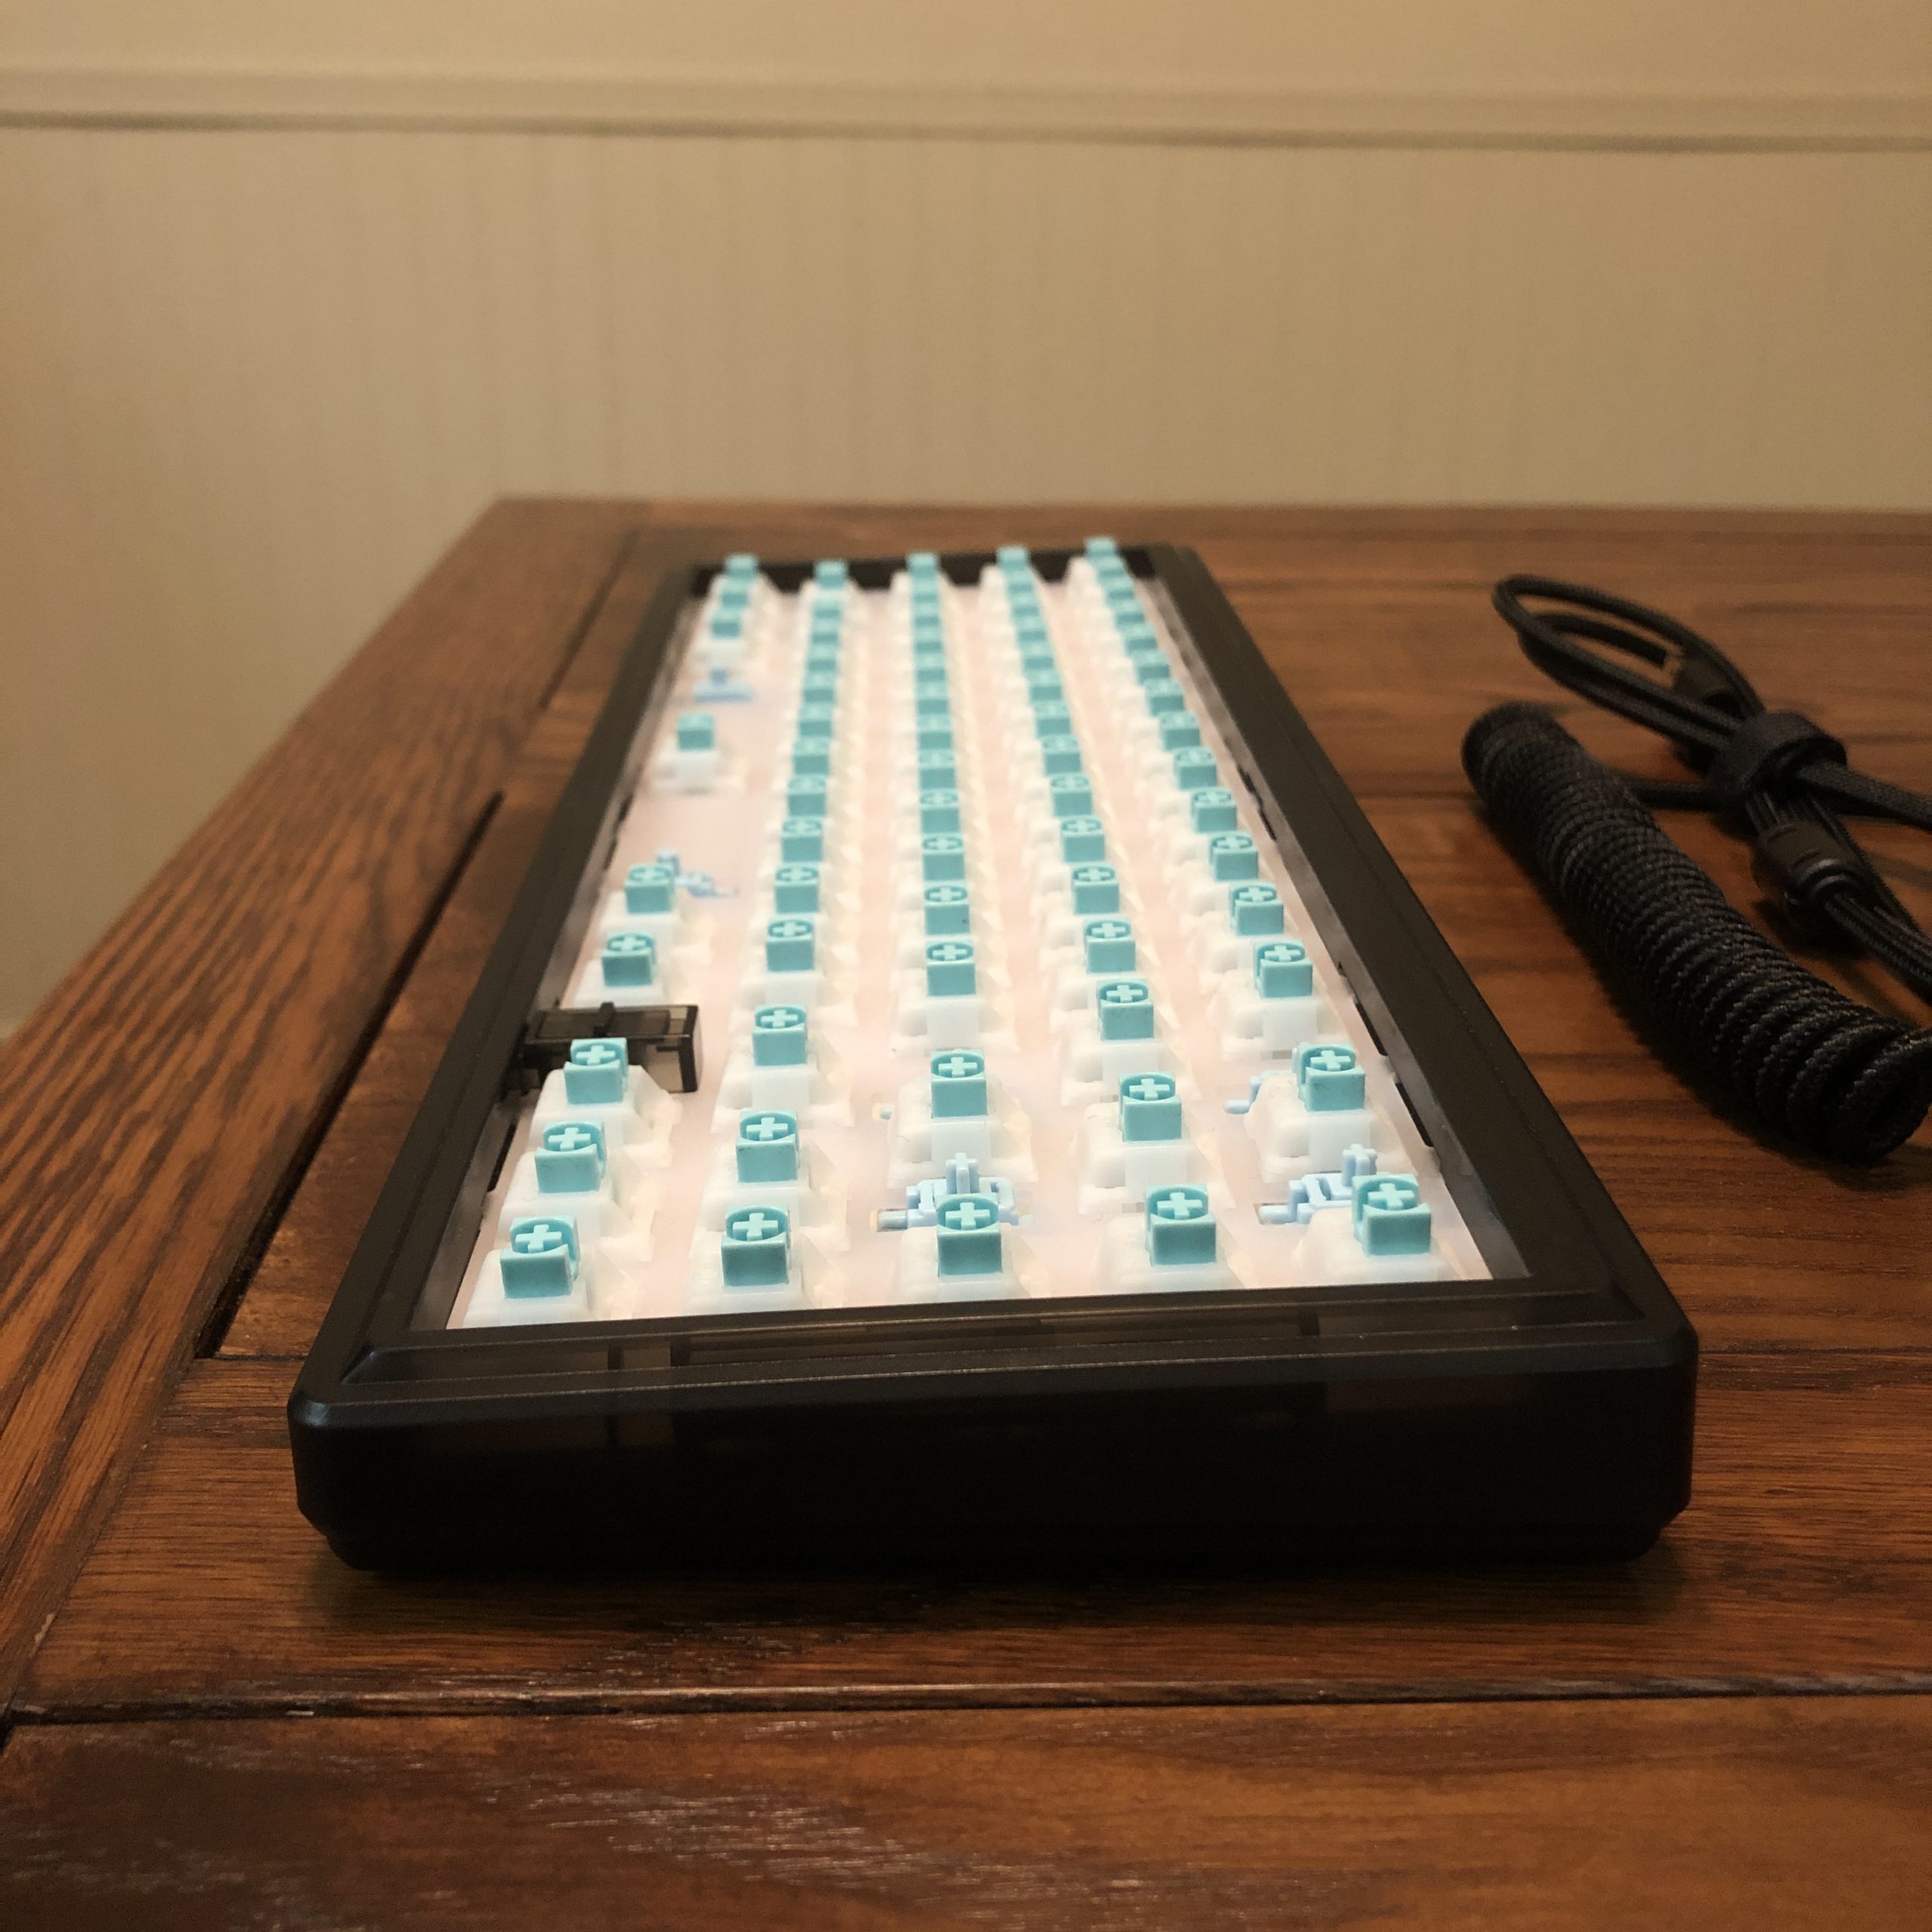
Another side view; here you can appreciate the subtle transparency of the black case.
I think this fact does represent a knock against the keyboard for a potential enthusiast, but for someone who is buying this thing for its function as a solder-free gasket gaming keyboard, I don’t think it’s too much of a problem – especially considering the price. You build it, you use it. Maybe one day you decide you want different switches – no problem, don’t even need a soldering iron and the board comes with the tools to switch them.
If you’re really interested in trying lots of switches, though, this might not be the very best choice owing to those plastic case threads. The sockets will last a lot longer if you support them from below while installing switches – and you can’t do that without opening the case – which you can’t do without putting significant wear on those threads. You can still use this keeb as a switch testing platform, but you’ll either need to really trust yourself with lining up pins or be at peace with the fact that those threads will not go the distance. If you’re planning on testing lots of switches, maybe consider a Portico instead – you’ll get a lot more durability for that particular use-case for your extra money.
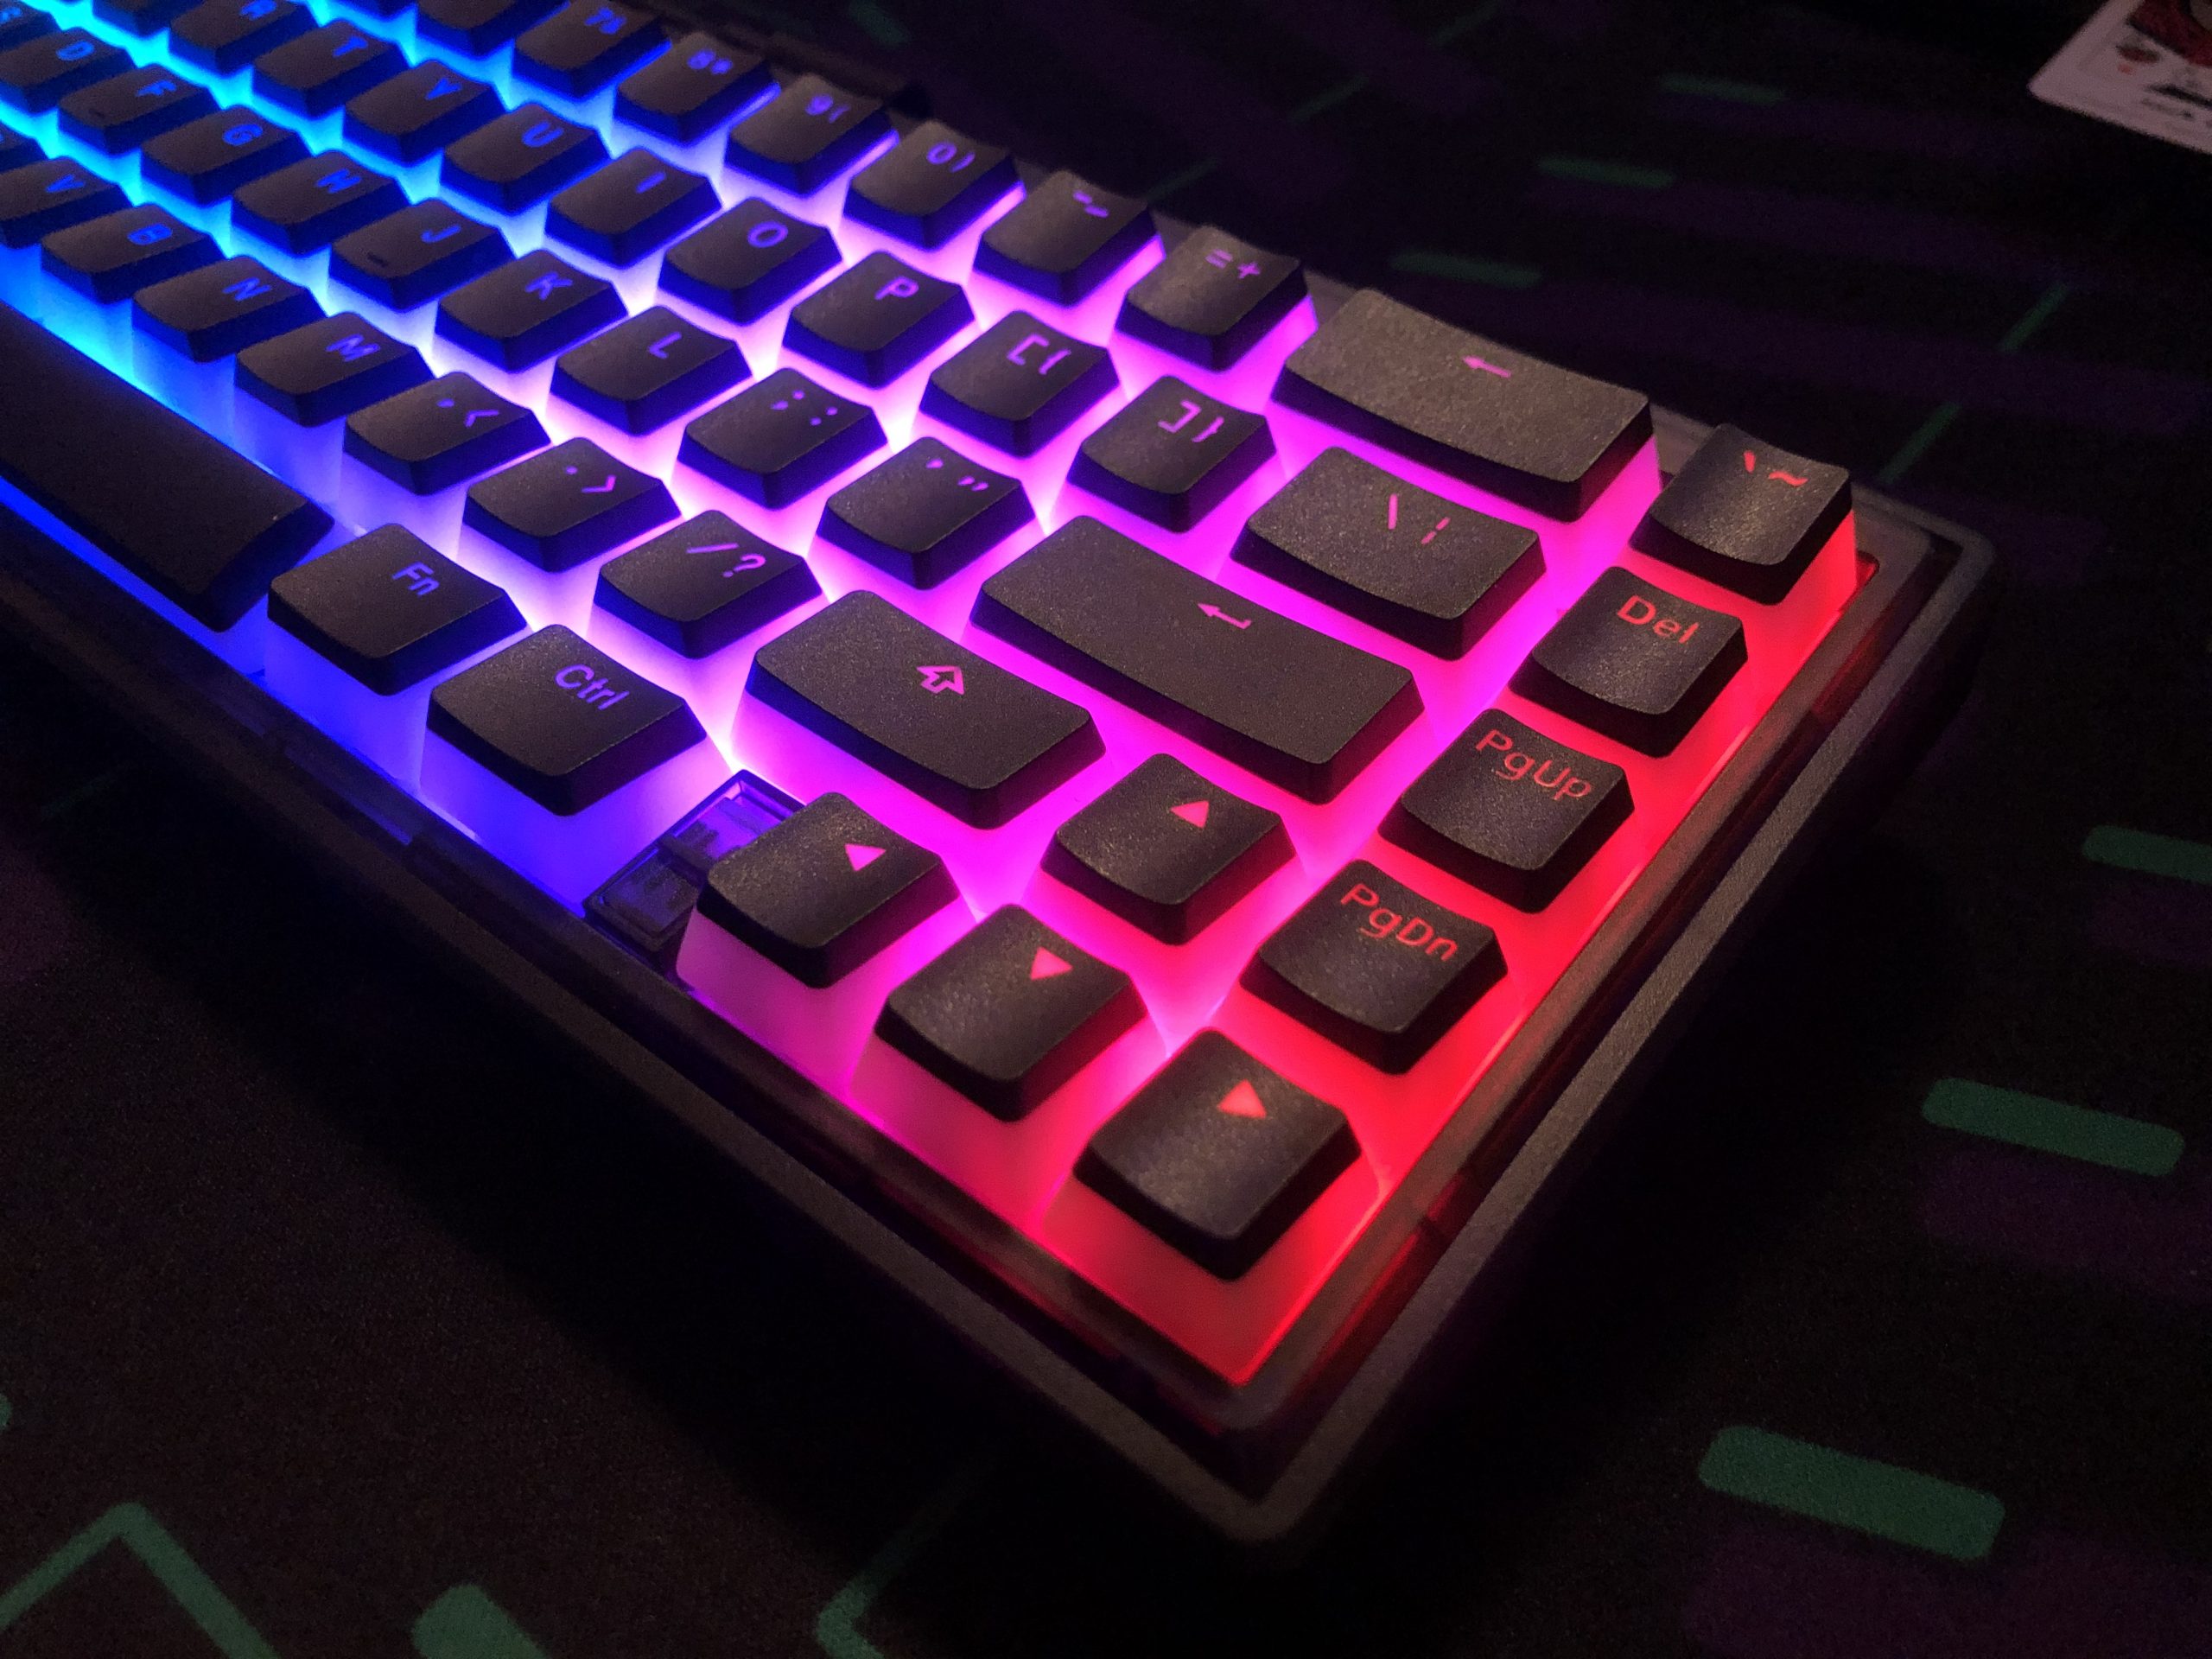
The RGB color really is no slouch on this keeb.
So, all that being said, I think the CIY GAS67 is a fantastic option for a gamer that wants a better, more consistent experience than the typical gaming keyboard provides – and at very least a decent and inexpensive option for those wanting to dip their toes into the pool of custom keyboards (or at least some of the features they’re famous for) without committing to a big expenditure up-front. For keyboard customers on a tight (specifically $100 or less) budget that really want to squeeze the most typing quality out of the least money, well, they could do a lot worse than this keyboard – and I think they’d find a challenge in doing better.
Alright! That’s all I have to say about the CIY GAS67 for today. This has been Deadeye Dave – thanks very much for reading, and whatever you’re typing on today, remember to enjoy it!

