Who is This For ep. 2 • CIY GAS67 • First Impressions Review


Introduction:

Hello and welcome to the second entry in my WiTF review series, where I focus on the question, “Who is This For?”

I include reviews in this series if I feel there’s something about the product that places it firmly in one demographic category or another – or if there’s something about the product that defies being categorized demographically. Cases where one market may see a decision as strange while another may appreciate the choice.

We have one such product on our hands today, and I intend to explore where it fits into the greater keeb-verse as well as relate my first impressions of real-world use. This is not a sponsored review; I was just curious and bought a GAS67 for the purpose of writing one. Let’s get right into it!

Promotional image for the GAS67 from banggood

Today we’ll be taking a look at the CIY GAS67; a budget bare-bones kit featuring a gasket mounting system.

That’s right, folks – gasket mounting has officially landed in the budget sector. Have the benefits of this innovation truly trickled down to modestly-priced keyboards? Is the middle market dead? Are customs redundant!? Hyperbolic attention-hooks aside, let’s find out.

RGB go brrrrr

TL;DR bullet-points:

· Very hard to beat for the price
· Only complaint is no metal inserts for the case screws
· Otherwise a fantastic kit

Other points of interest:

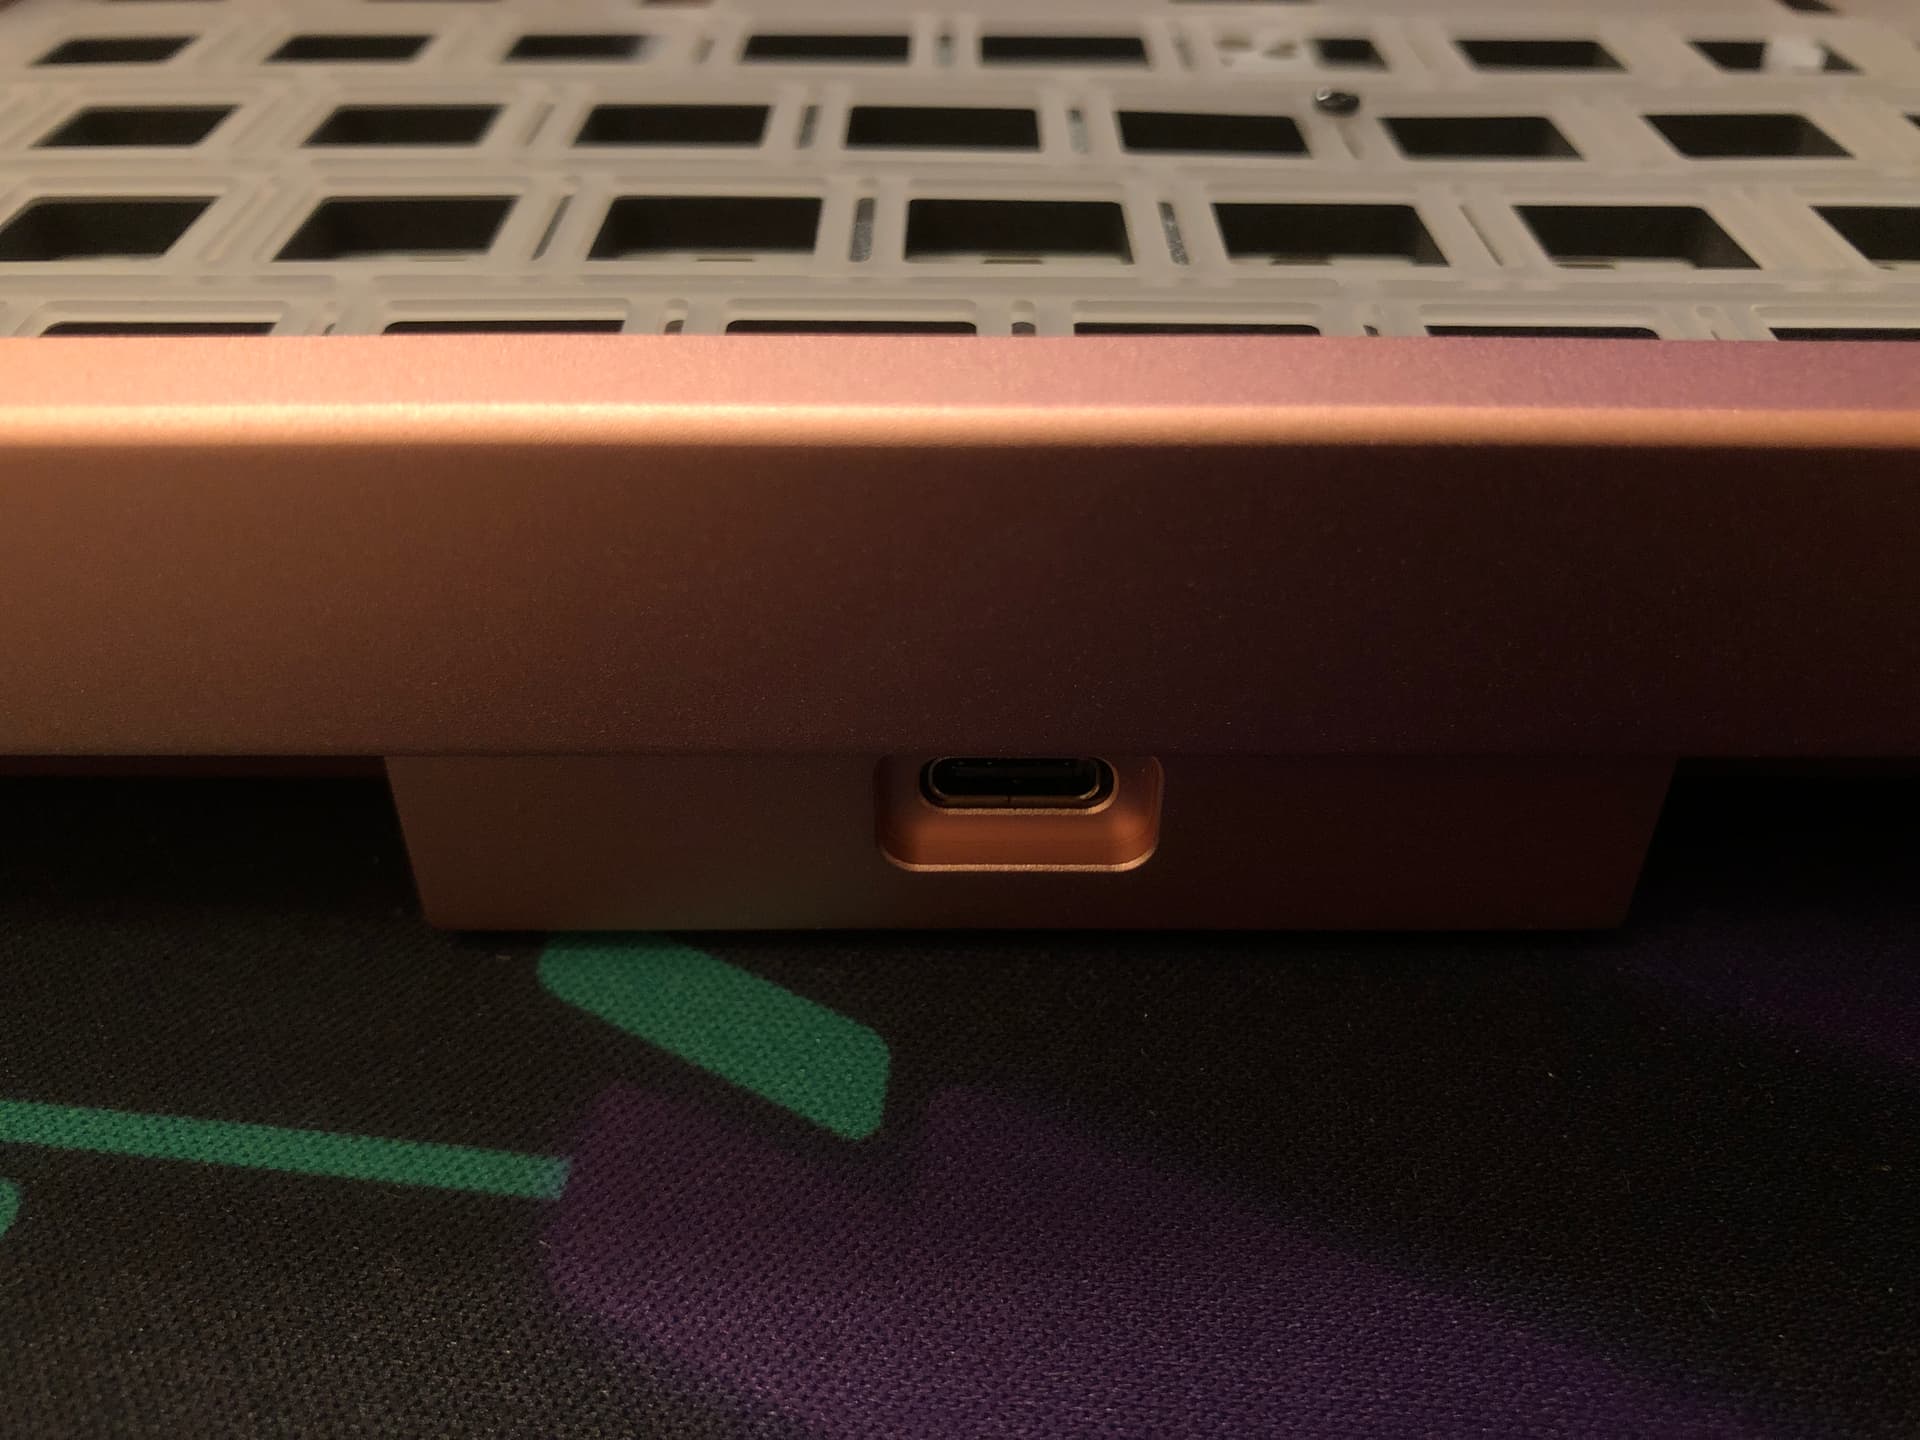
· This keeb has a daughter board for the USBC; killer inclusion at this price
· The build is solder-free and tools are included
· Plate is CNC cut from a sheet
· There are no standoffs in this build
· The dampening works, and there’s even some deck flex
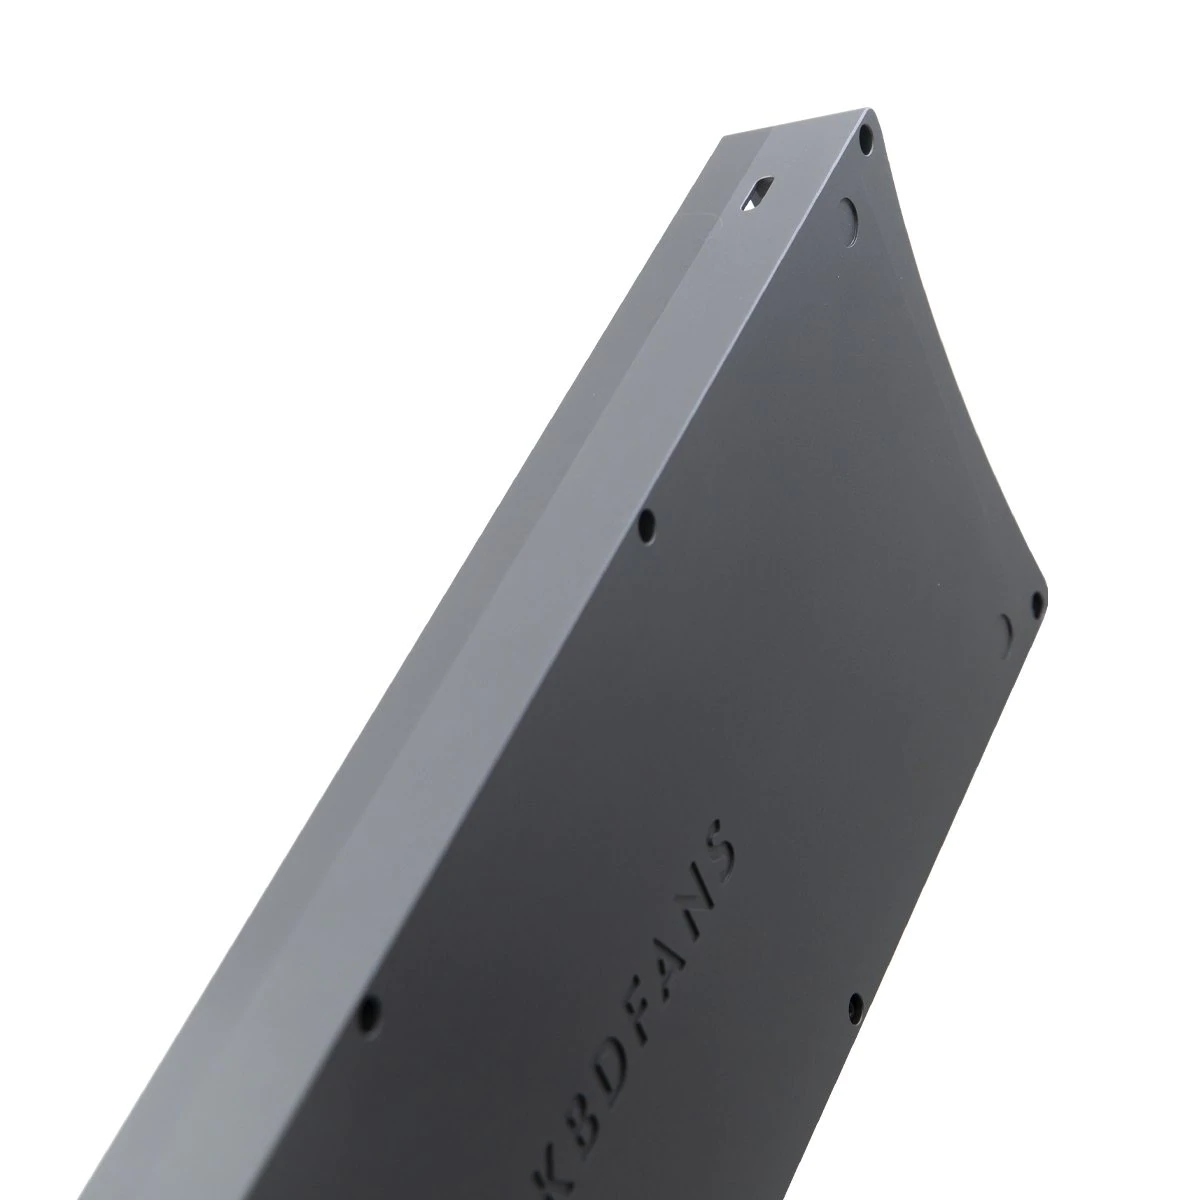
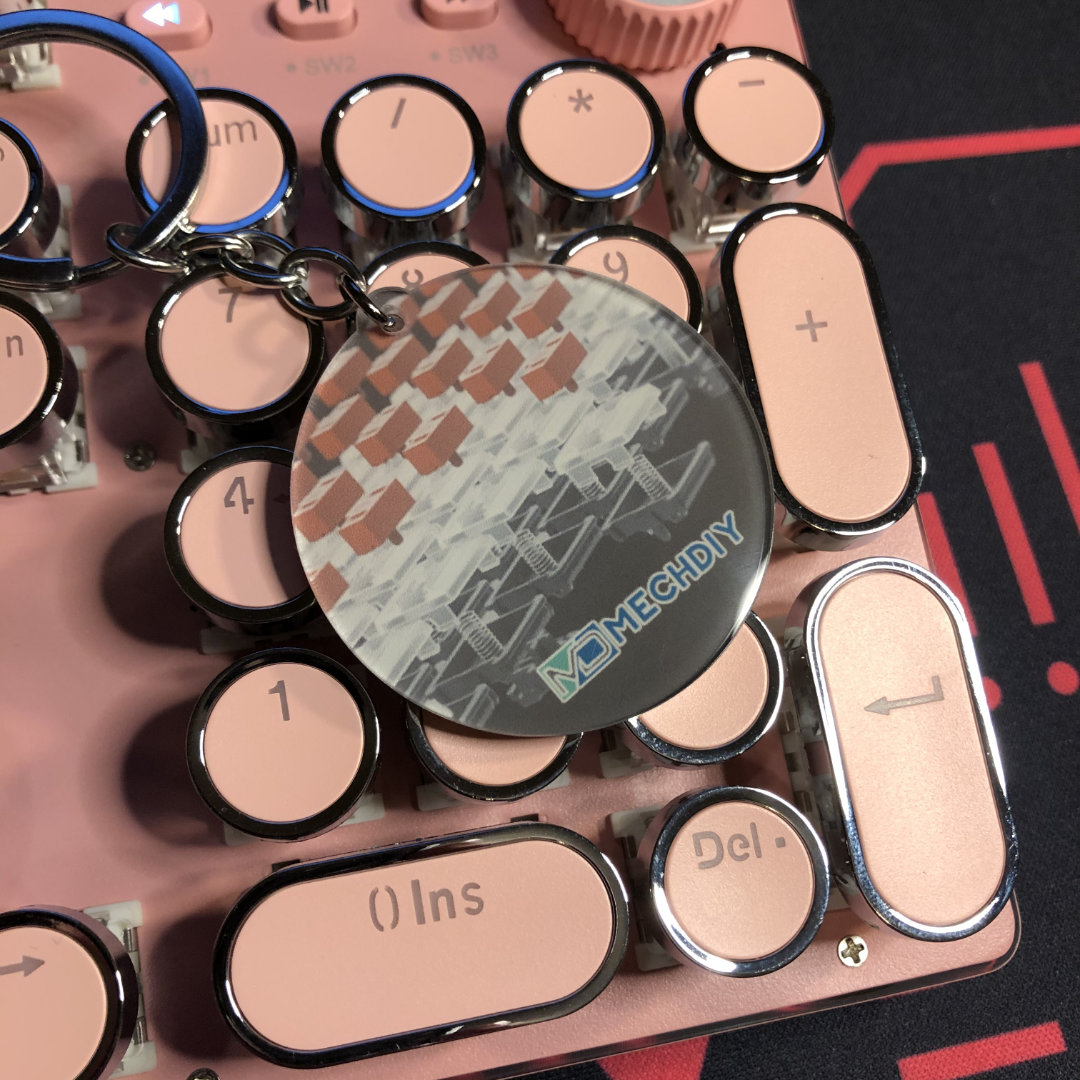
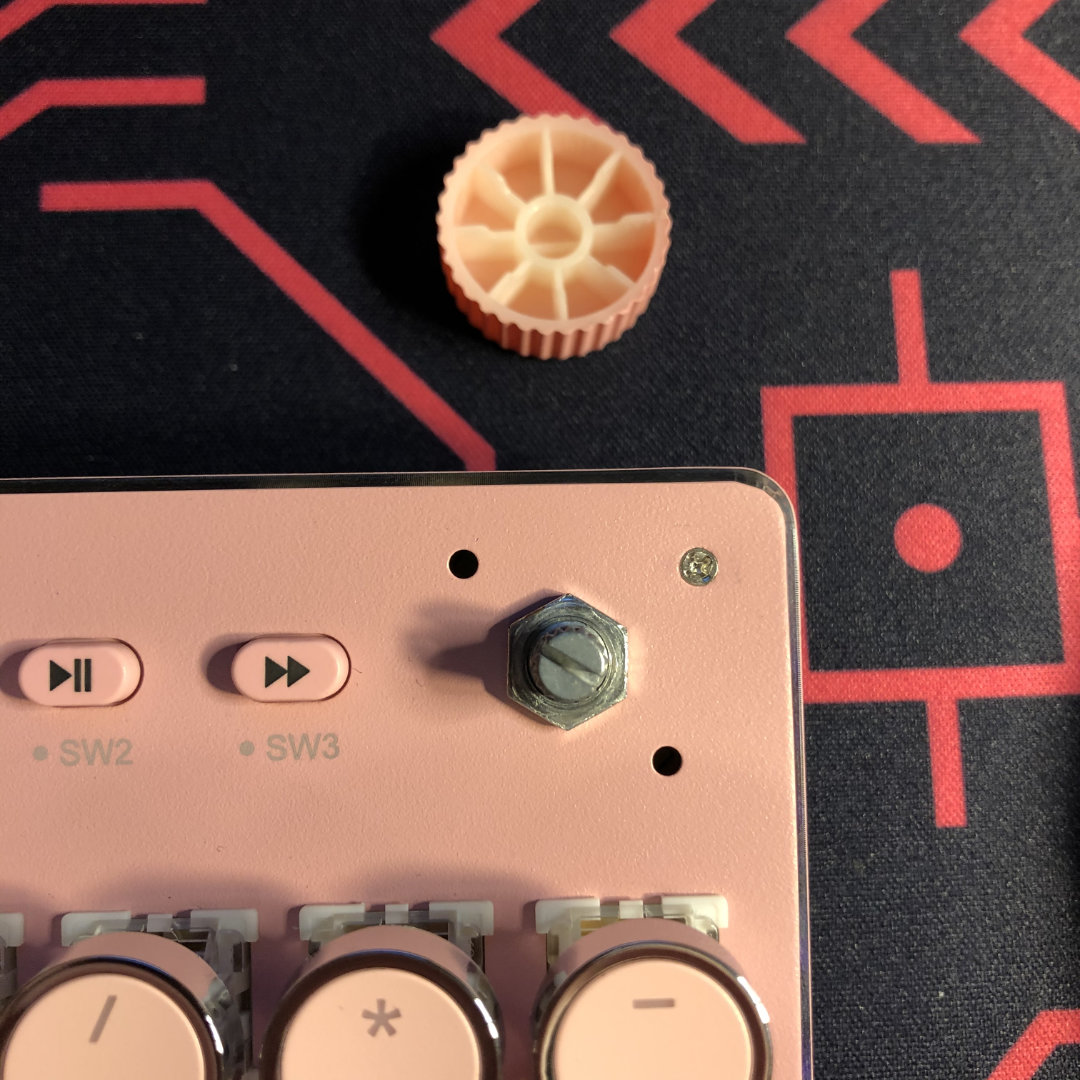
· The bottom “badge” is actually a solid aluminum wedge …neat
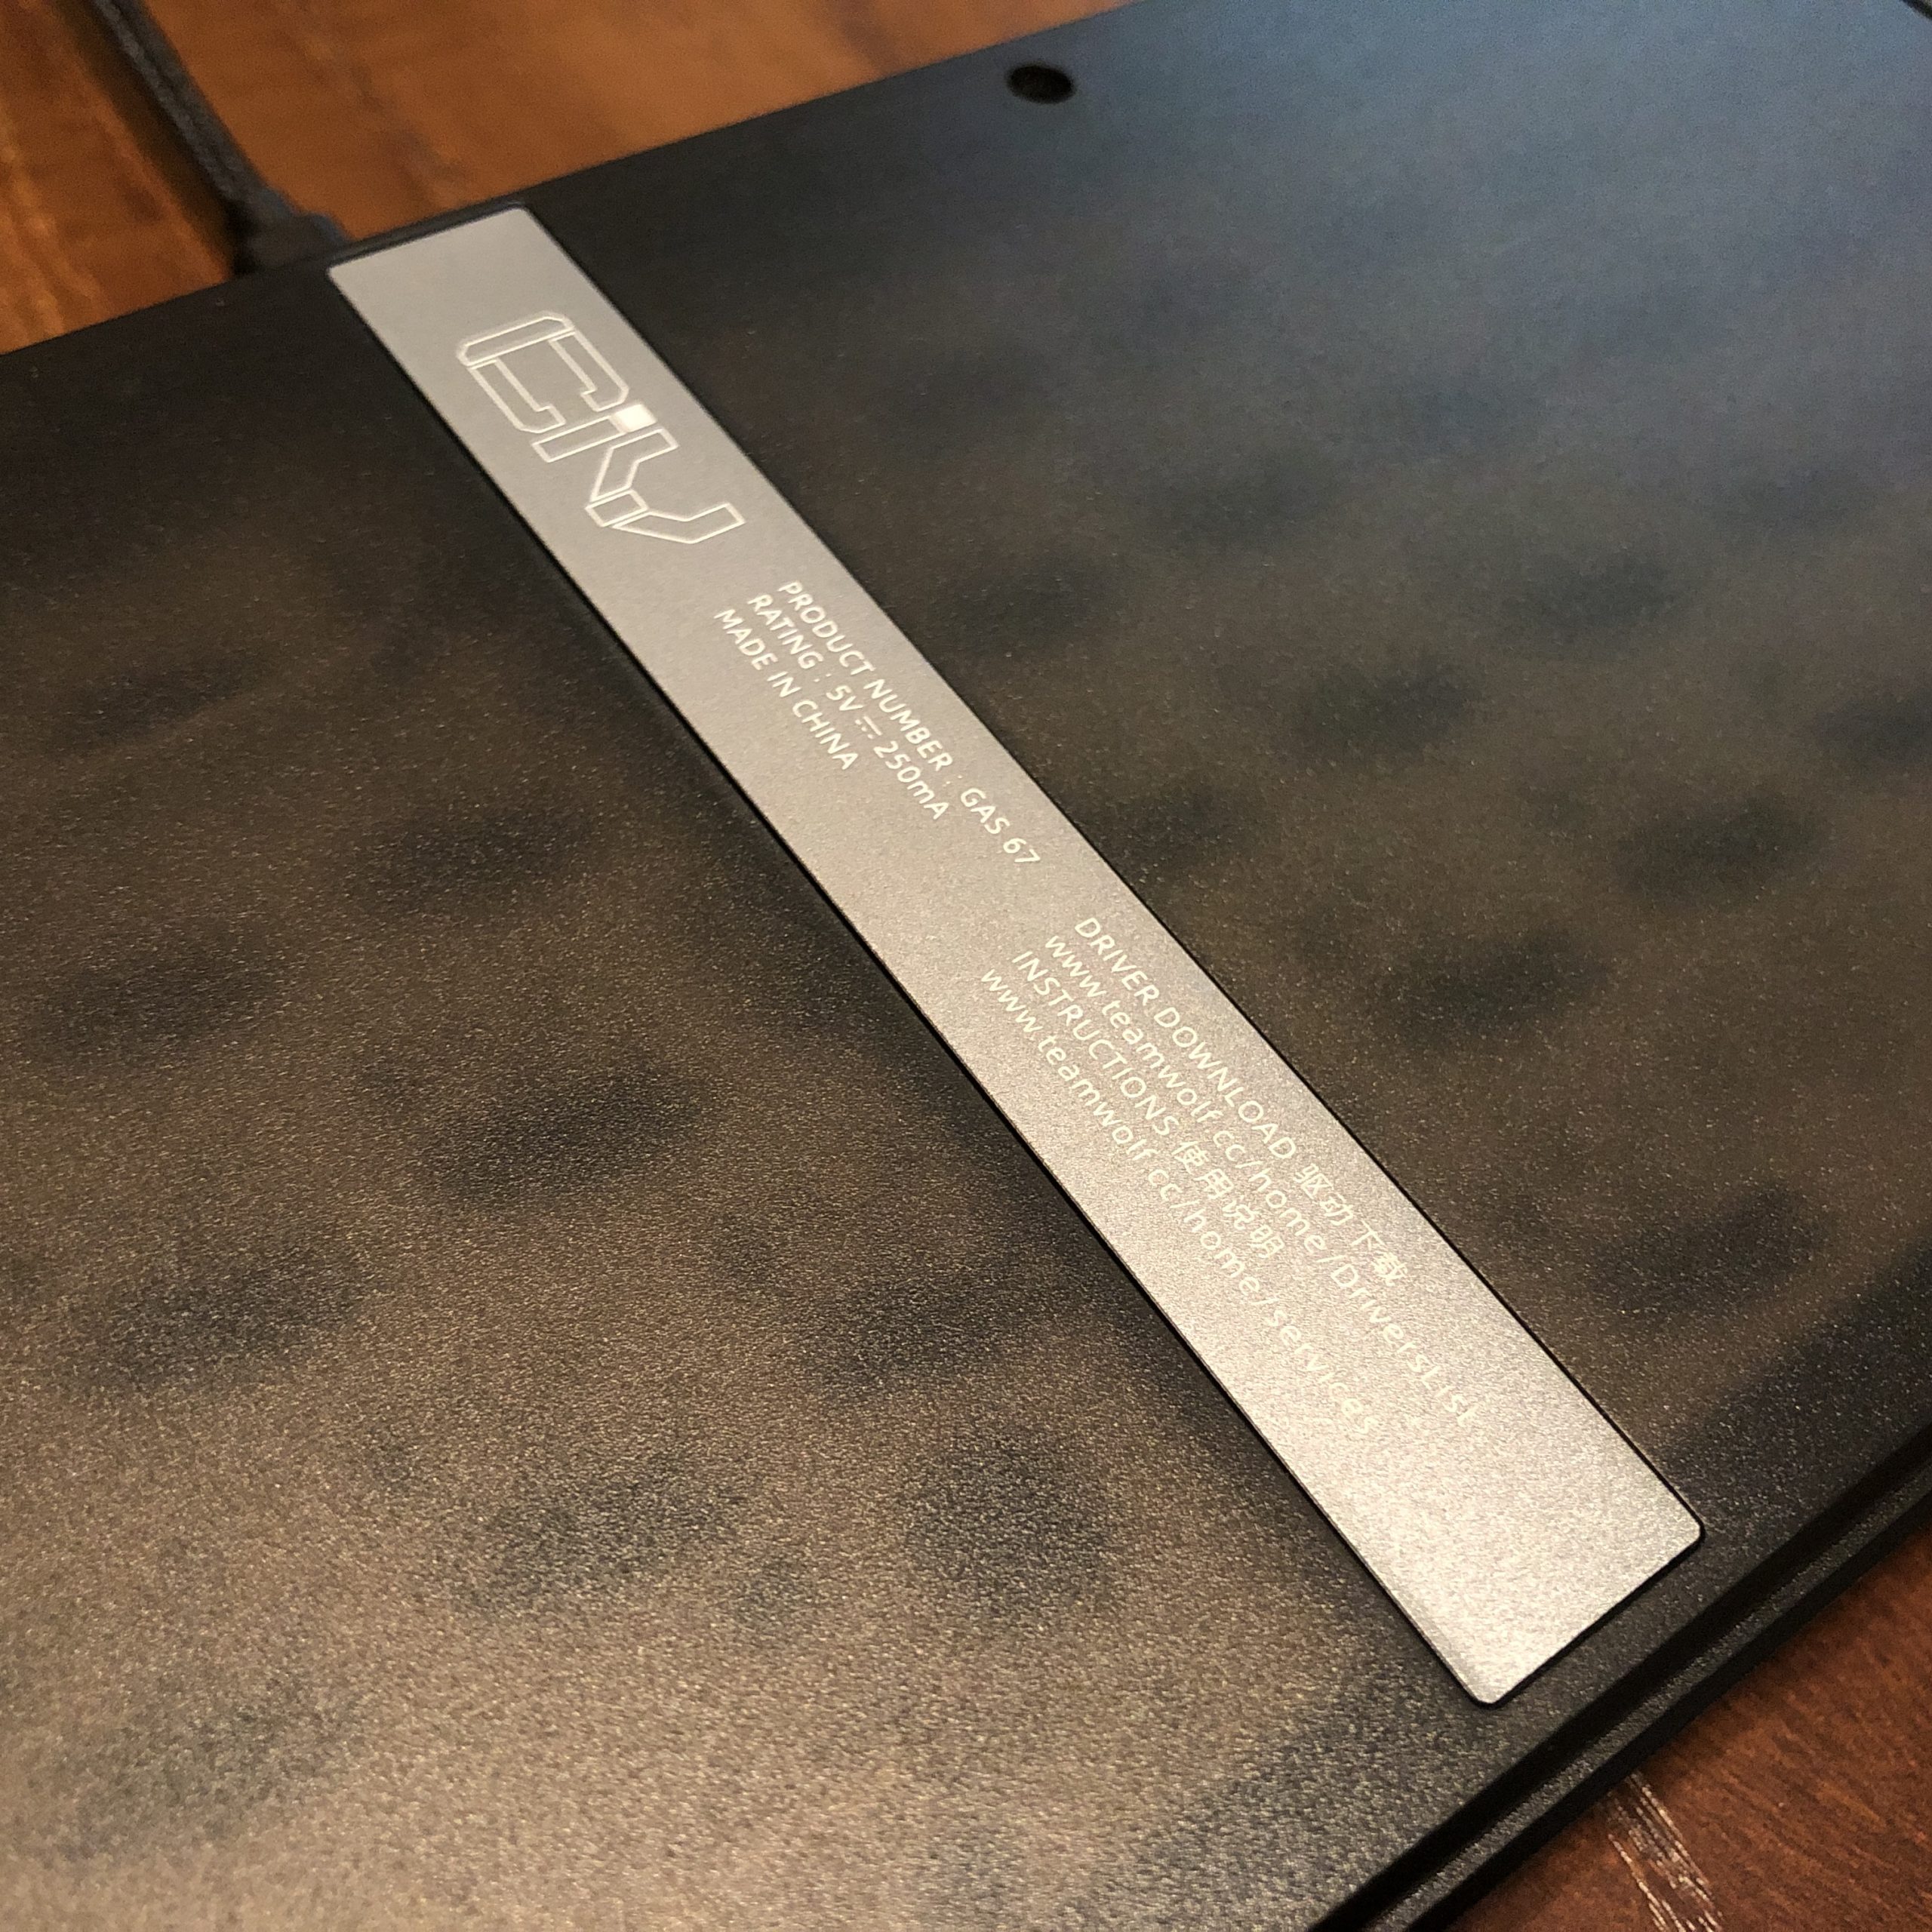
The bottom “badge”

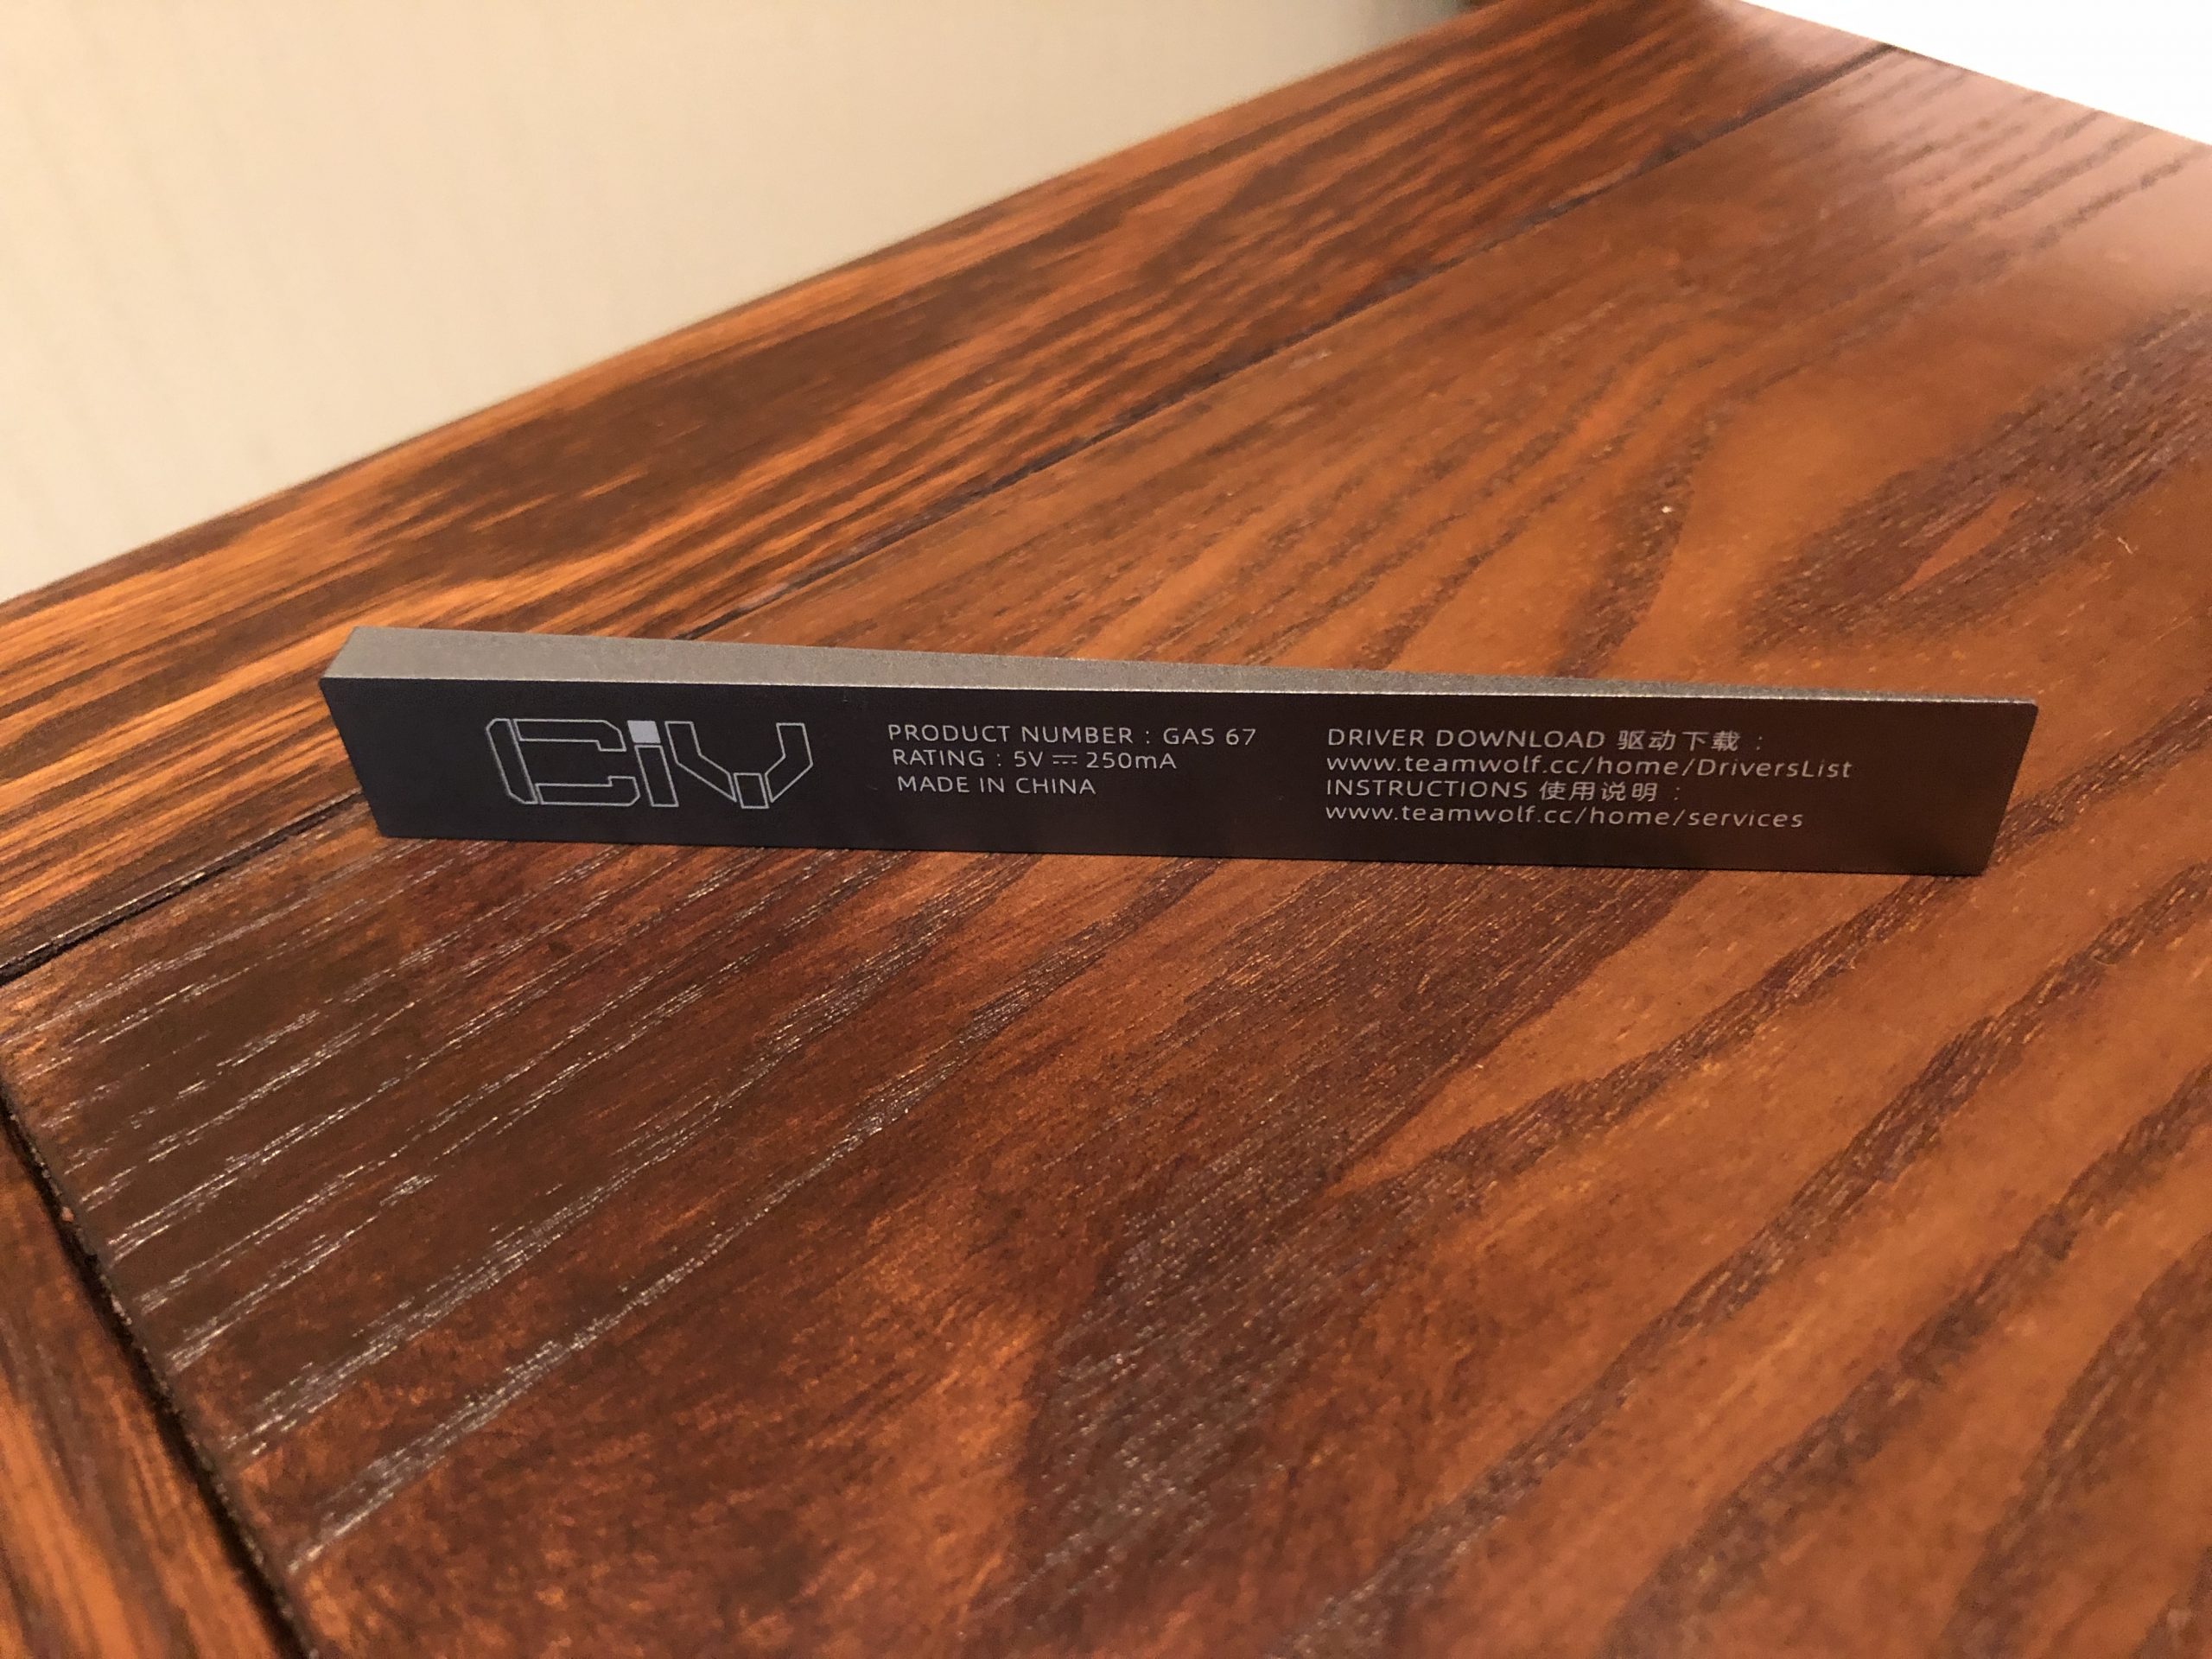
I wouldn’t call it a “weight” per-se, but it is a solid wedge of aluminum.


Context:

Without a doubt, the most special thing about this kit is the fact that it features gasket mounting at such a low price. Plenty of you are likely already familiar with what that means, but if not, here’s a brief primer:

“Gasket mounting” is an umbrella term referring to a variety of construction styles that share a specific feature; namely that the functional part of the keyboard is in some way isolated from the case by some kind of dampening material – the “gasket”. From there, you’ll find a large variety of executions with this concept – but what they all have in common is an elimination of hot-spots that would otherwise be caused by a traditional standoff mounting system. Most of them also soften high-frequency vibrations, and some of them also introduce flex and/or bounce into the typing experience.

Sometimes this comes in the form of a big rubber band that wraps around the assembly. Sometimes it’s adhesive pads in the case or on the plate. Sometimes it’s rubber or silicone inserts. In any case, these various permutations of “gasket mounting” all act to improve the consistency, sound, and feel of a given keyboard.

When first introduced, gasket mounting was exclusively found in the realm of high-end, bespoke custom keyboards. We’re talking engineers designing their own luxury products for themselves at a professional level and getting like-minded folks to buy-in on a production run – but these also acted as proofs-of-concept for other boards to follow:

The whole landscape of expectation shifted with the release of the KBD67 Lite – at the time, this was the first “gasket mount” keyboard available for the masses – though even at that it’s still mostly sold through group-buy pre-orders. This kit generally goes for around $110 bare-bones, and when it released that was the least expensive gasket option by a very wide margin. It simultaneously elevated and expanded the middle-market.

An over-exposed shot of my KBD67L at work

Fast-forward a few years and the 67L has plenty of peers, but nothing that undercuts it significantly in terms of making gasket mounting more accessible or budget friendly. That is, not until now.

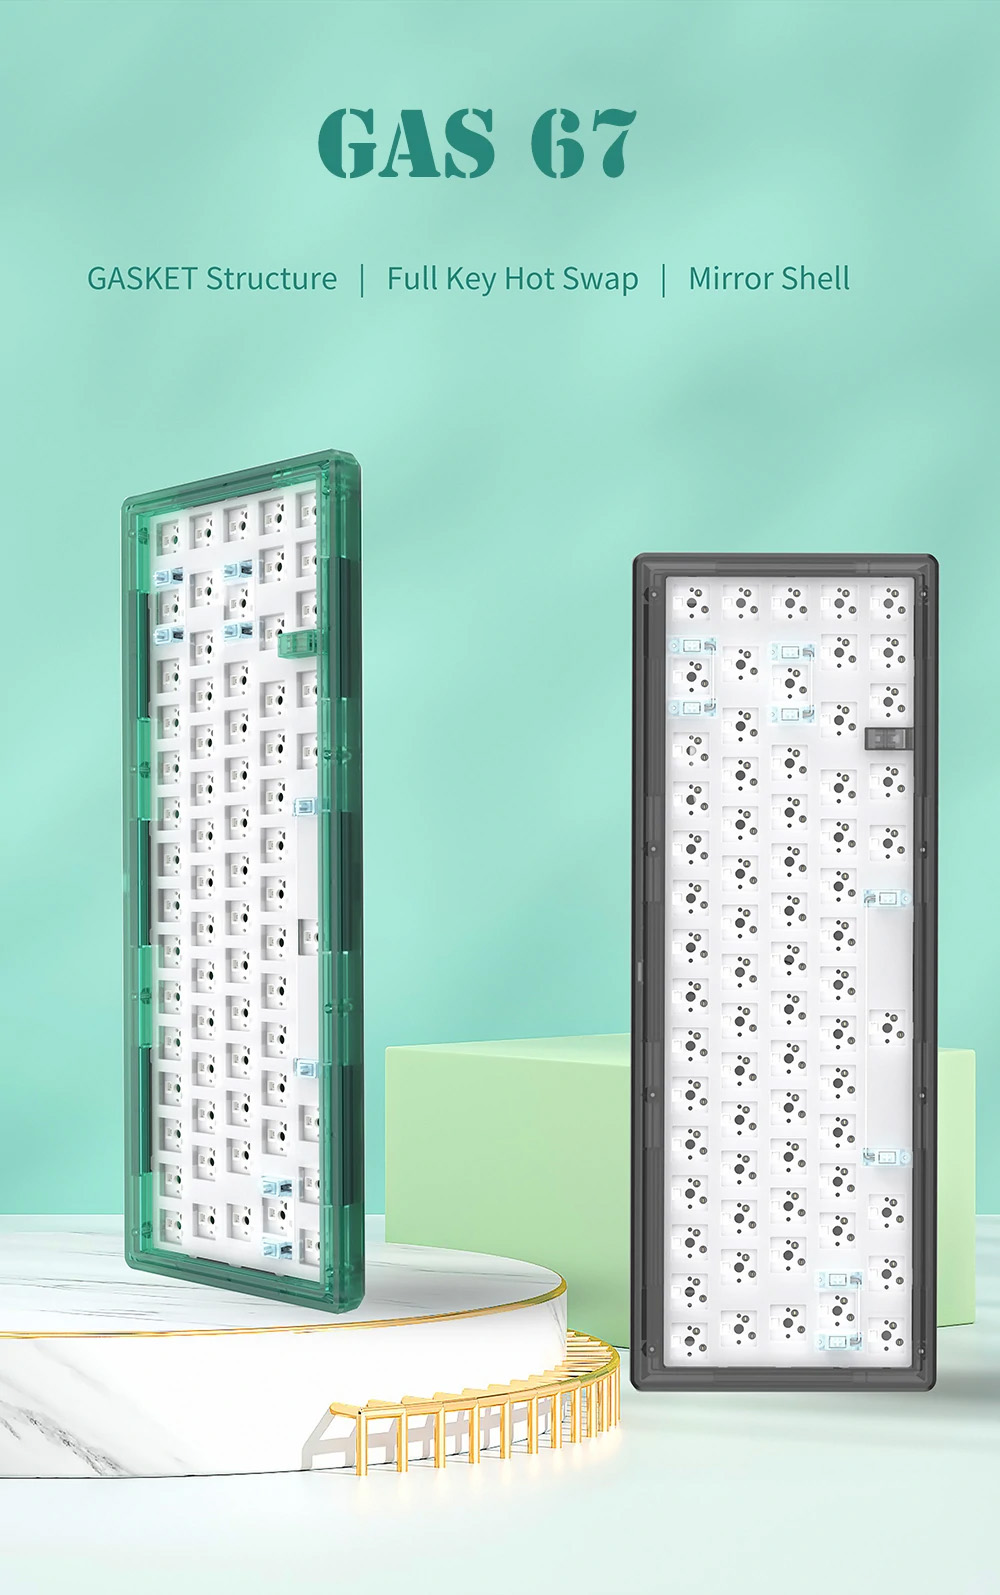
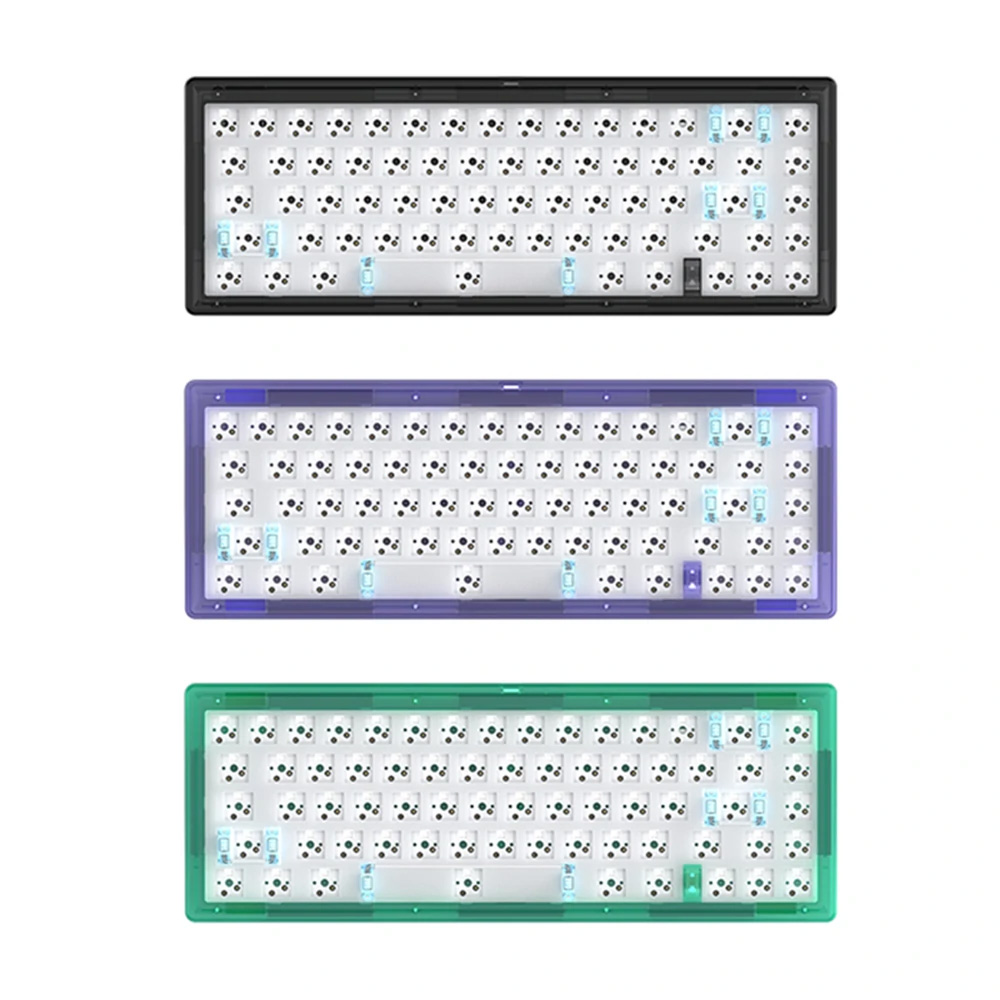
Another promo image from banggood, showing the structure of the keyboard – complete with gaskets.


The Kit:

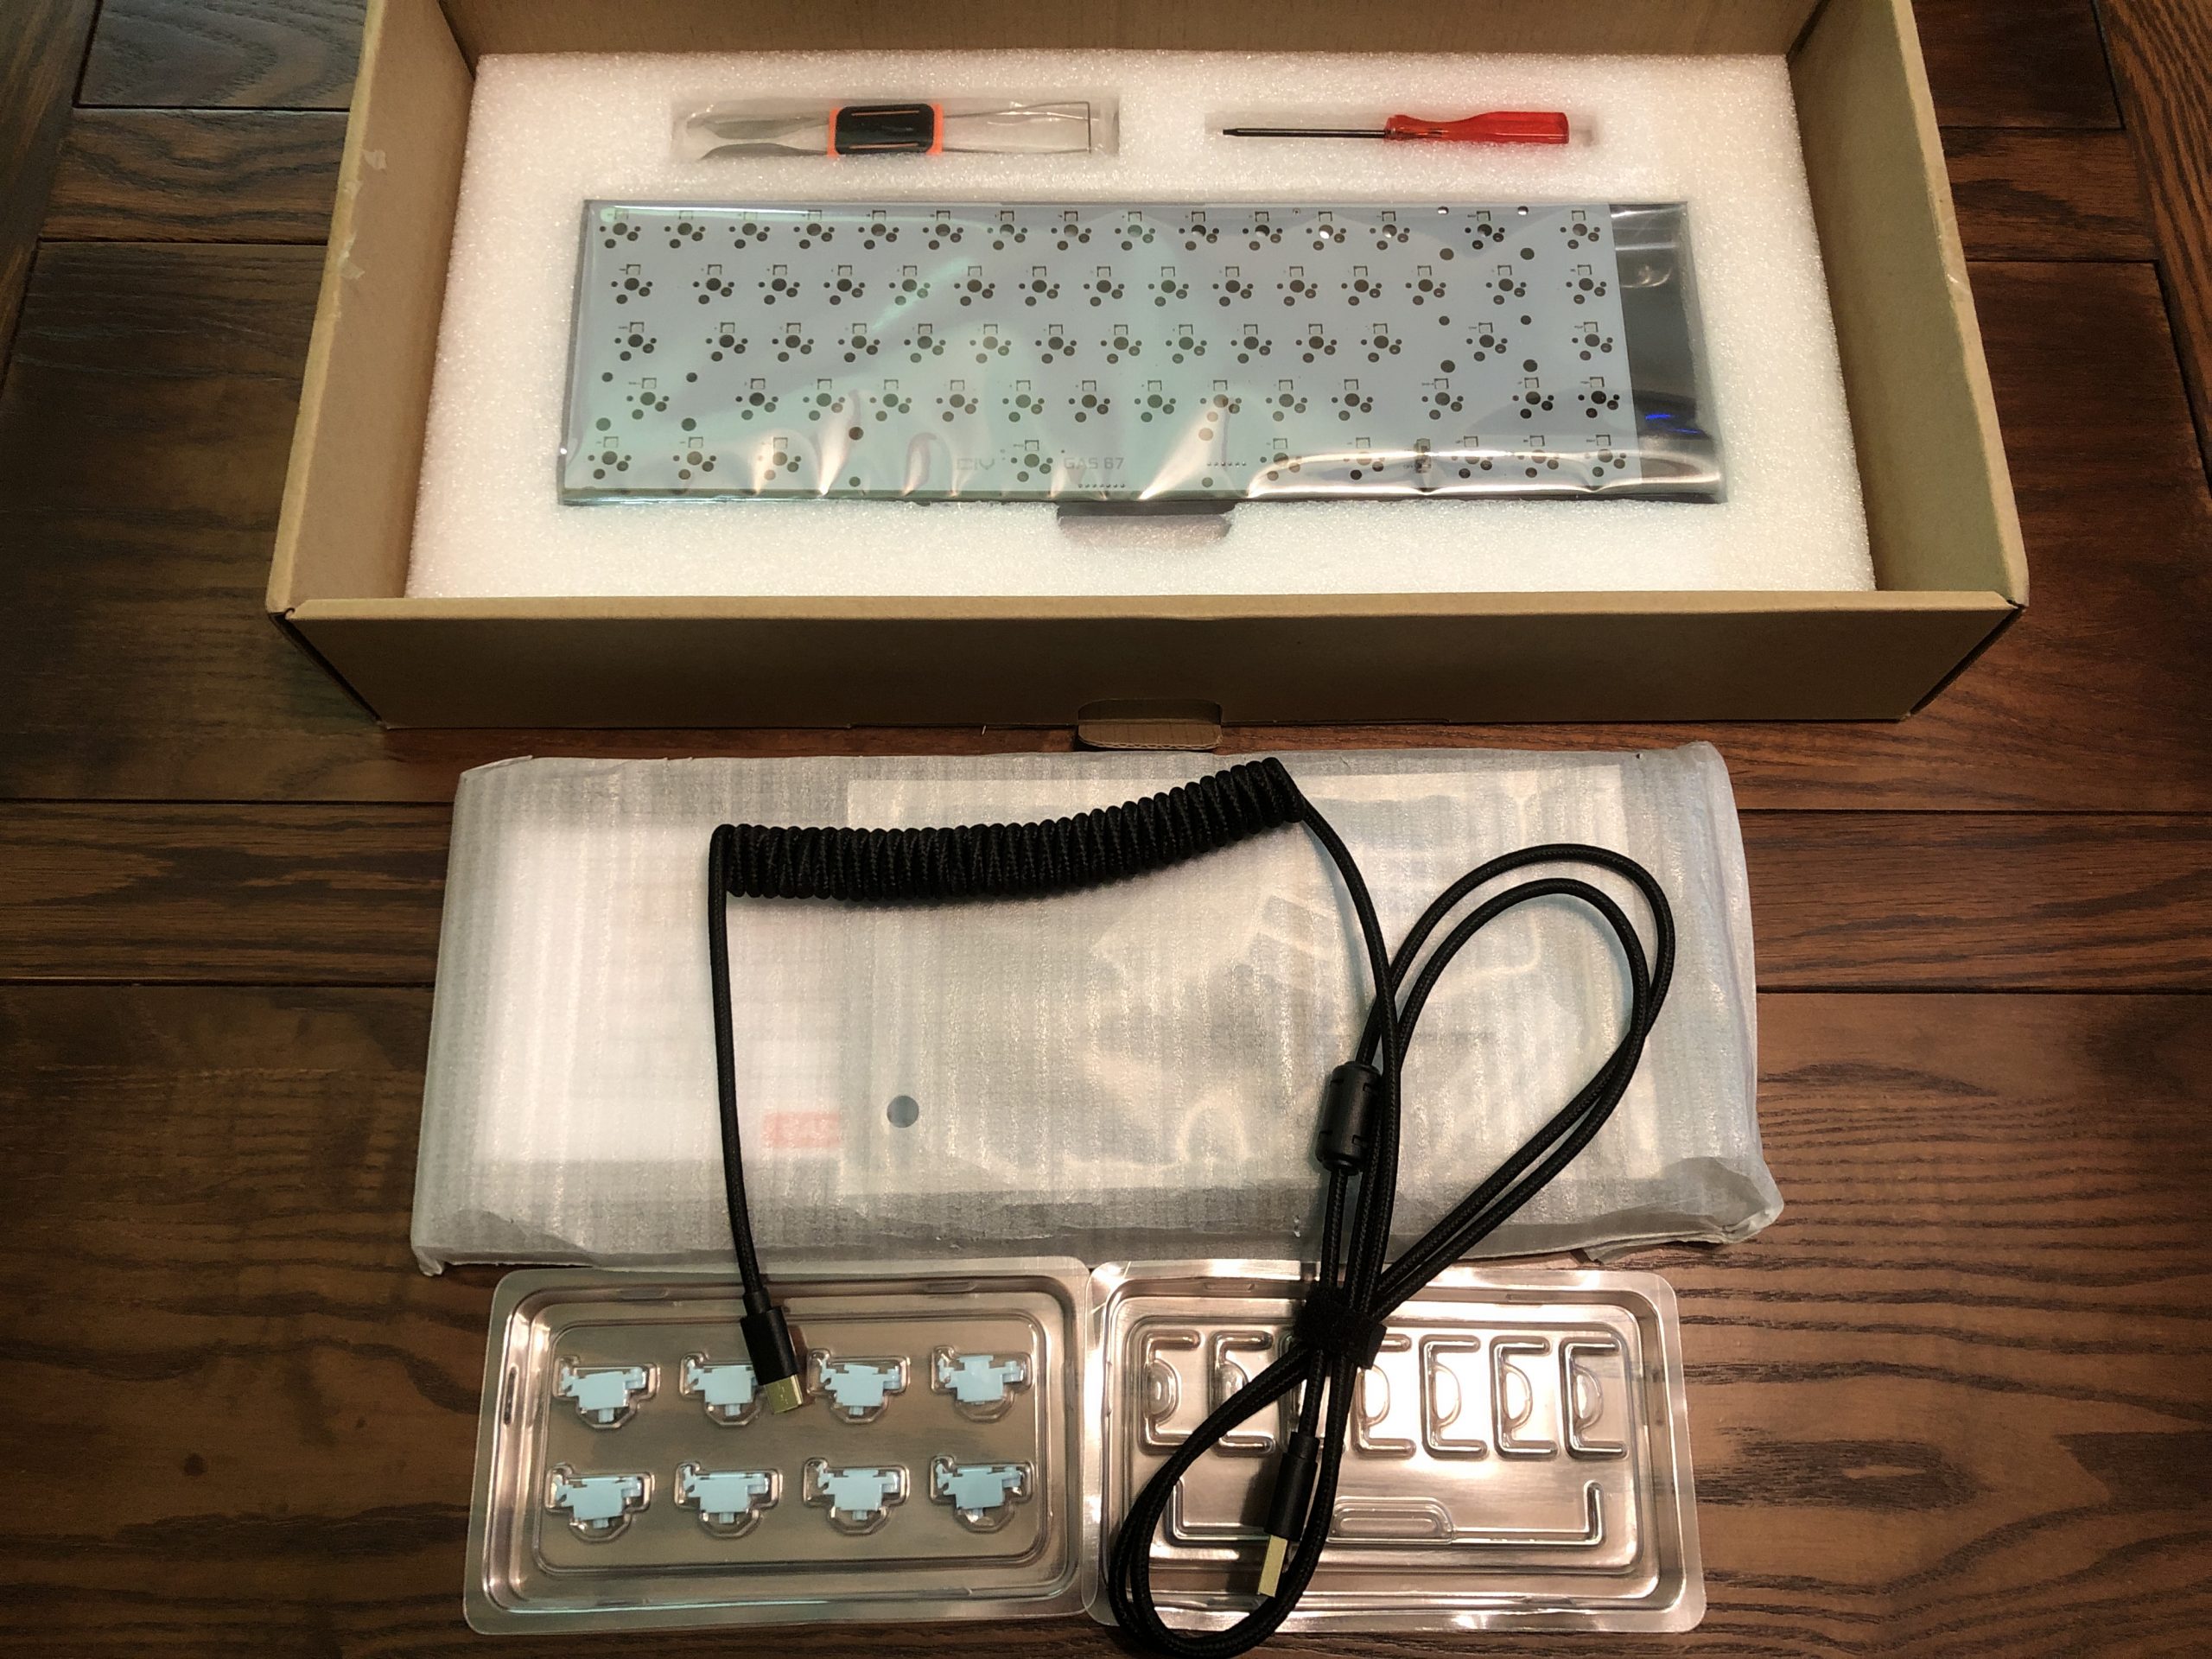
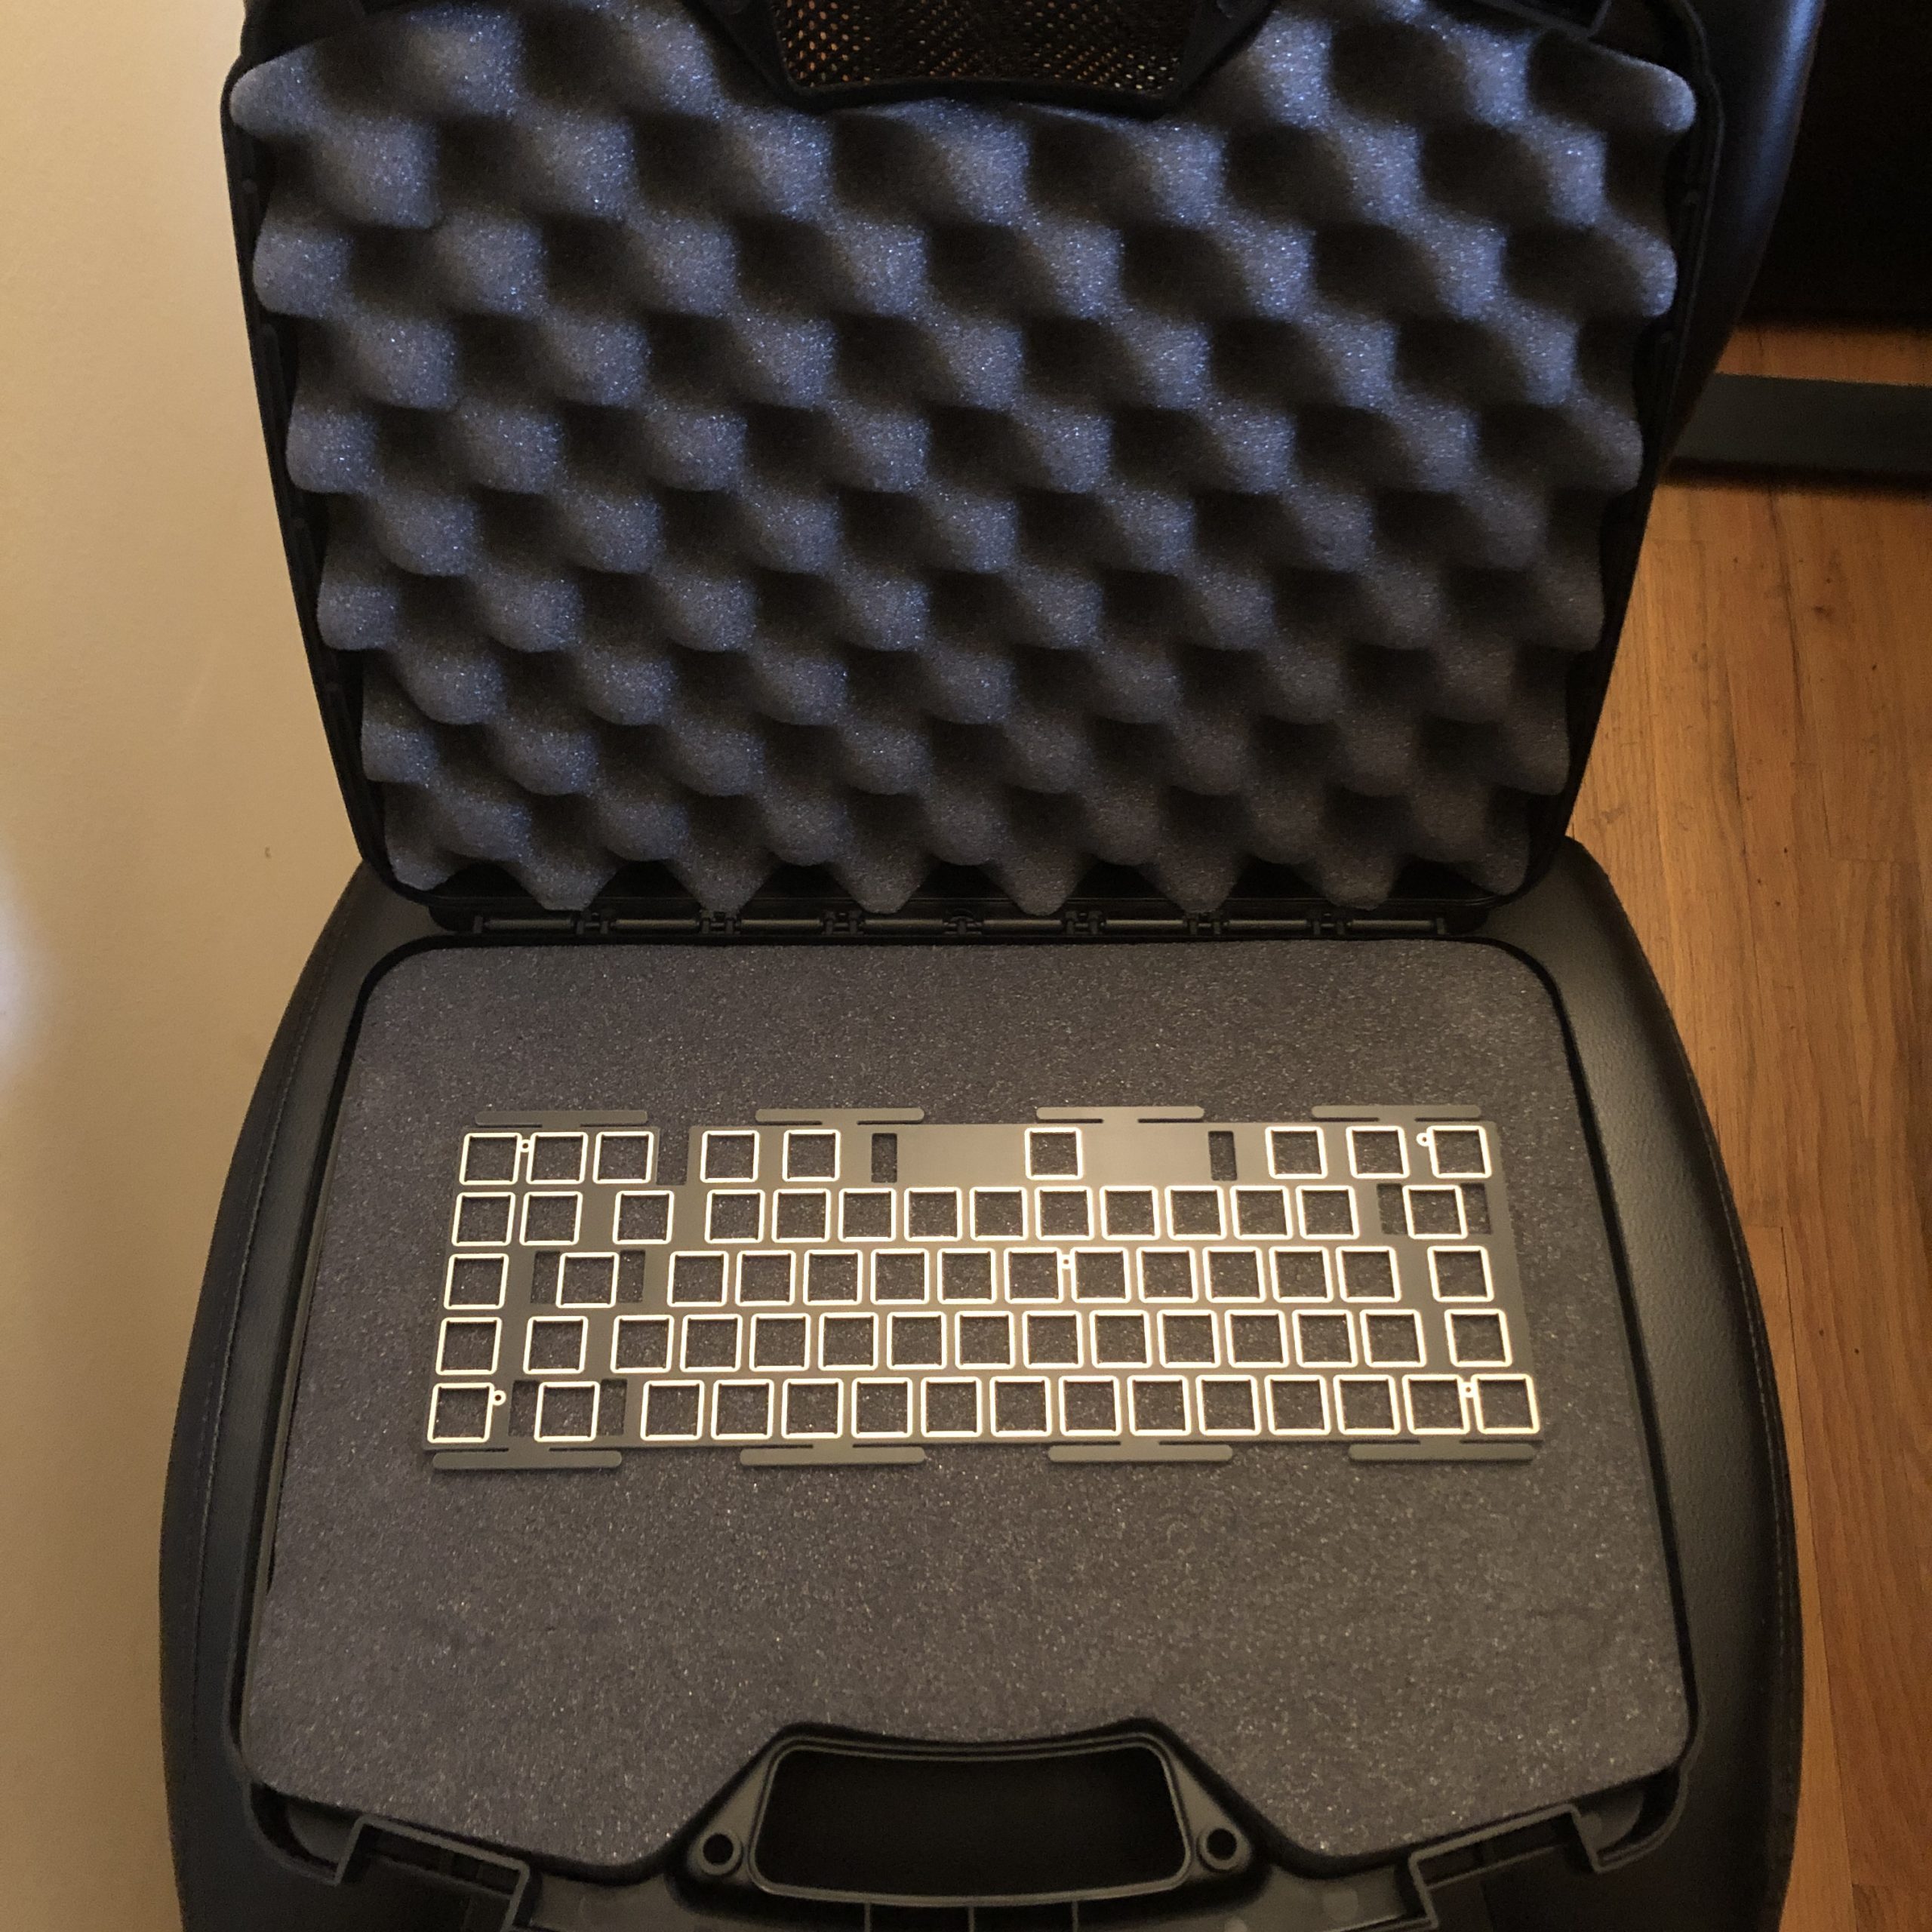
The box and everything in it.

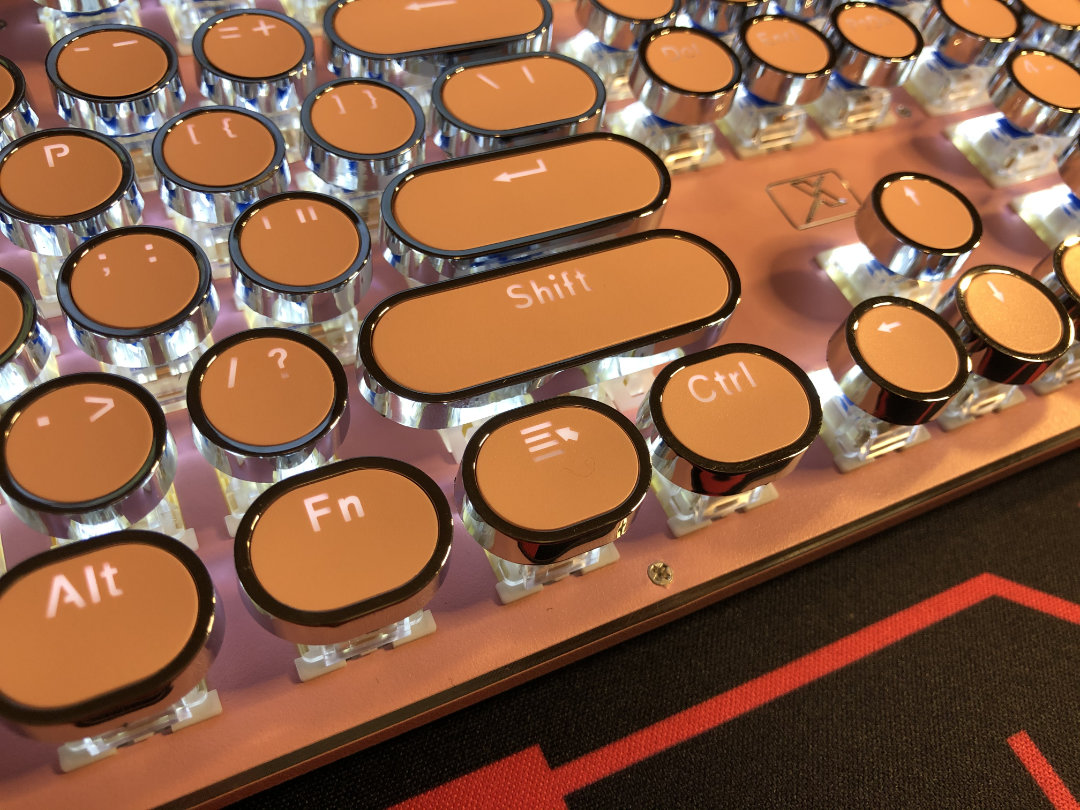
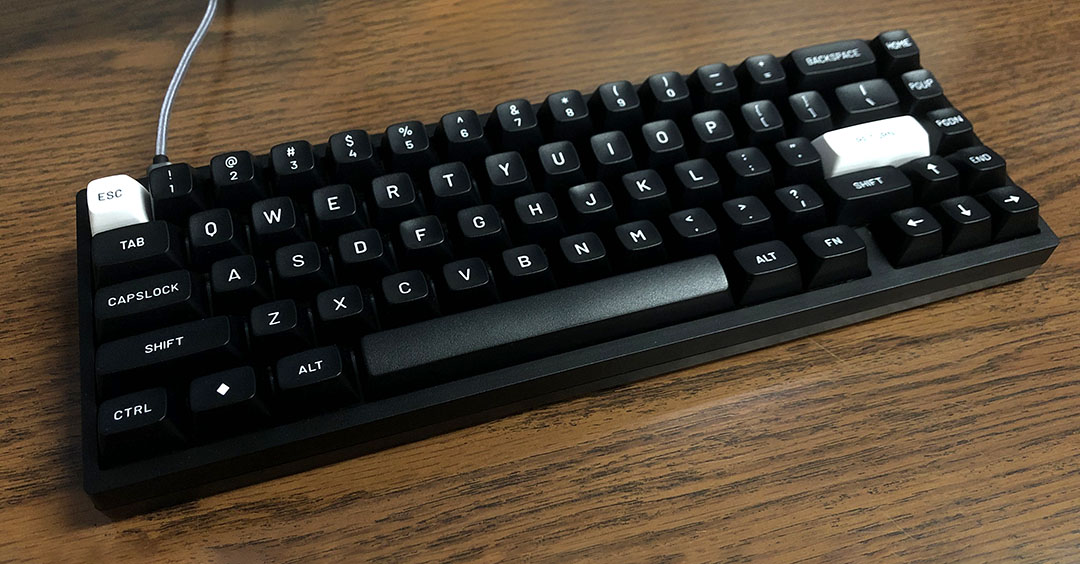
This is a 67-key layout with a fairly traditional configuration as far as those go.

With switches and a pretty standard set of caps, the fully-assembled board weighs 608g / 1.34 lbs.

In the box, the first thing you’ll see are the blister packs containing the stabilizer parts. They’re pretty decent ones, too.

Opening the box

Below that you’ll see the rest of the parts; case, plate, PCB, hardware, pads, switch & cap puller, and of course the cable. There is software available for the PCB [ here ]; covered in more detail below.
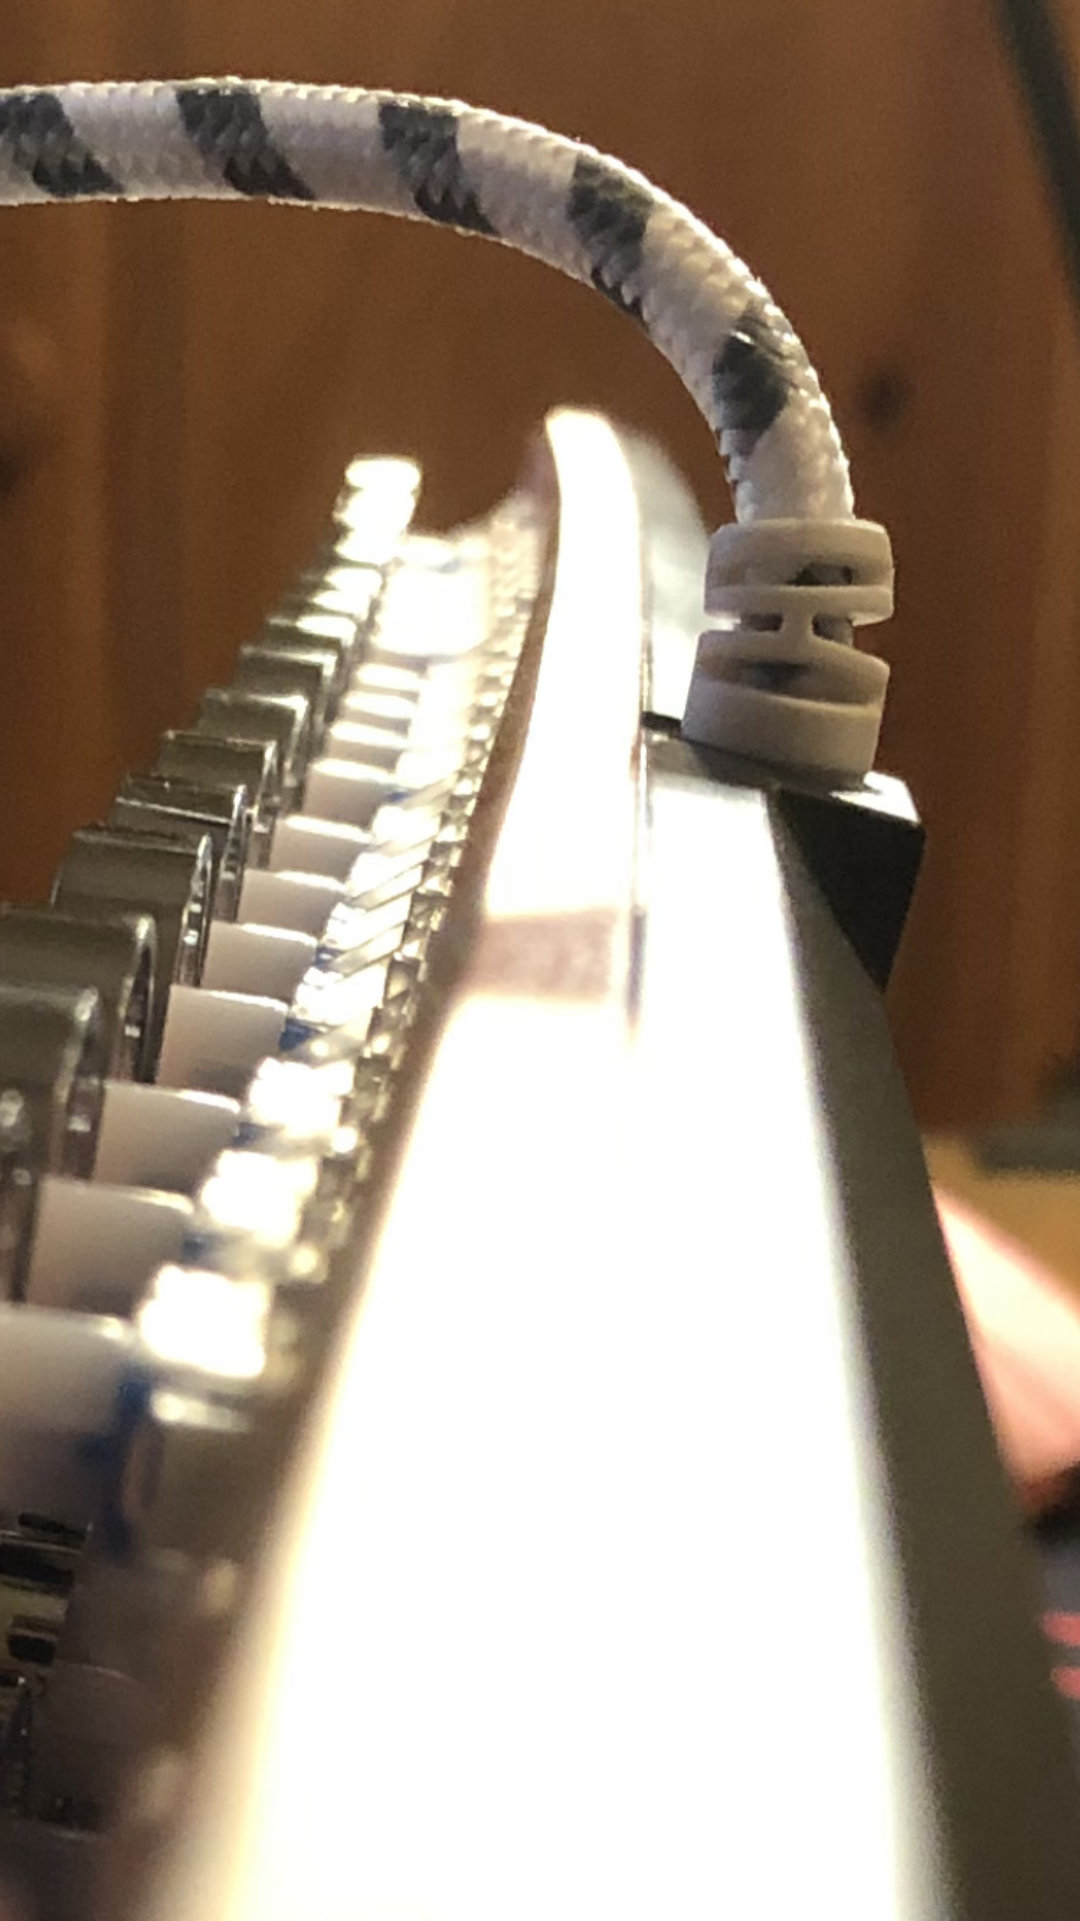
The Cable:

The cable is pretty typical of what you’d get in one of those middle-market kits, and honestly it’s a bit nicer than at least a few of them. Considering this kit is between $40 and $60 cheaper than those, I’d say that’s a notable inclusion.

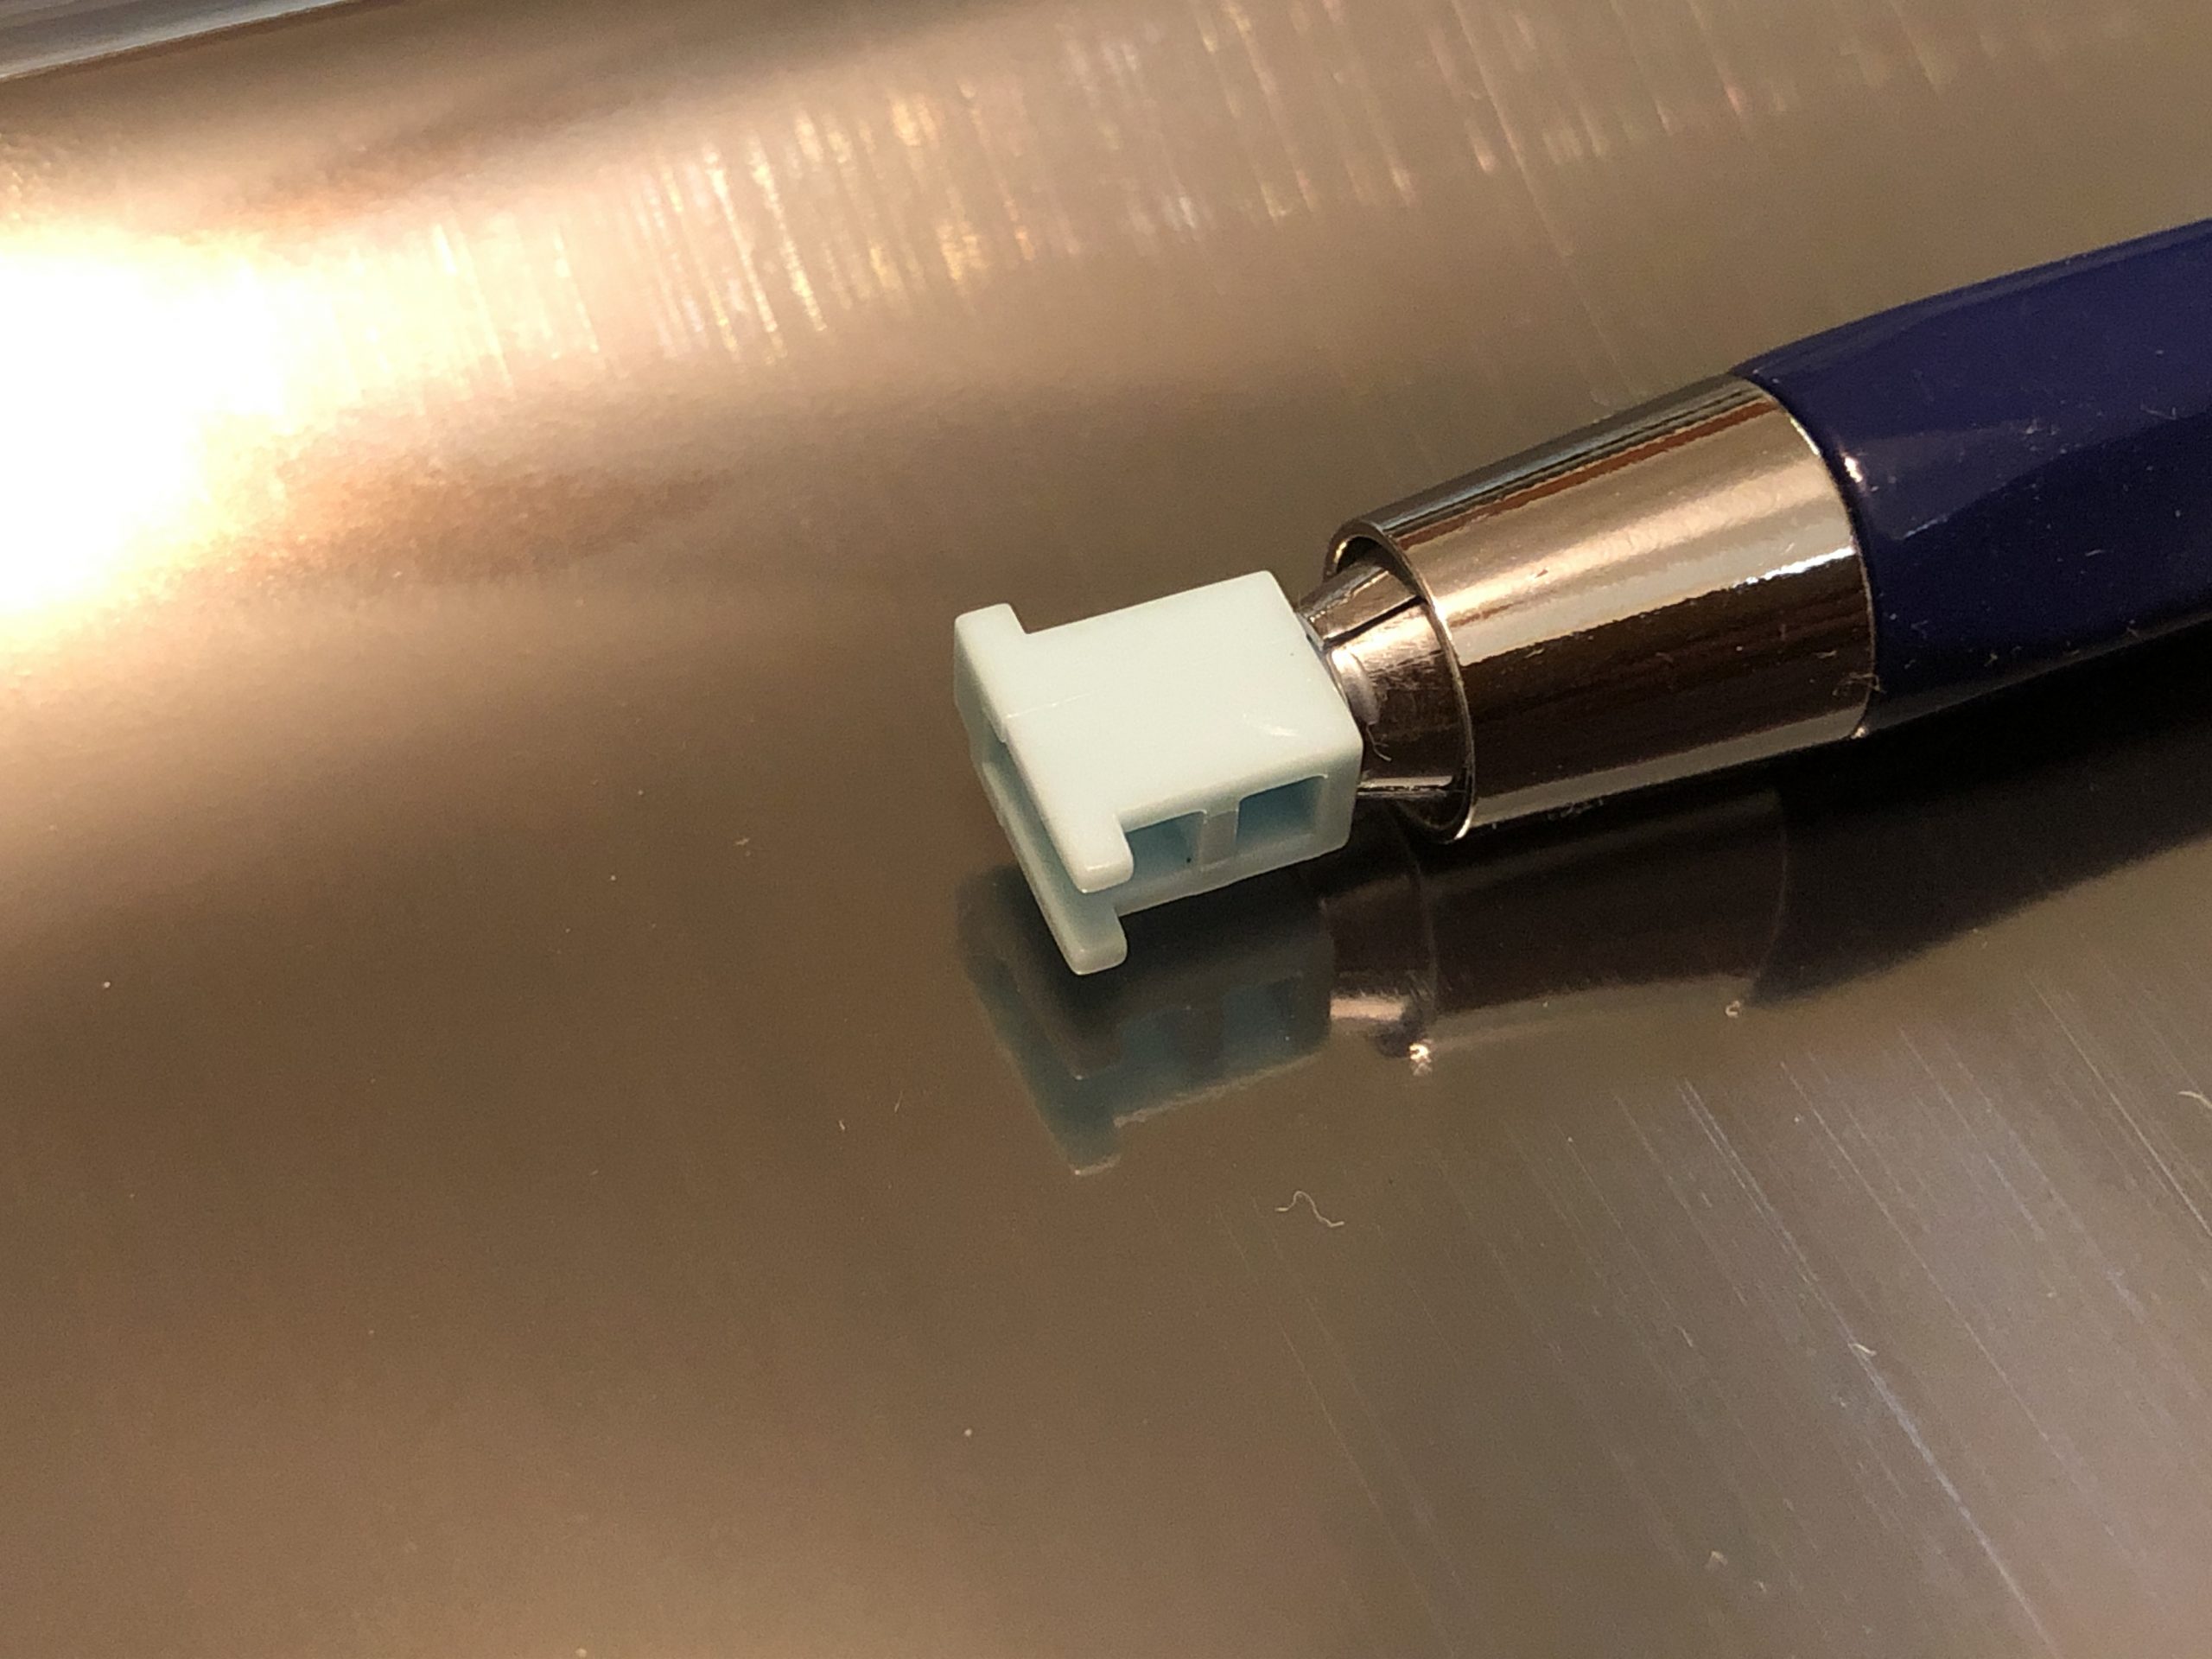
A fully-assembled GAS67 with its included stock cable. It plugs into a center-mounted USBC daughter board.

It’s got a braided sleeve and is on the firm side. It has a nice, even coil and gold-colored connectors. As pack-in cables go, this really is one of the better ones, and frankly better than this kit needed to come with; I wouldn’t change a thing about it.
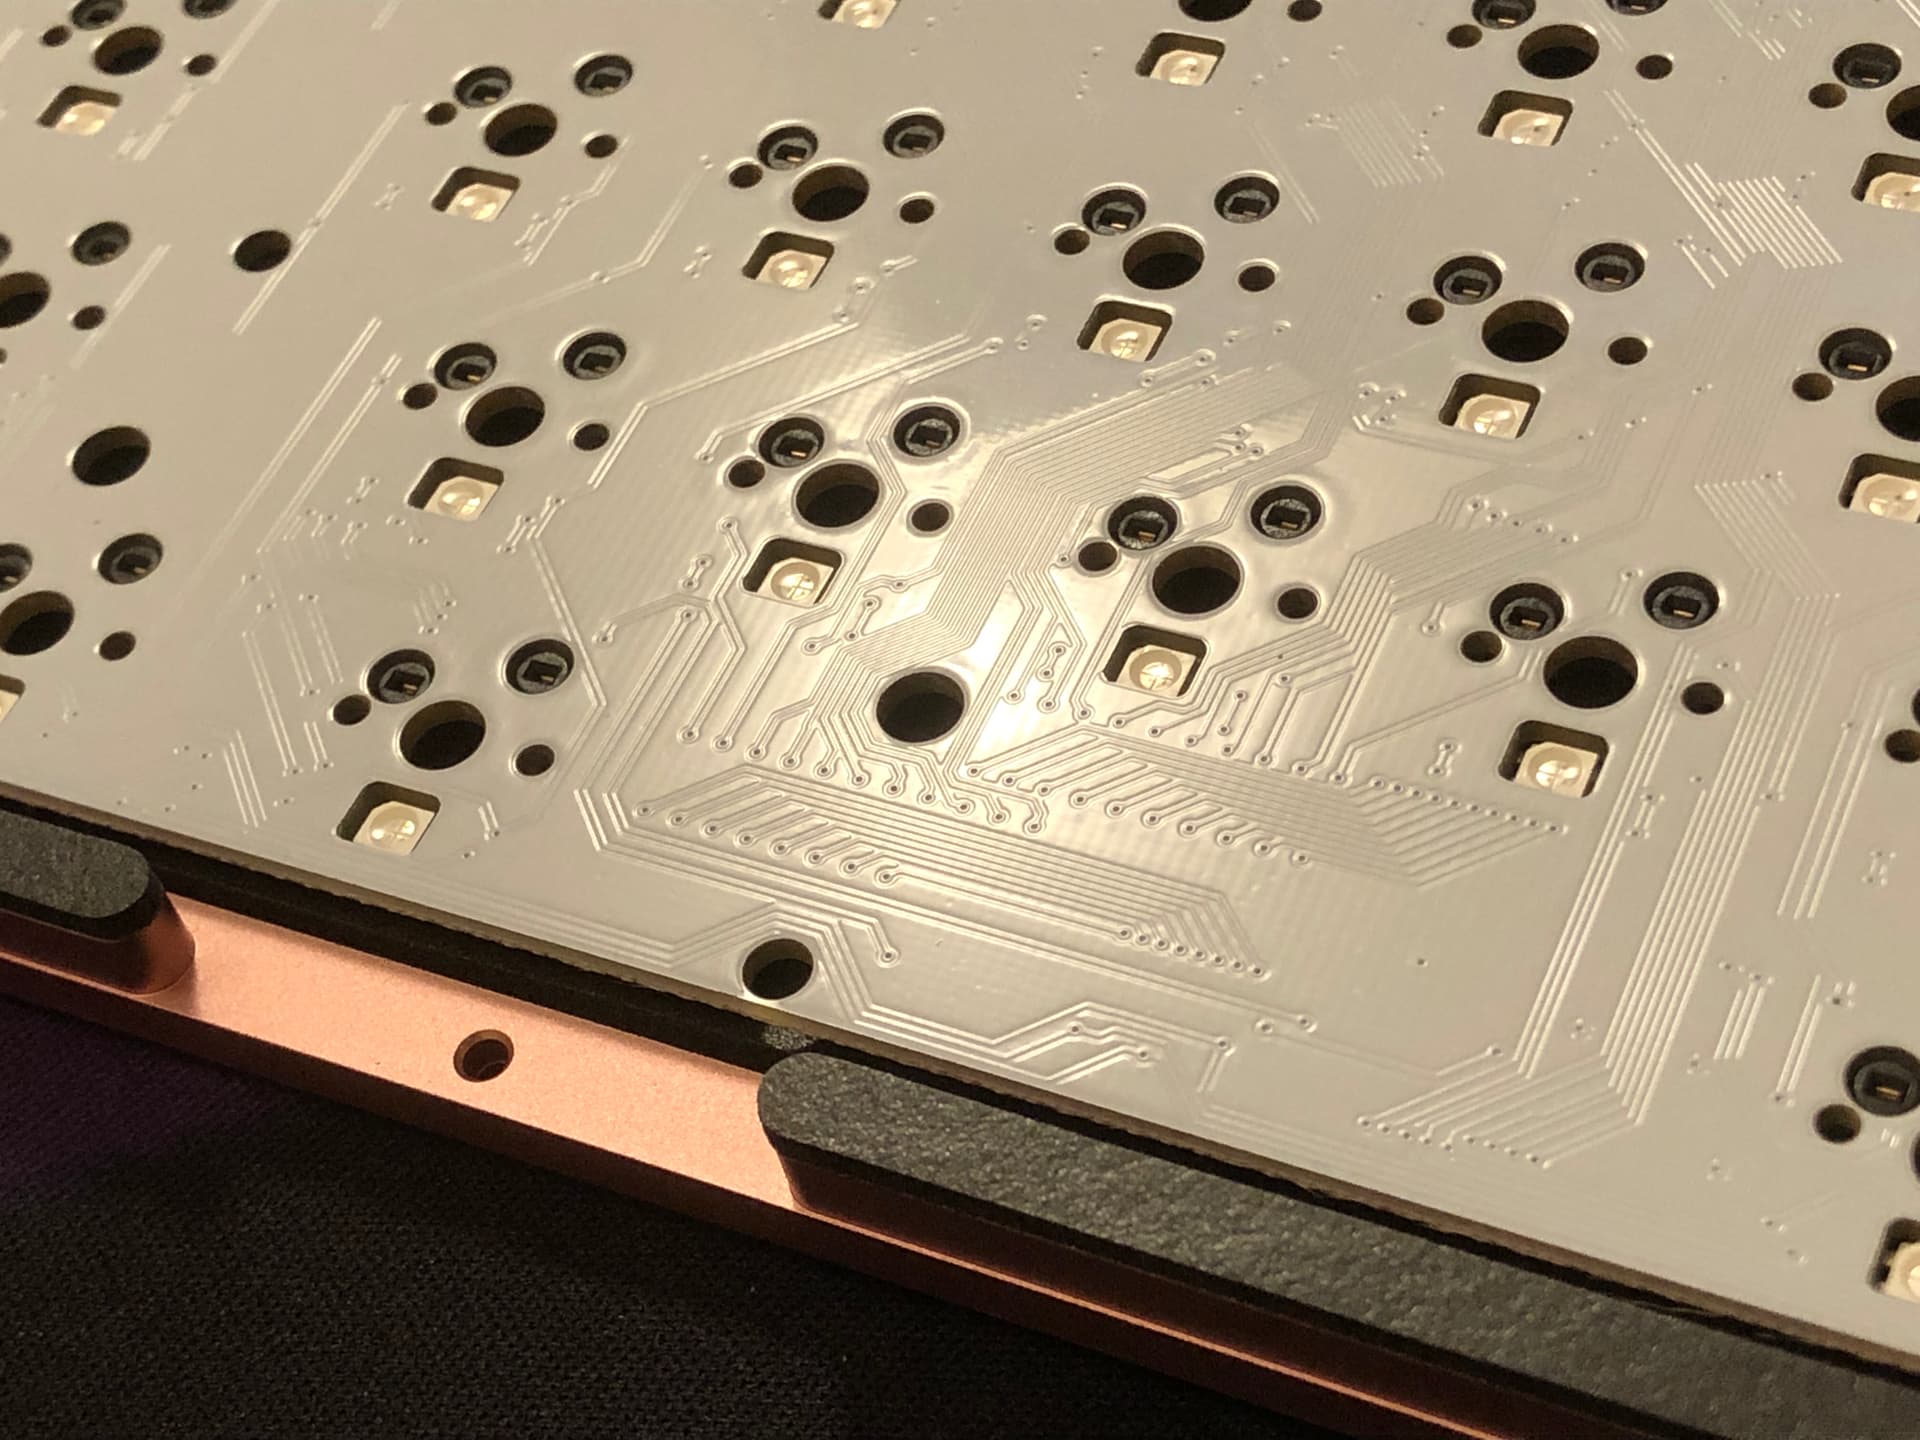
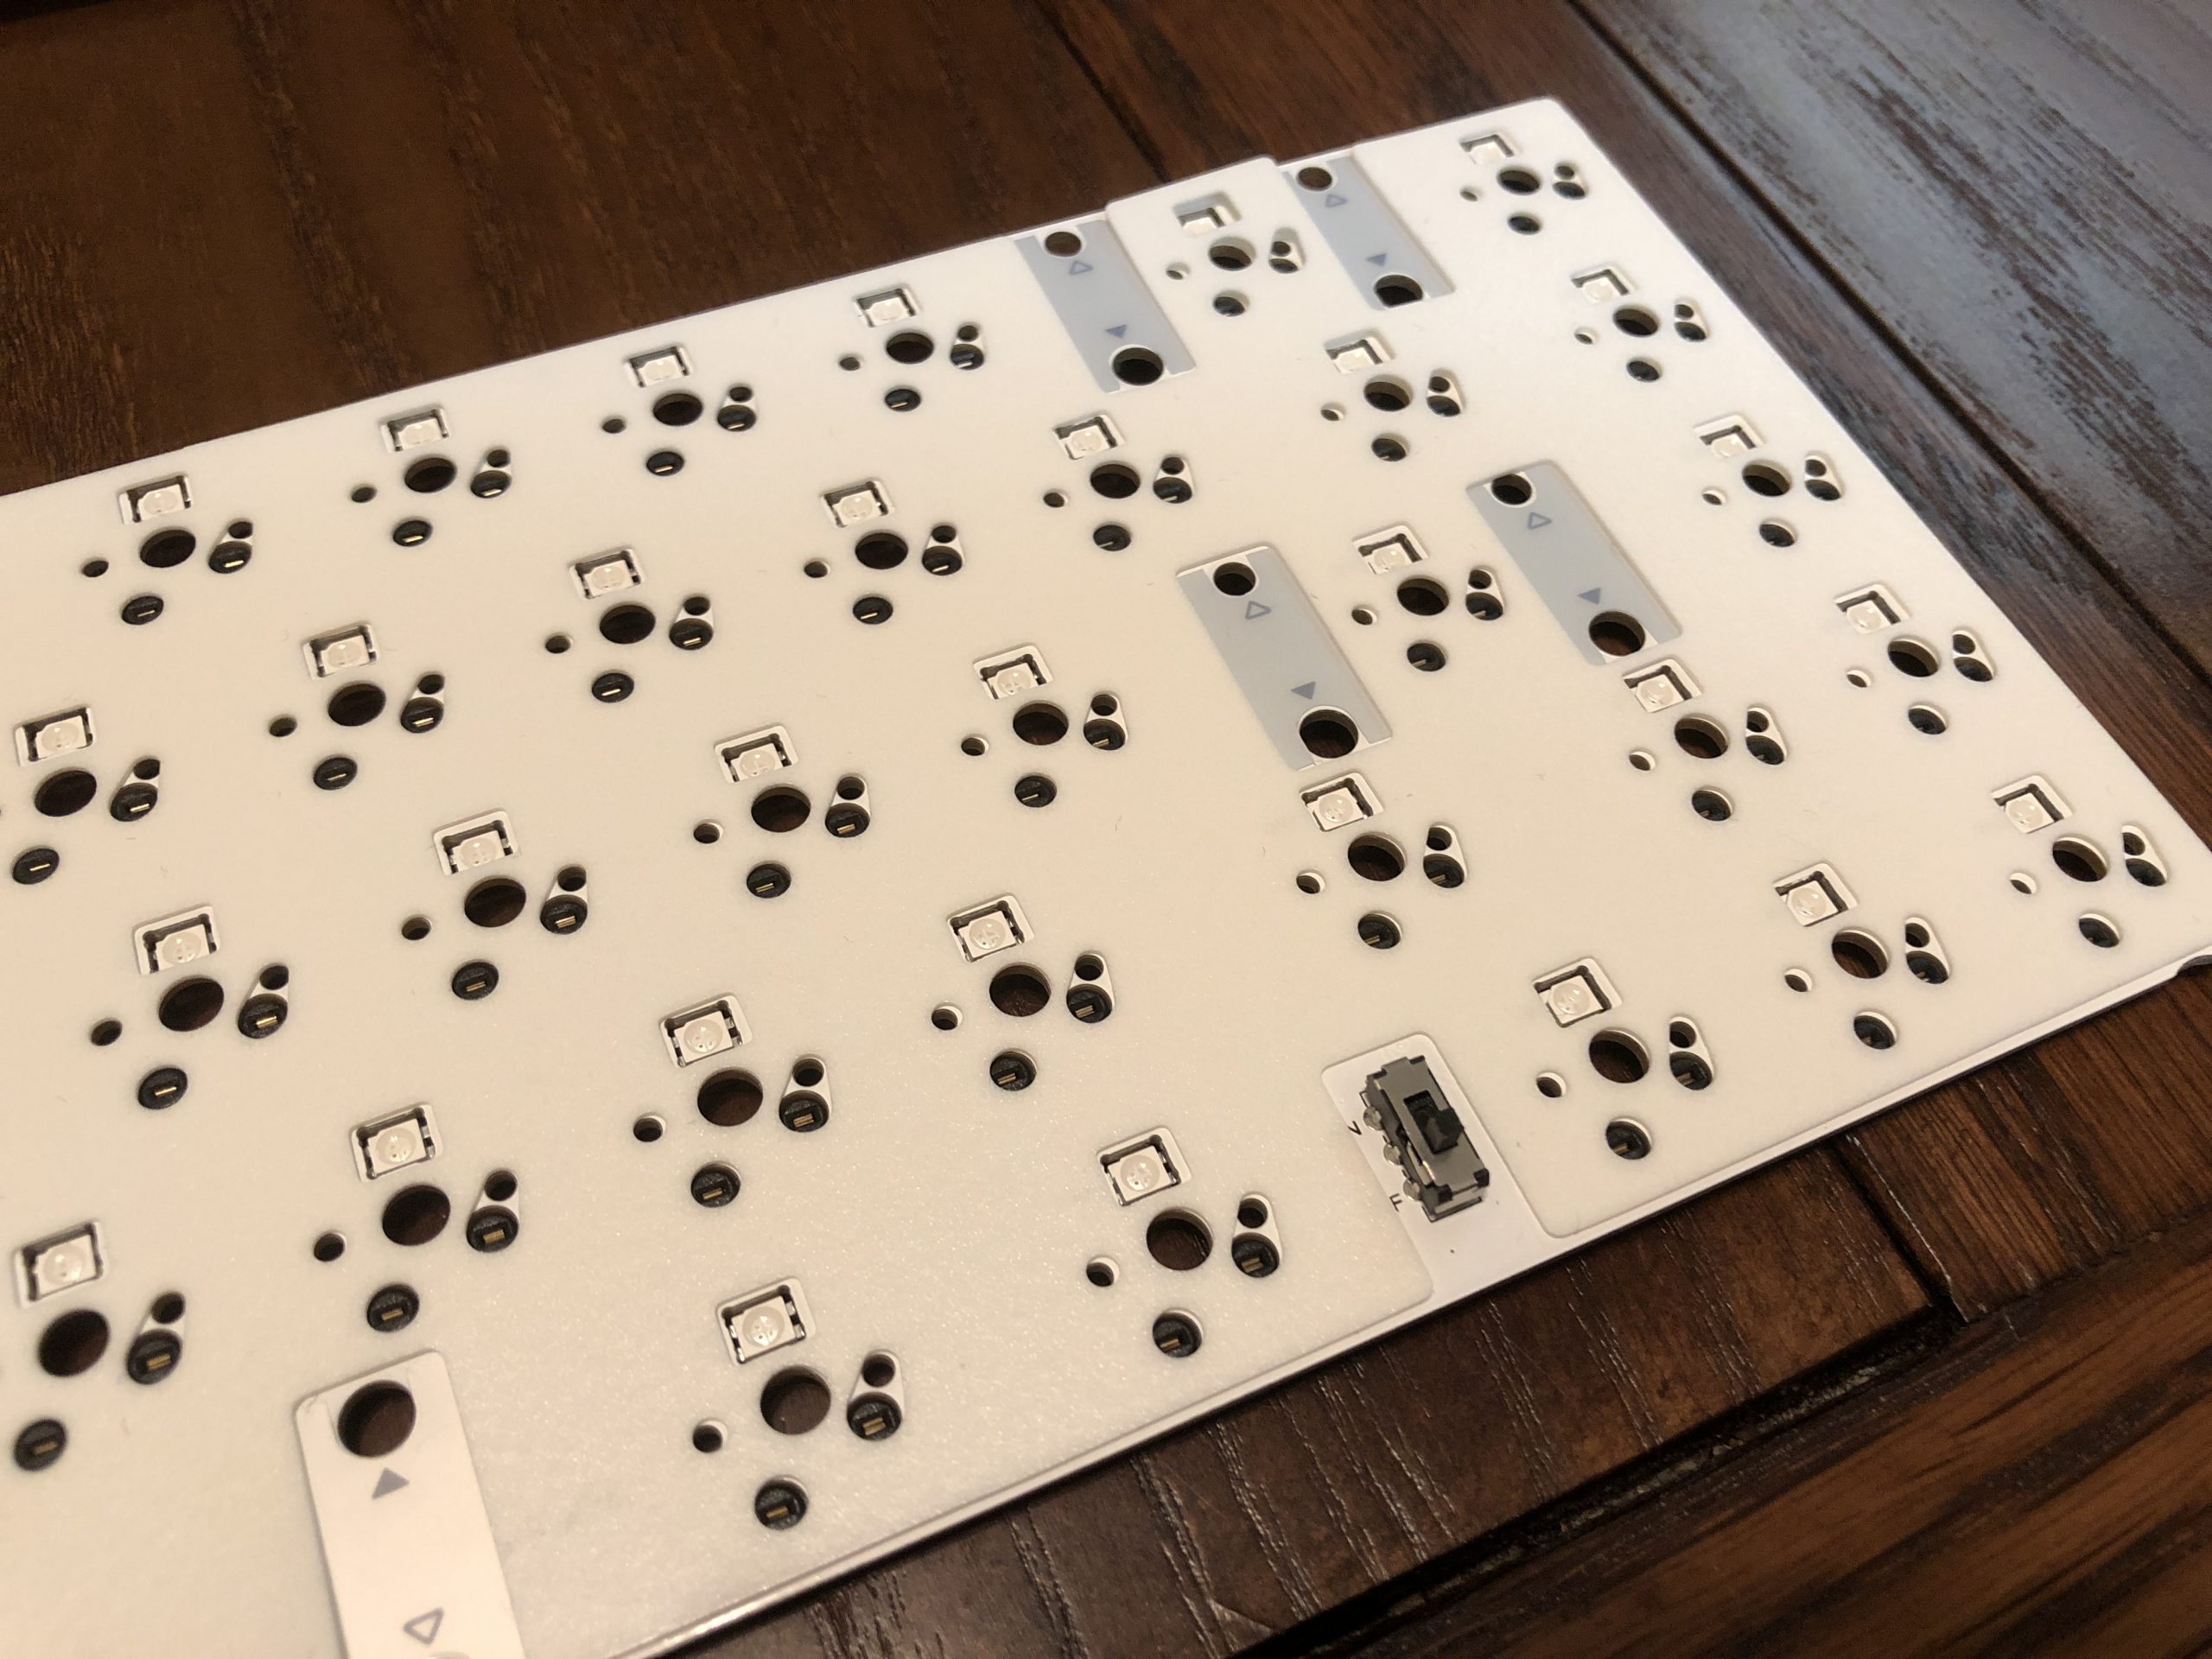
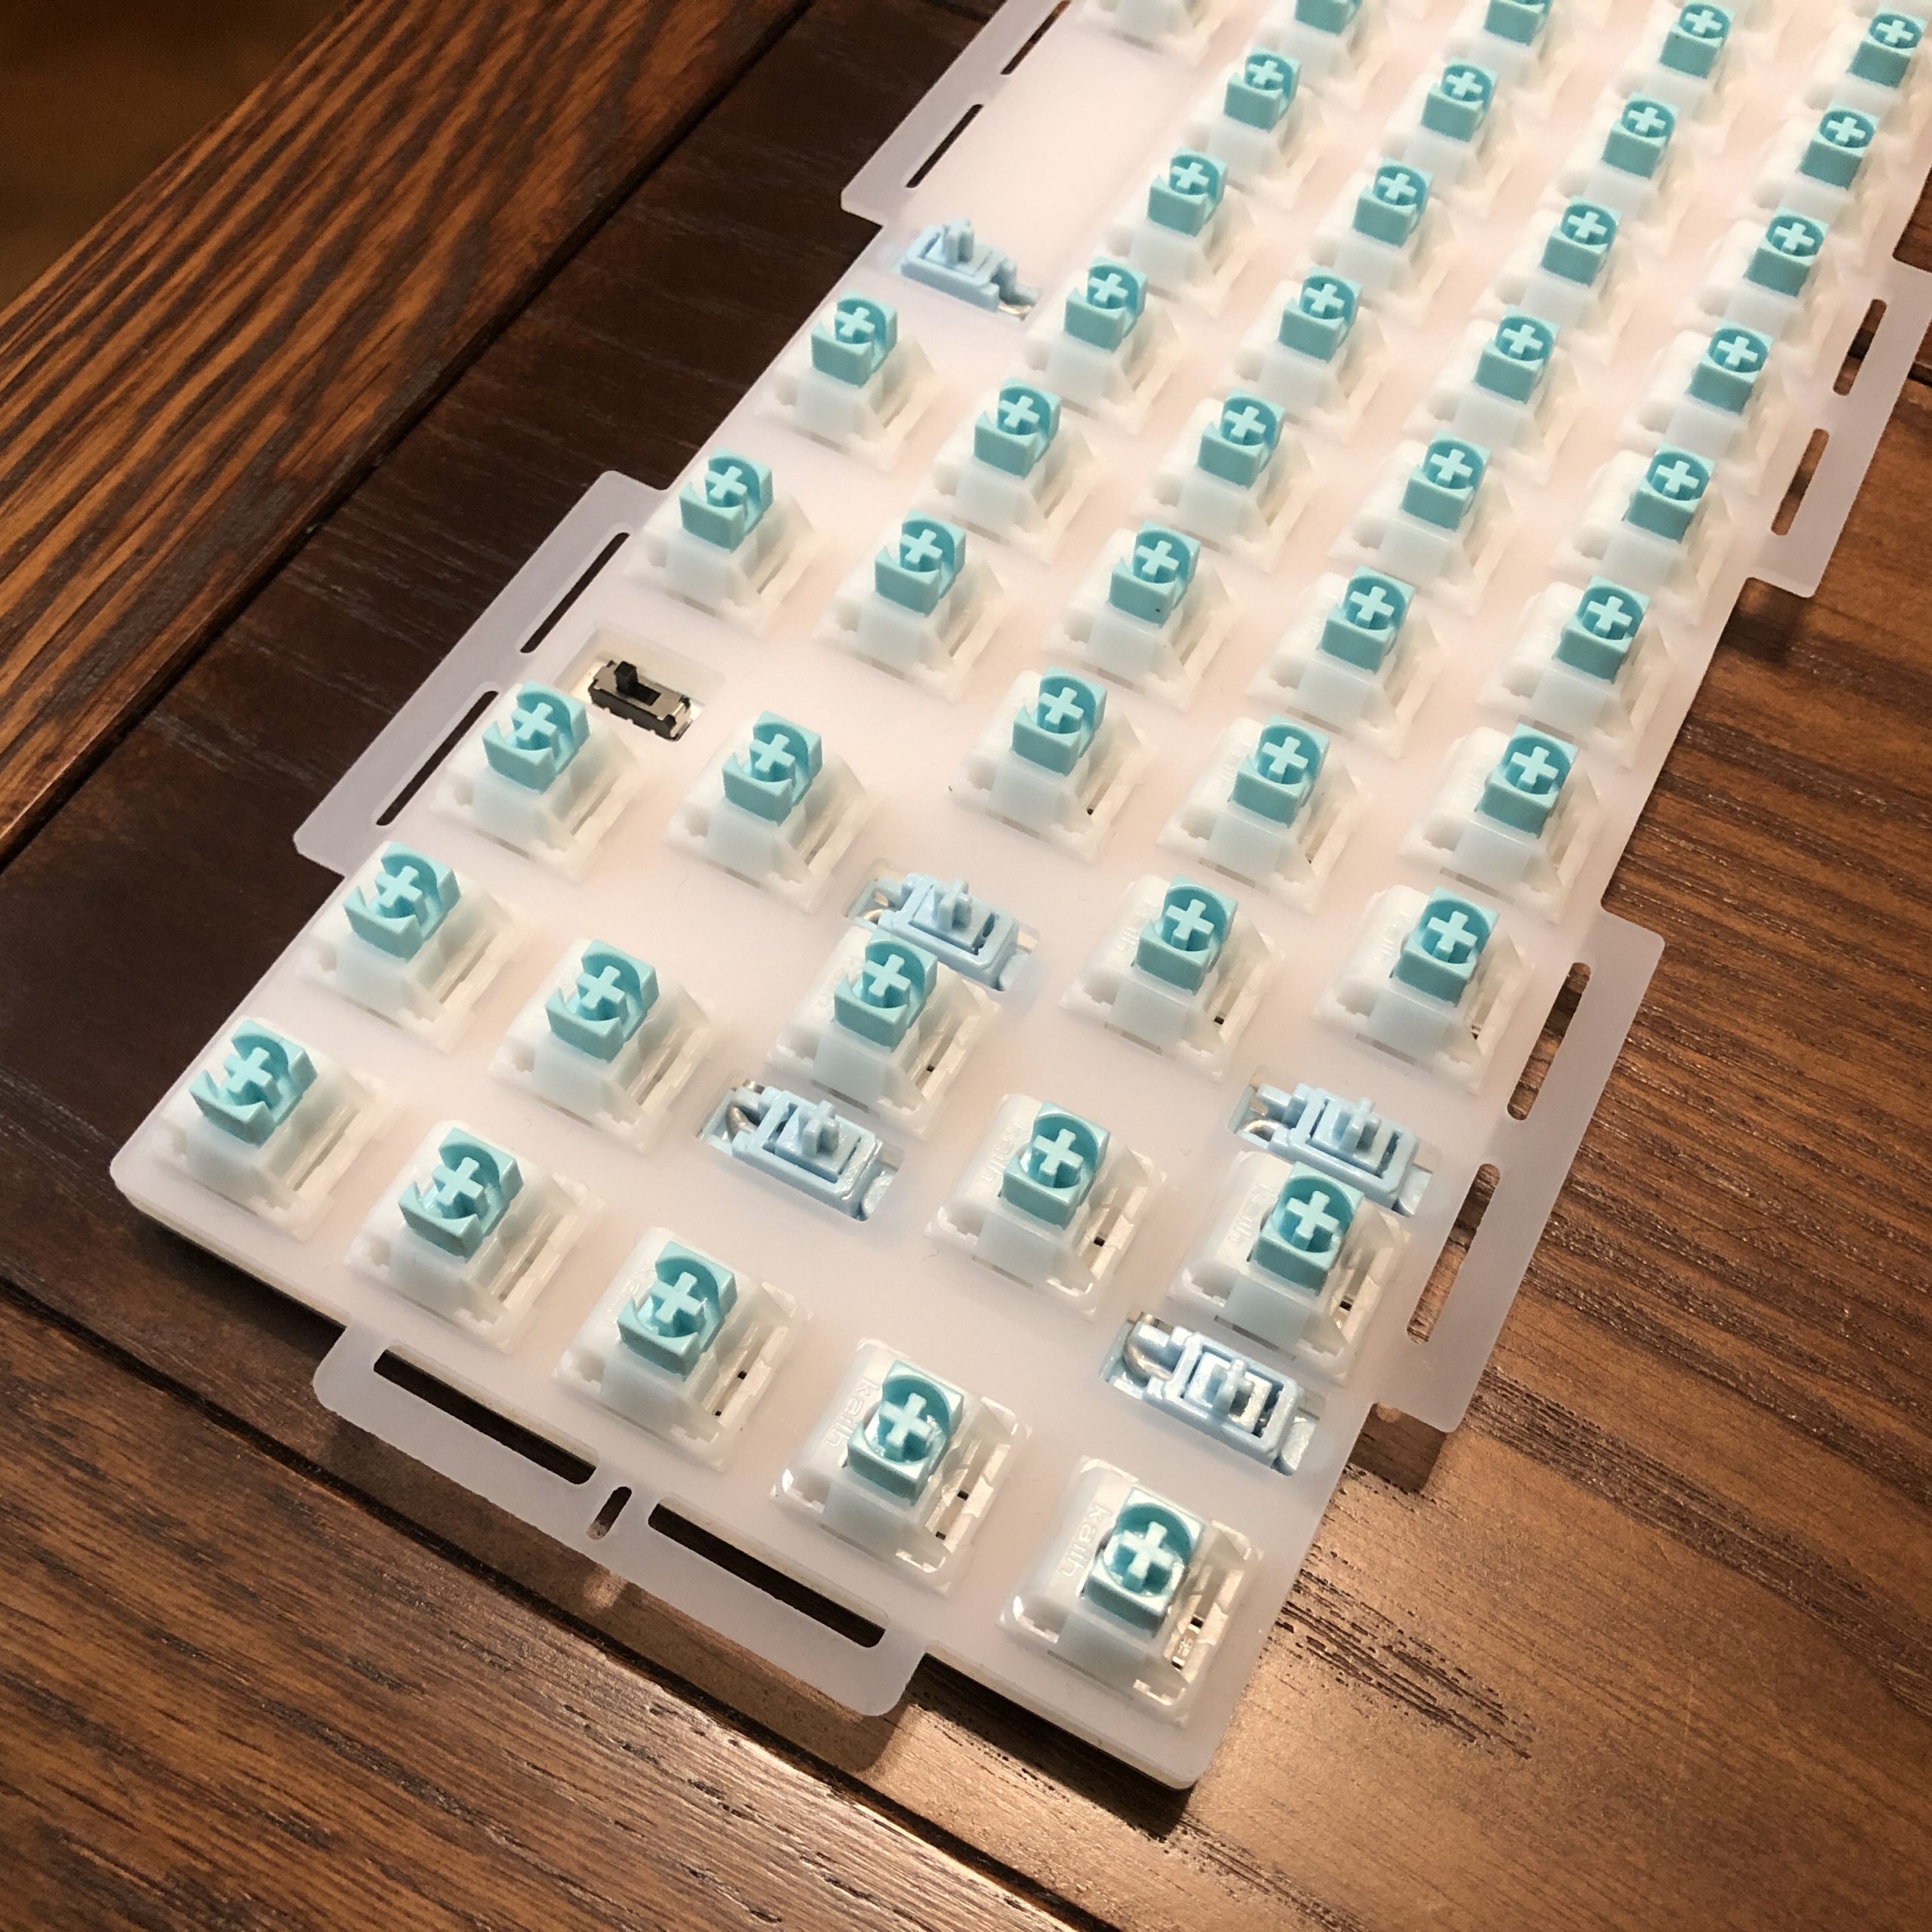
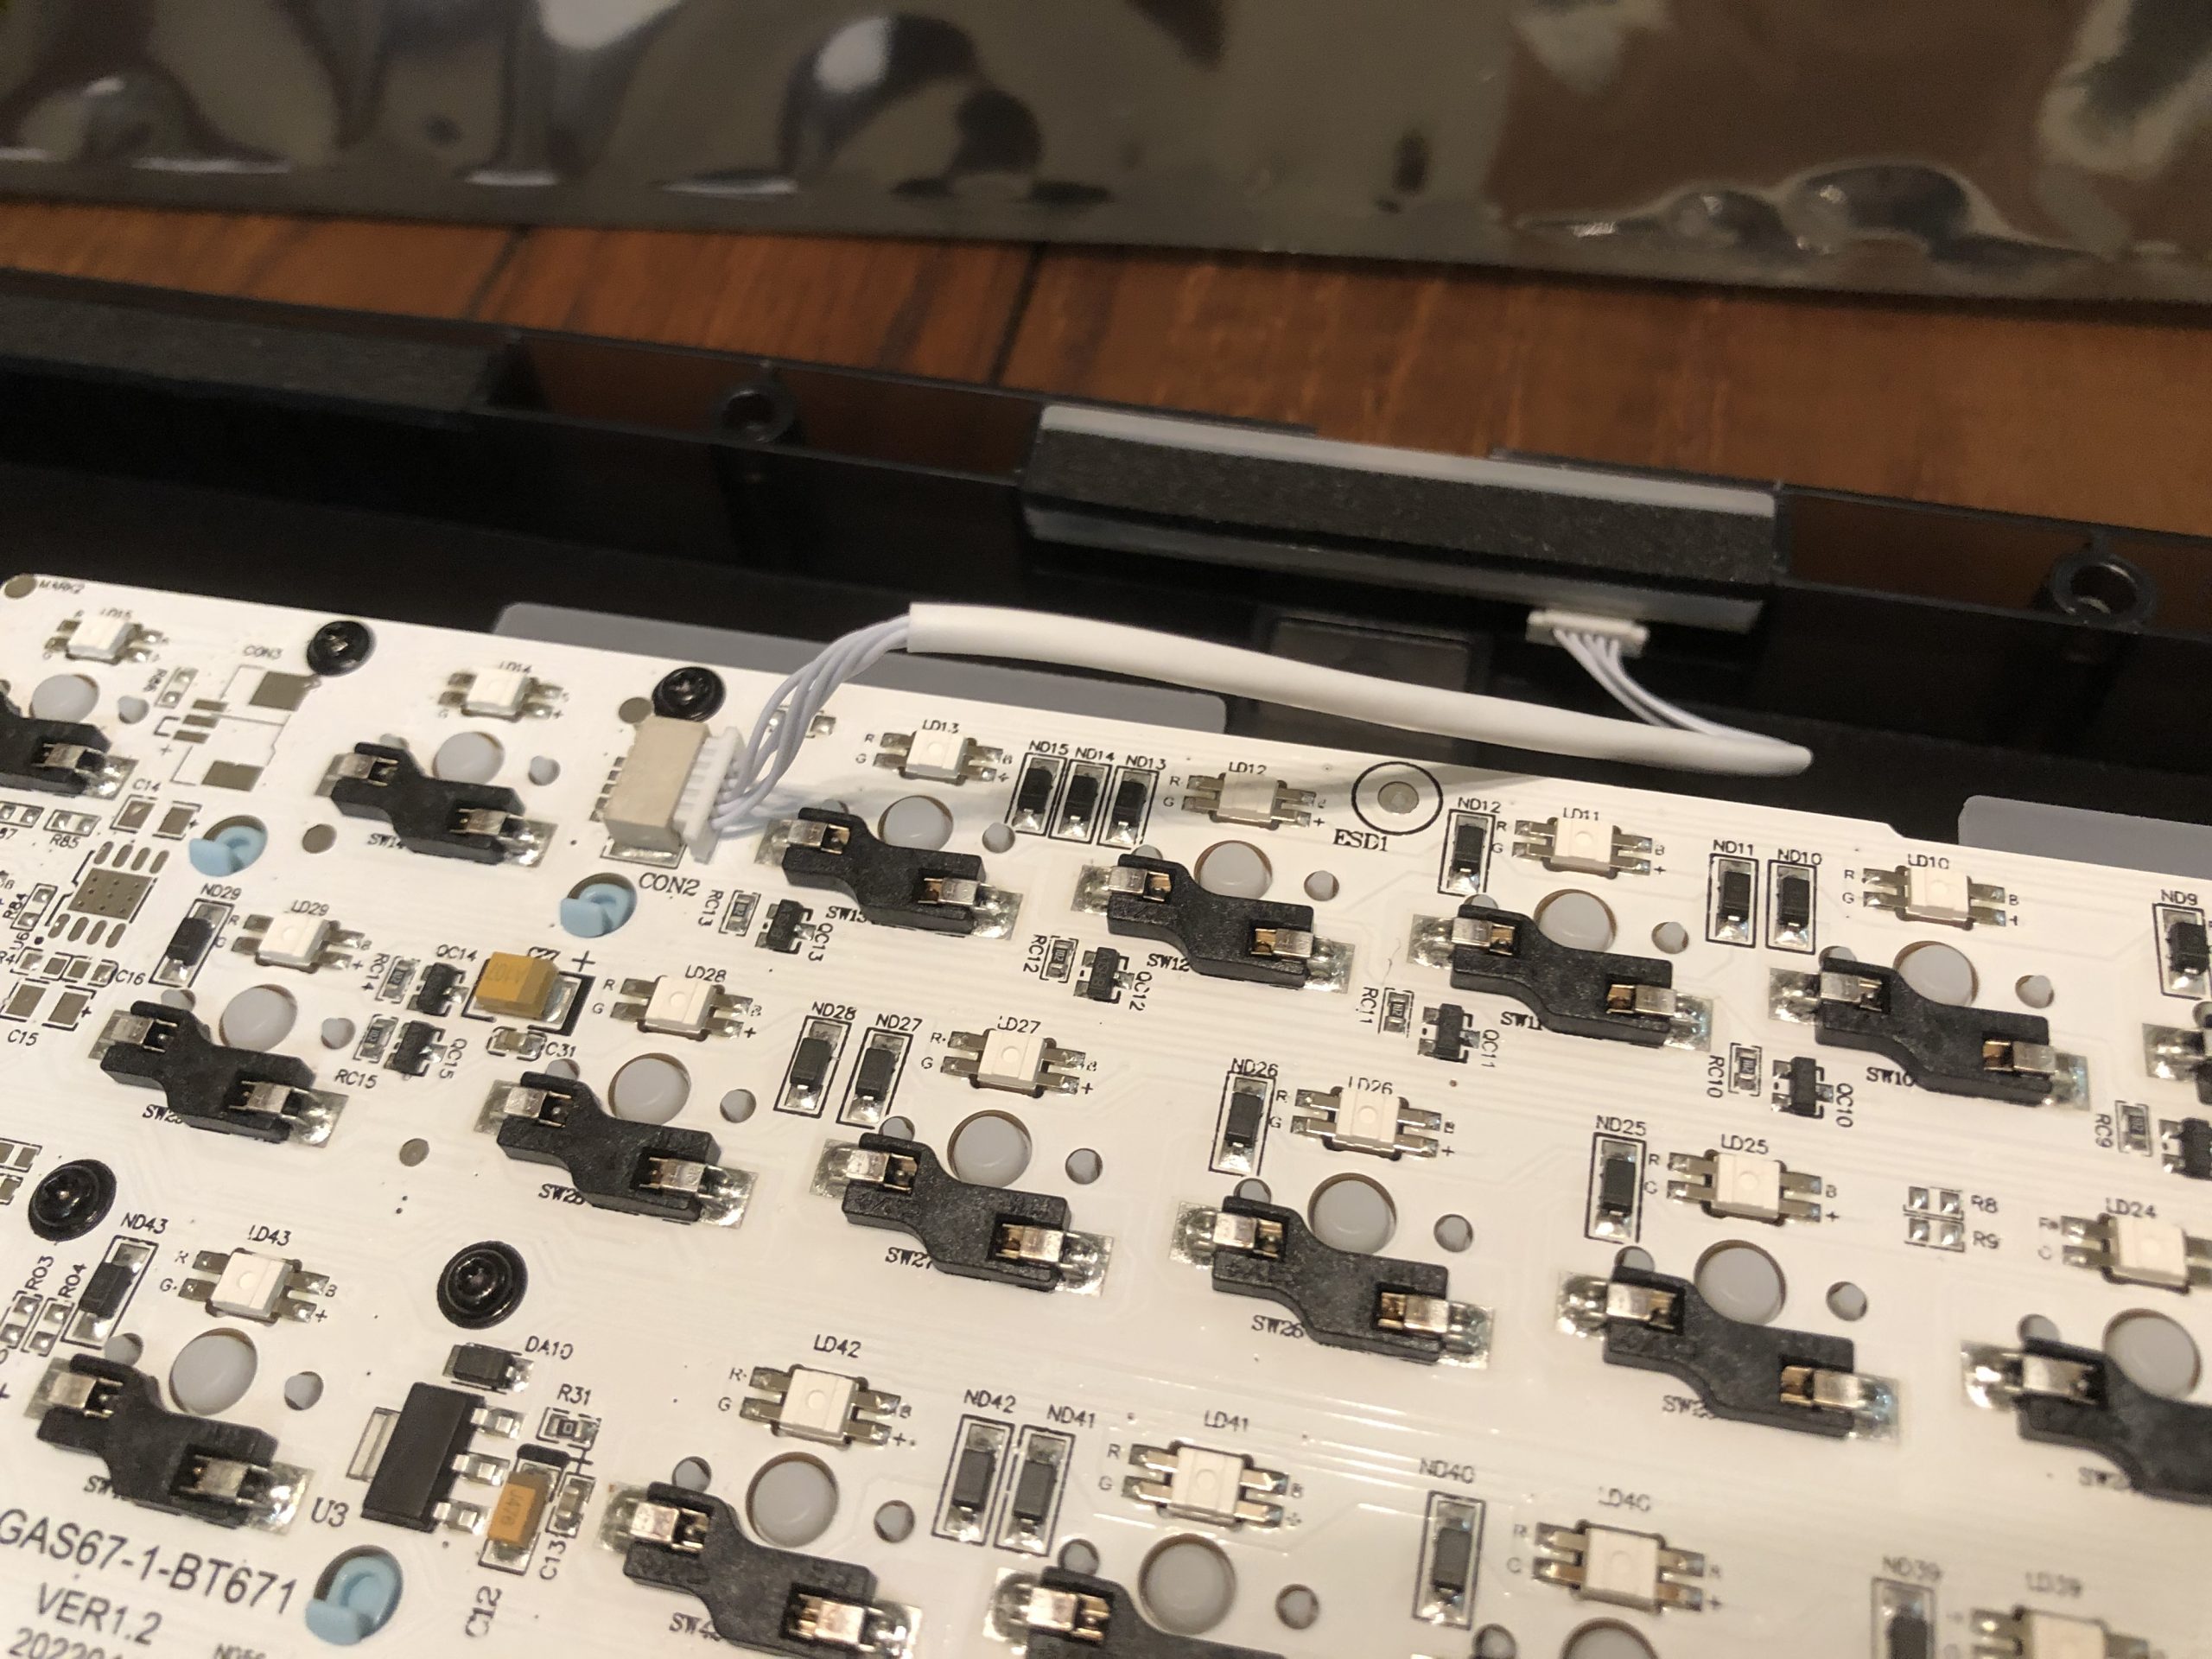
The PCB:

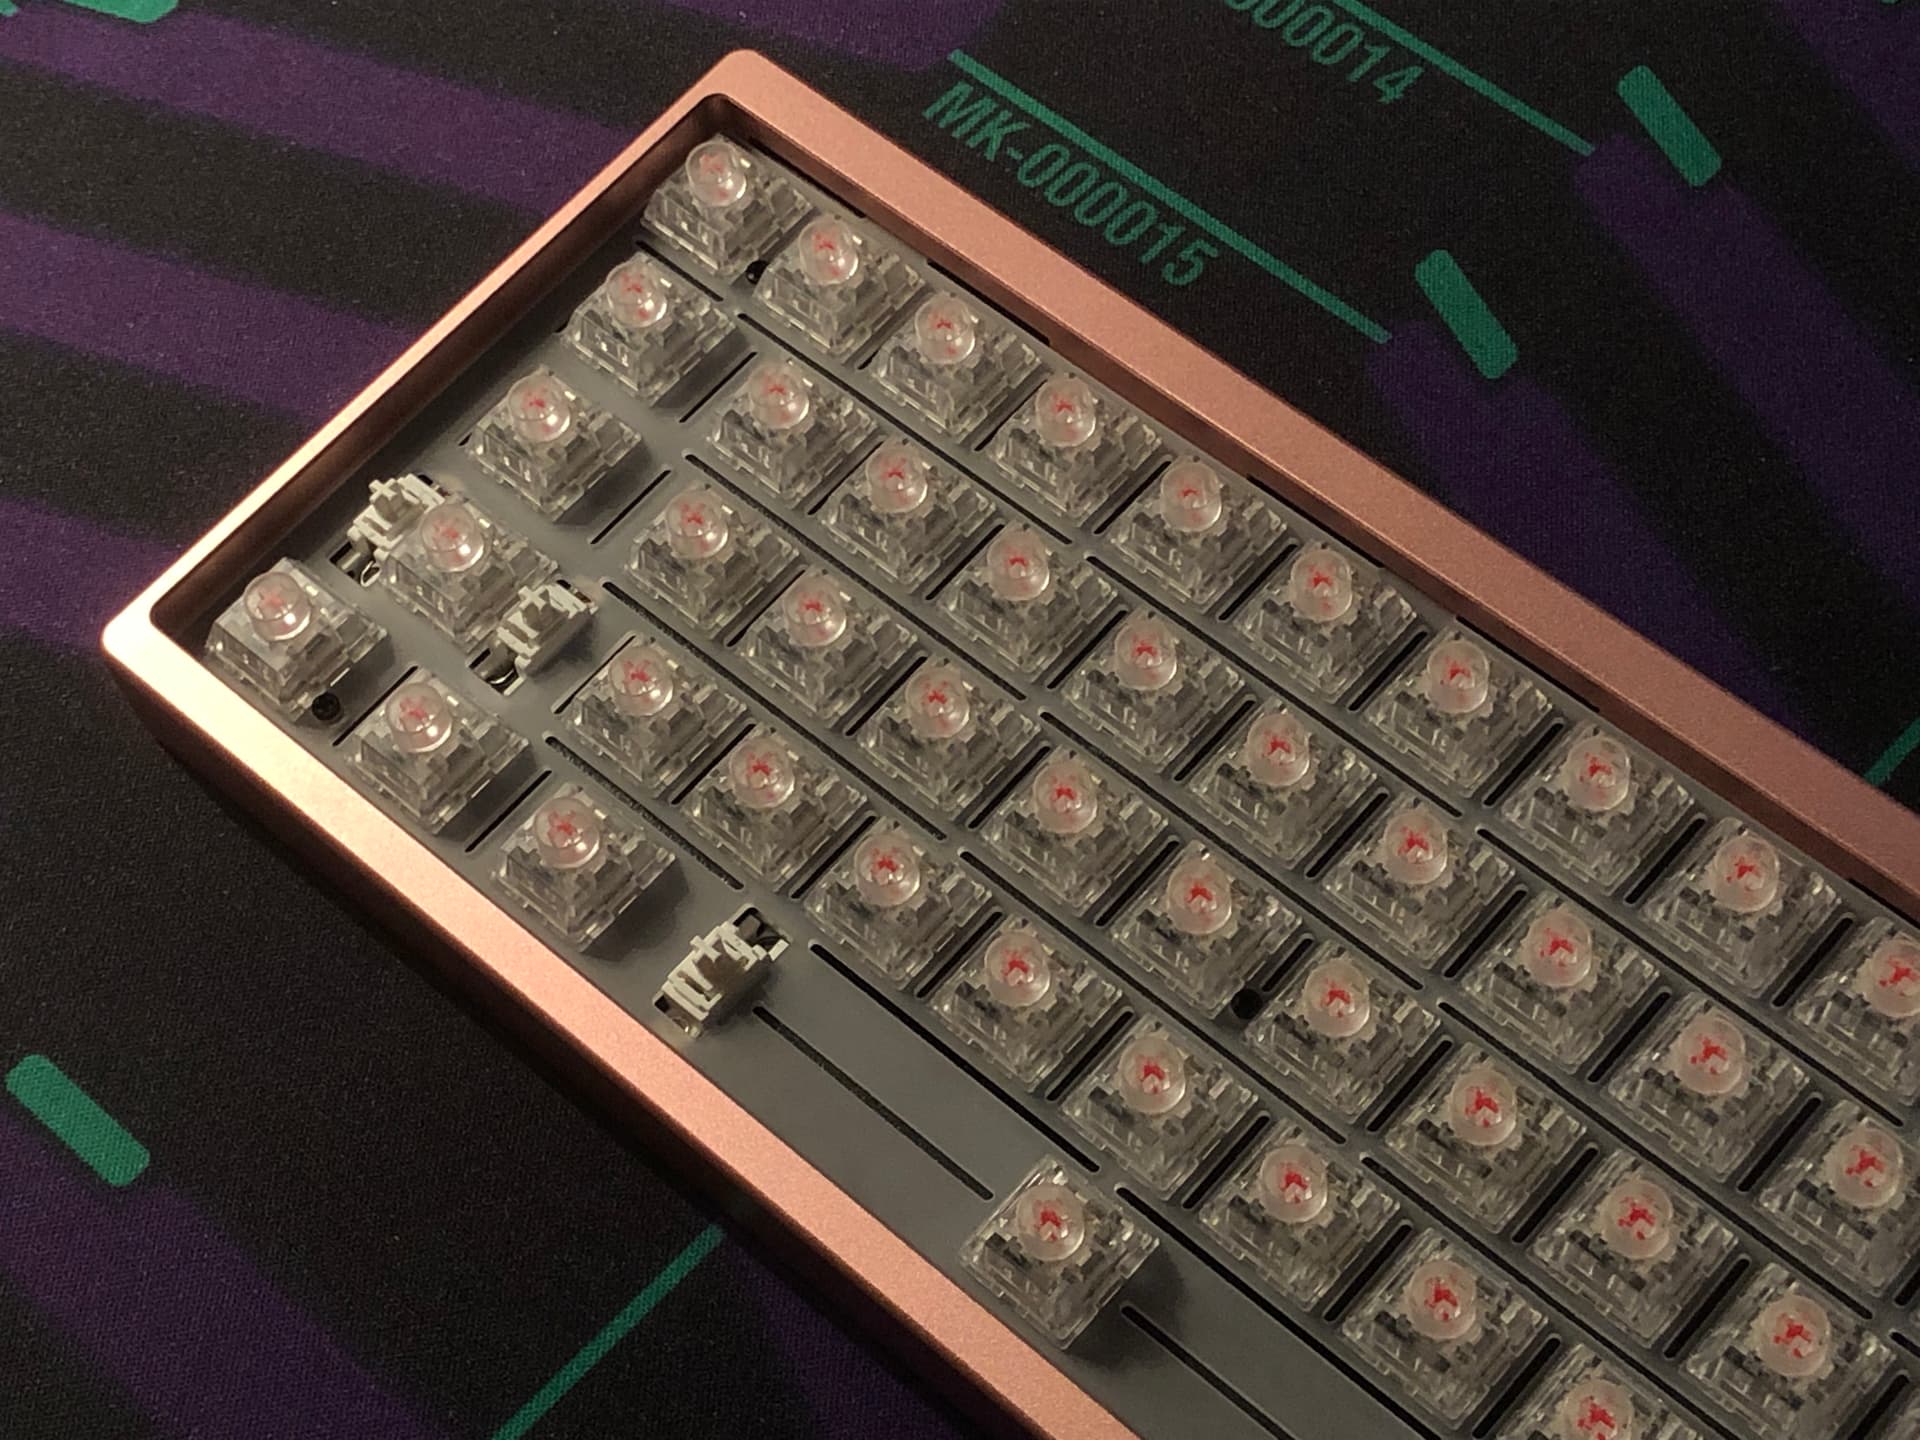
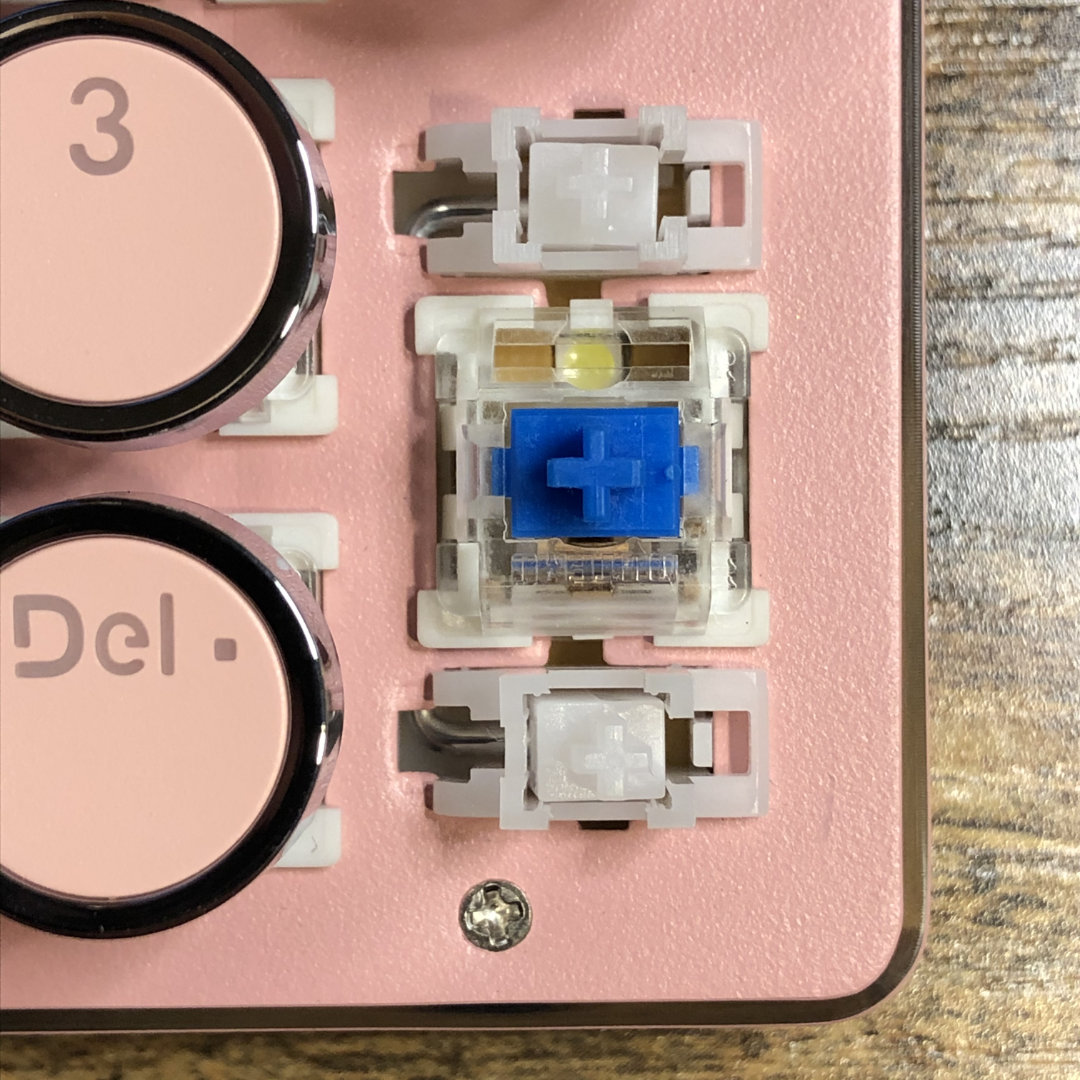
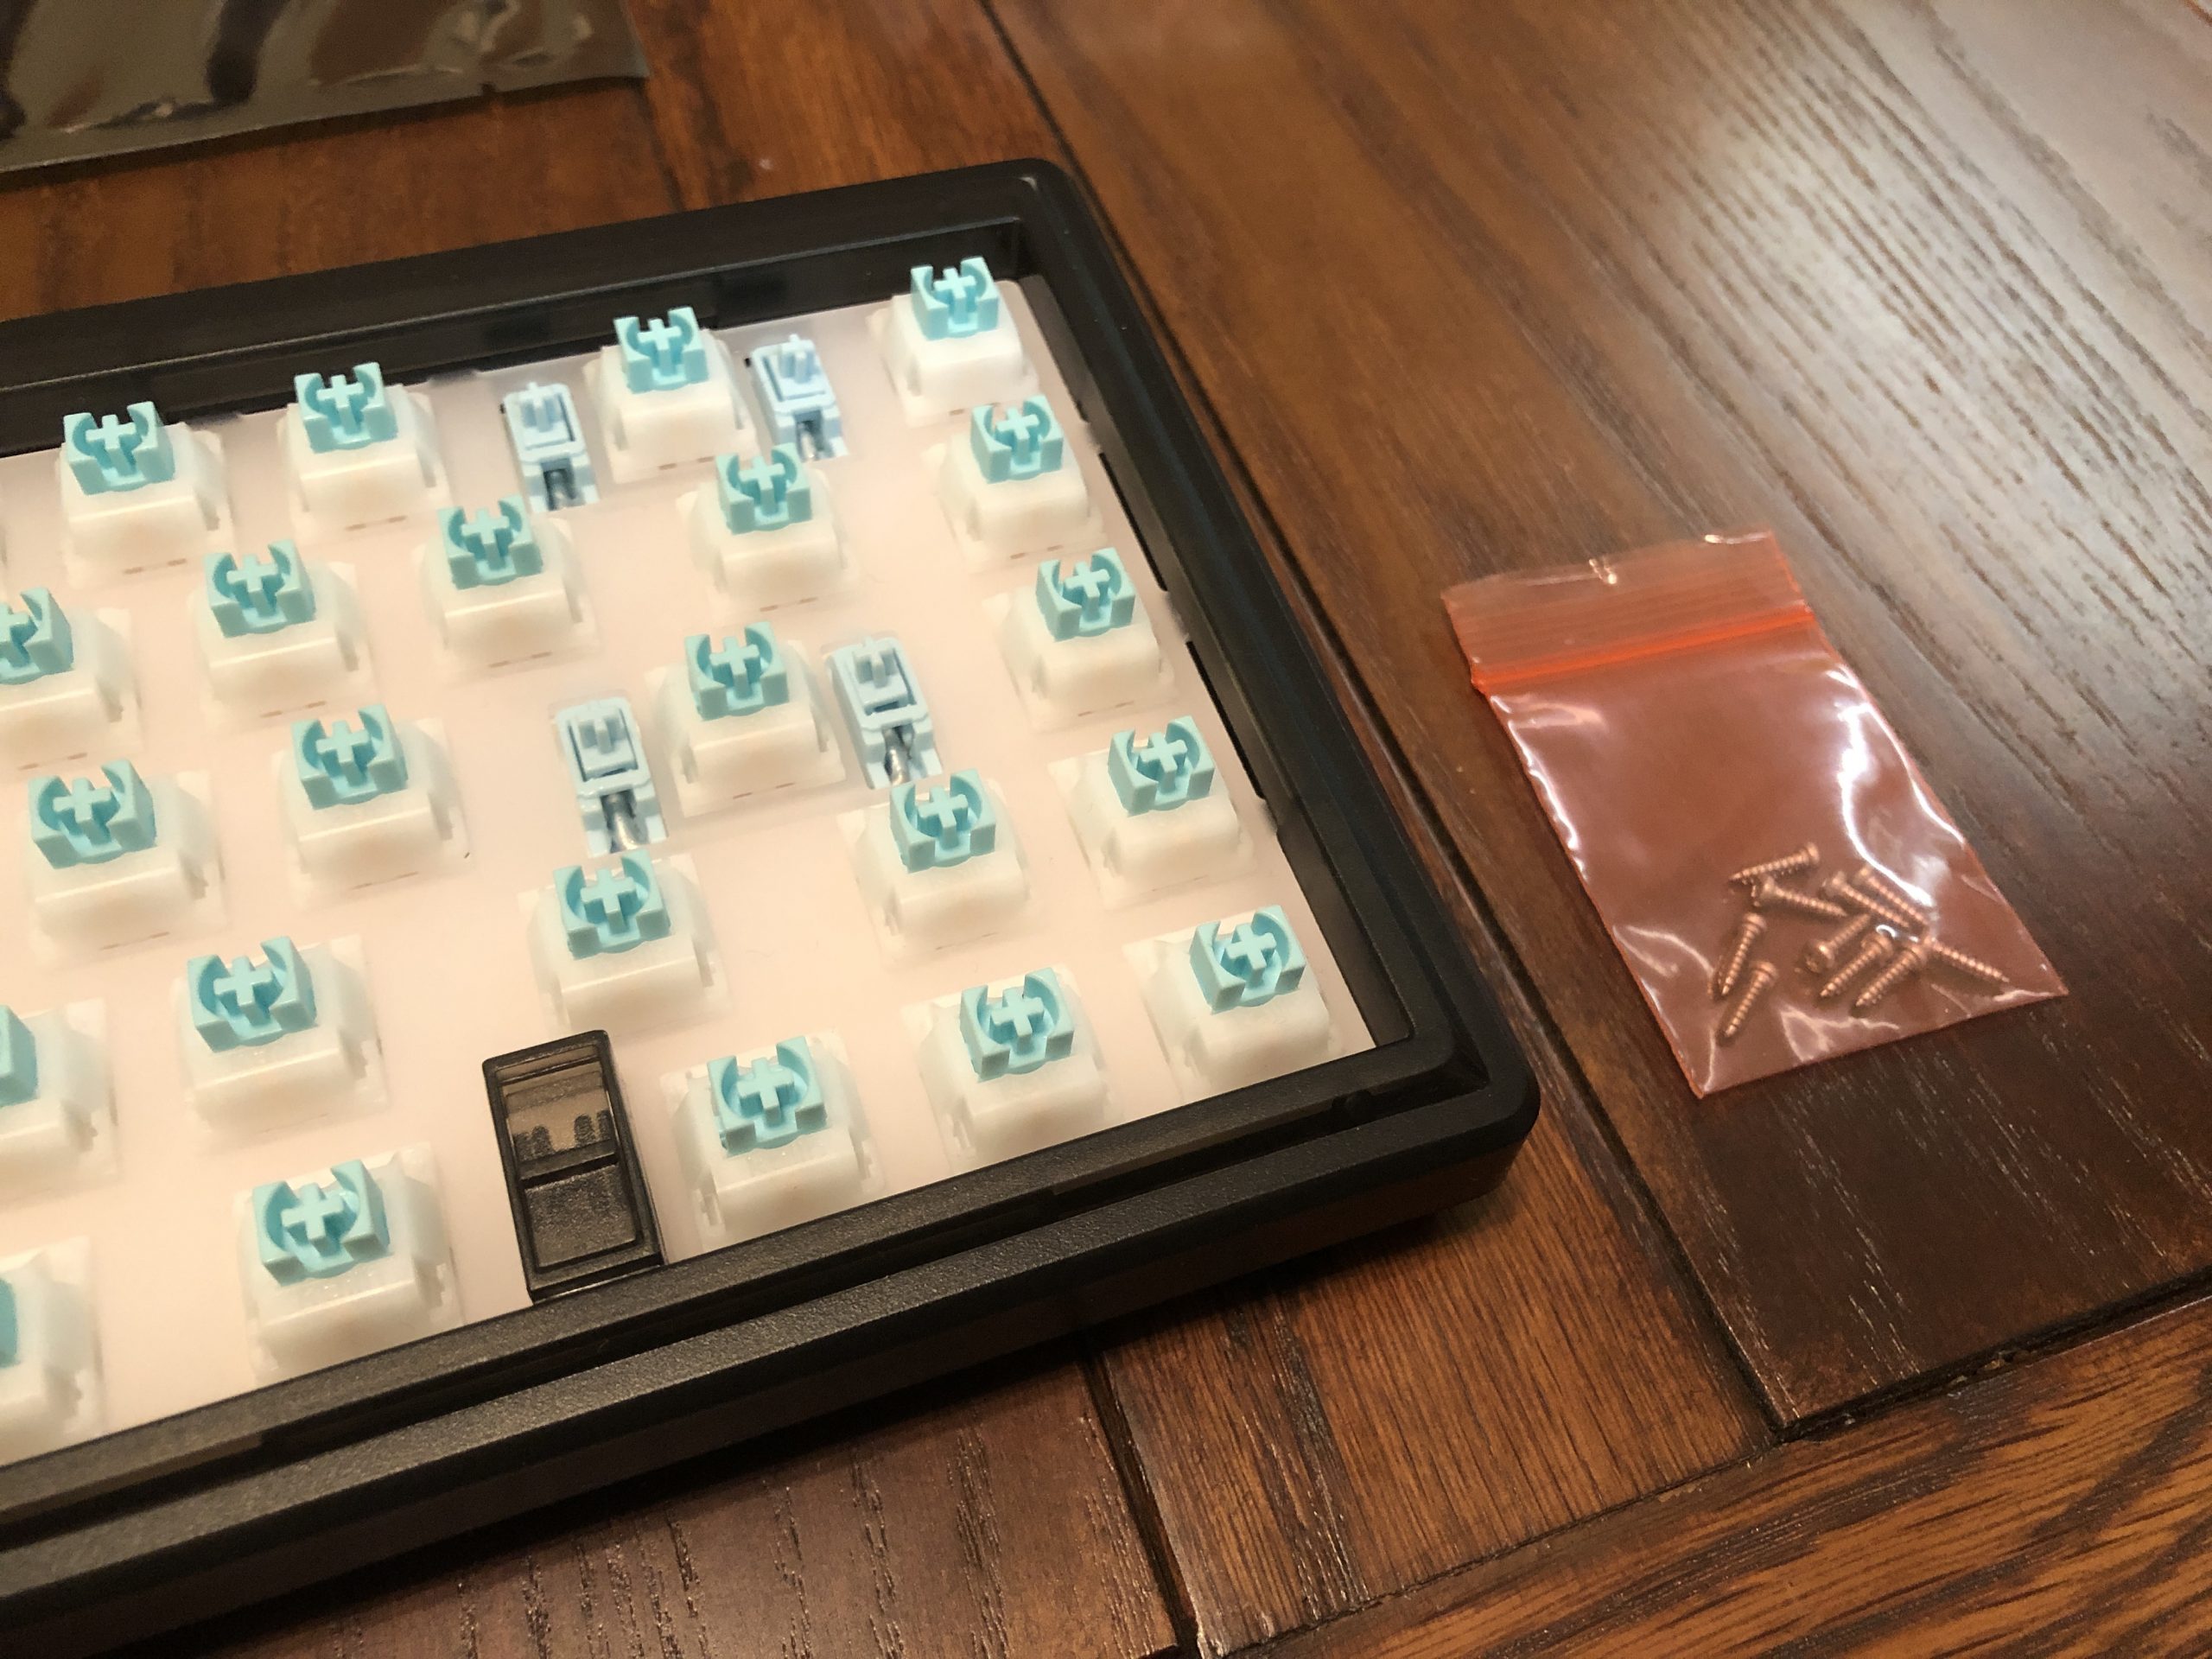
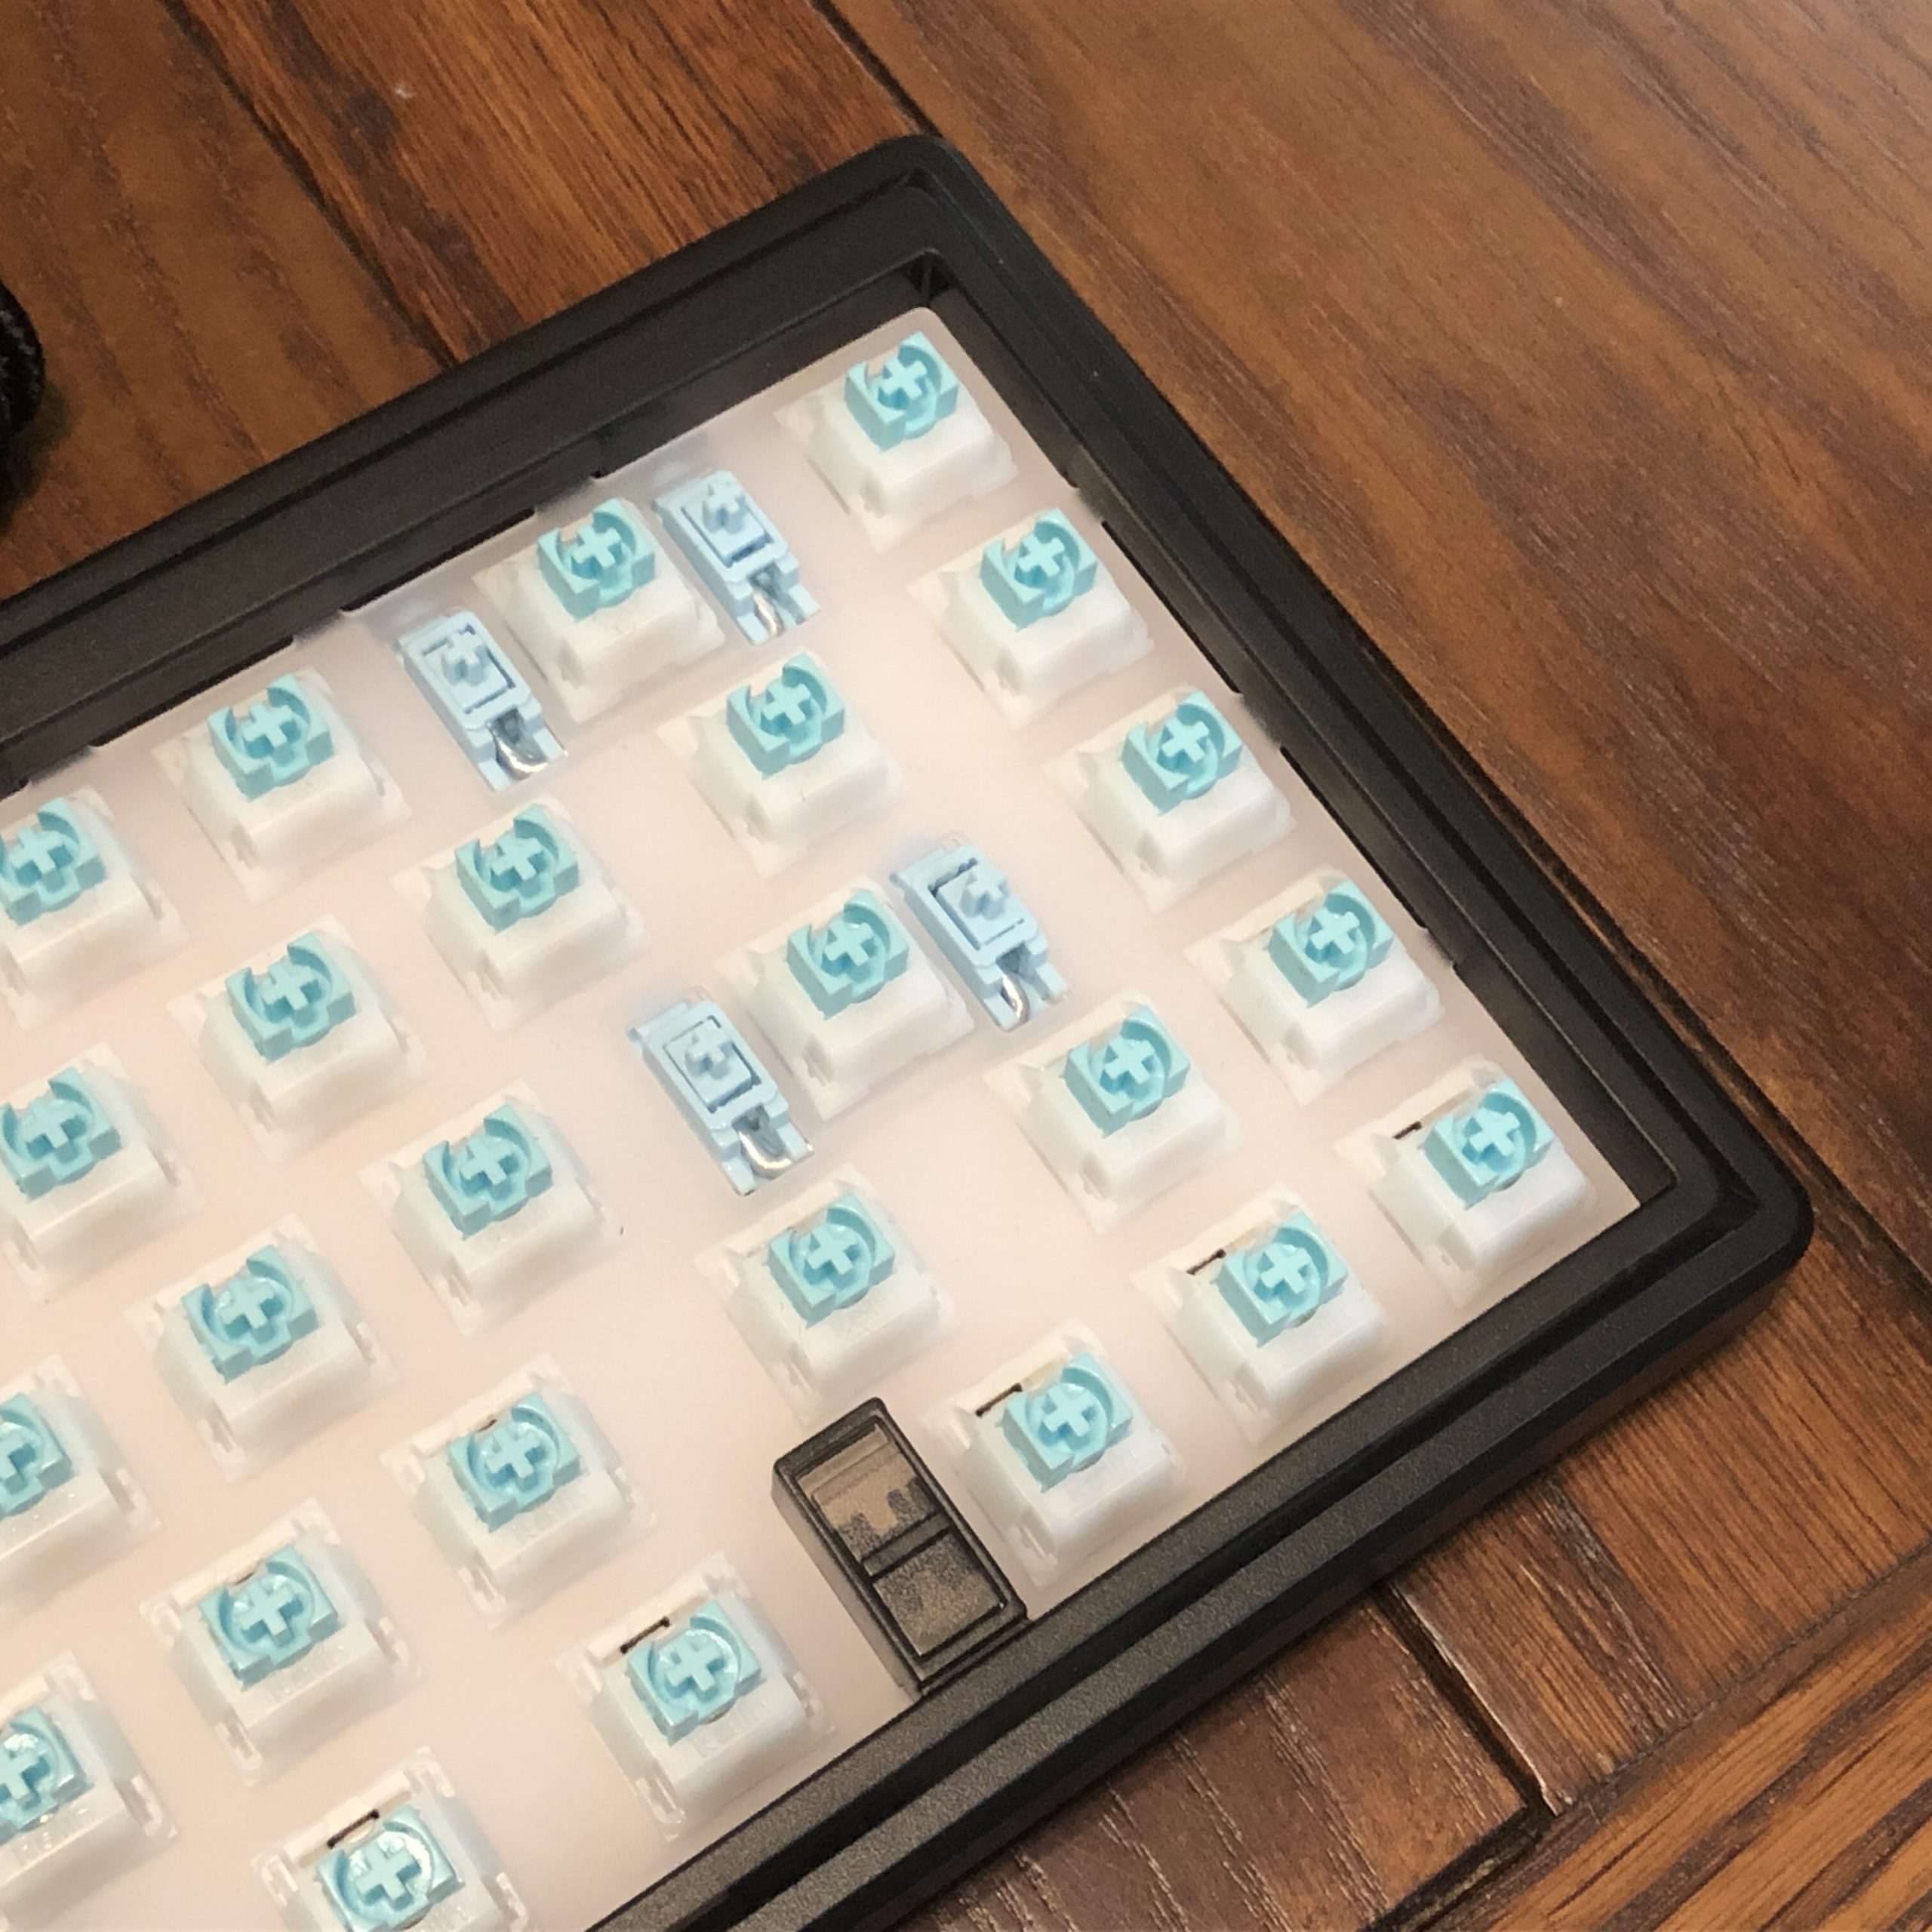
Nothing super fancy, but it’s no slouch. We’ve got RGB LEDs for each key as well as hot-swap sockets, which I believe are CIY’s own but patterned after Kailh or Gateron ones. There are holes to accommodate fixing pins for “5-pin” switches. The LEDs are oriented North of the contacts; more on that later. There are also holes for stabilizers – that’s right – a cheap kit with PCB-mount stabs, and they don’t even suck. They’re not perfect, though – more on that later. There’s also a physical toggle switch positioned between the arrow cluster and right CTRL key.

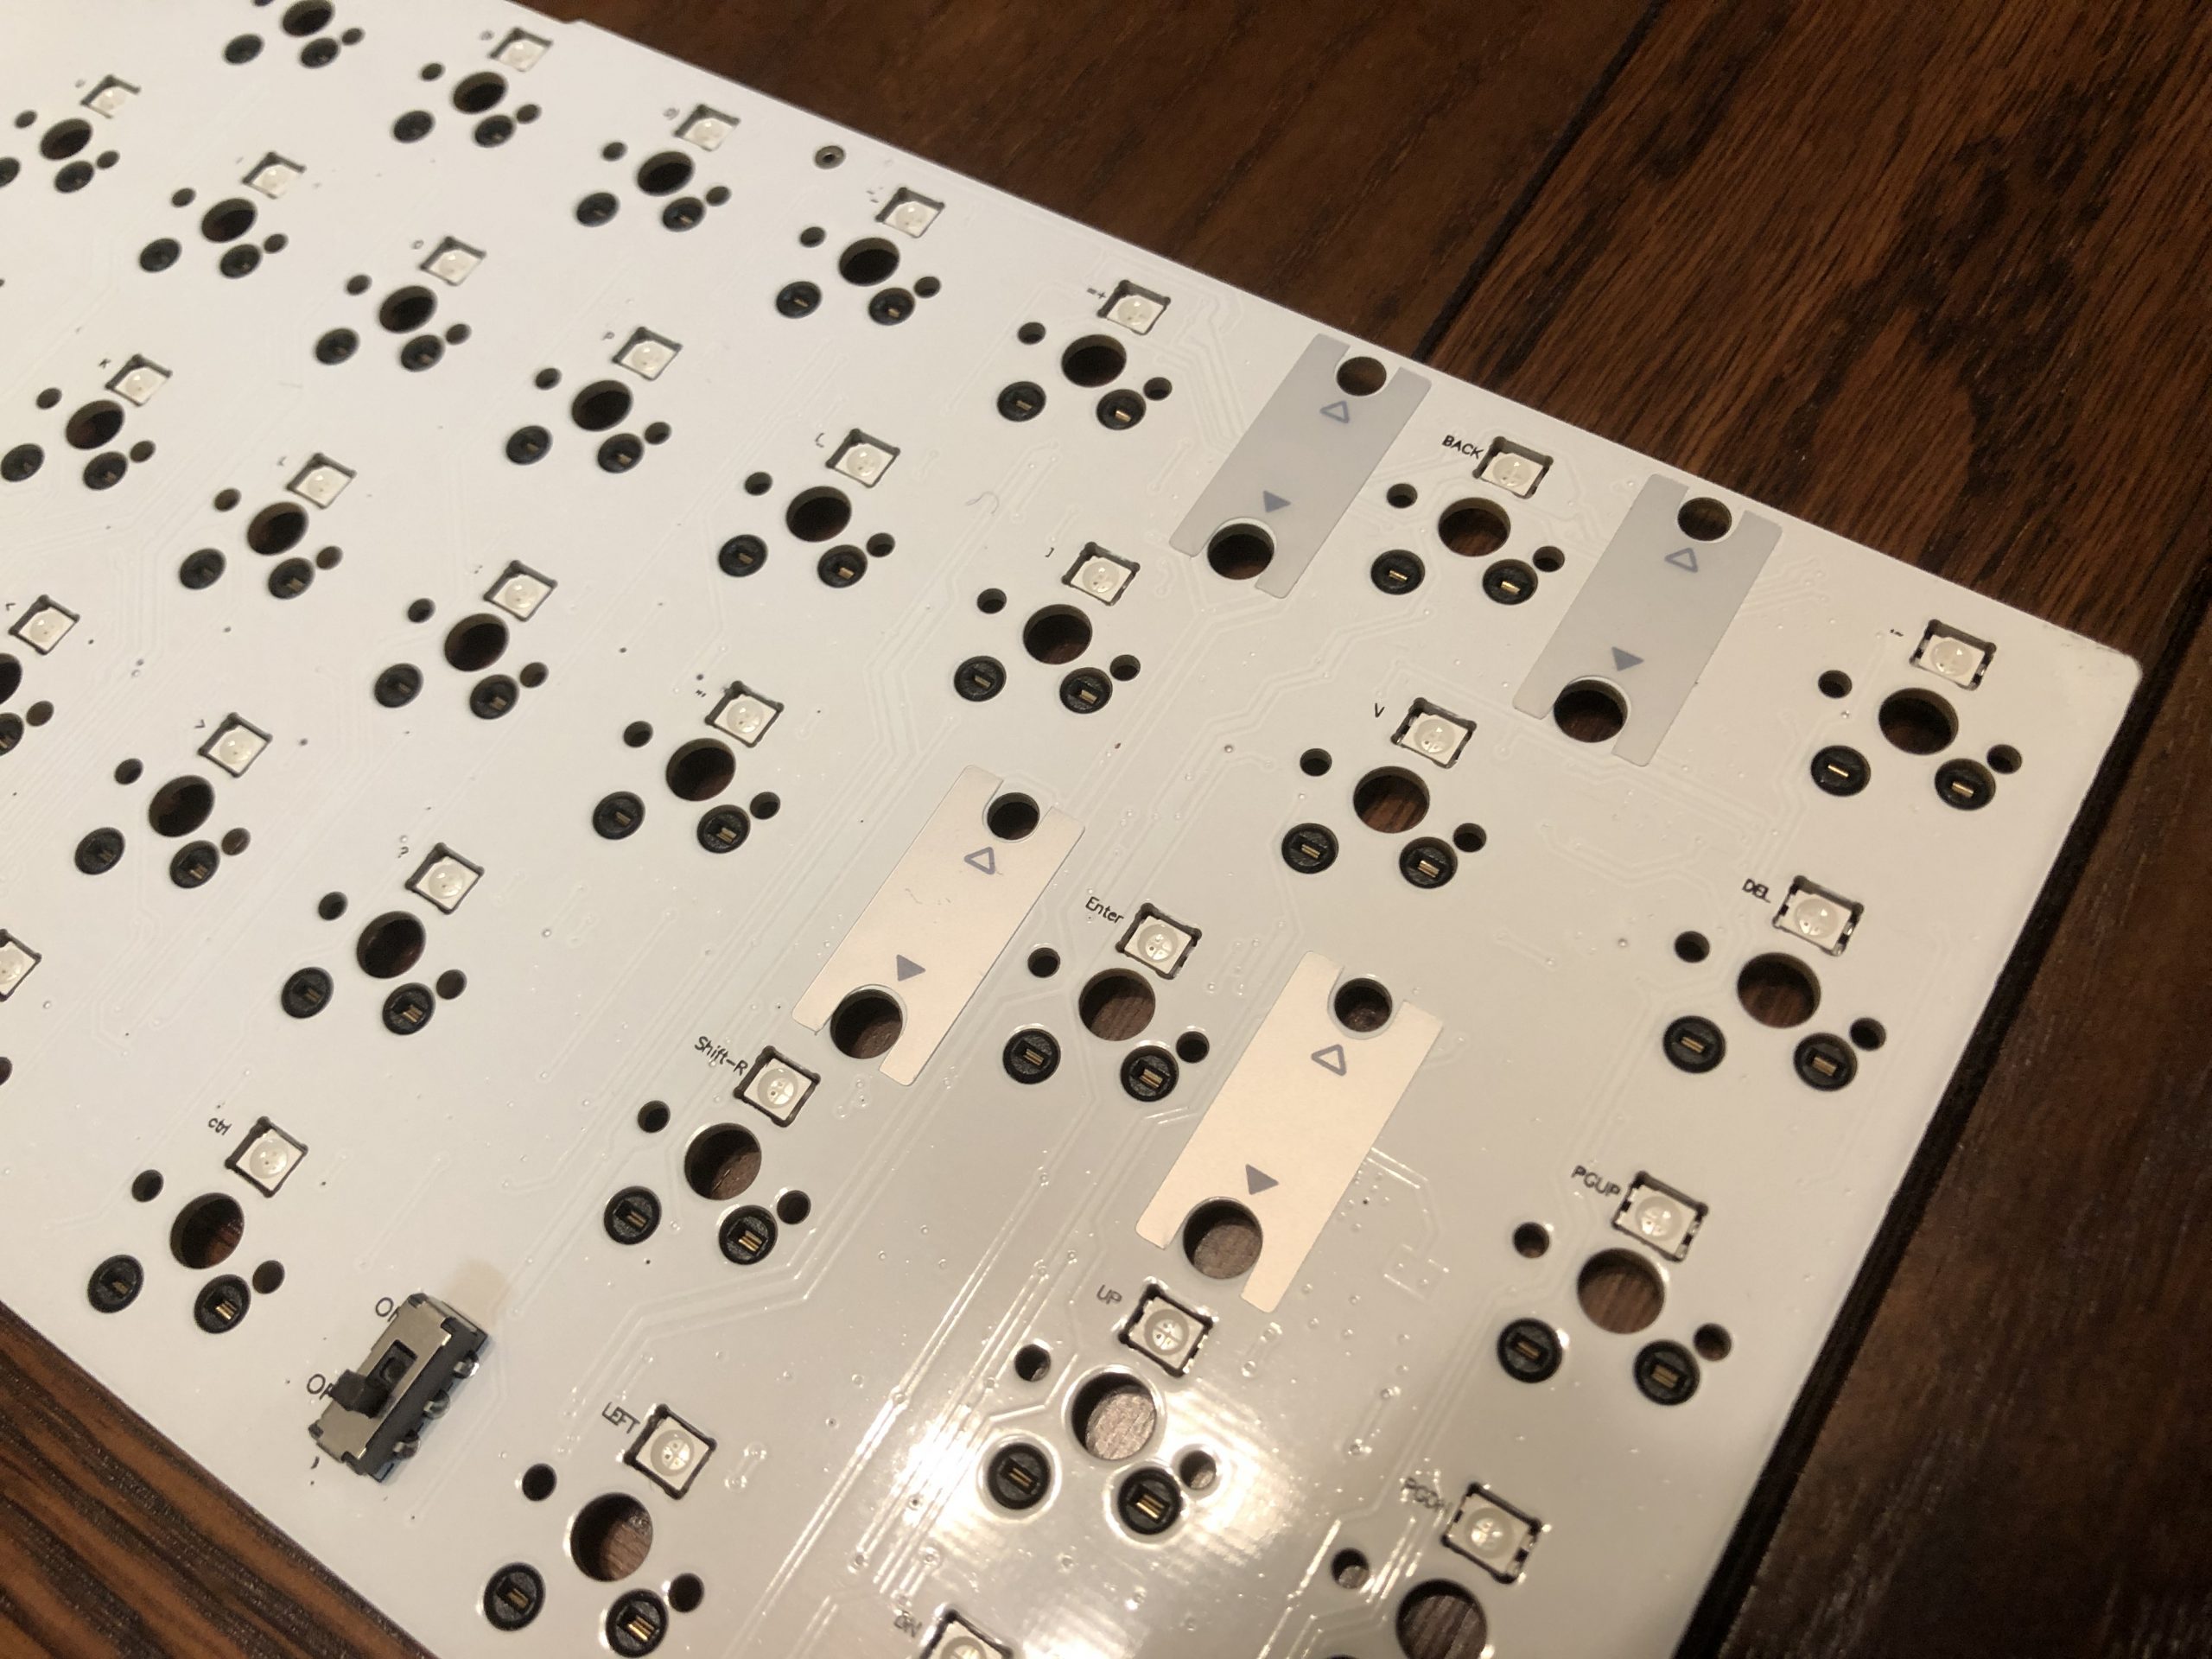
A look at the PCB, where you can see the toggle switch and shiny stab dampening stickers.

The most notable thing about this PCB, especially at this price point, is the fact that I/O is handled through a daughter board. Probably not that expensive to execute given how many pre-builts rely on it, but for whatever reason this feature has been notably absent on almost every budget and middle-market kit, despite being objectively better for gasket-mount boards, or any board with a somewhat mobile assembly. We’ve got it here, though – and that’s a very welcome feature.

The Stabs:

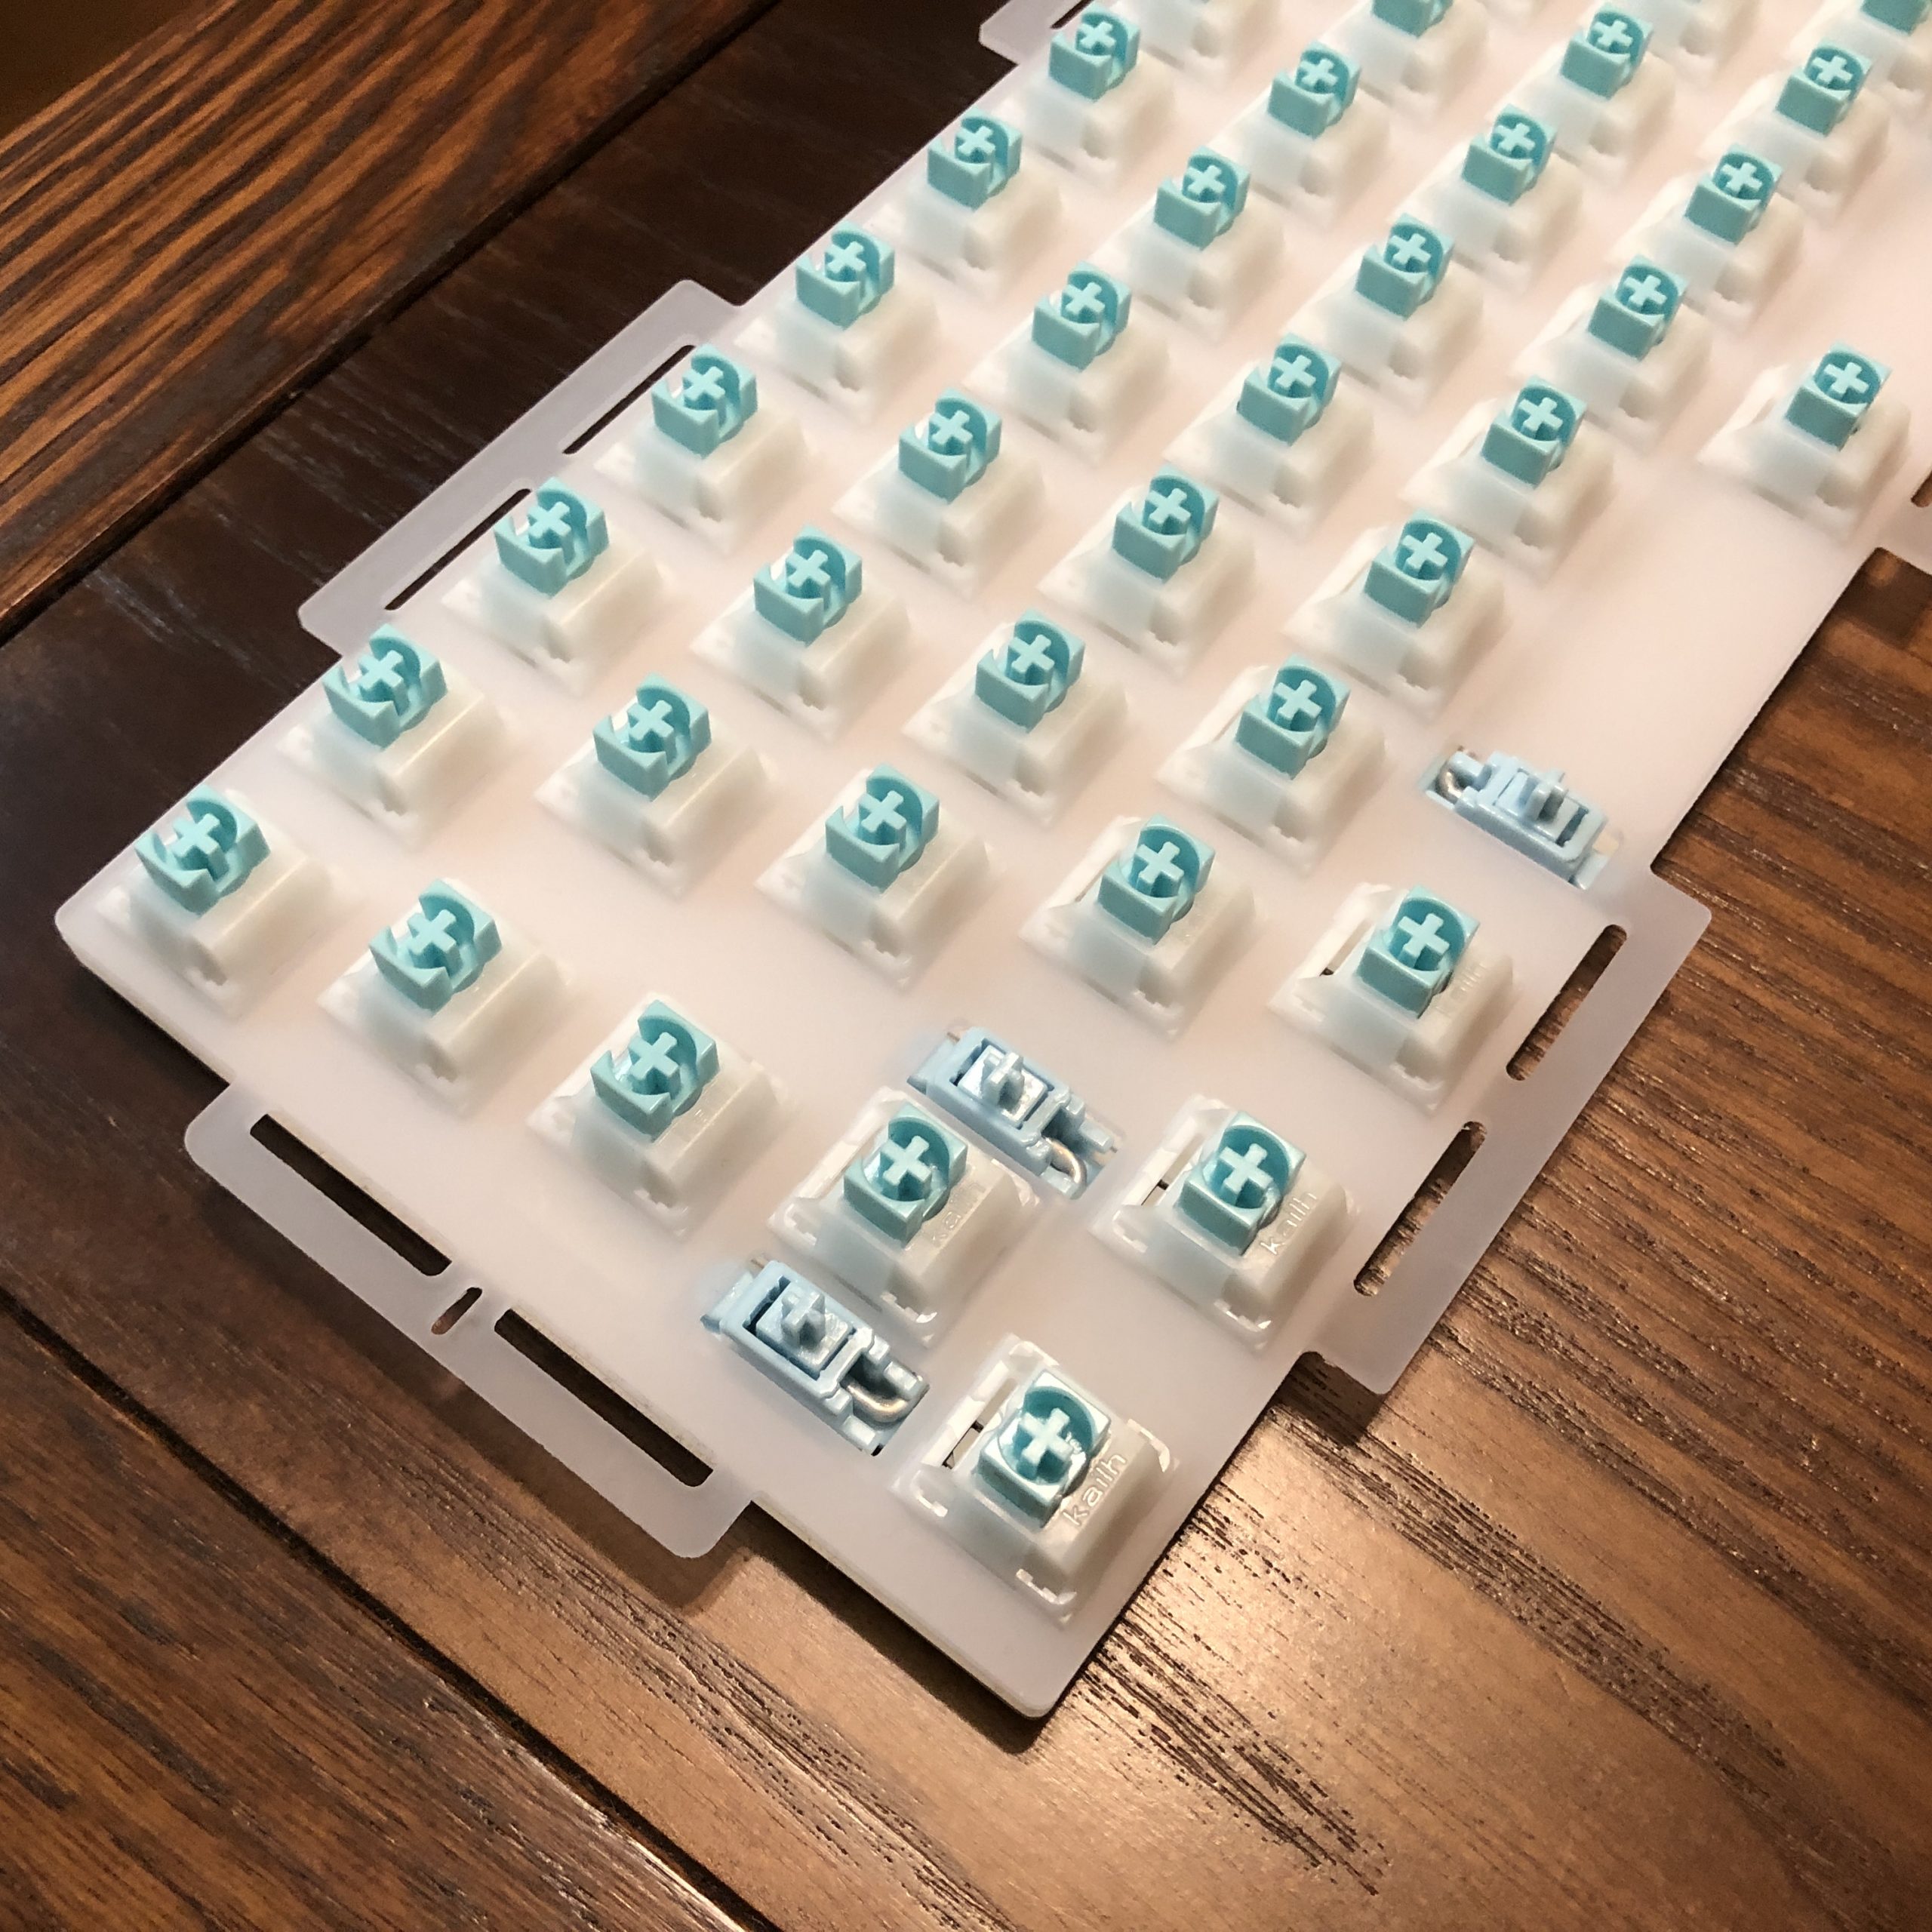
As far as I can tell, these are CIY’s own screw-in PCB-mount stabilizers. They’re shaped pretty similarly to KBDfans’ polycarb ones, but I believe these are POM. They also don’t have metal inserts, more like GMK screw-ins. They’re made without the dampening legs that most prefer to clip-off anyway.

A close look at the stabs installed in a complete build. They almost match the FLCMMK Ice Mint stems – almost.

They’re a baby-blue color with a glossy finish and generally seem well-made. I lubed them with a mix of 205g0 and 206g2, and I don’t have a complaint about them.
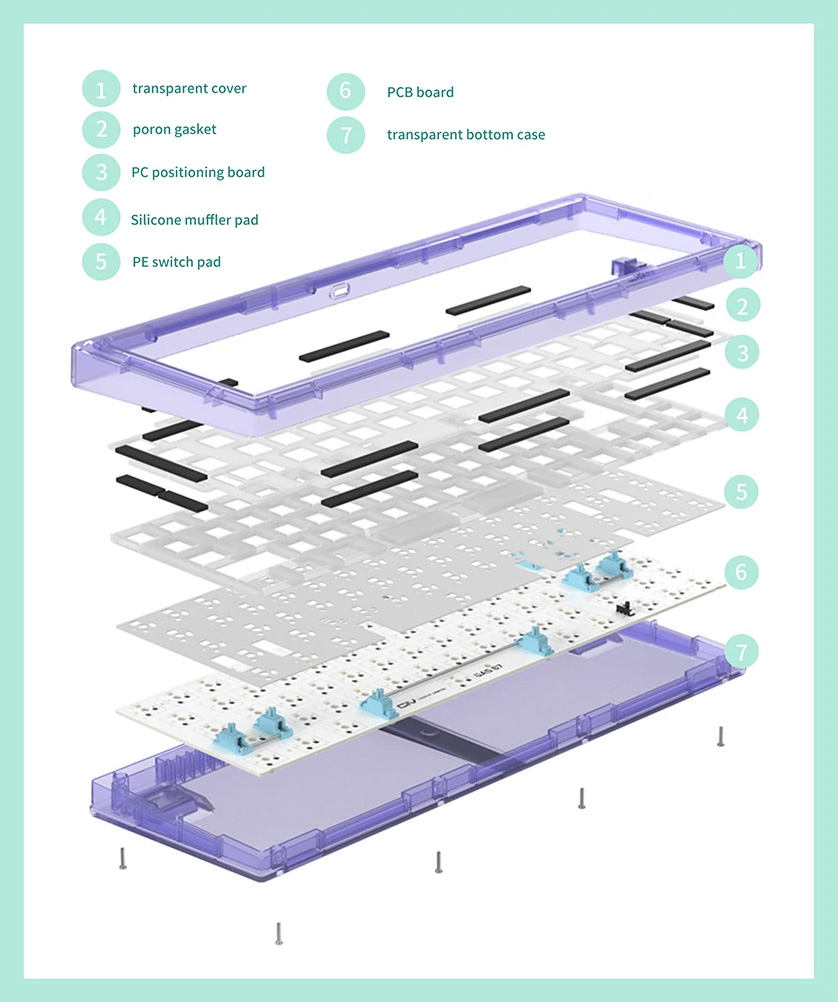
The Case:

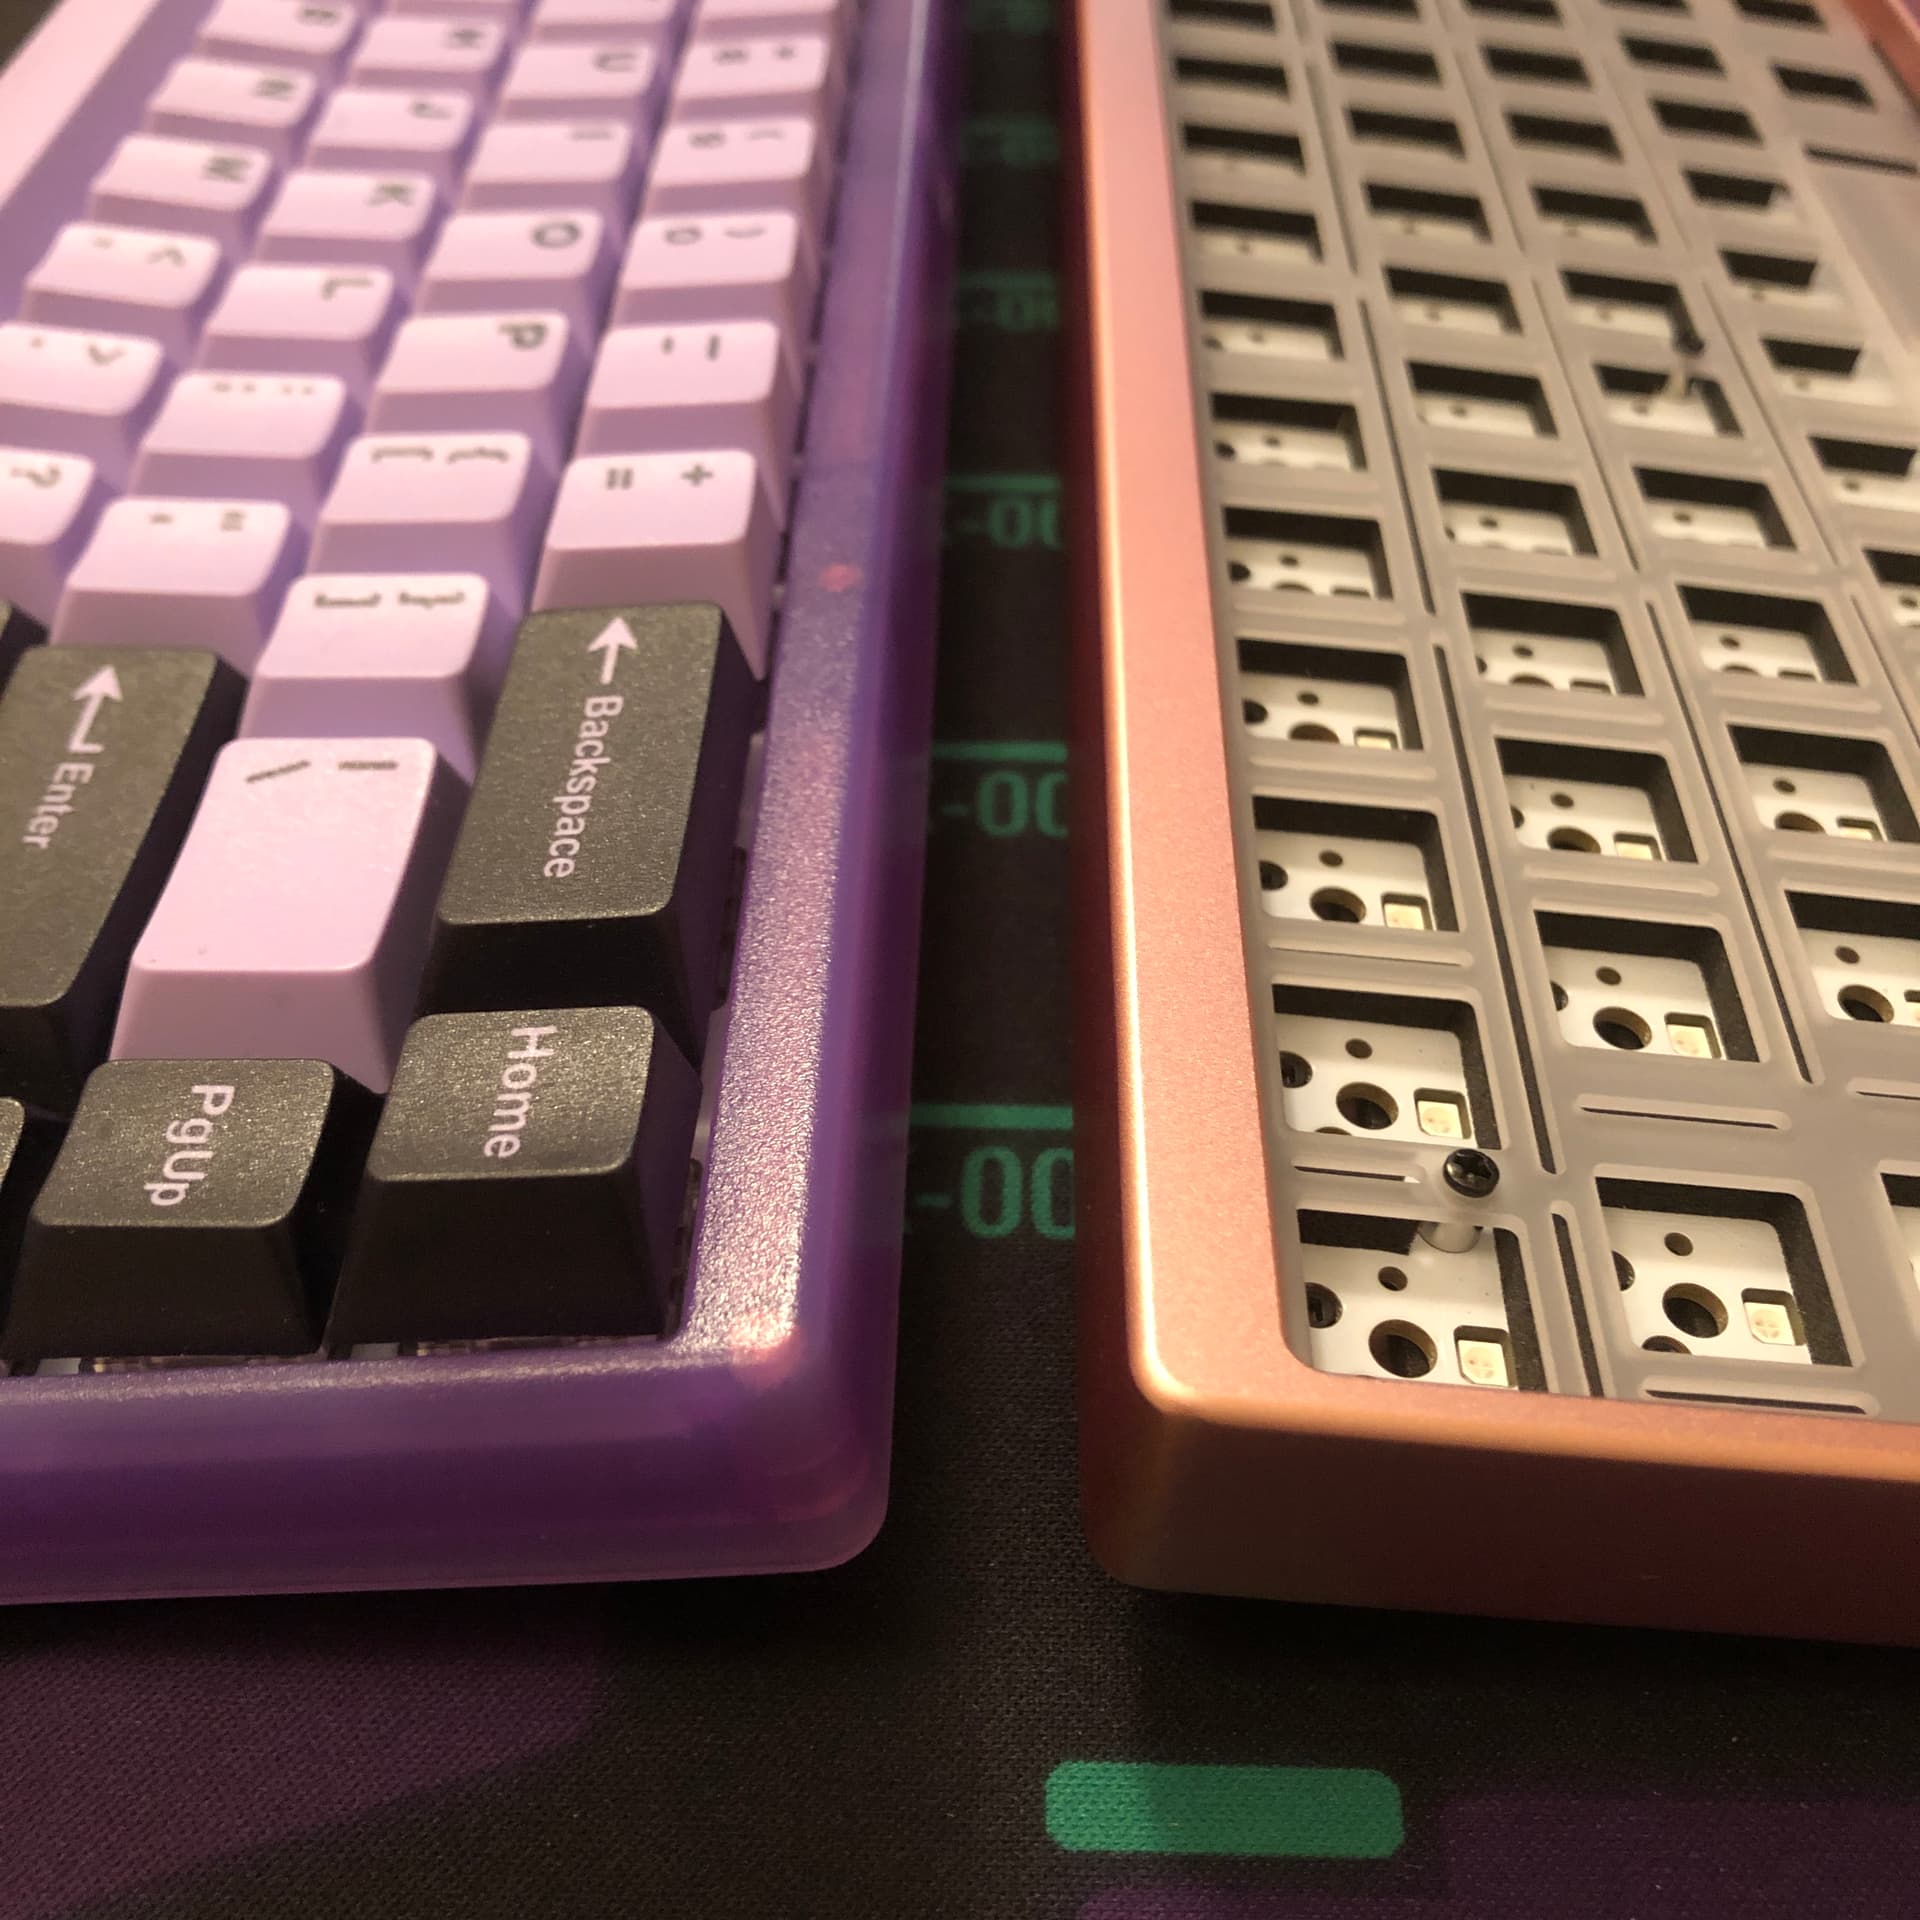
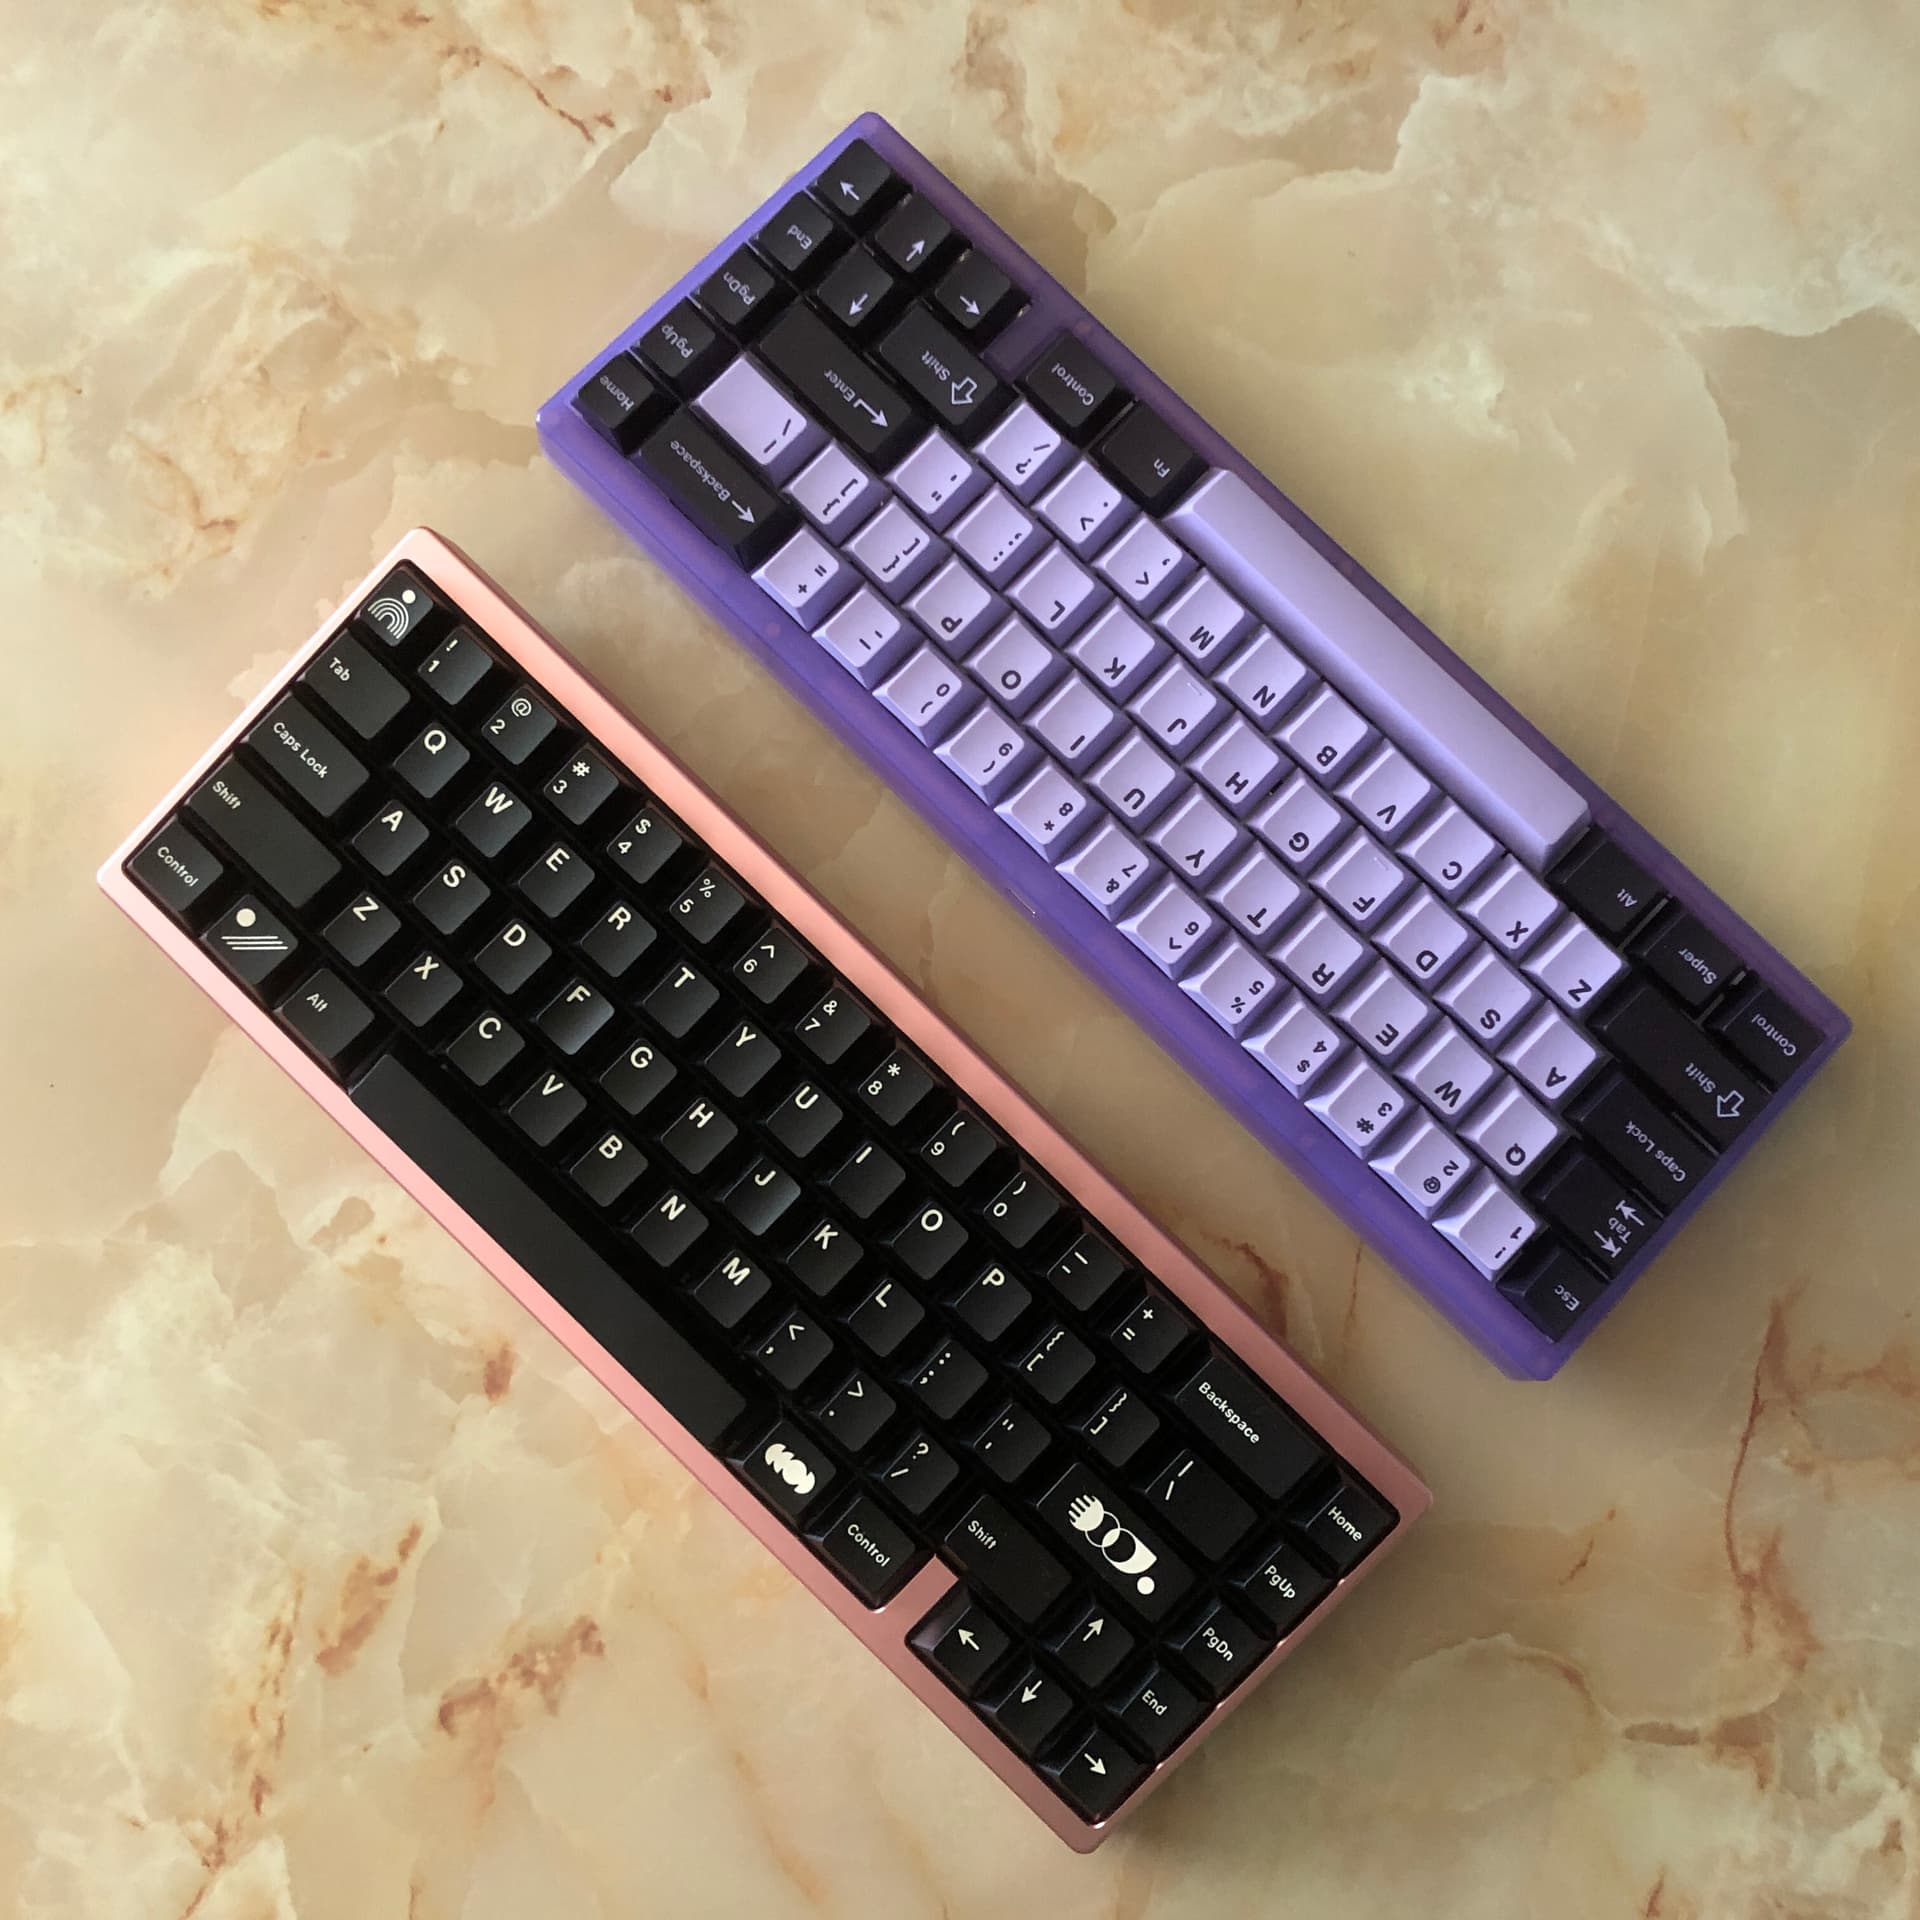
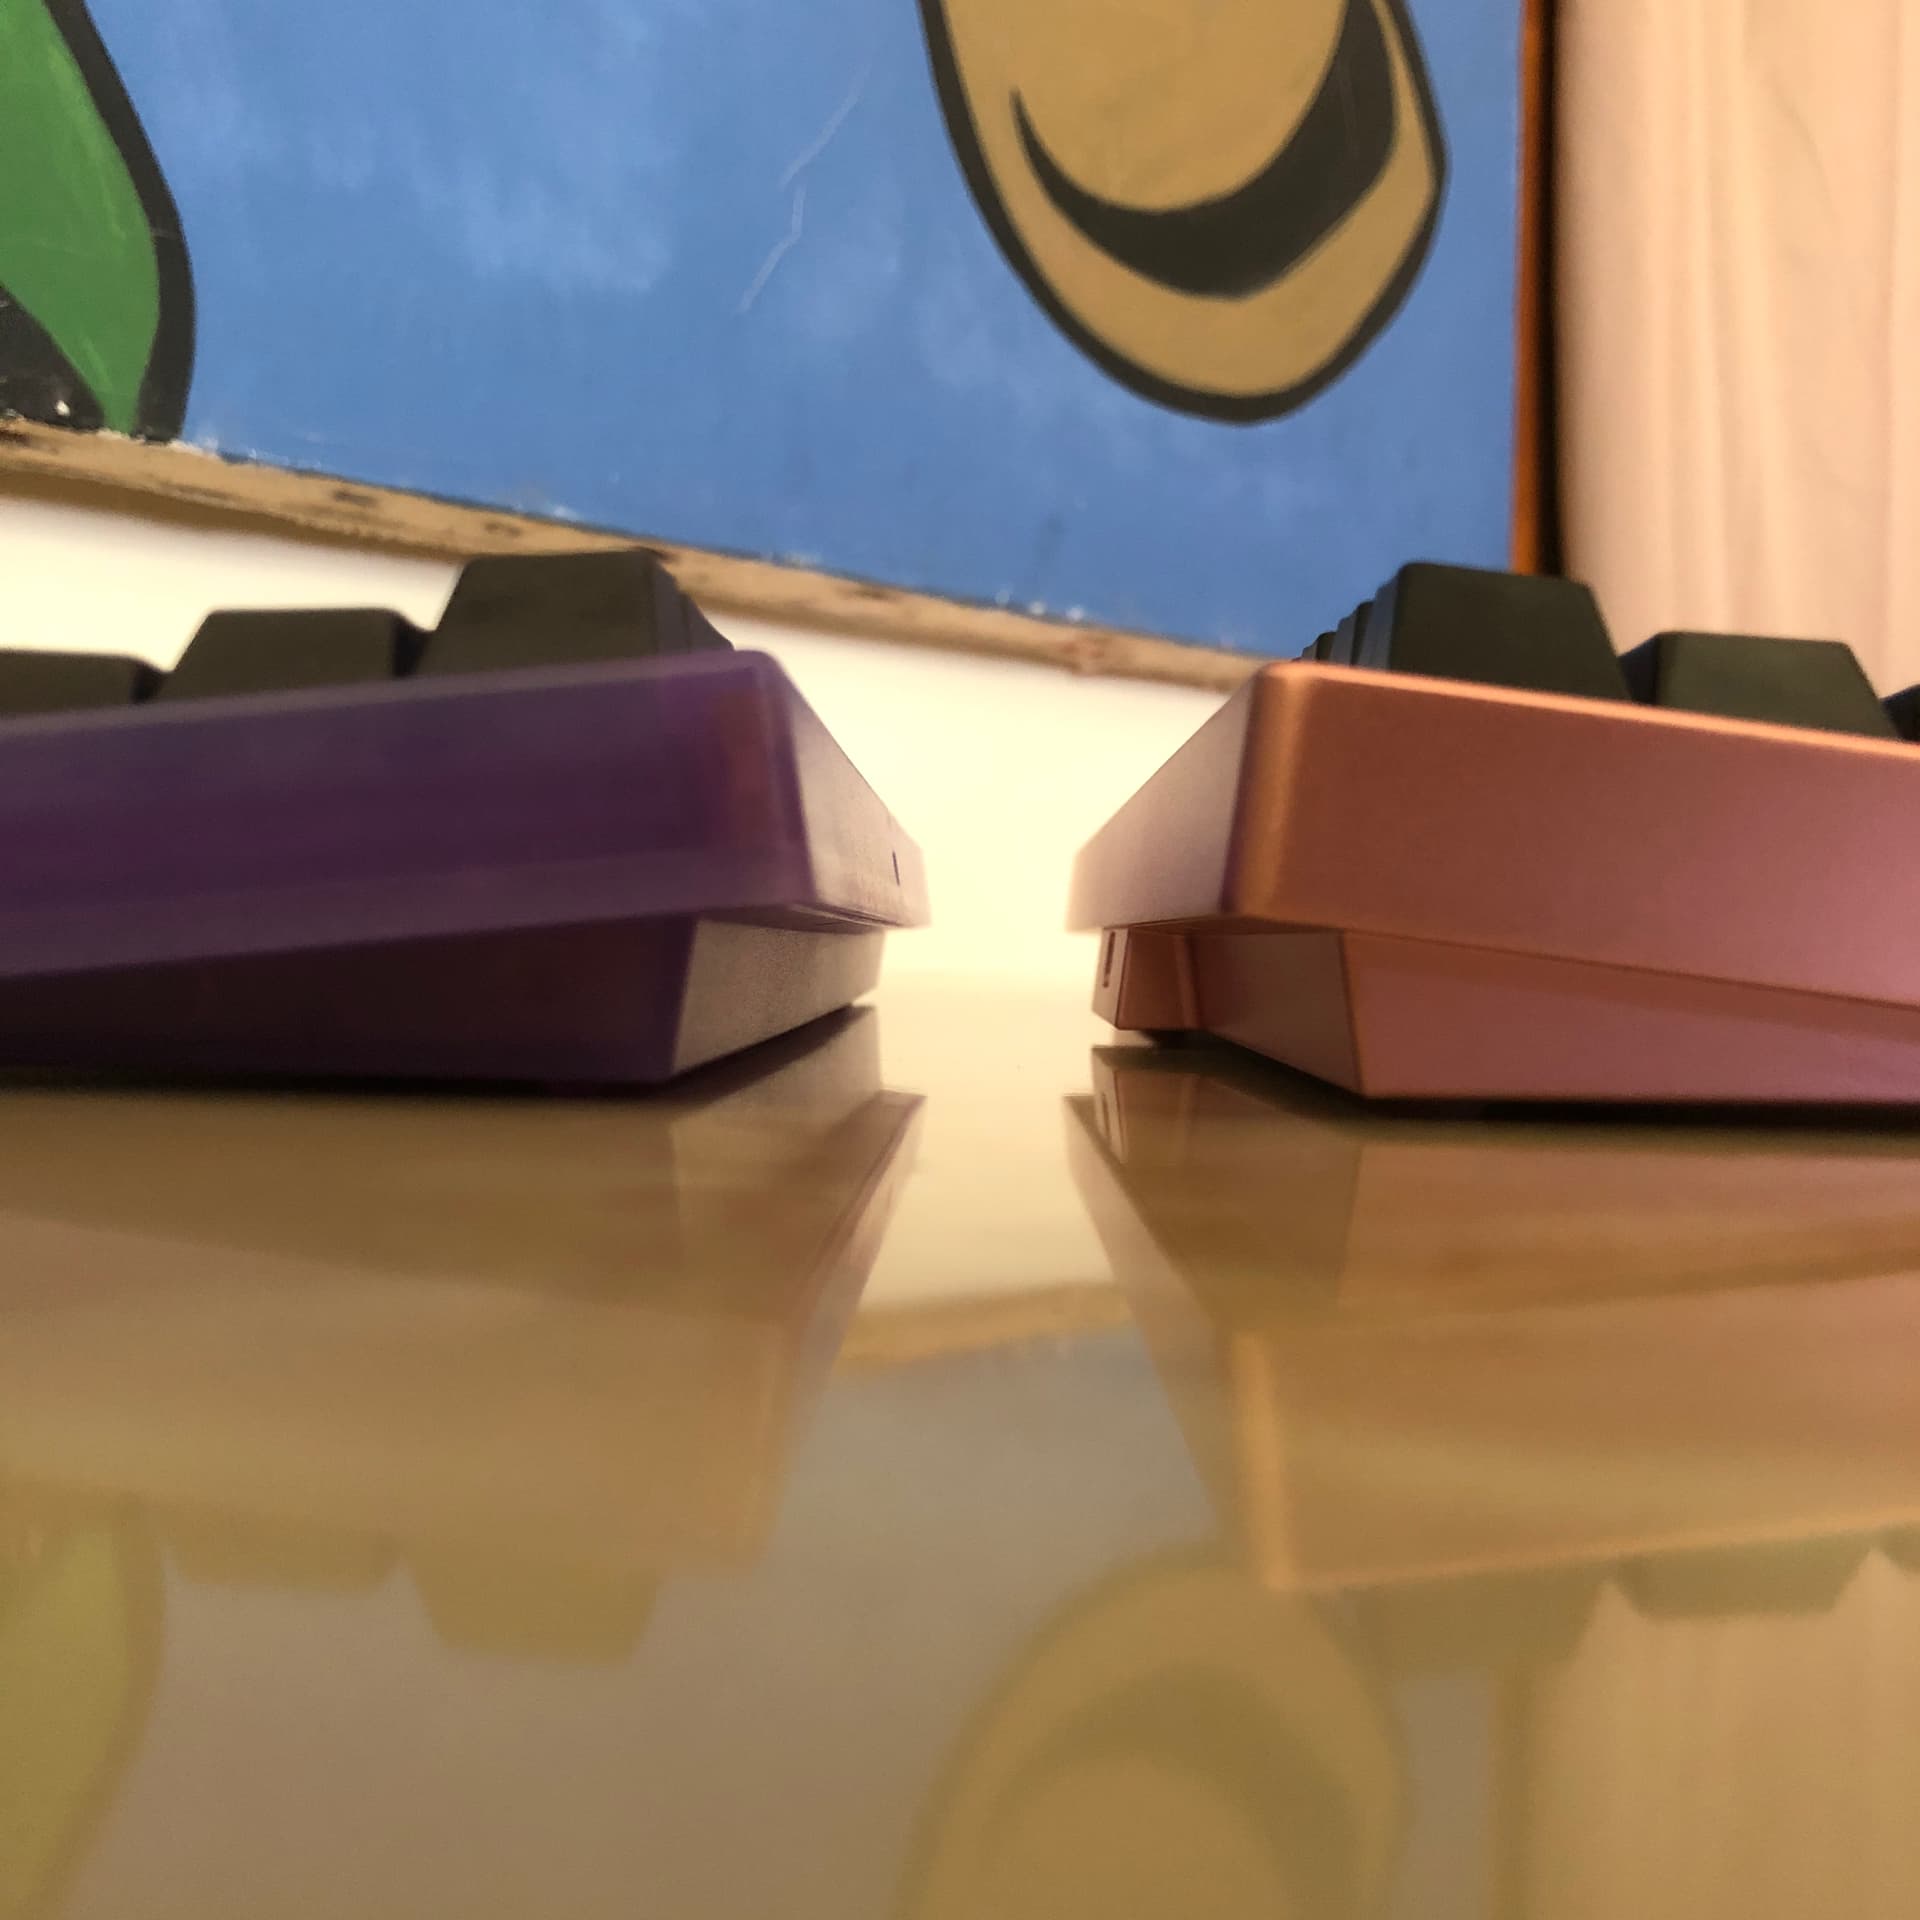
Pretty simple sandwich style design; the top and bottom halves carry the gasket pads, and those hold onto tabs on the sides of the plate. The case is available in three colors; bluish-green, light-purple, and smoky grey. All three are translucent. I think the plastic quality is surprisingly high for being a budget kit – not bad at all.

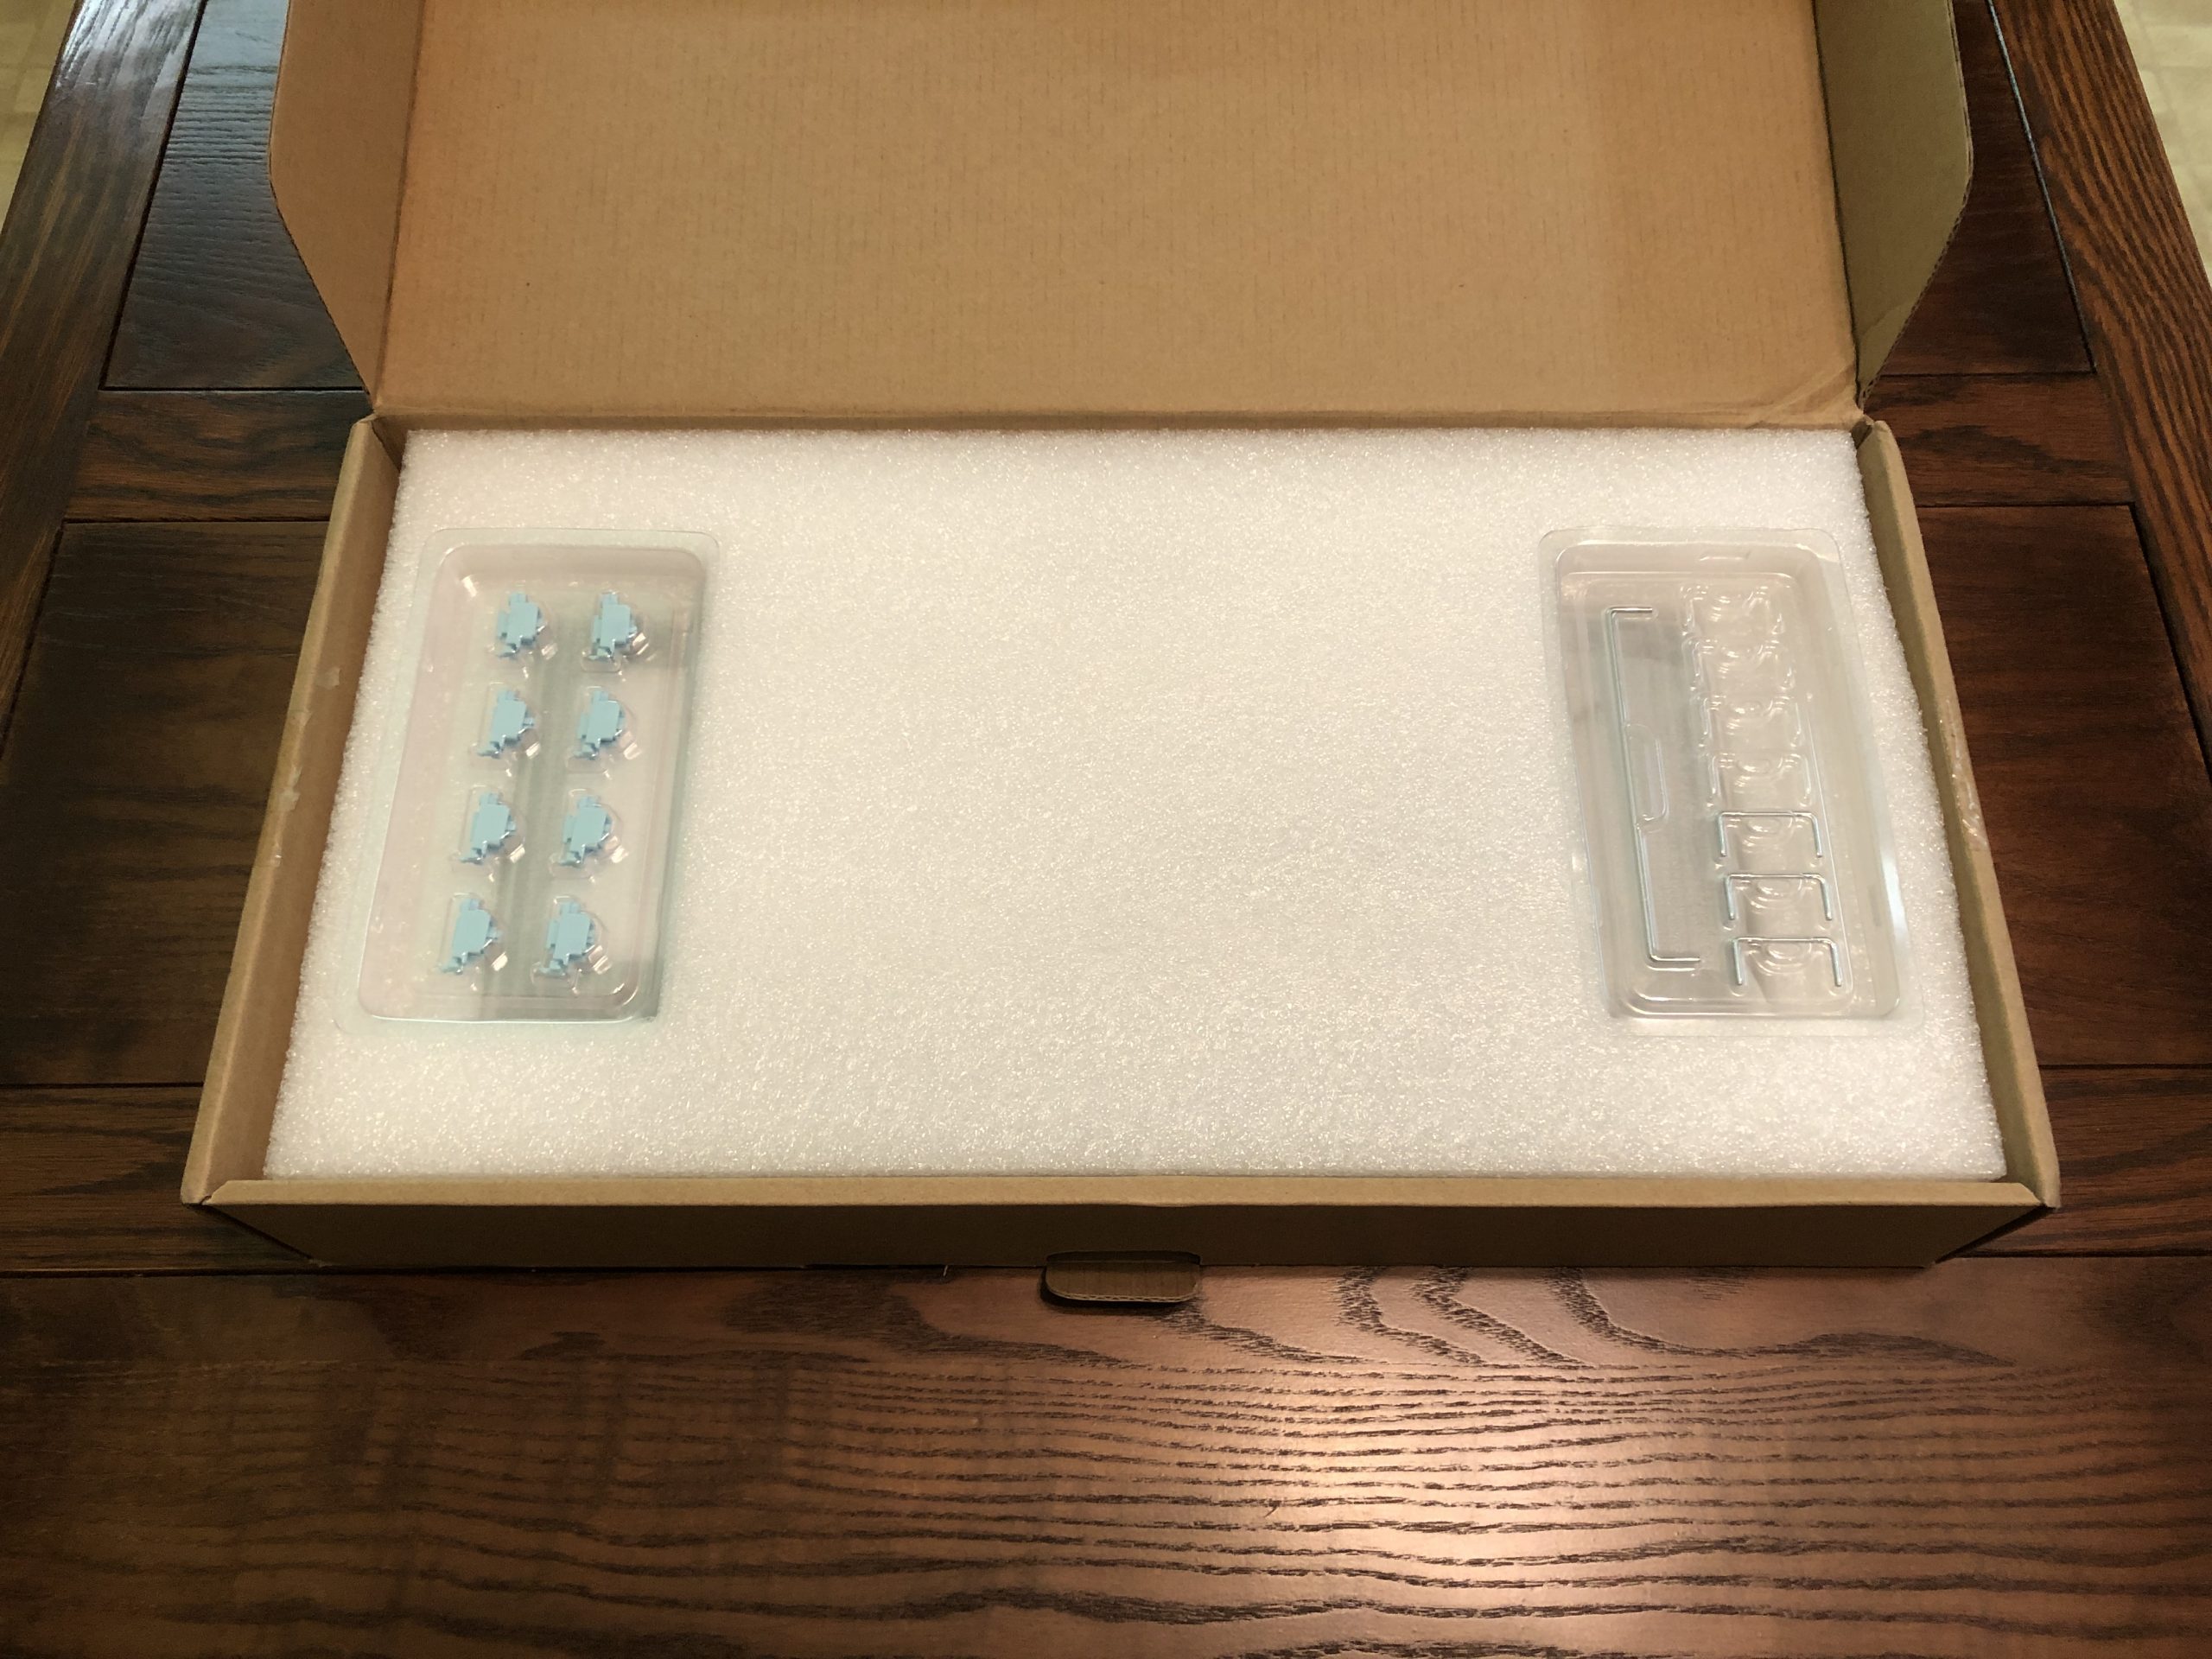
Case, foam, silicone, adhesive bits, hardware, manual.

My one and only real complaint about this case is also my one and only real complaint about the entire kit: the case is held together with screws, and those wood-style screws carve their own threads into plastic holes. With no metal inserts, those threads will get chewed-up with repeated use, which is not great for a keyboard that’s otherwise supposed to be “hot-swap”. More on this later.

The case features areas to place the gaskets, as well as a slider built into the blocker that meshes with the toggle switch on the PCB. There are a pair of guide posts that the plate slots onto, one on each side.

The Gaskets:

I don’t know if these would technically qualify as “gaskets” or not in the traditional engineering sense, but in terms of our use-case here, that’s the function served by these little pads.

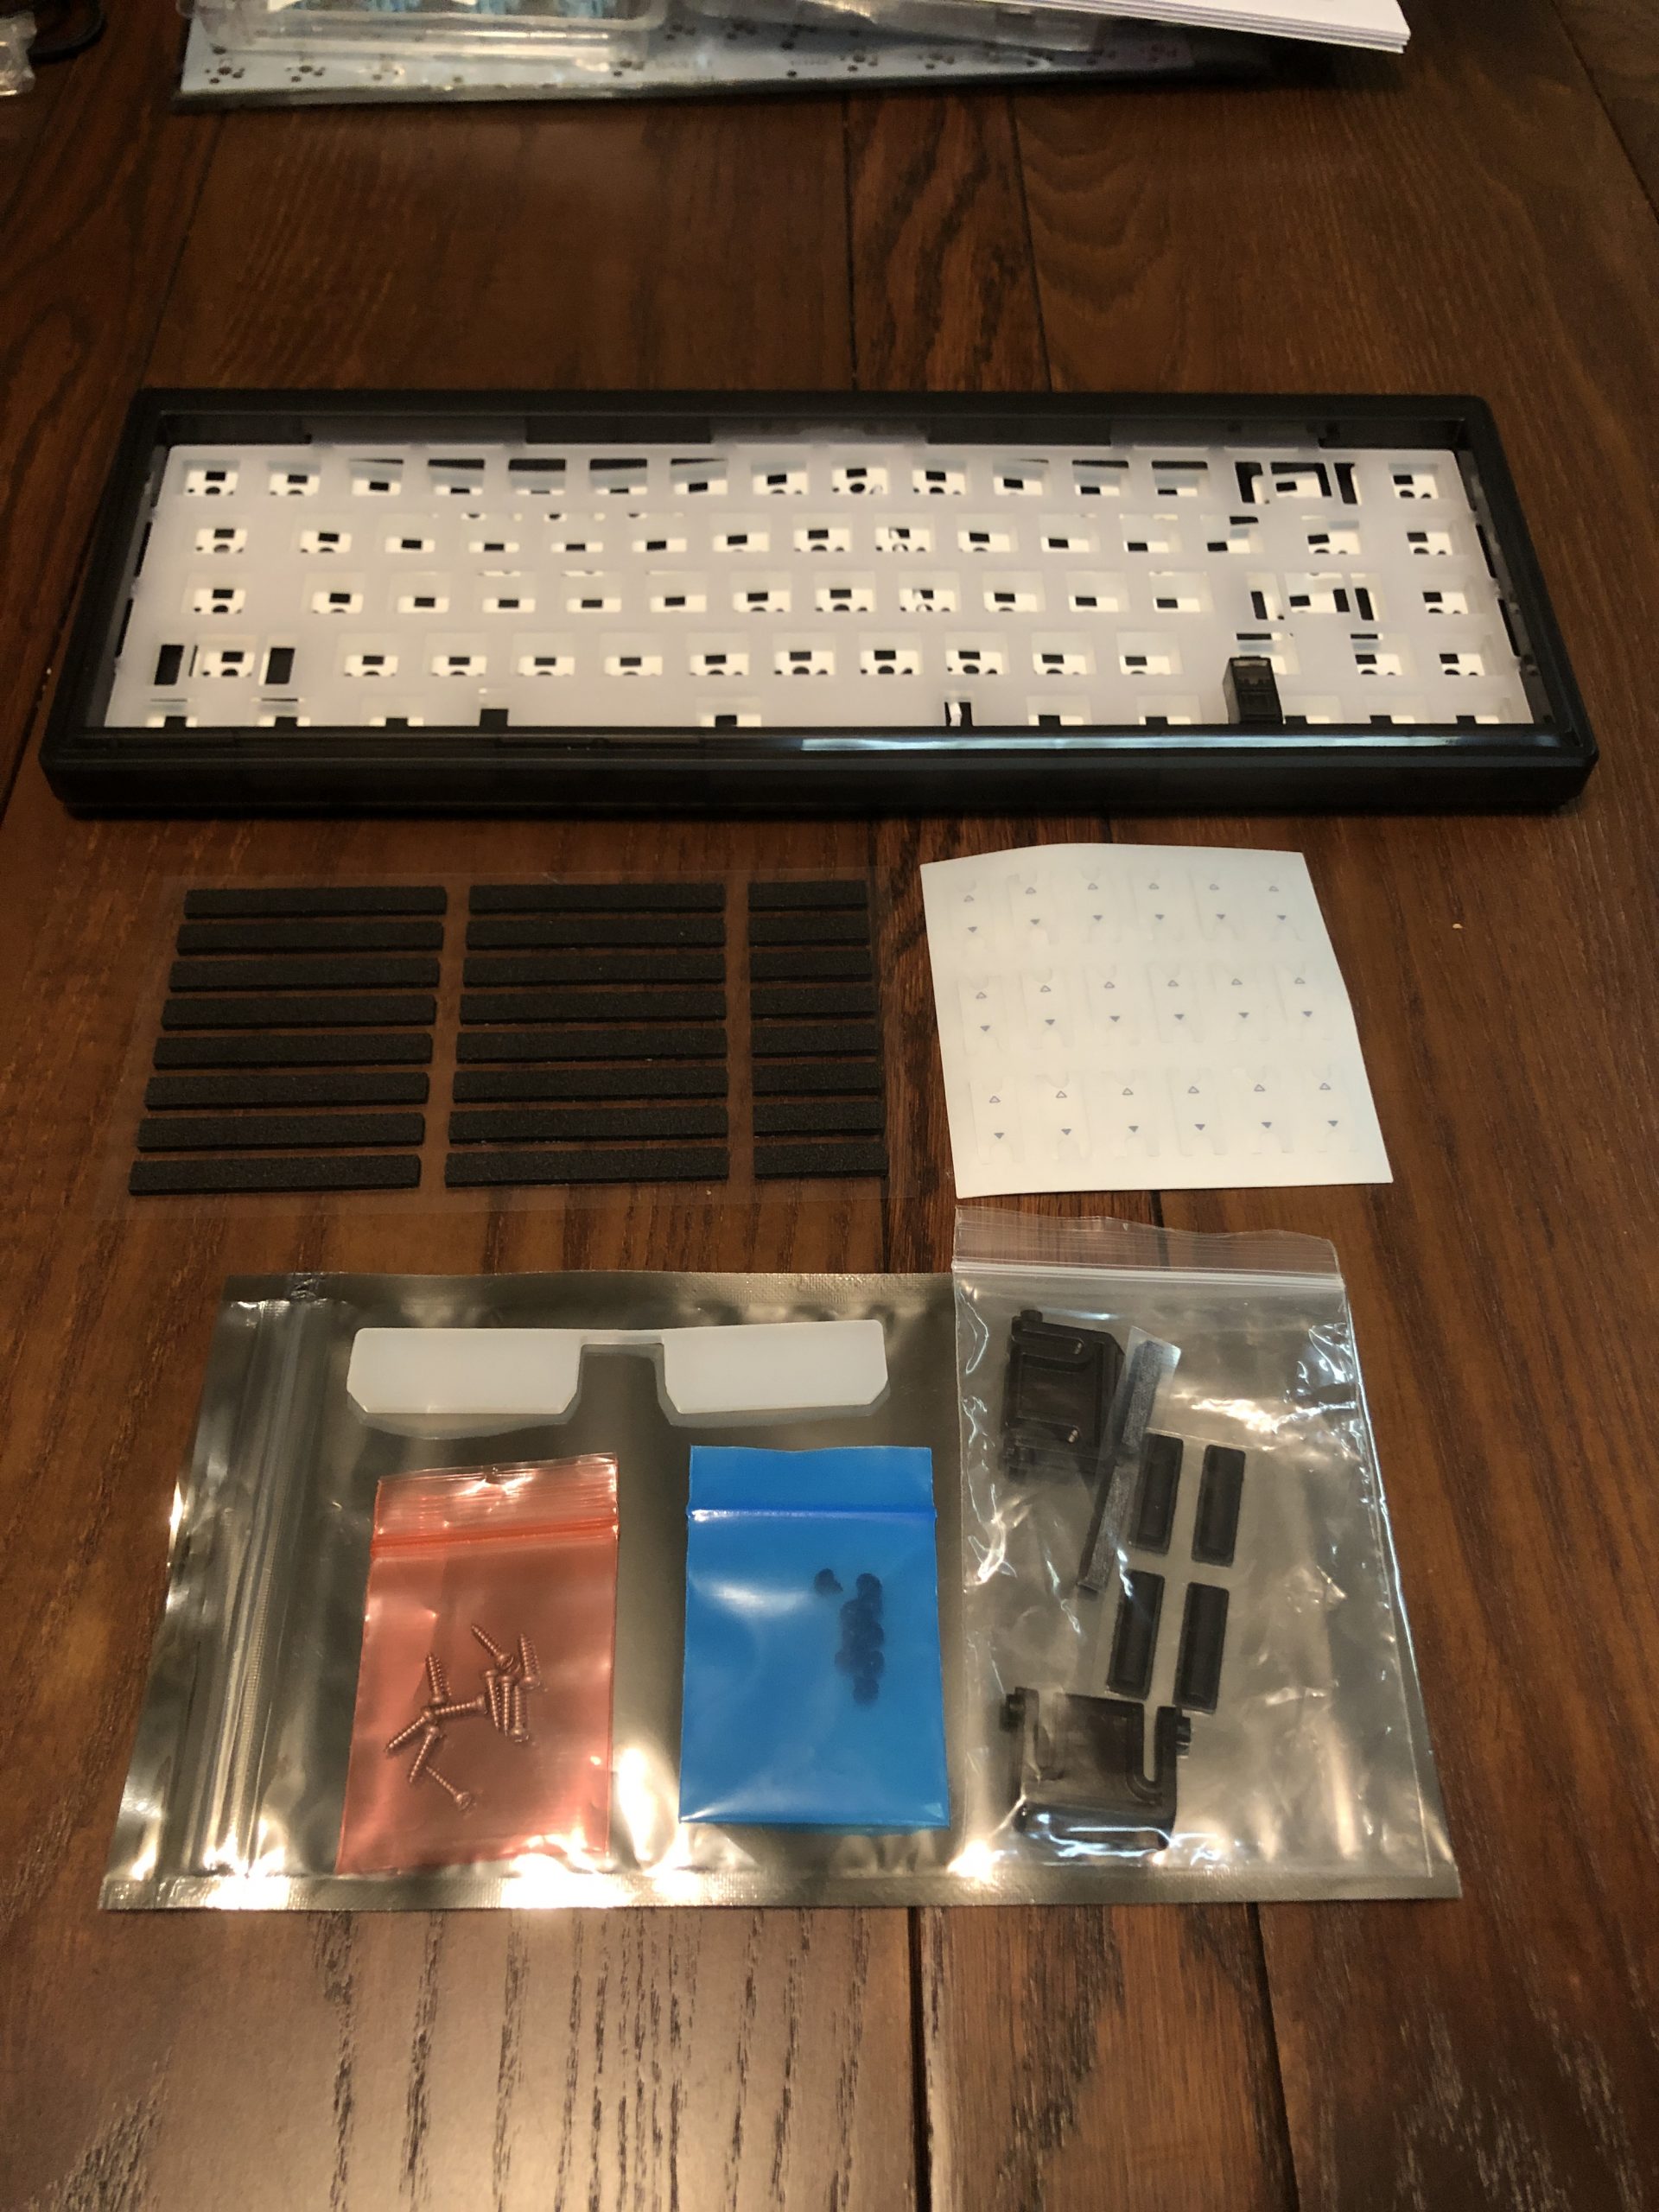
Gaskets on the clear sheet. Stab stickers on the white shiny one. Case screws in the red bag, stab screws in the blue one.

Nothing fancy but they do the job: simple Poron foam rectangles with adhesive on one side. Simply install them into the similarly-shaped slots in the case and you’re good to go.

Other Goodies:

Also included is a thin layer of dense foam for the PCB, and some minimal dampening stickers for the stabs. They’re shiny!

Here you can see the PCB foam, toggle switch, and shiny stab stickers.
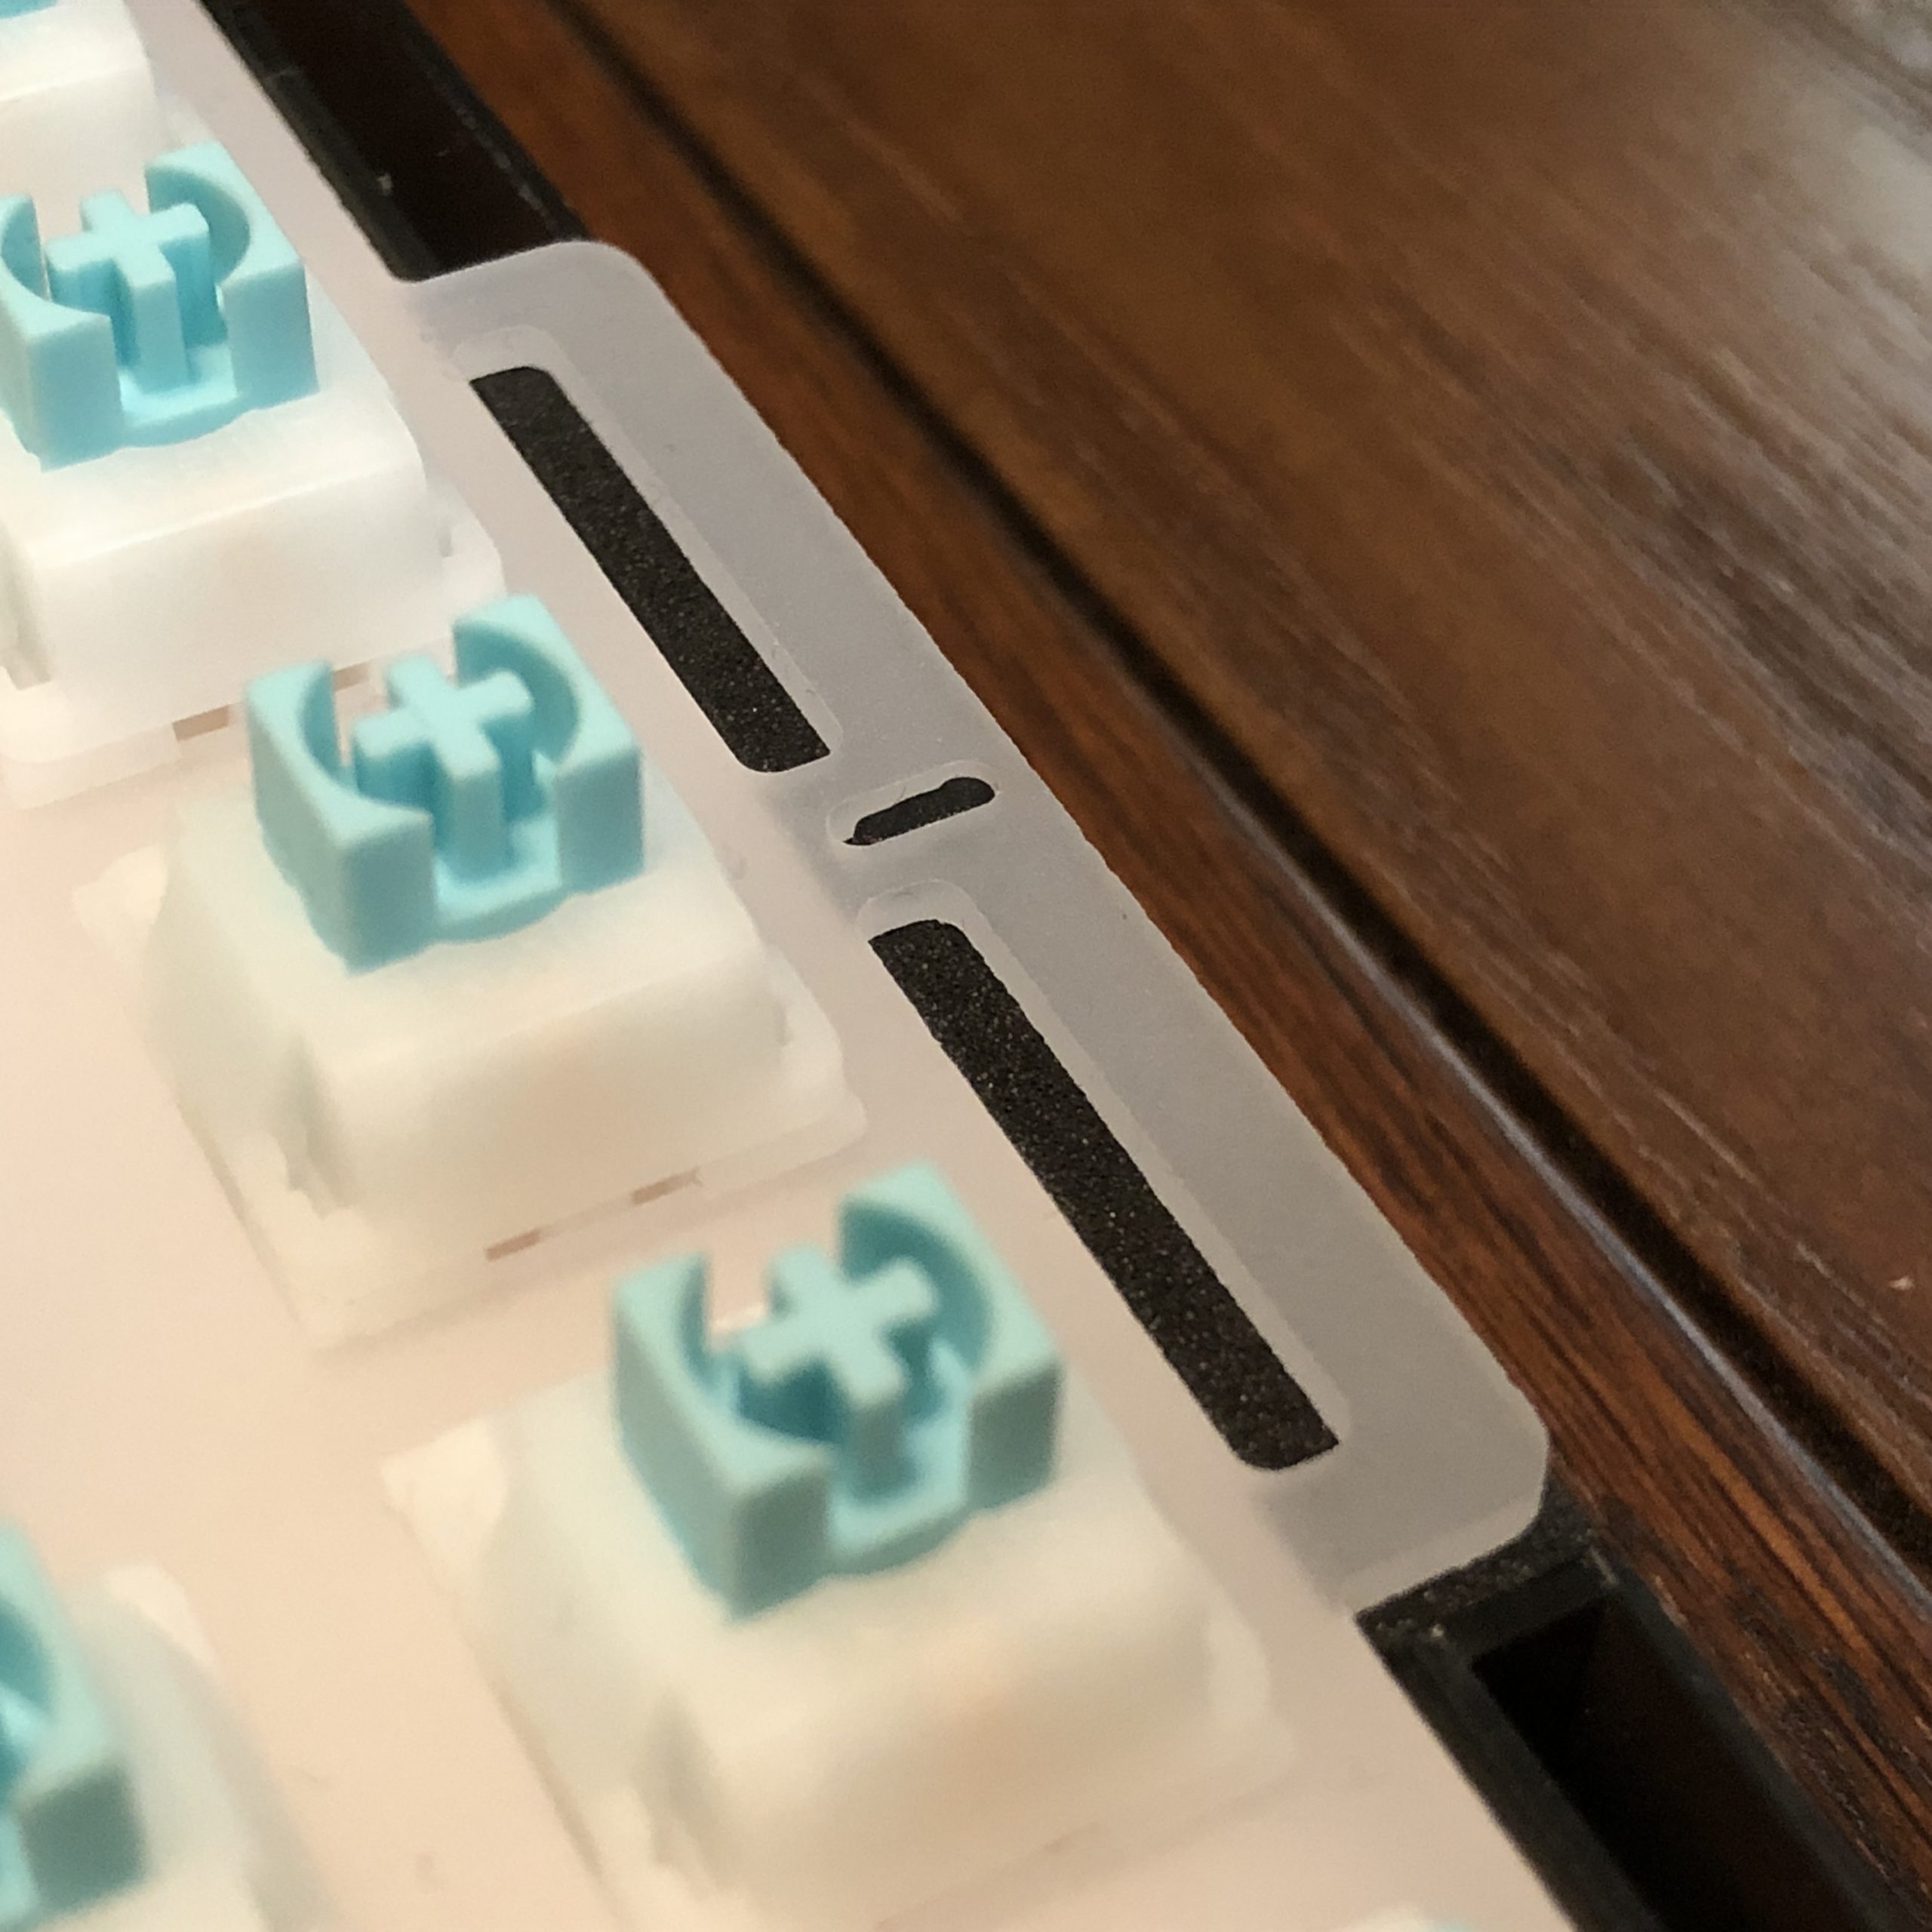
The Plate:

This right here is the star of the show, isn’t it? Very simple when it comes to material and manufacture, but the design is refreshingly thoughtful. In general that’s something I think this kit does really well: making excellent economic use of material and design to perform otherwise high-end functions with modest materials and manufacturing methods.

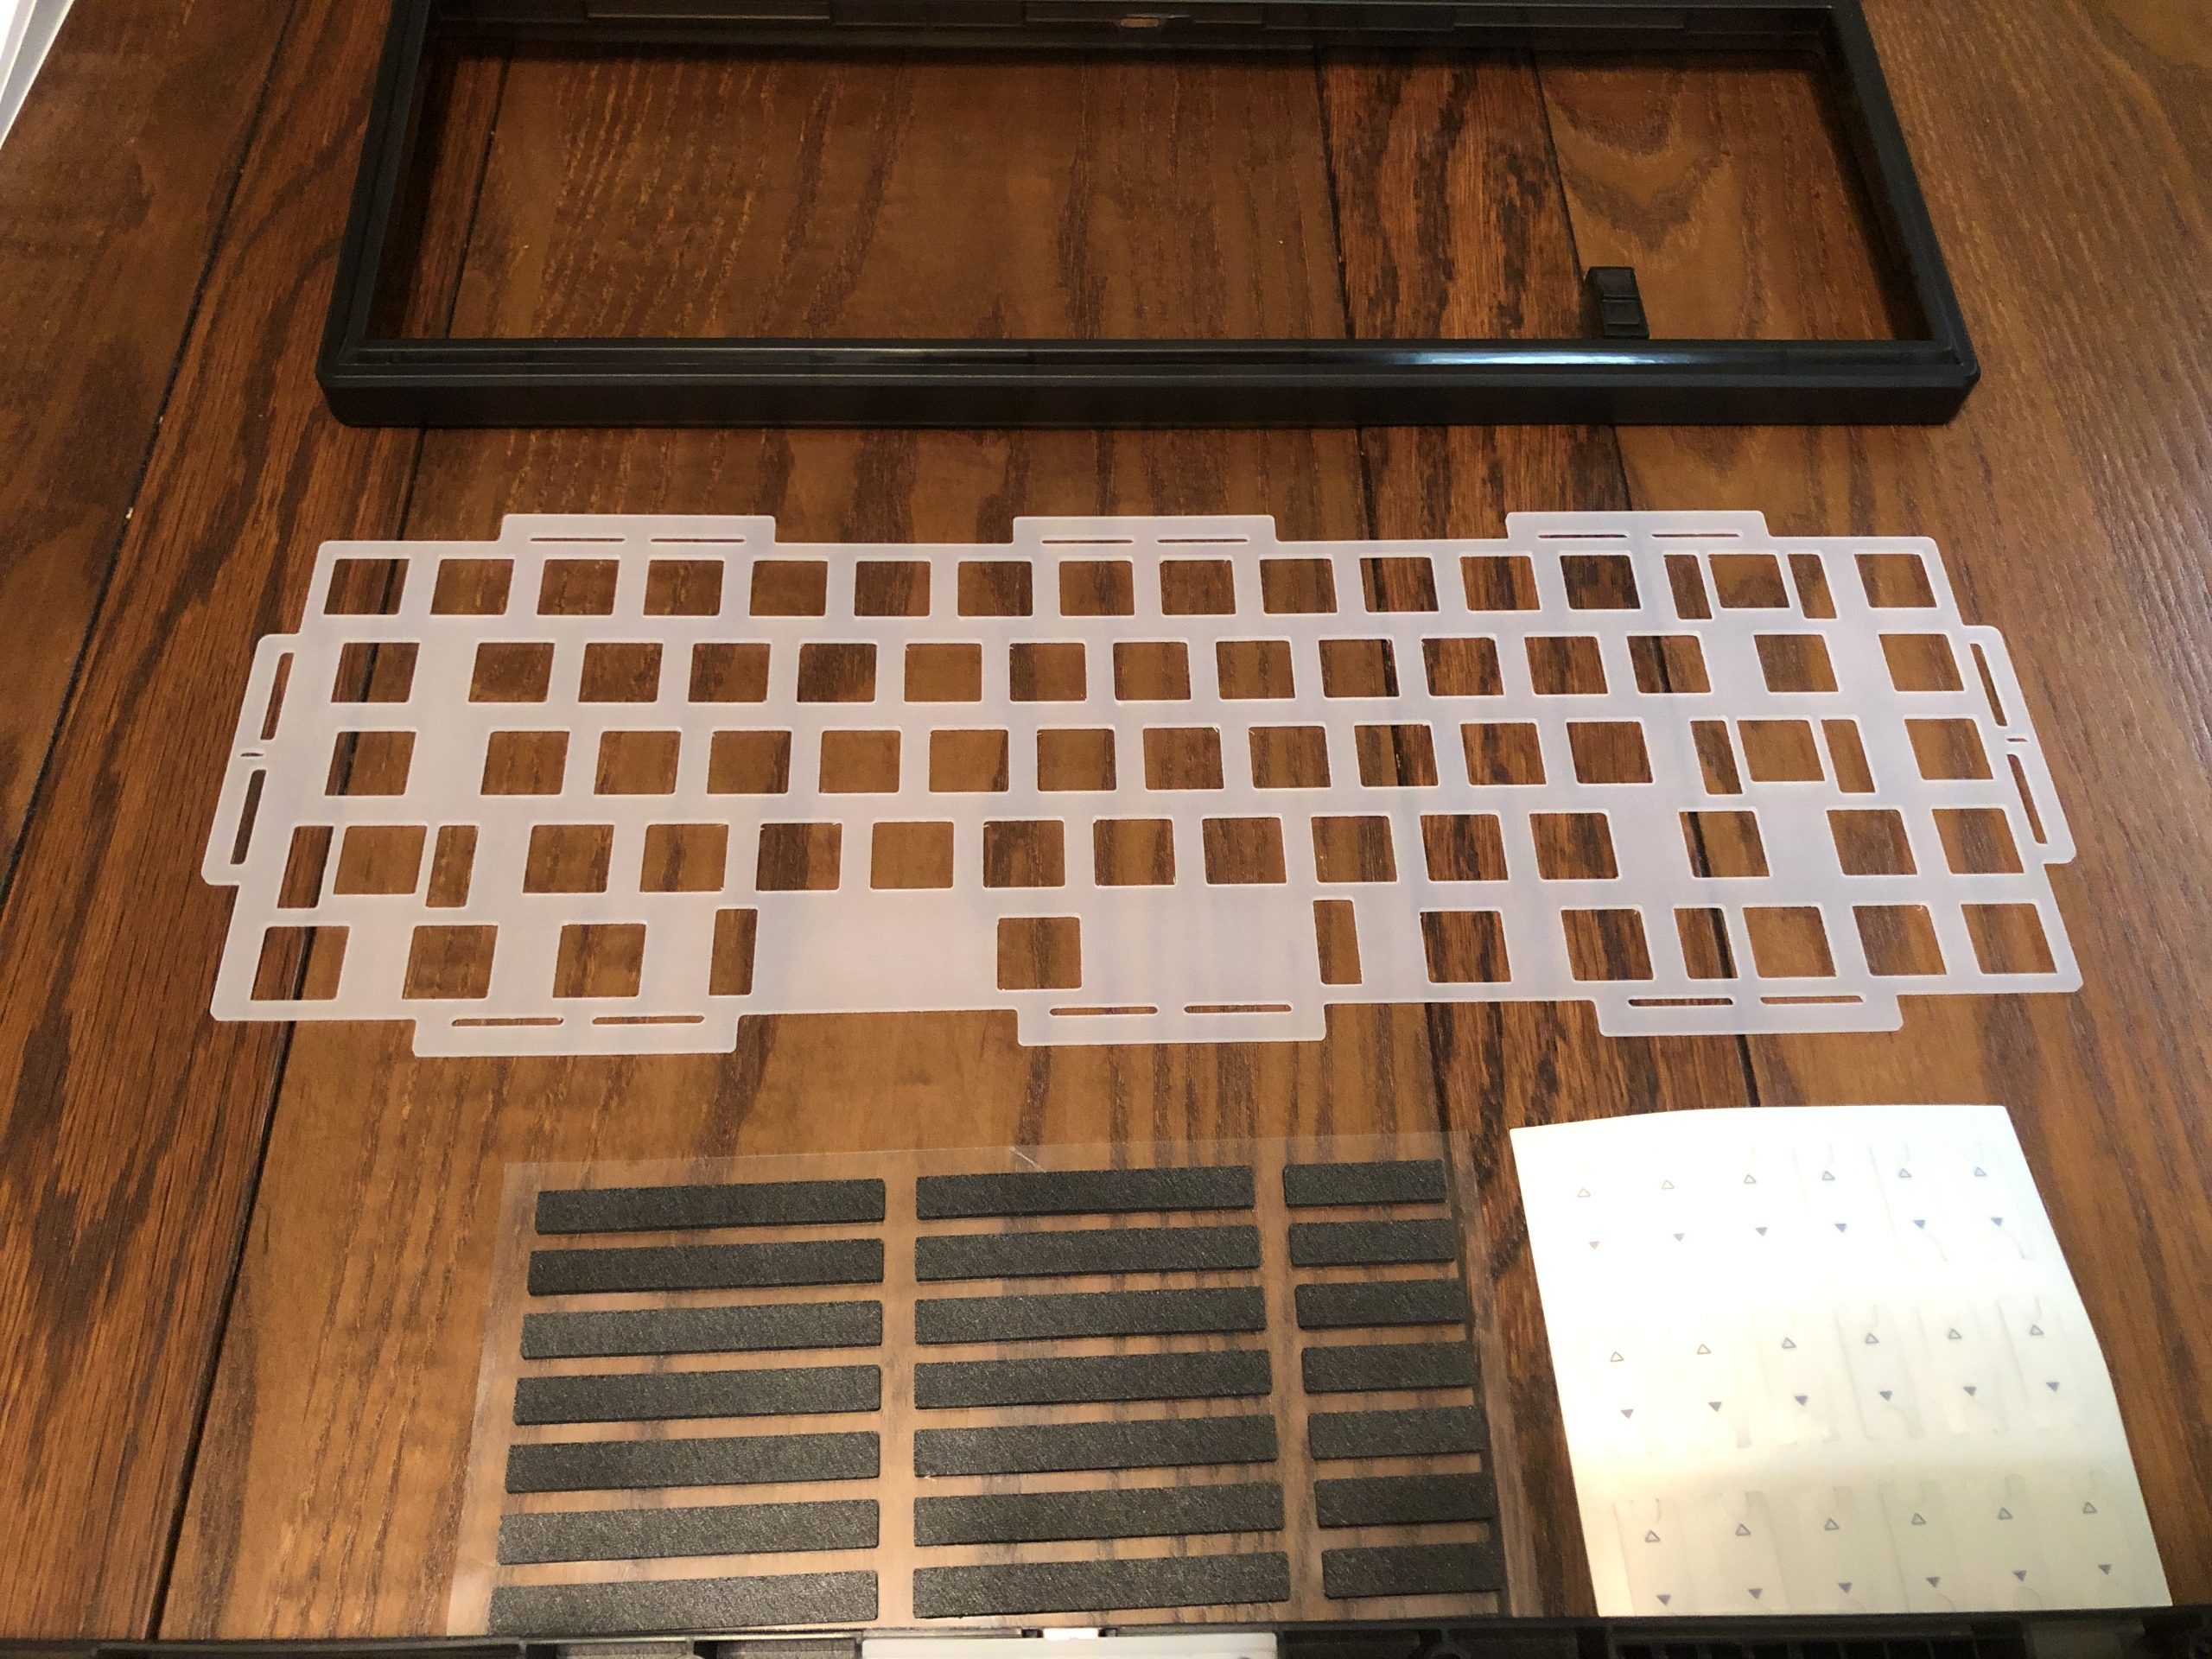
Plate in the middle; top shell above, gaskets and stickers below.

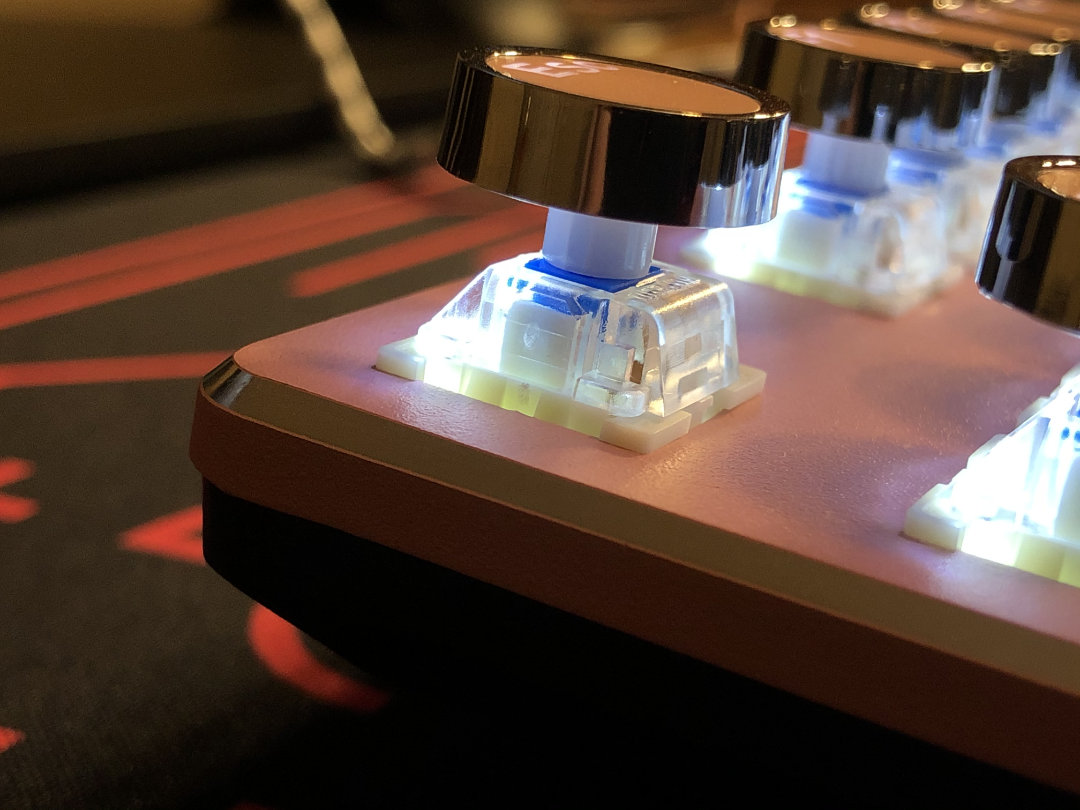
What we have here is a simple sheet of plastic cut with a CNC router – just like the KBD67L had in its first run. Unlike that plate, however, this one has a smooth surface and is made of a milky polycarbonate, which makes it perfect for diffusing RGB light.

The eight winglets sticking out around the periphery are the mounting tabs; these are what interact with the gaskets and generally what supports the internals of the keyboard. The flexibility of the plate material as well as the flexibility imparted by the shape and size of these tabs play into the final product of typing quality. In this case, we have plenty of dampening, a little bounce, and even some deck flex despite the absence of any flex cuts on the PCB or plate interior:

Lastly – this build features zero standoffs – this means that the PCB is held by the switches, themselves being held by the plate. This may add a tiny bit of complication to installing or changing switches, but I actually prefer this execution to using standoffs to hold the “sandwich” together. Even though they’re not nearly as bad as support standoffs, sandwich standoffs can still create their own hot-spots, and aren’t strictly necessary. I think electing to skip them here was a good call; both for the lower cost and for the quality of end-user experience.

A shot of the full “sandwich”, featuring the blocker toggle switch.


Assembly:

As mentioned before, this is a kit – that means it’s a collection of parts you get to assemble yourself! As far as keyboard kits go, this one is fun and easy – I’d definitely consider this one beginner friendly. One tool is required, and it comes in the box.

First thing’s first, tune and assemble your stabs. I won’t go over that here, but if you aren’t familiar with the process here’s a fantastic guide. With the stabilizers tuned and assembled, install them into the PCB using the included screws (blue bag).

These 4mm led clutch pencils are pretty helpful with stabs.

Now – here’s where the one obvious weakness of these becomes apparent: the clip side is quite loose with this PCB. Still, I do think that’s preferable to being too tight – you can add shims if you really want to, but since these are screw-in, I don’t think it’s necessary. Just be mindful the housings can twist a little bit because of the play on the clip side.

Installing the gasket pads; these are the short ones with the alignment post in the middle.

Adding the rubber to the flip-out feet.

Now add the adhesive Poron pads into their slots on the case; the smaller ones go on the short sides, with the guide posts in between them. All the other ones are the same size. The tallest two rubber pads go on the included plastic flip-out feet; just match the angle in terms of orientation and you should have an easy time. The other four black rubber pads go on the bottom case, in the similarly shaped recessed areas at the four corners. Pop the flip-out feet into their respective recesses on the case, and flip it back over.

The flip-out foot in-place.

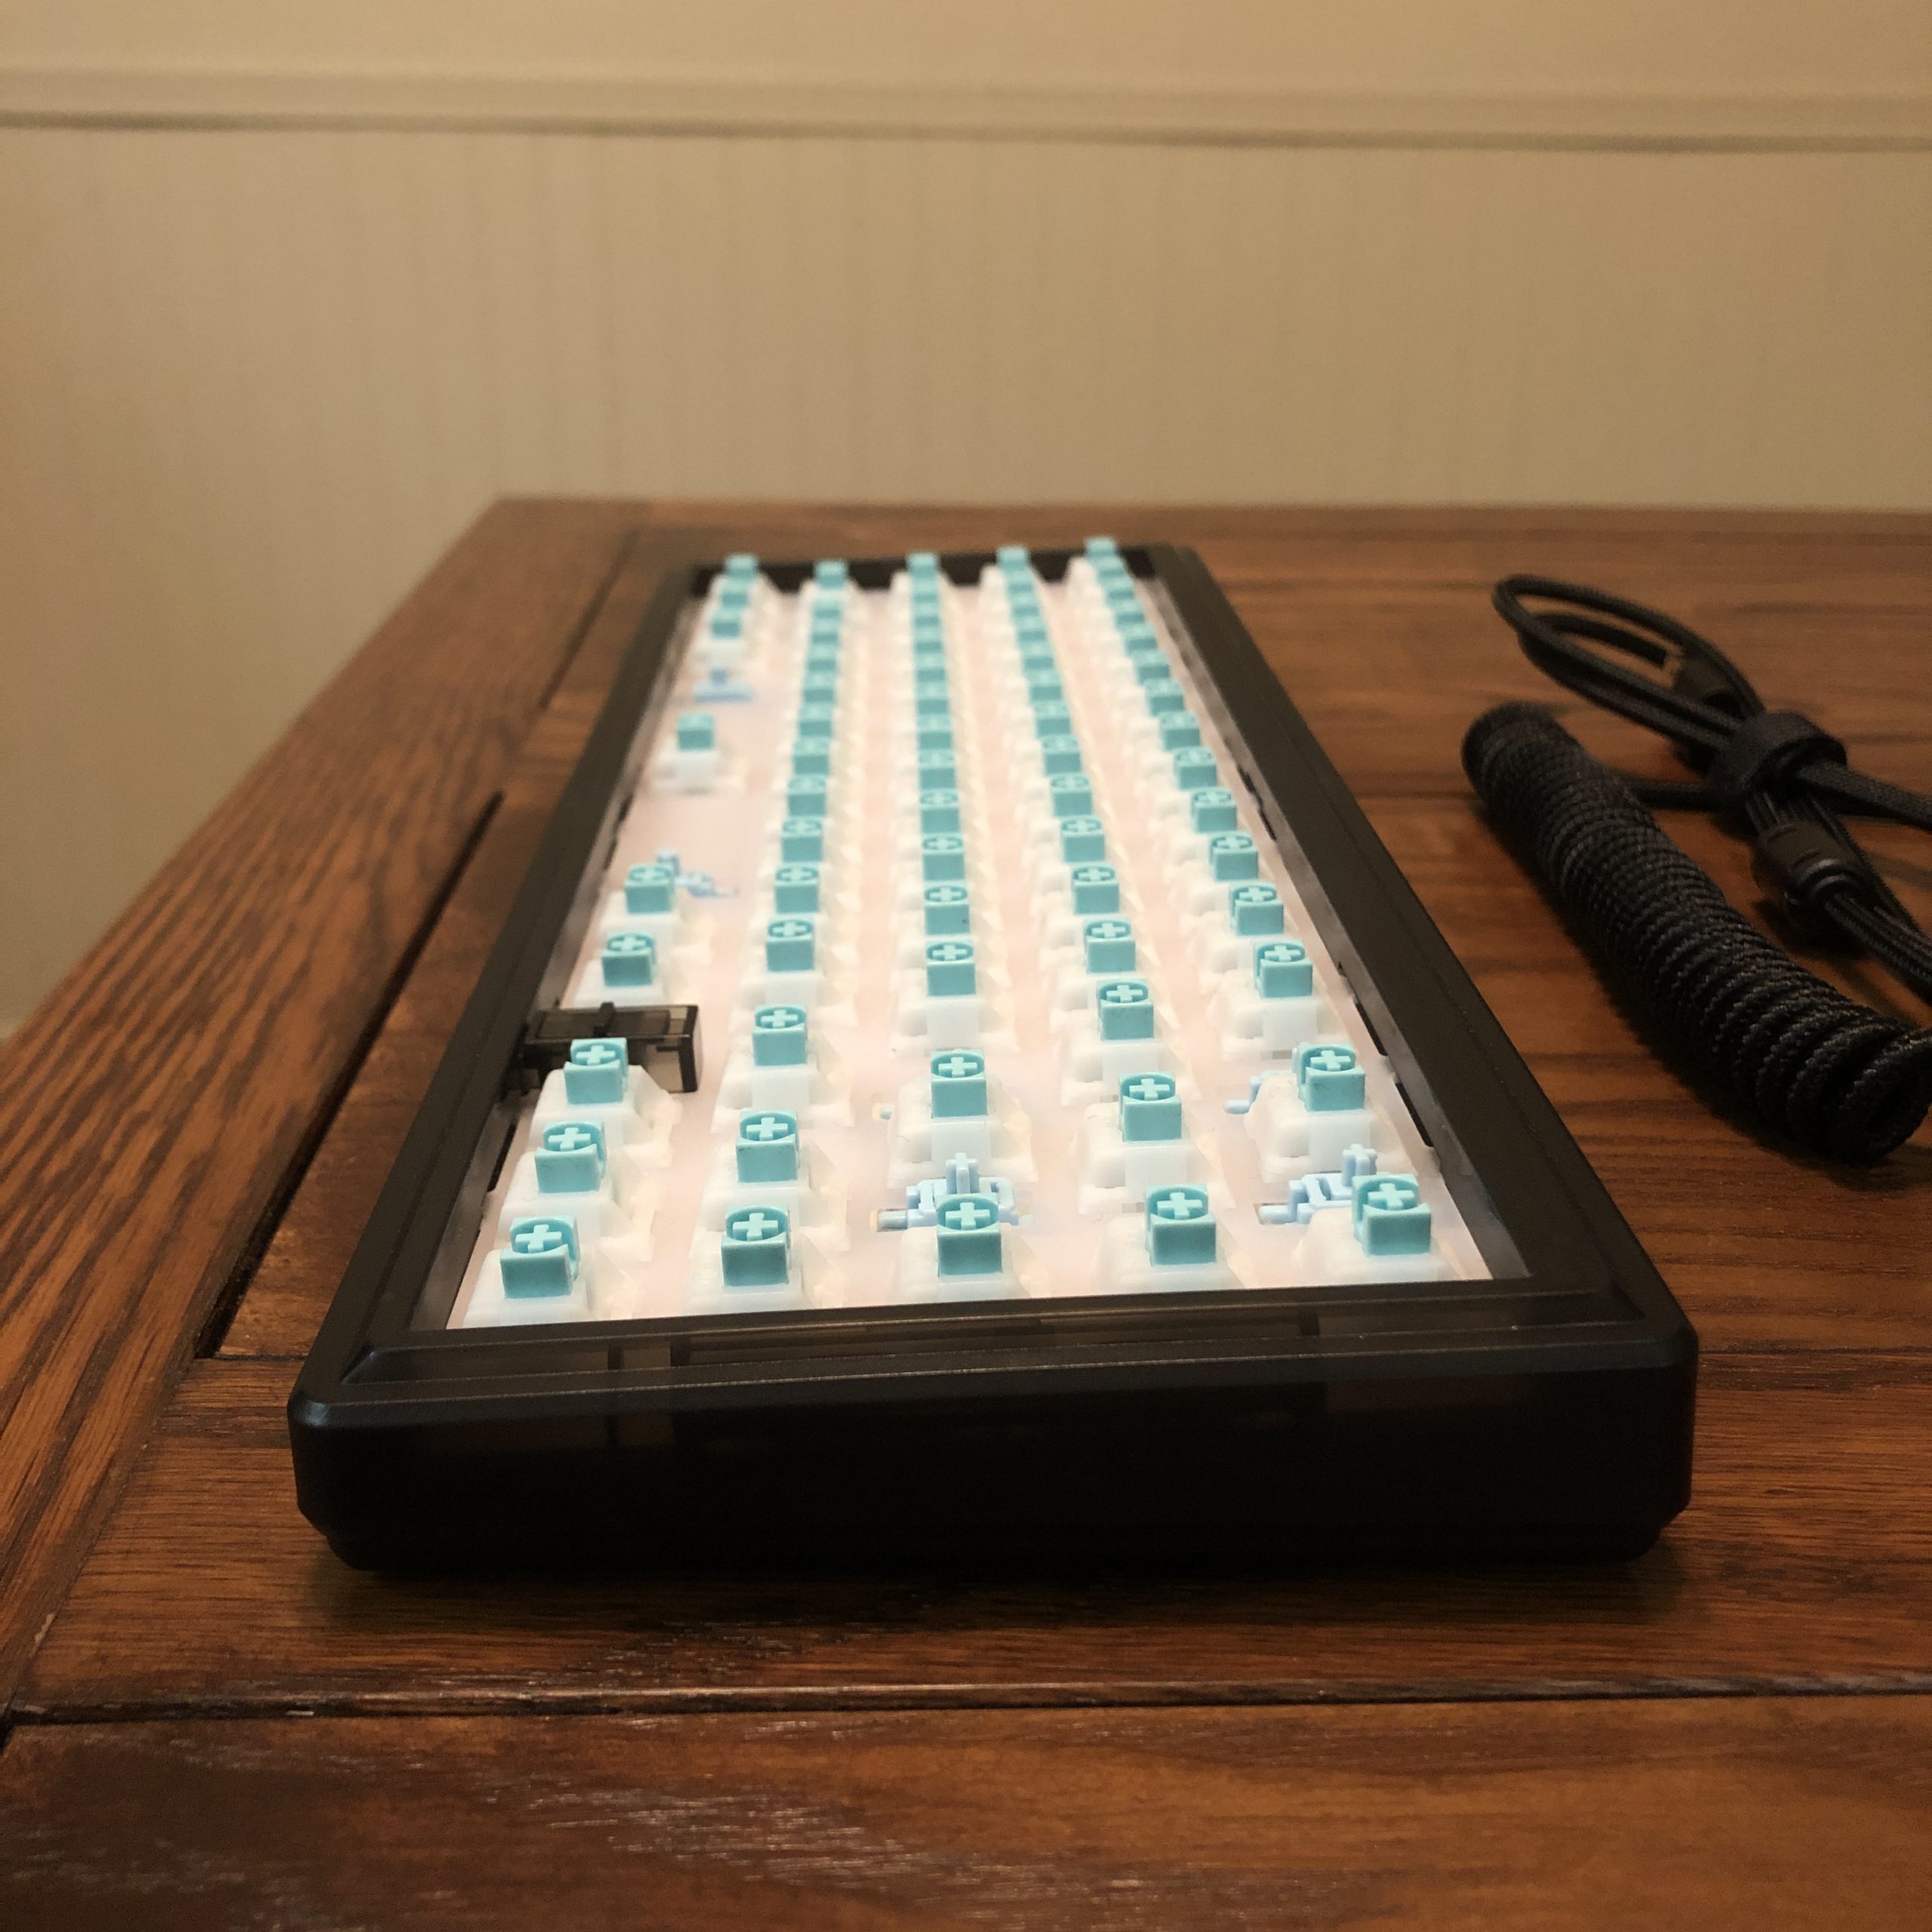
Place the silicone dampeners on top of the PCB, and then the plate on top of that. The holes should line up with the sockets, so let that be your guide for orientation. The silicone has one big part and one small part; the small one goes on the outer side of the space bar area. Holding the “sandwich” together, begin to snap the switches into place, starting at the outer corners.

When installing switches, first make sure the pins are straight, and gently line them up with the sockets. Supporting the socket from the other side, push the switch into the socket – you’ll likely hear and feel a click from the clips grasping the plate.

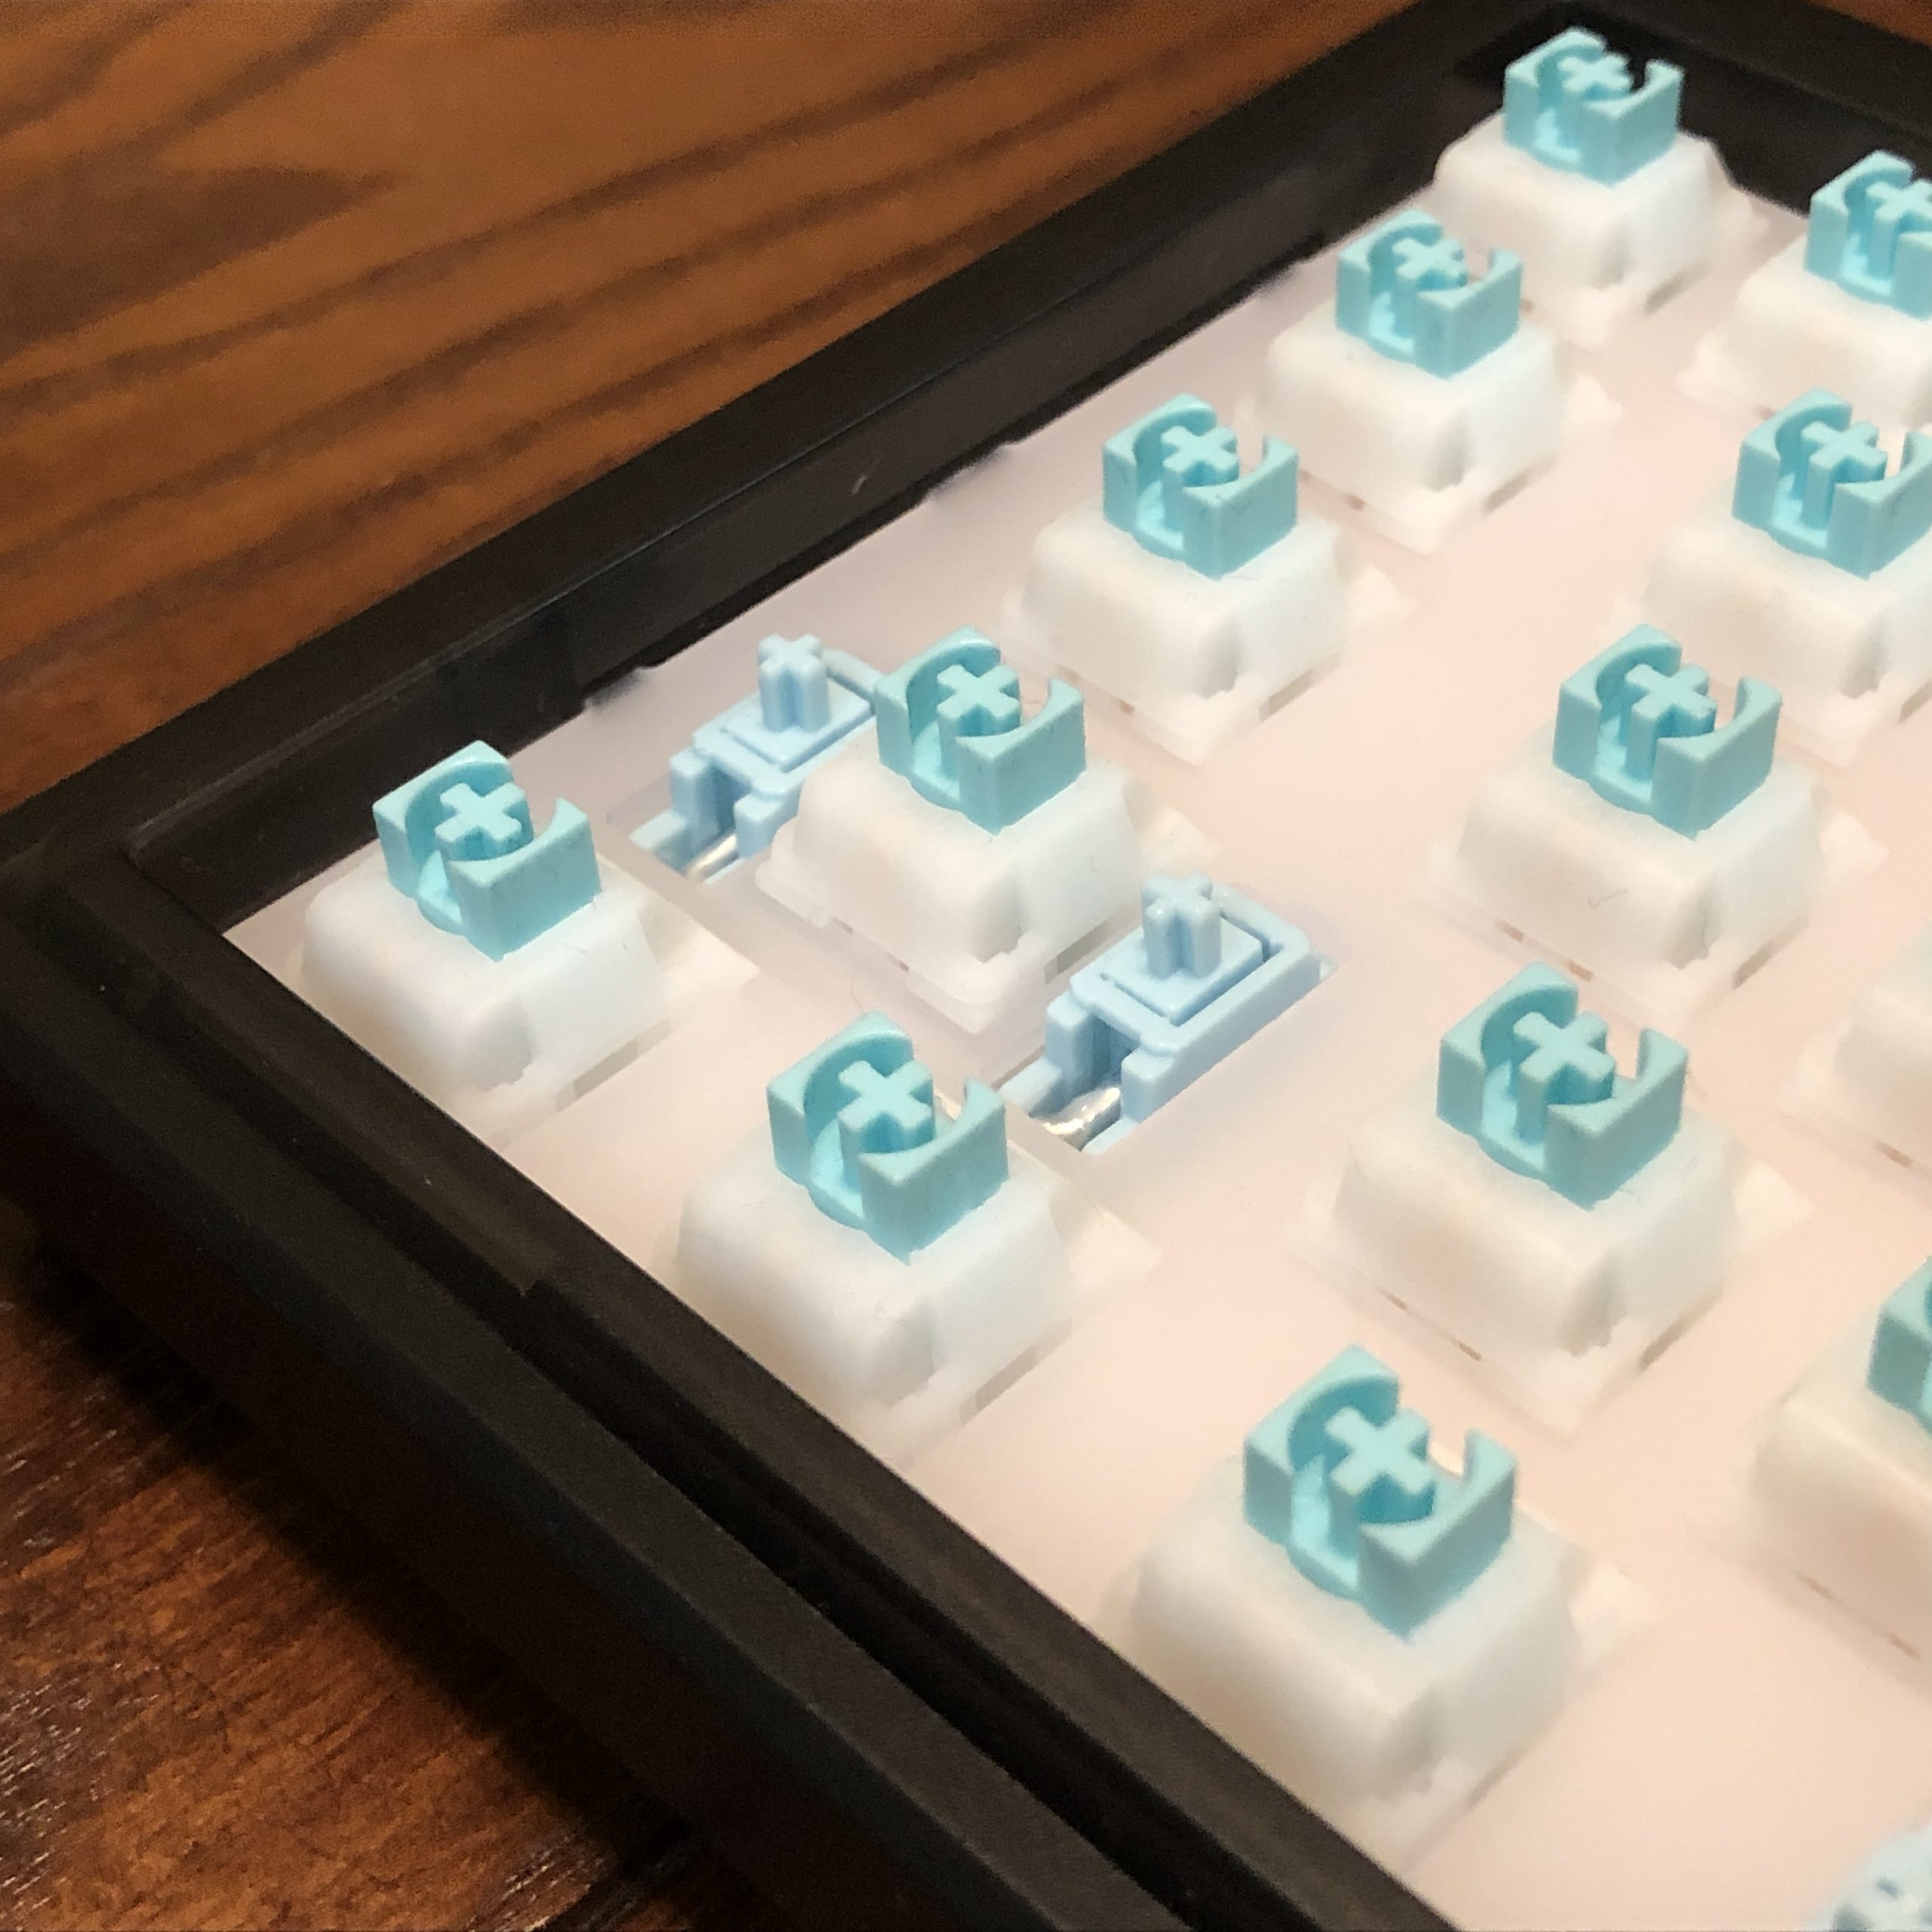
Another angle of the assembled “sandwich” – complete with FLCMMK Ice Mint switches made by Kailh. You can also see here the baby-blue stabs that come with the kit.

Once all the switches are installed, place the sandwich assembly near the bottom case, and carefully connect the cable from the daughter board to the PCB. With this connected, place the sandwich atop the pads, with the guide-post on each side interacting with the associated slots in the plate.

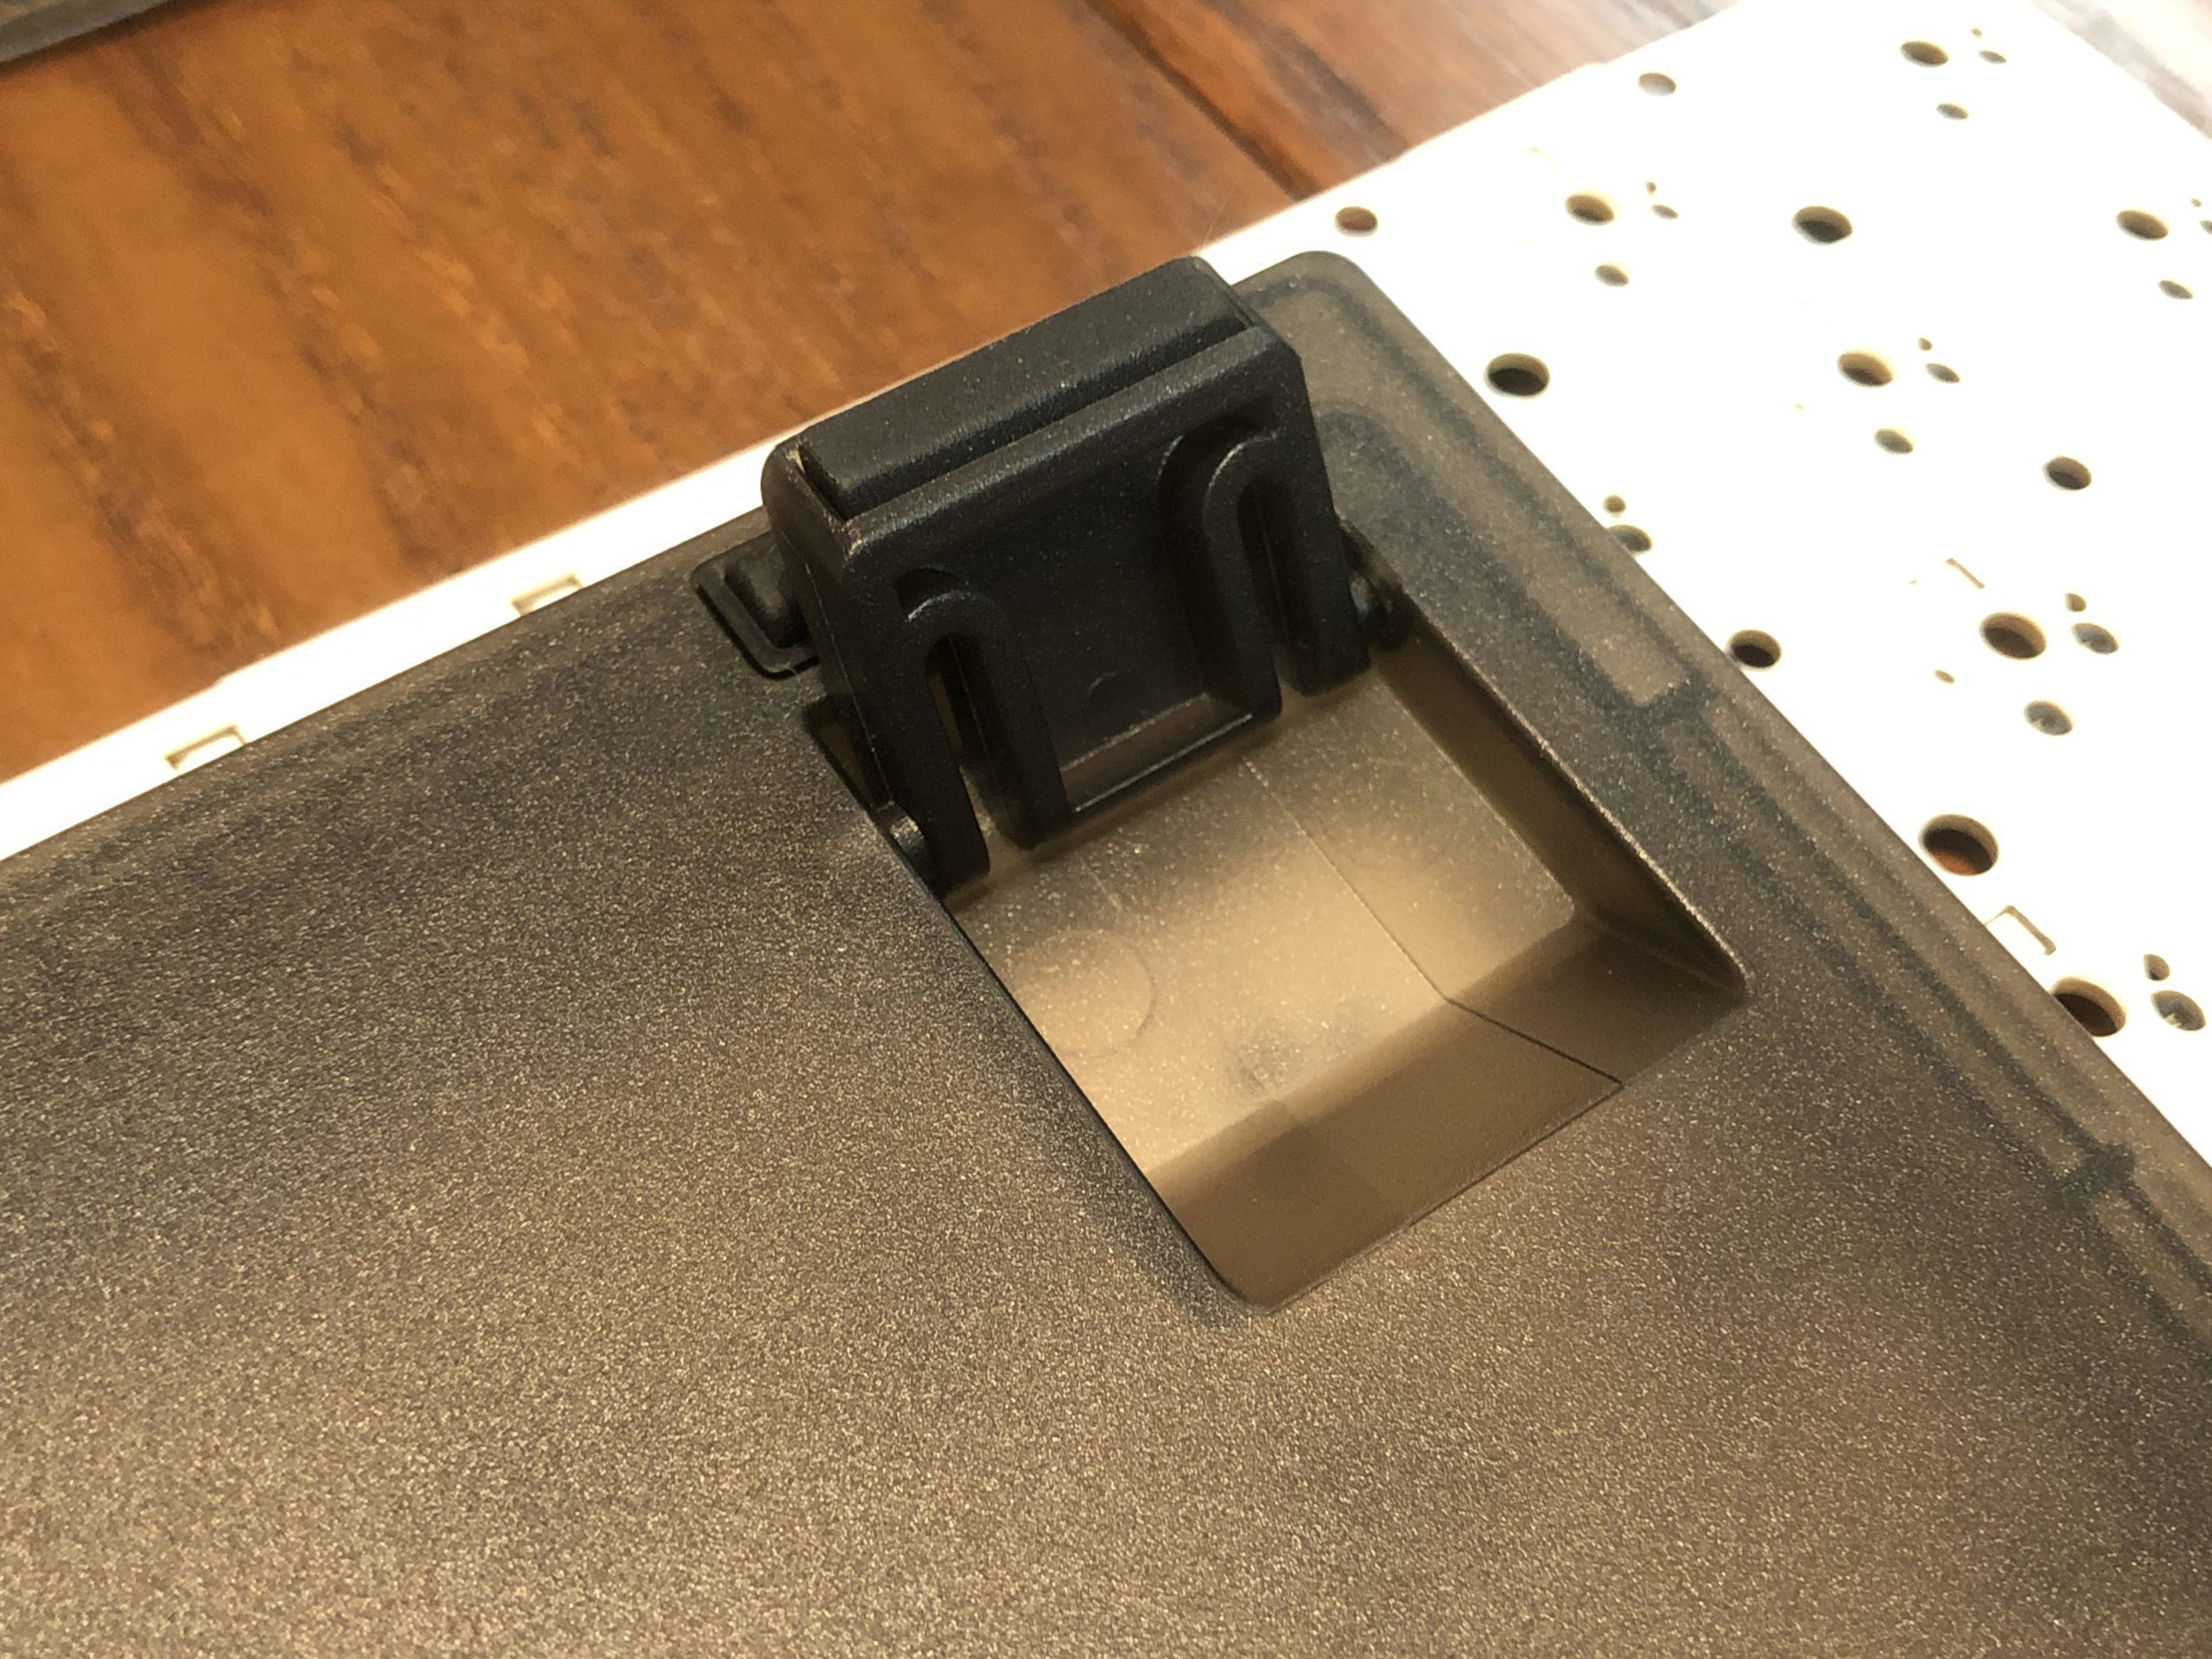
Daughter board connection

Alignment post

Next, place the top shell, taking care that the toggle switch slots-into the slider built into the blocker. Flip the keyboard over, and install the case screws (red bag), starting with one corner and alternating opposite remaining corners. Tighten these screws gently, as they cut their own threads into bare plastic and can easily strip those threads out.

Case, screws.

That’s it! Install some keycaps, plug it in, and start enjoying your keyboard.

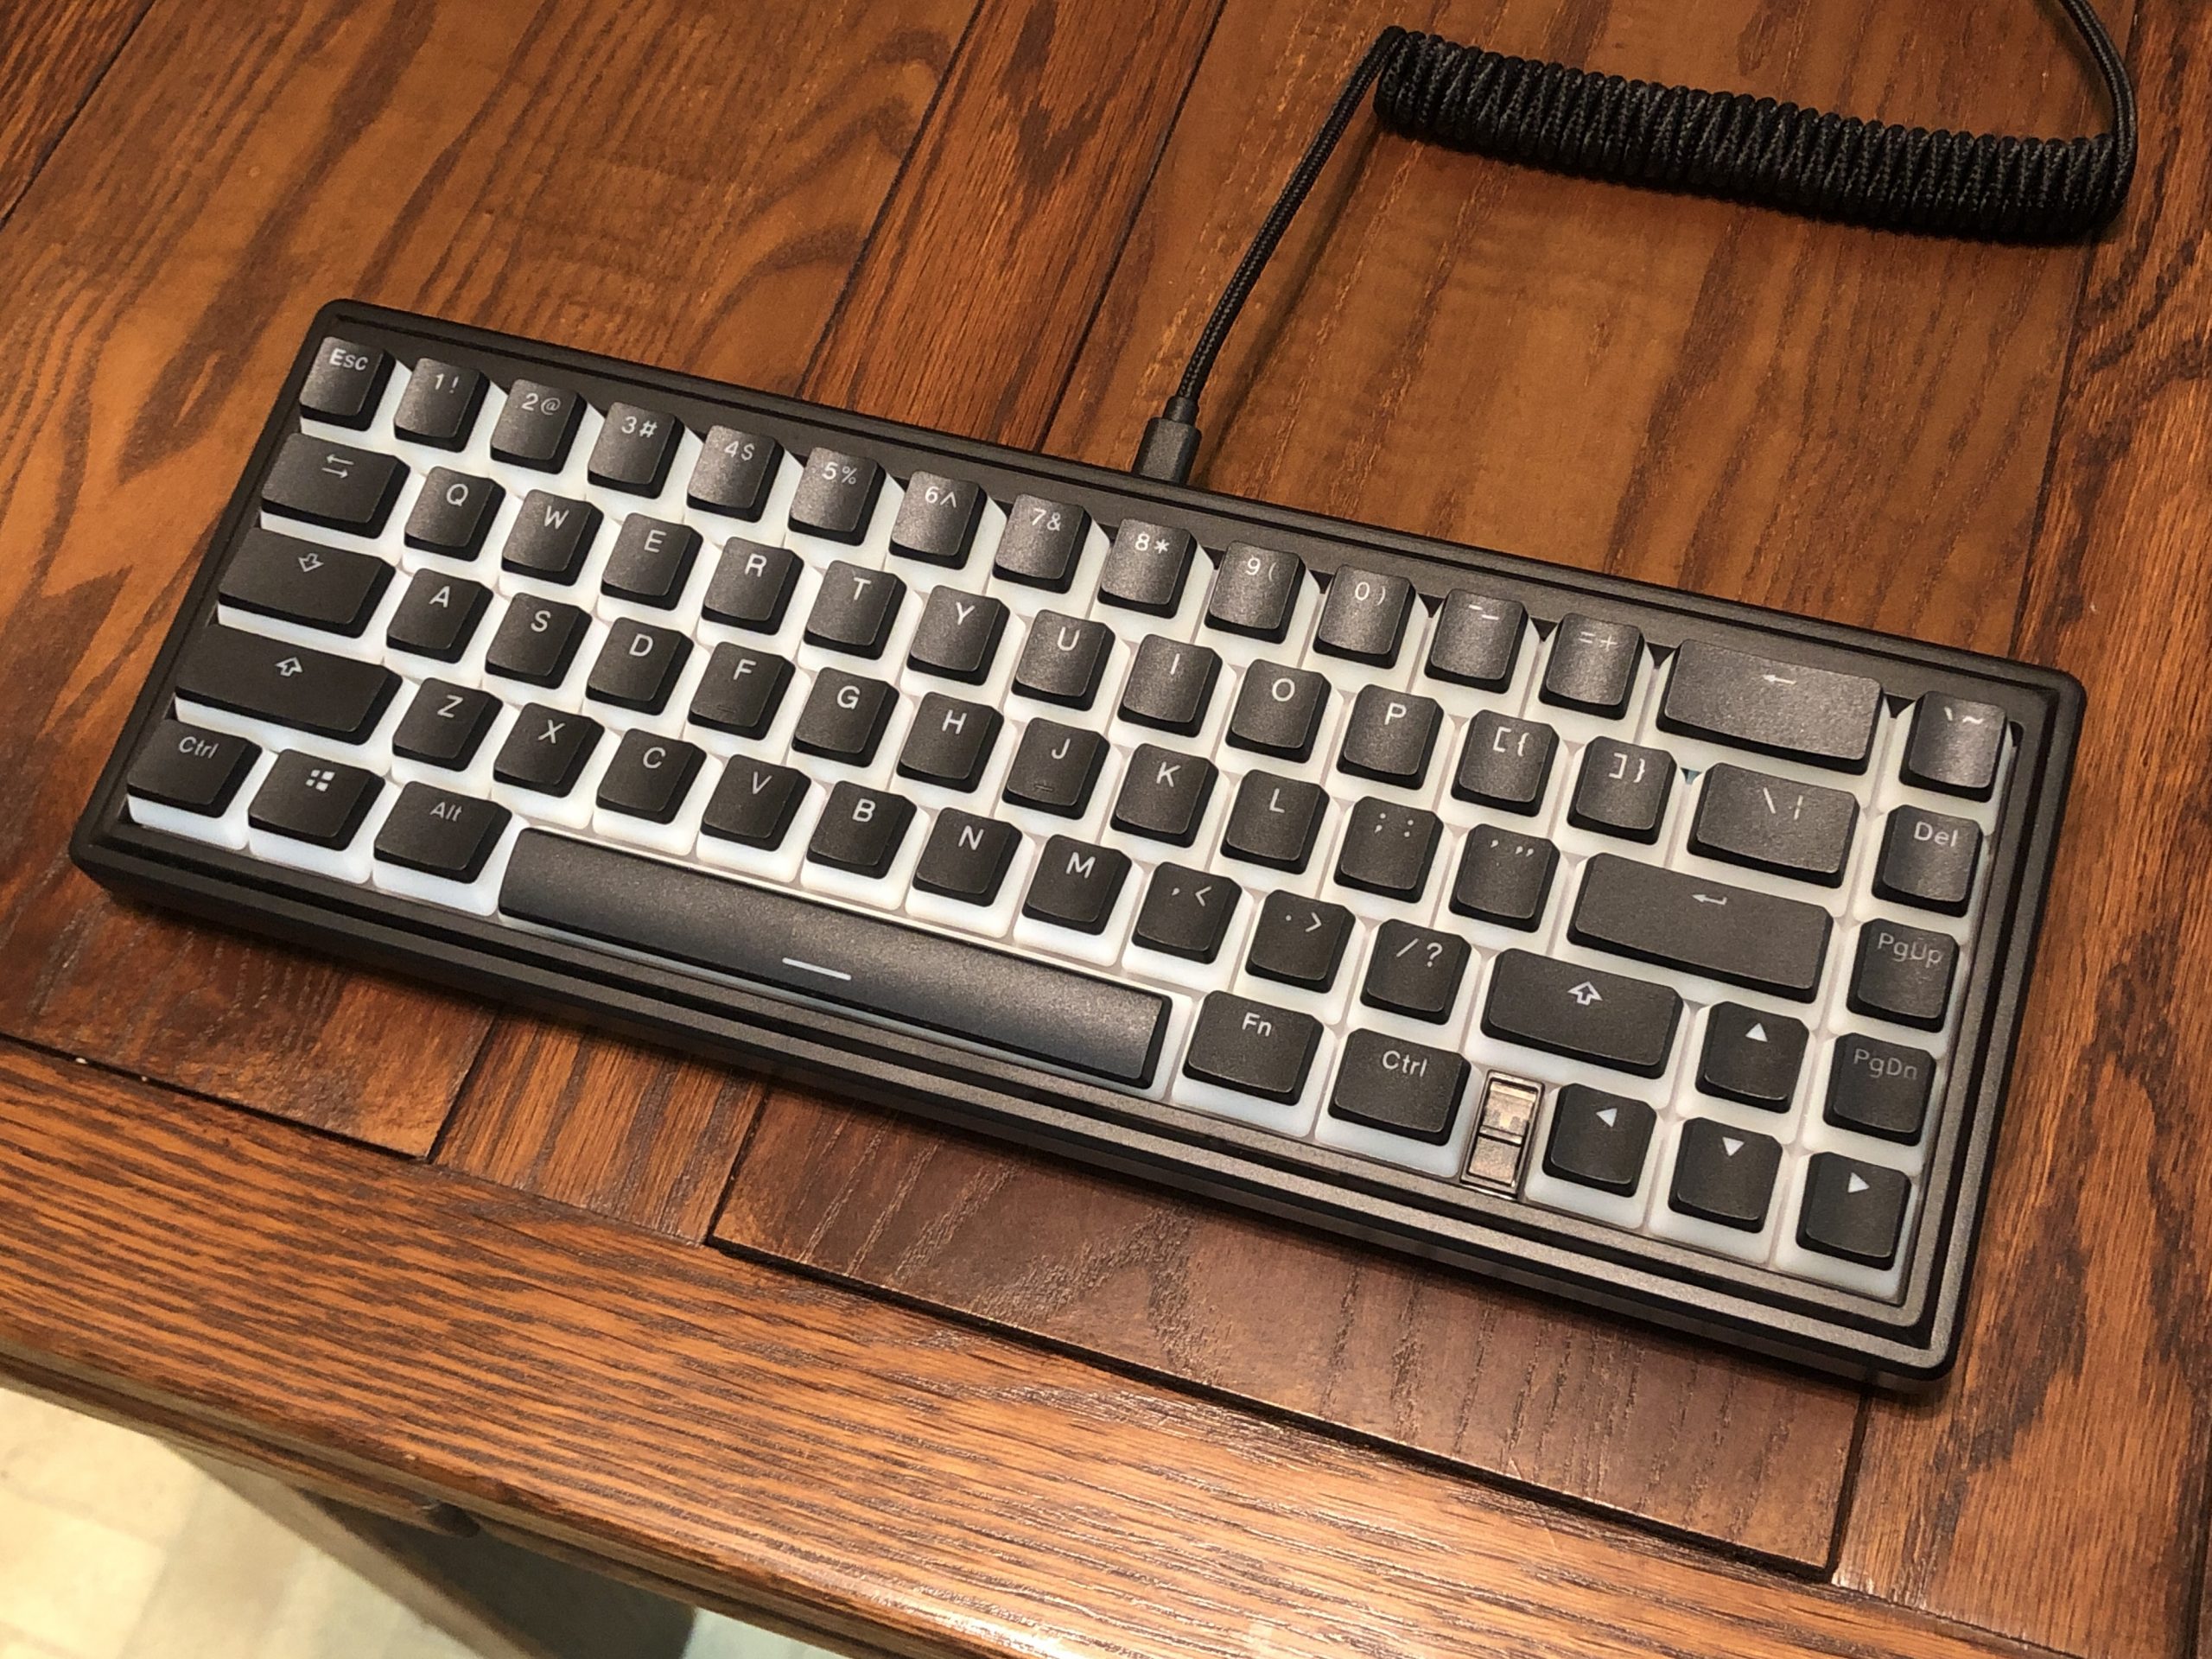
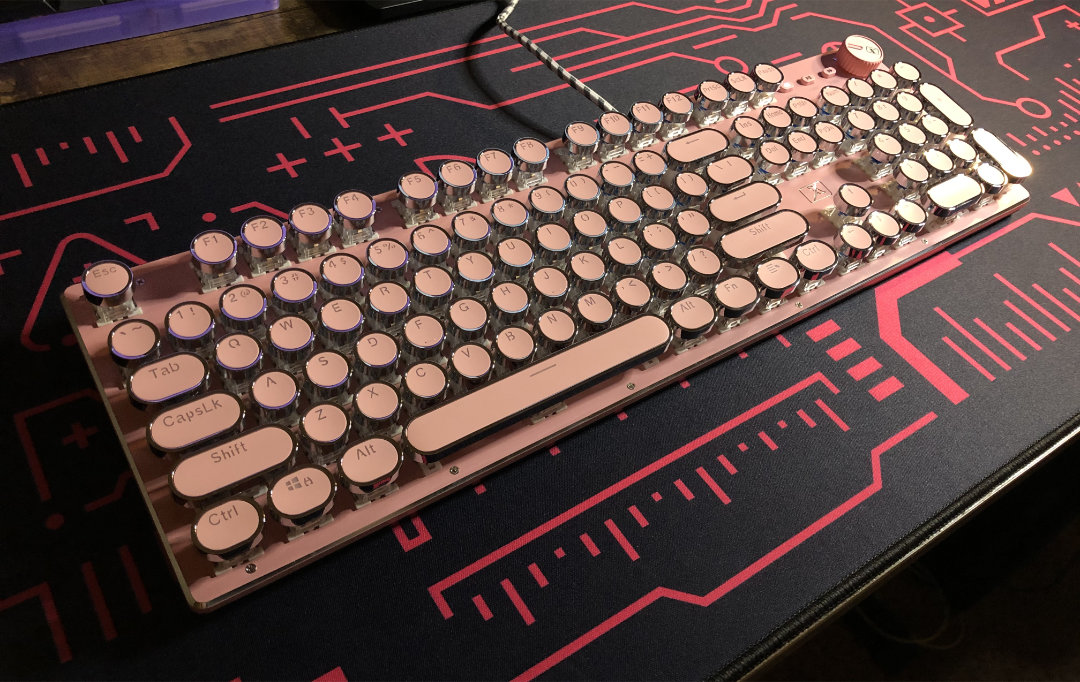
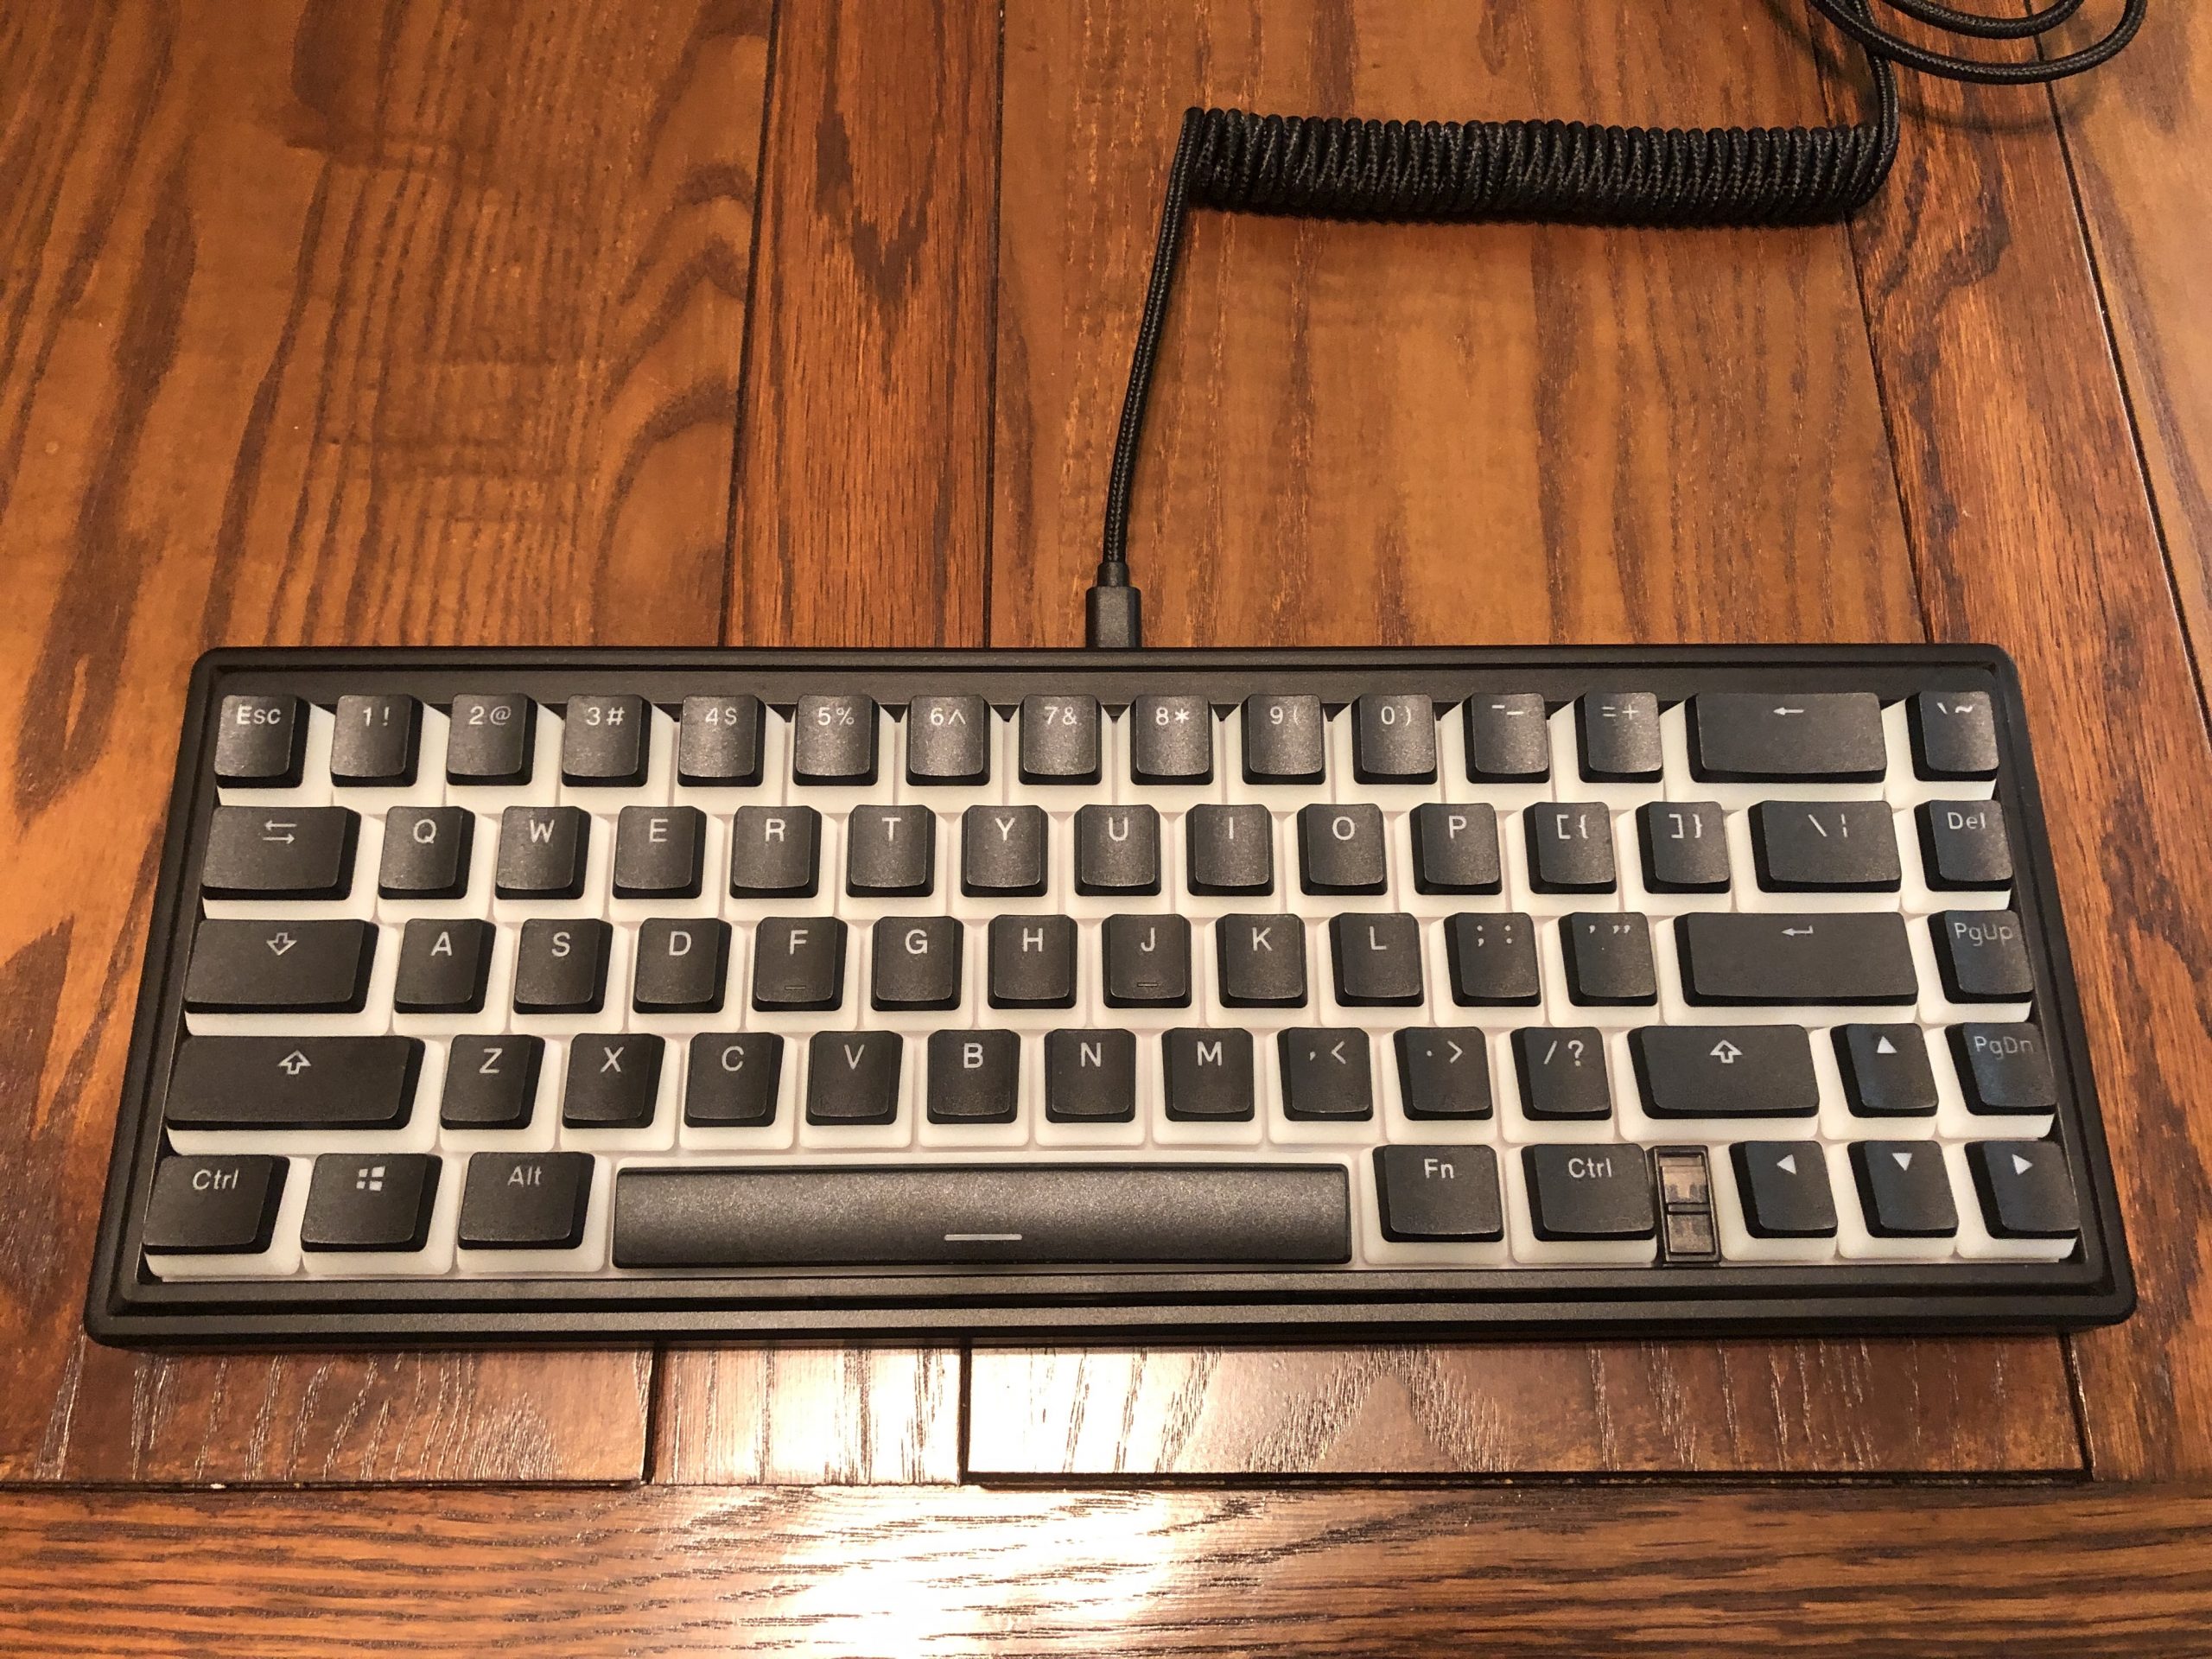
Fully-built CIY GAS67 with pudding caps


Features & Performance:

Alright – now we can get into what this keyboard can do and what it’s like to use.

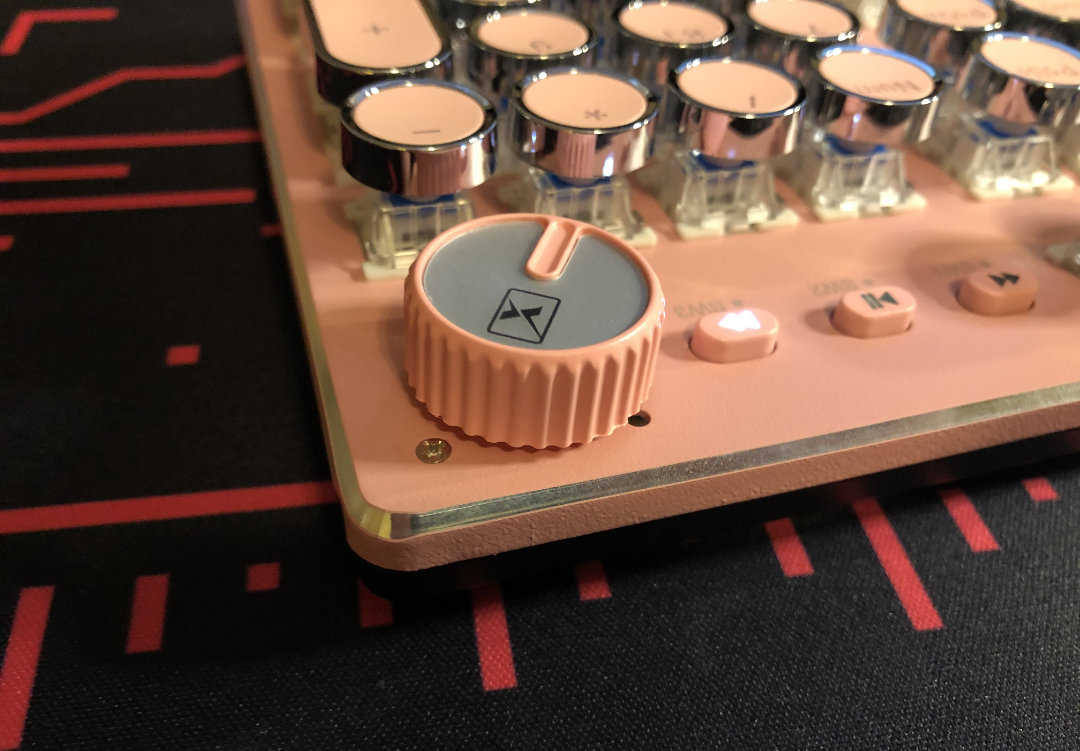
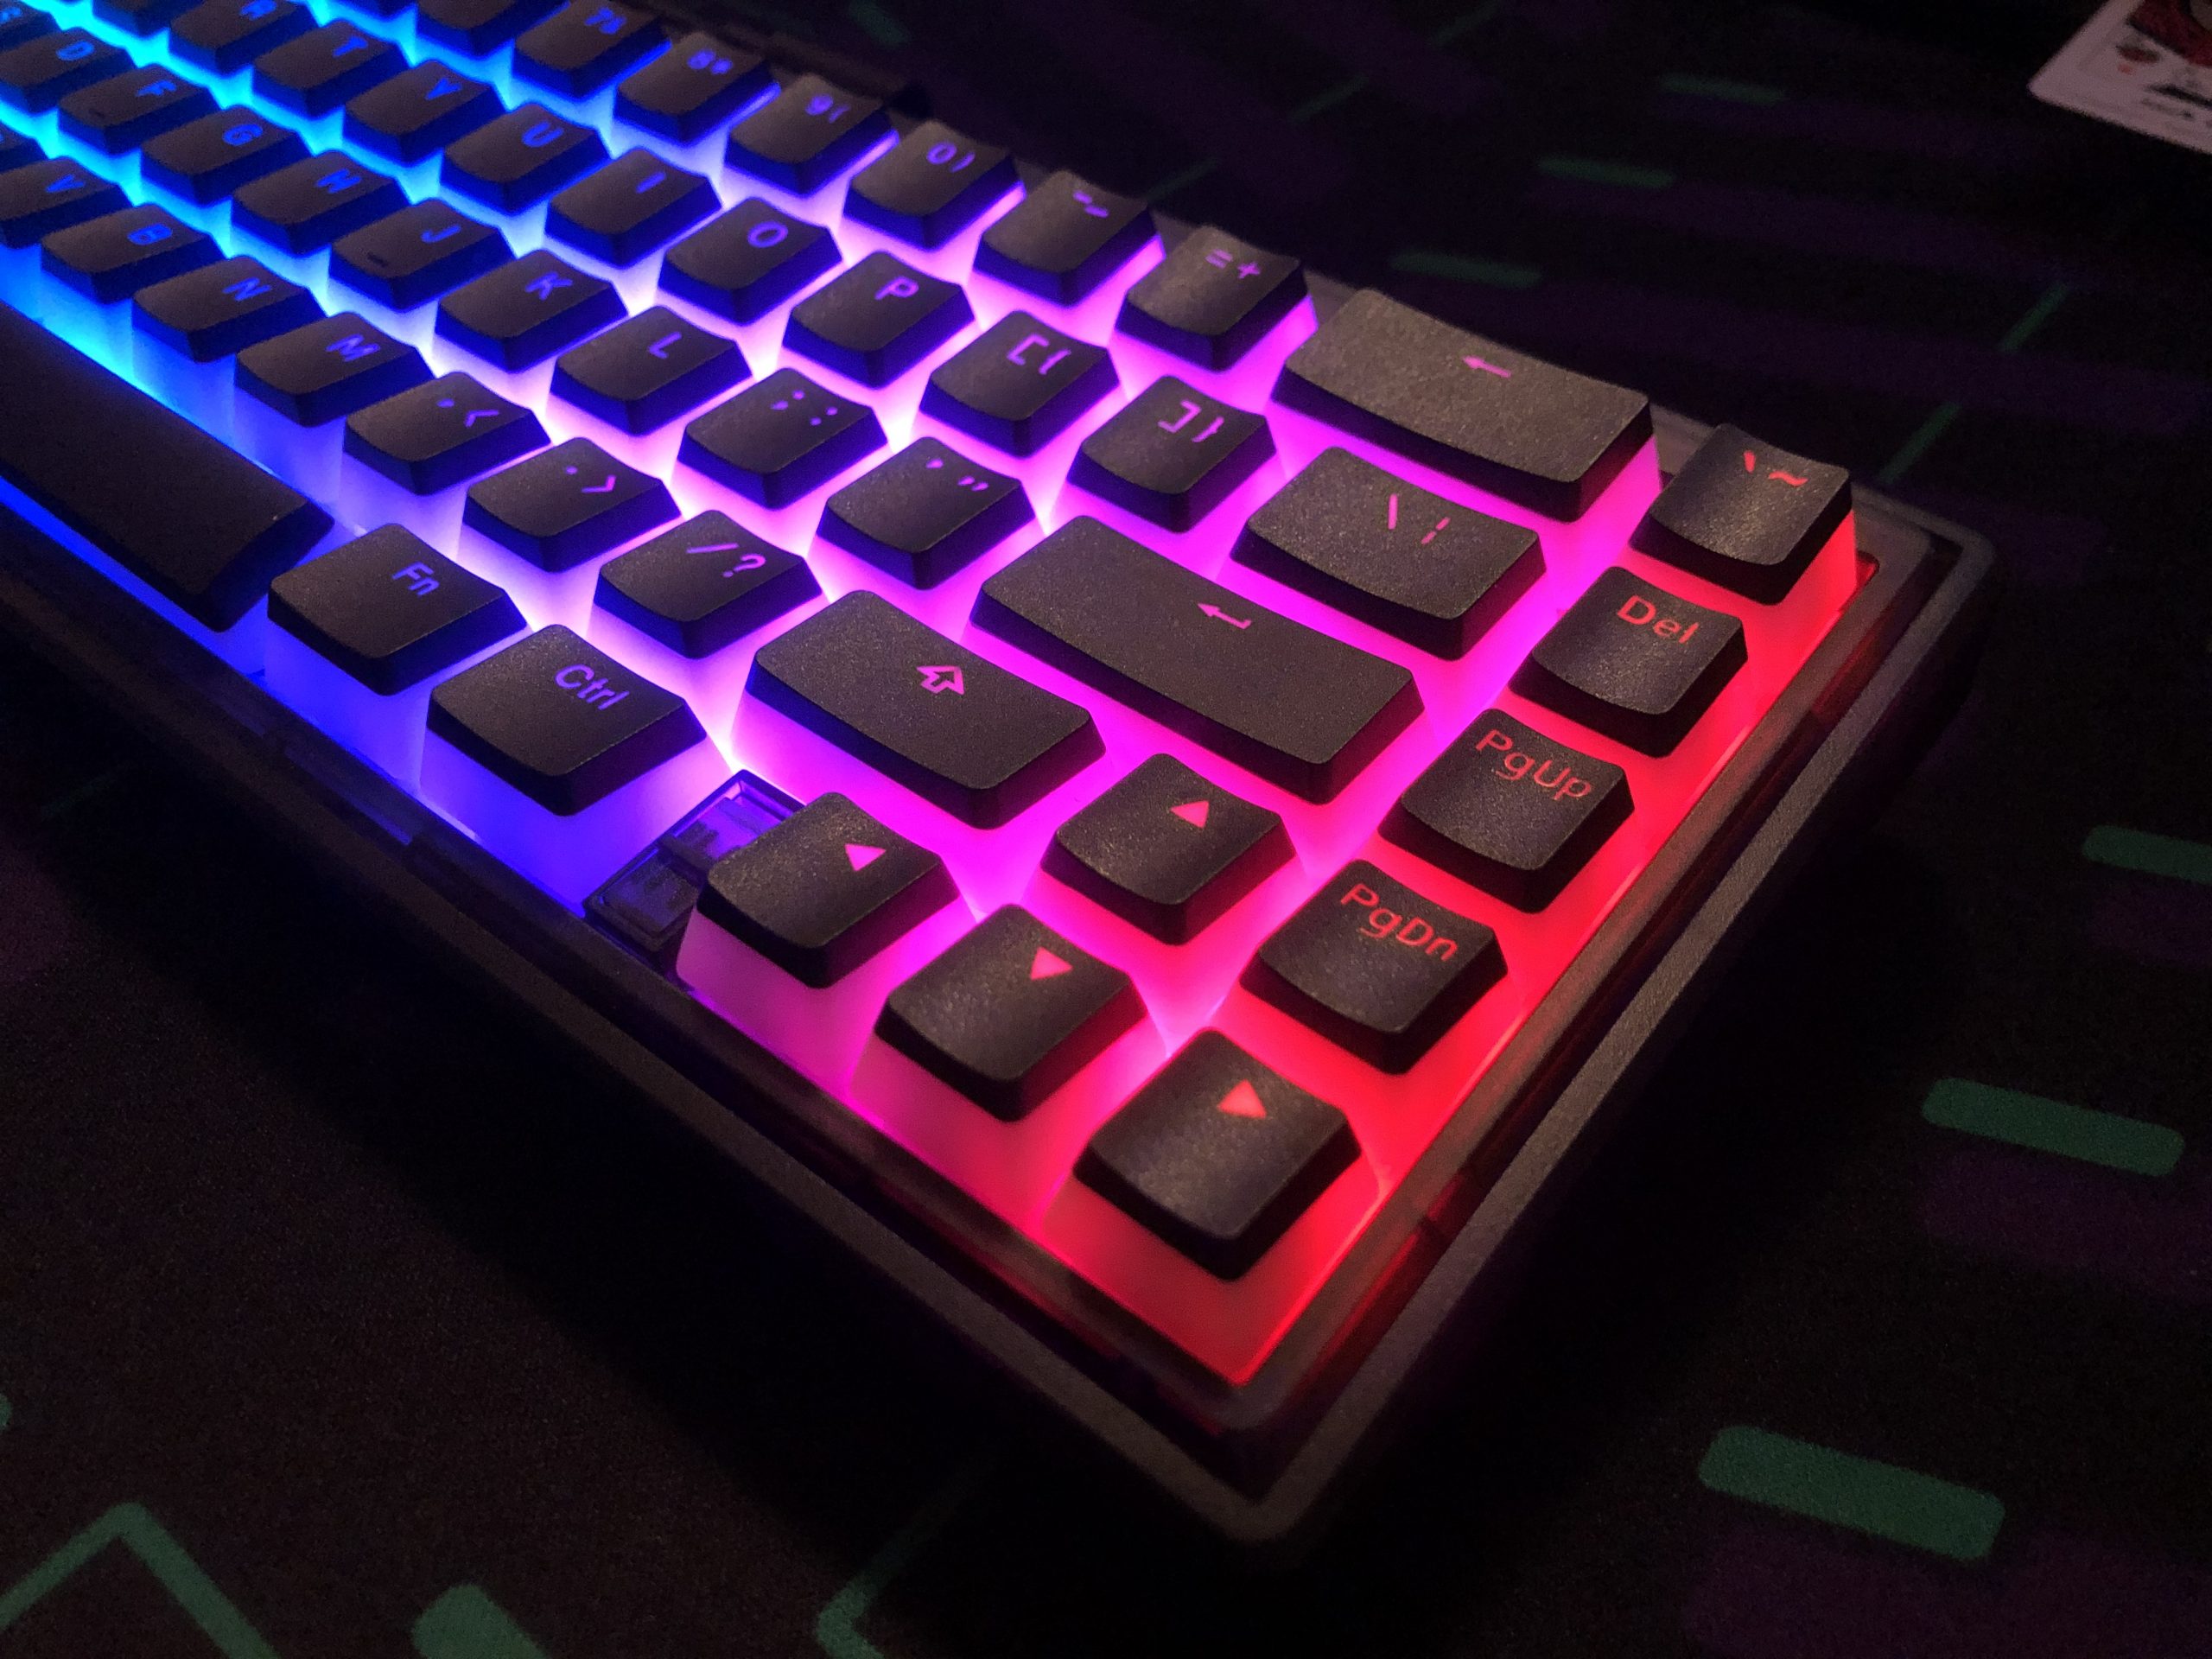
As mentioned before, this is a 67-key layout in a fairly standard configuration by default. The biggest variable with these tends to be the right column, and in this case it starts from the top with Tilde, Delete, Page Up, and Page Down. These can be re-defined through the available software, which you can download [ here ].

There is a toggle-switch situated in the blocker to the left of the arrow cluster, and this switch changes the Windows / Command key into a second FN (function layer) key. This acts as a “gamer mode” since striking the key accidentally while in this mode won’t call-up the start menu and tab-out of your game – though it does still have a function in combination with other keys, which is pretty neat.

A right-side view that shows the toggle-blocker.

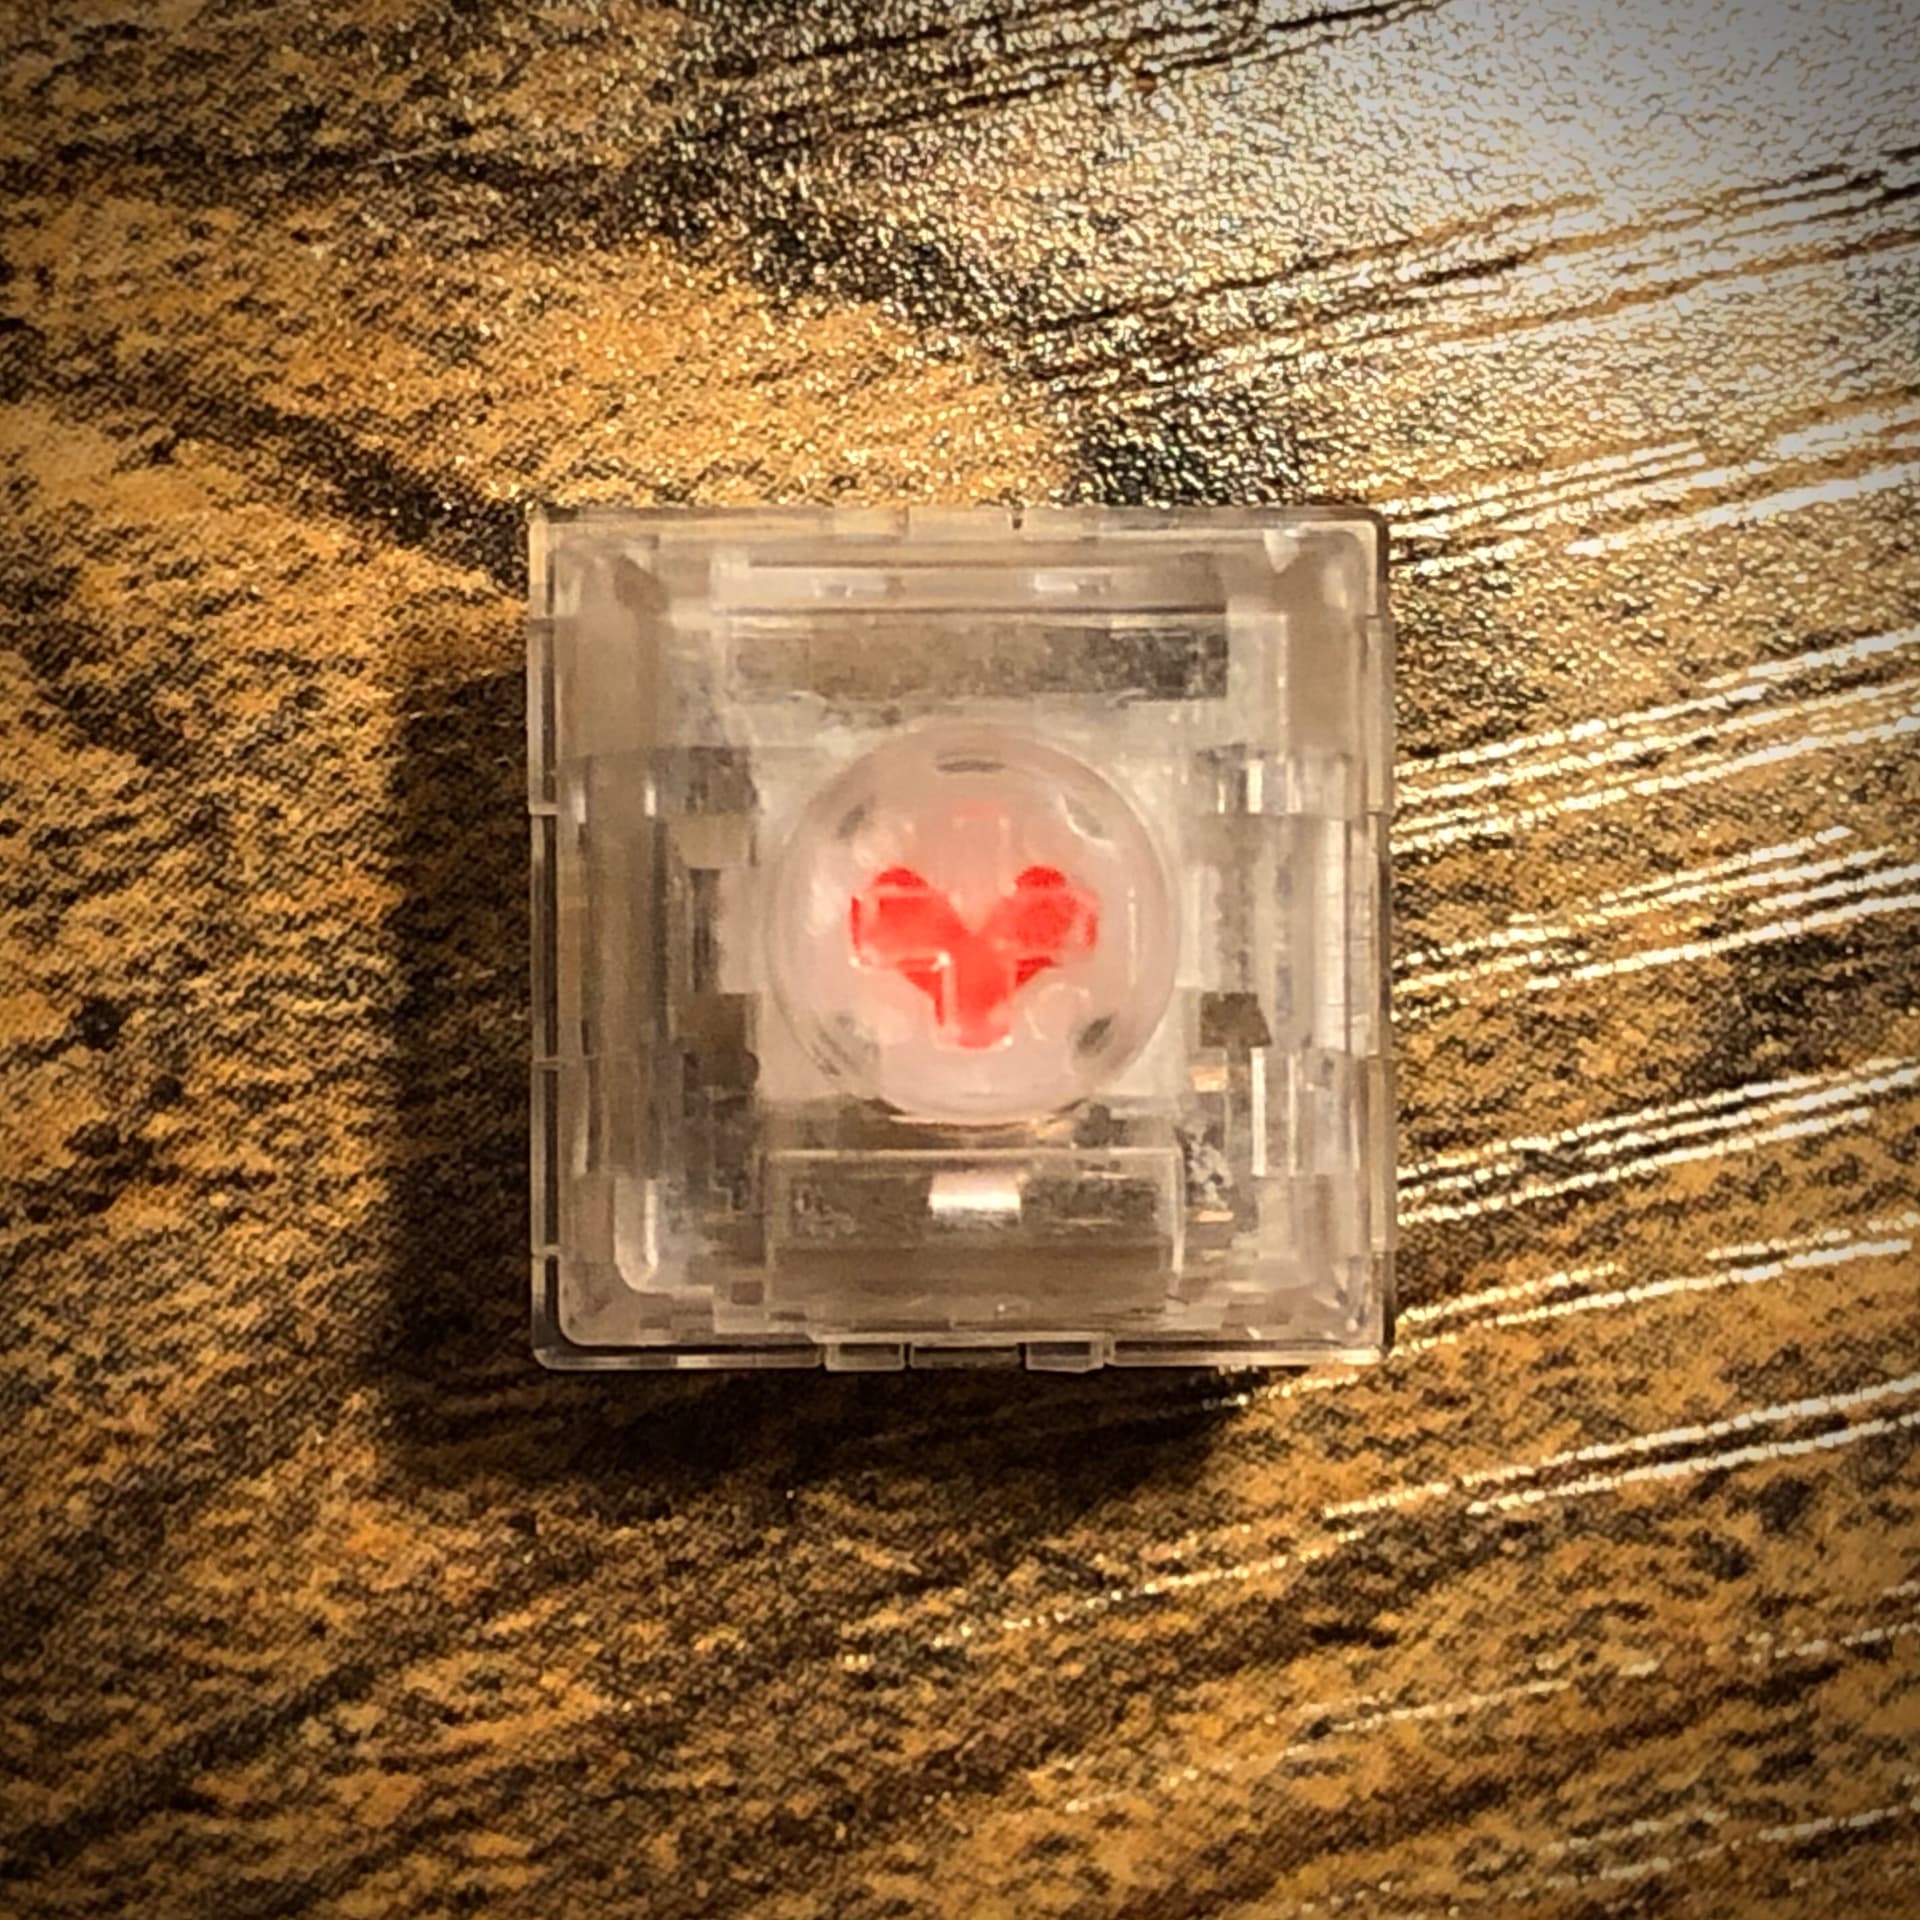
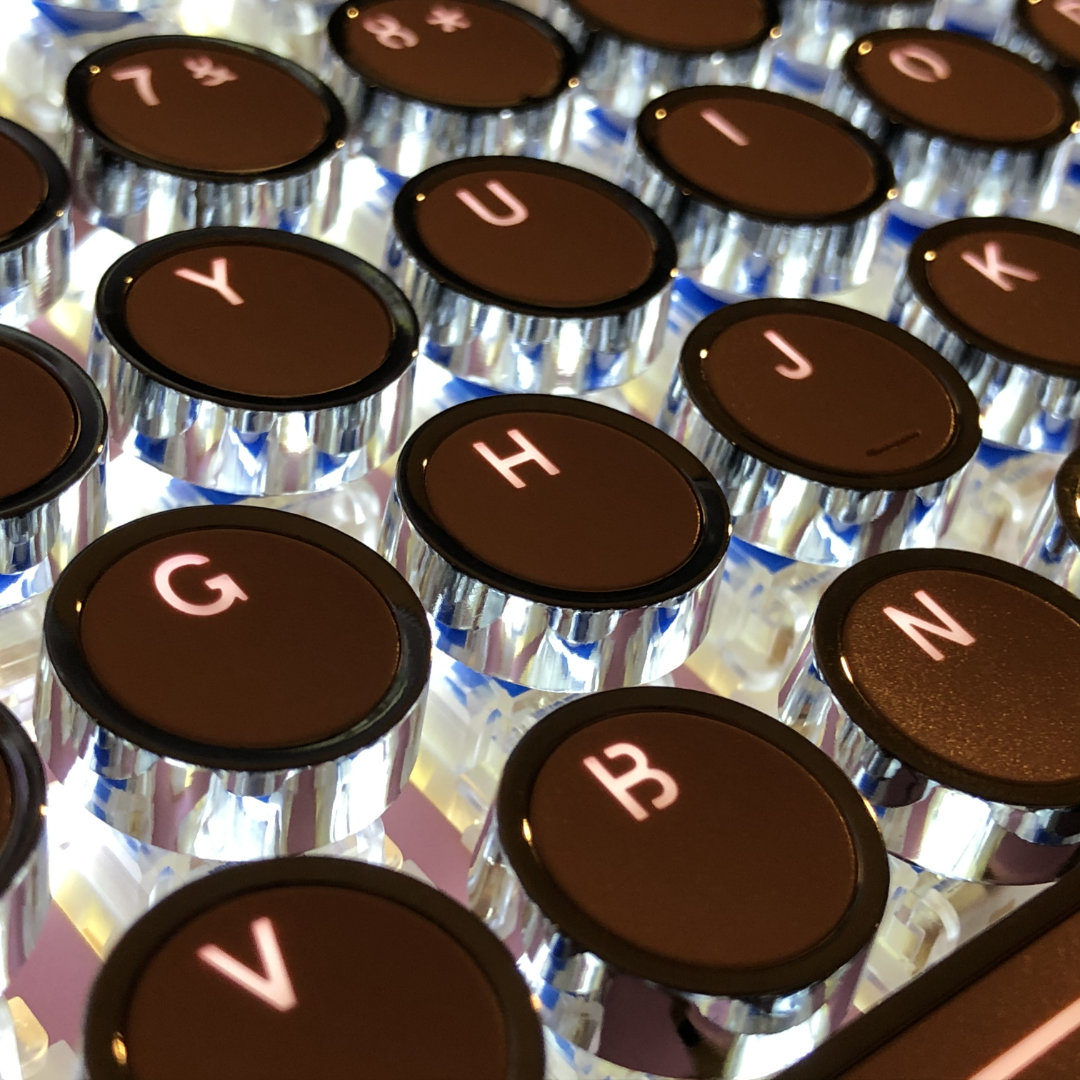
We’ve got a USBC connection on the aforementioned daughter board, which powers some respectably-bright RGB lights. RGB lights positioned to fire straight into shine-through legends. I *know* – trust me – we’re getting there. The PCB accommodates (but of course does not require) 5-pin switches, which is always nice.

There’s the aforementioned function layer, accessible through the FN key(s). This layer gives the user access to all the keys otherwise not included in the layout, and also controls some on-board functions such as all the RGB options as well as toggling a full key-lock. Here’s the default keymap, including the function layer:
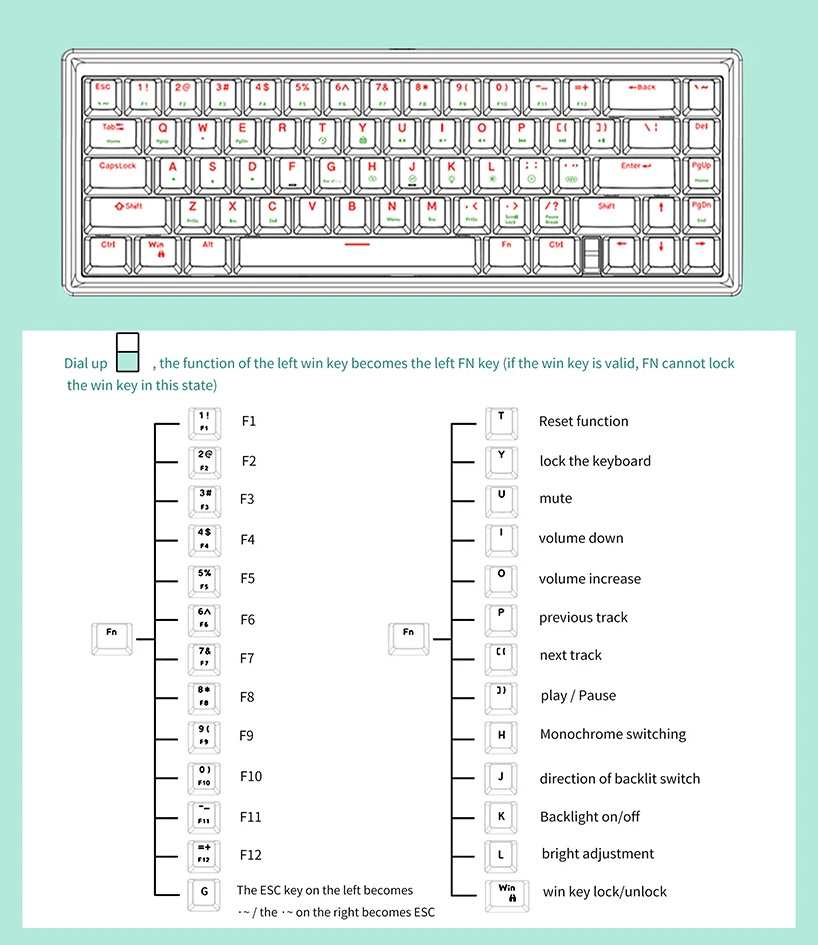
Image from banggood

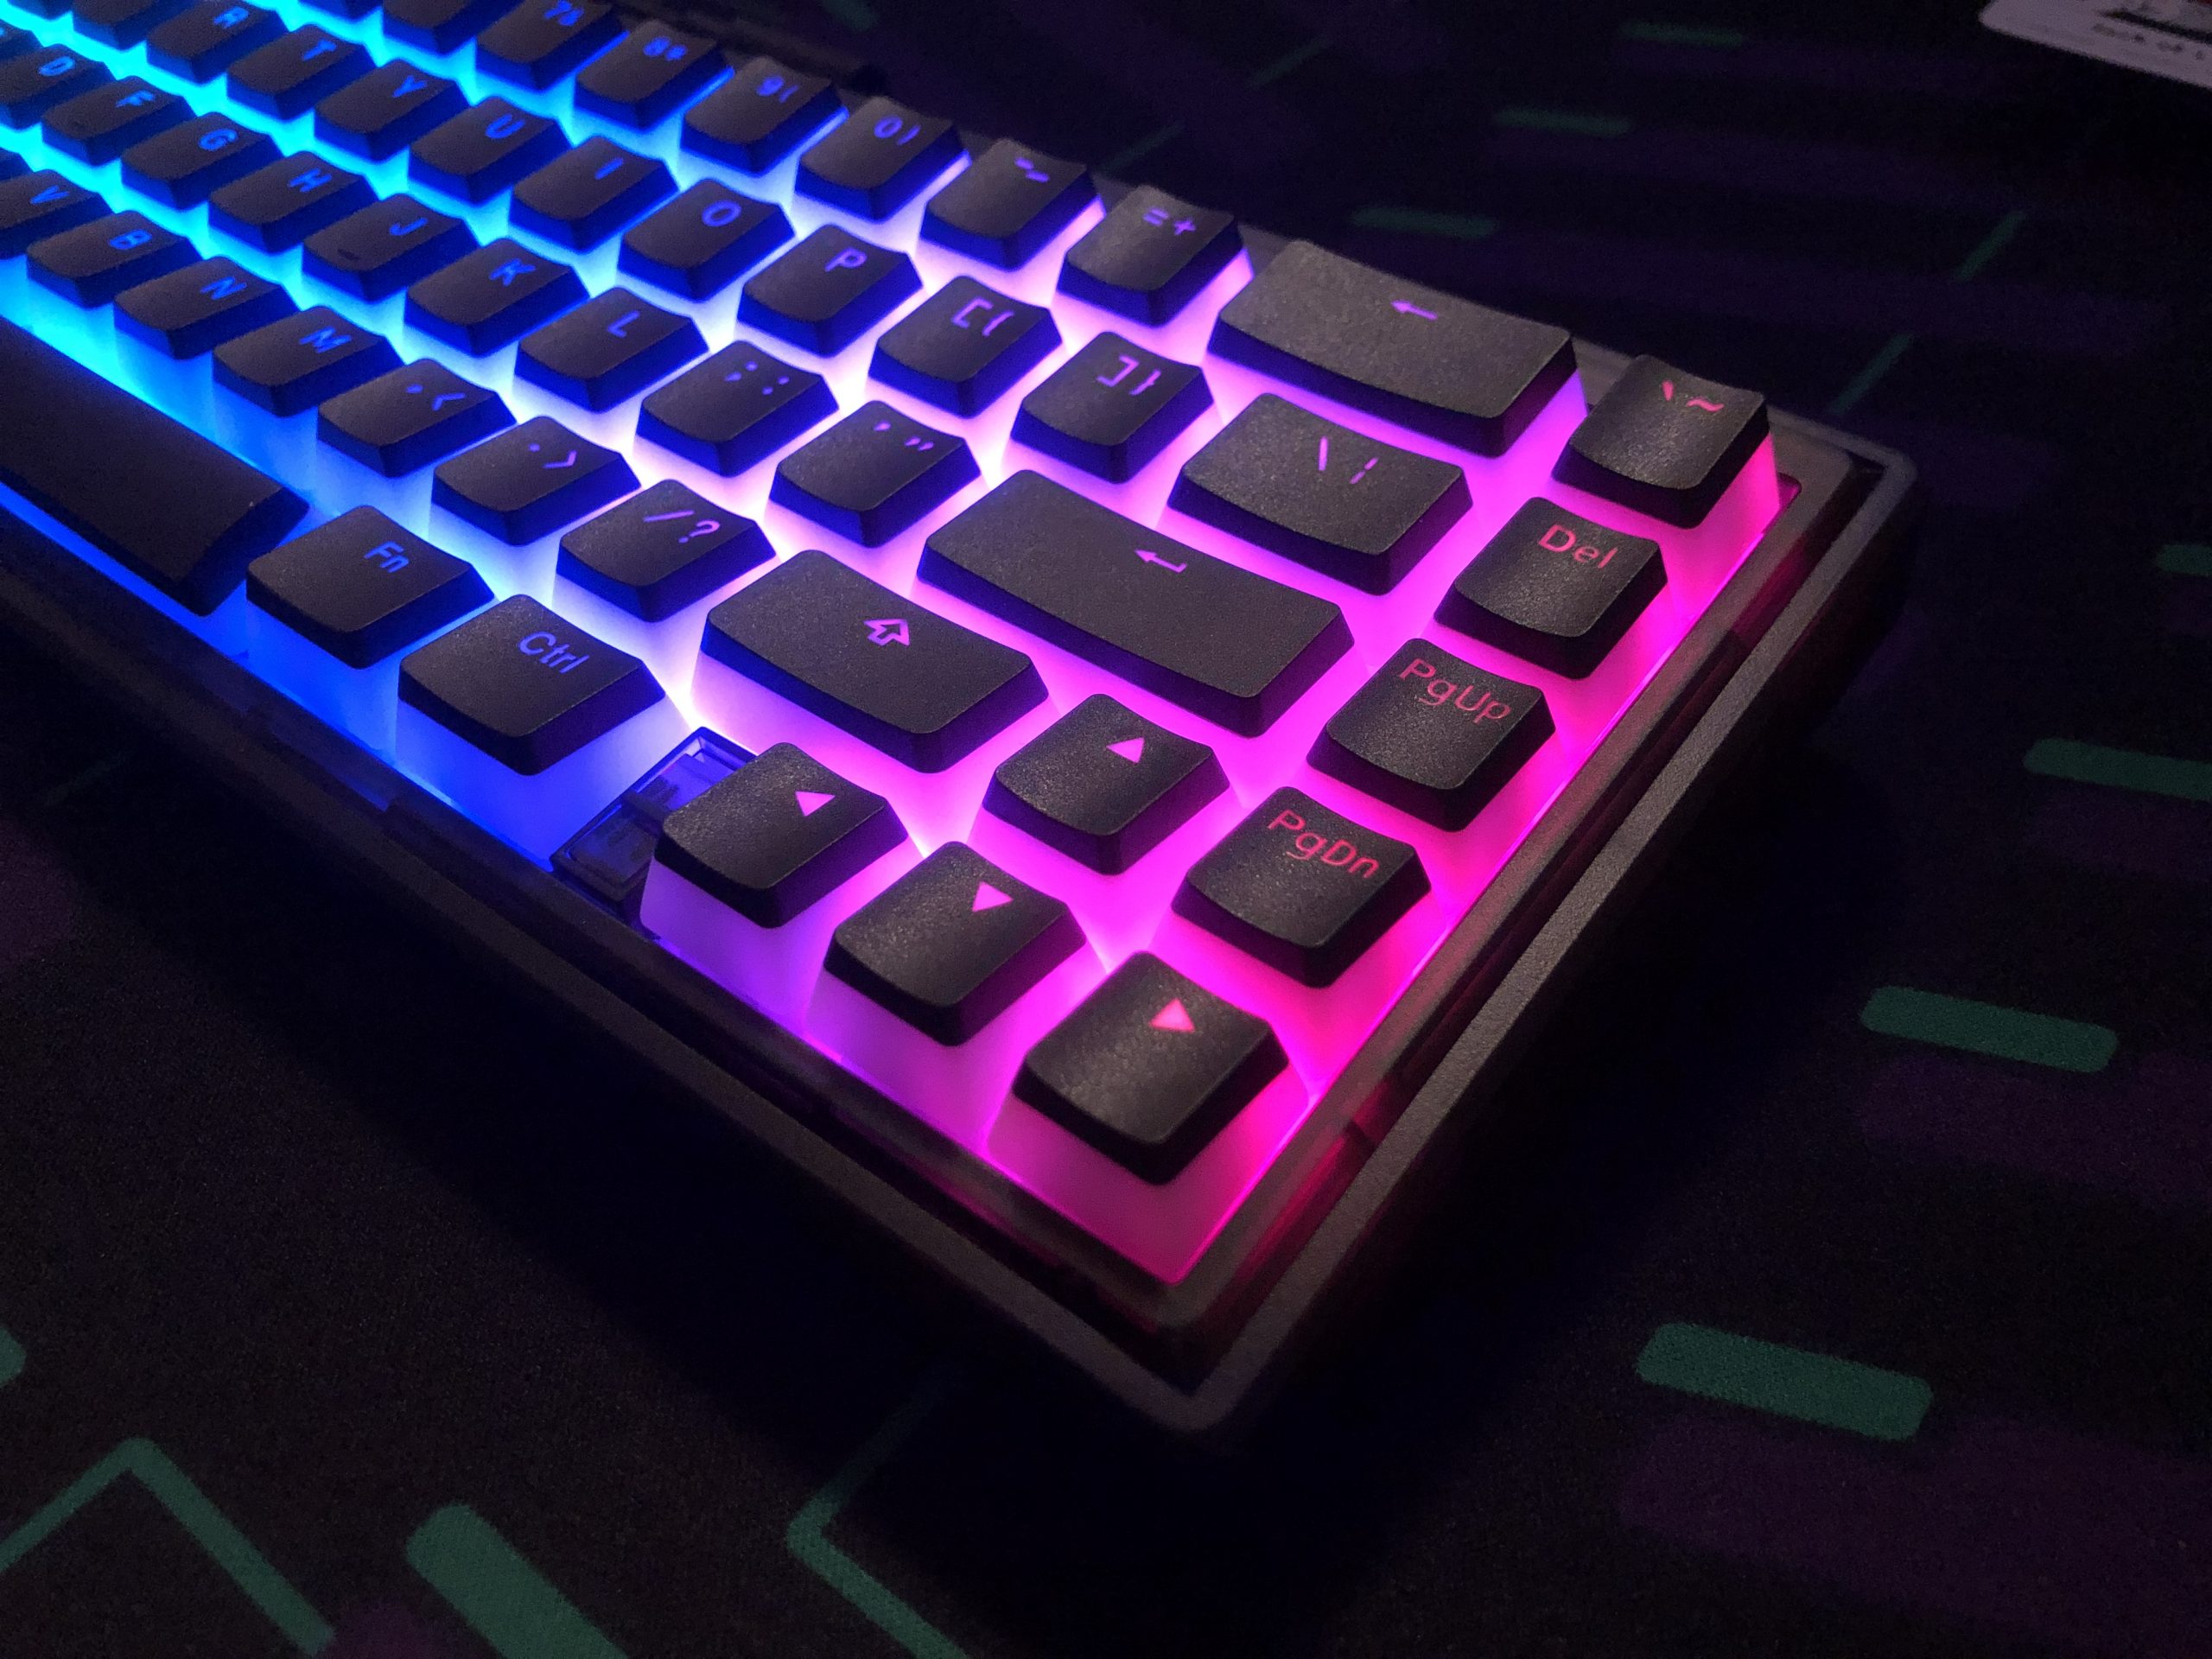
Speaking of RGB, it’s nice and bright here. It diffuses well through the frosty / milky polycarb plate, (and the milky POM switches and pudding caps I have installed). It has a typical handful of modes and four brightness settings.

Aesthetics:

It’s nothing fancy, and I’m not particularly a fan of the stepped-bevel on the top shell, but I also have no real complaints about the look of this keyboard. It’s simple and minimal, and I think the toggle-switch placement is actually pretty clever and works well with the intention of the keyboard. ~more on that laterrr~

The three currently available colors; image from banggood

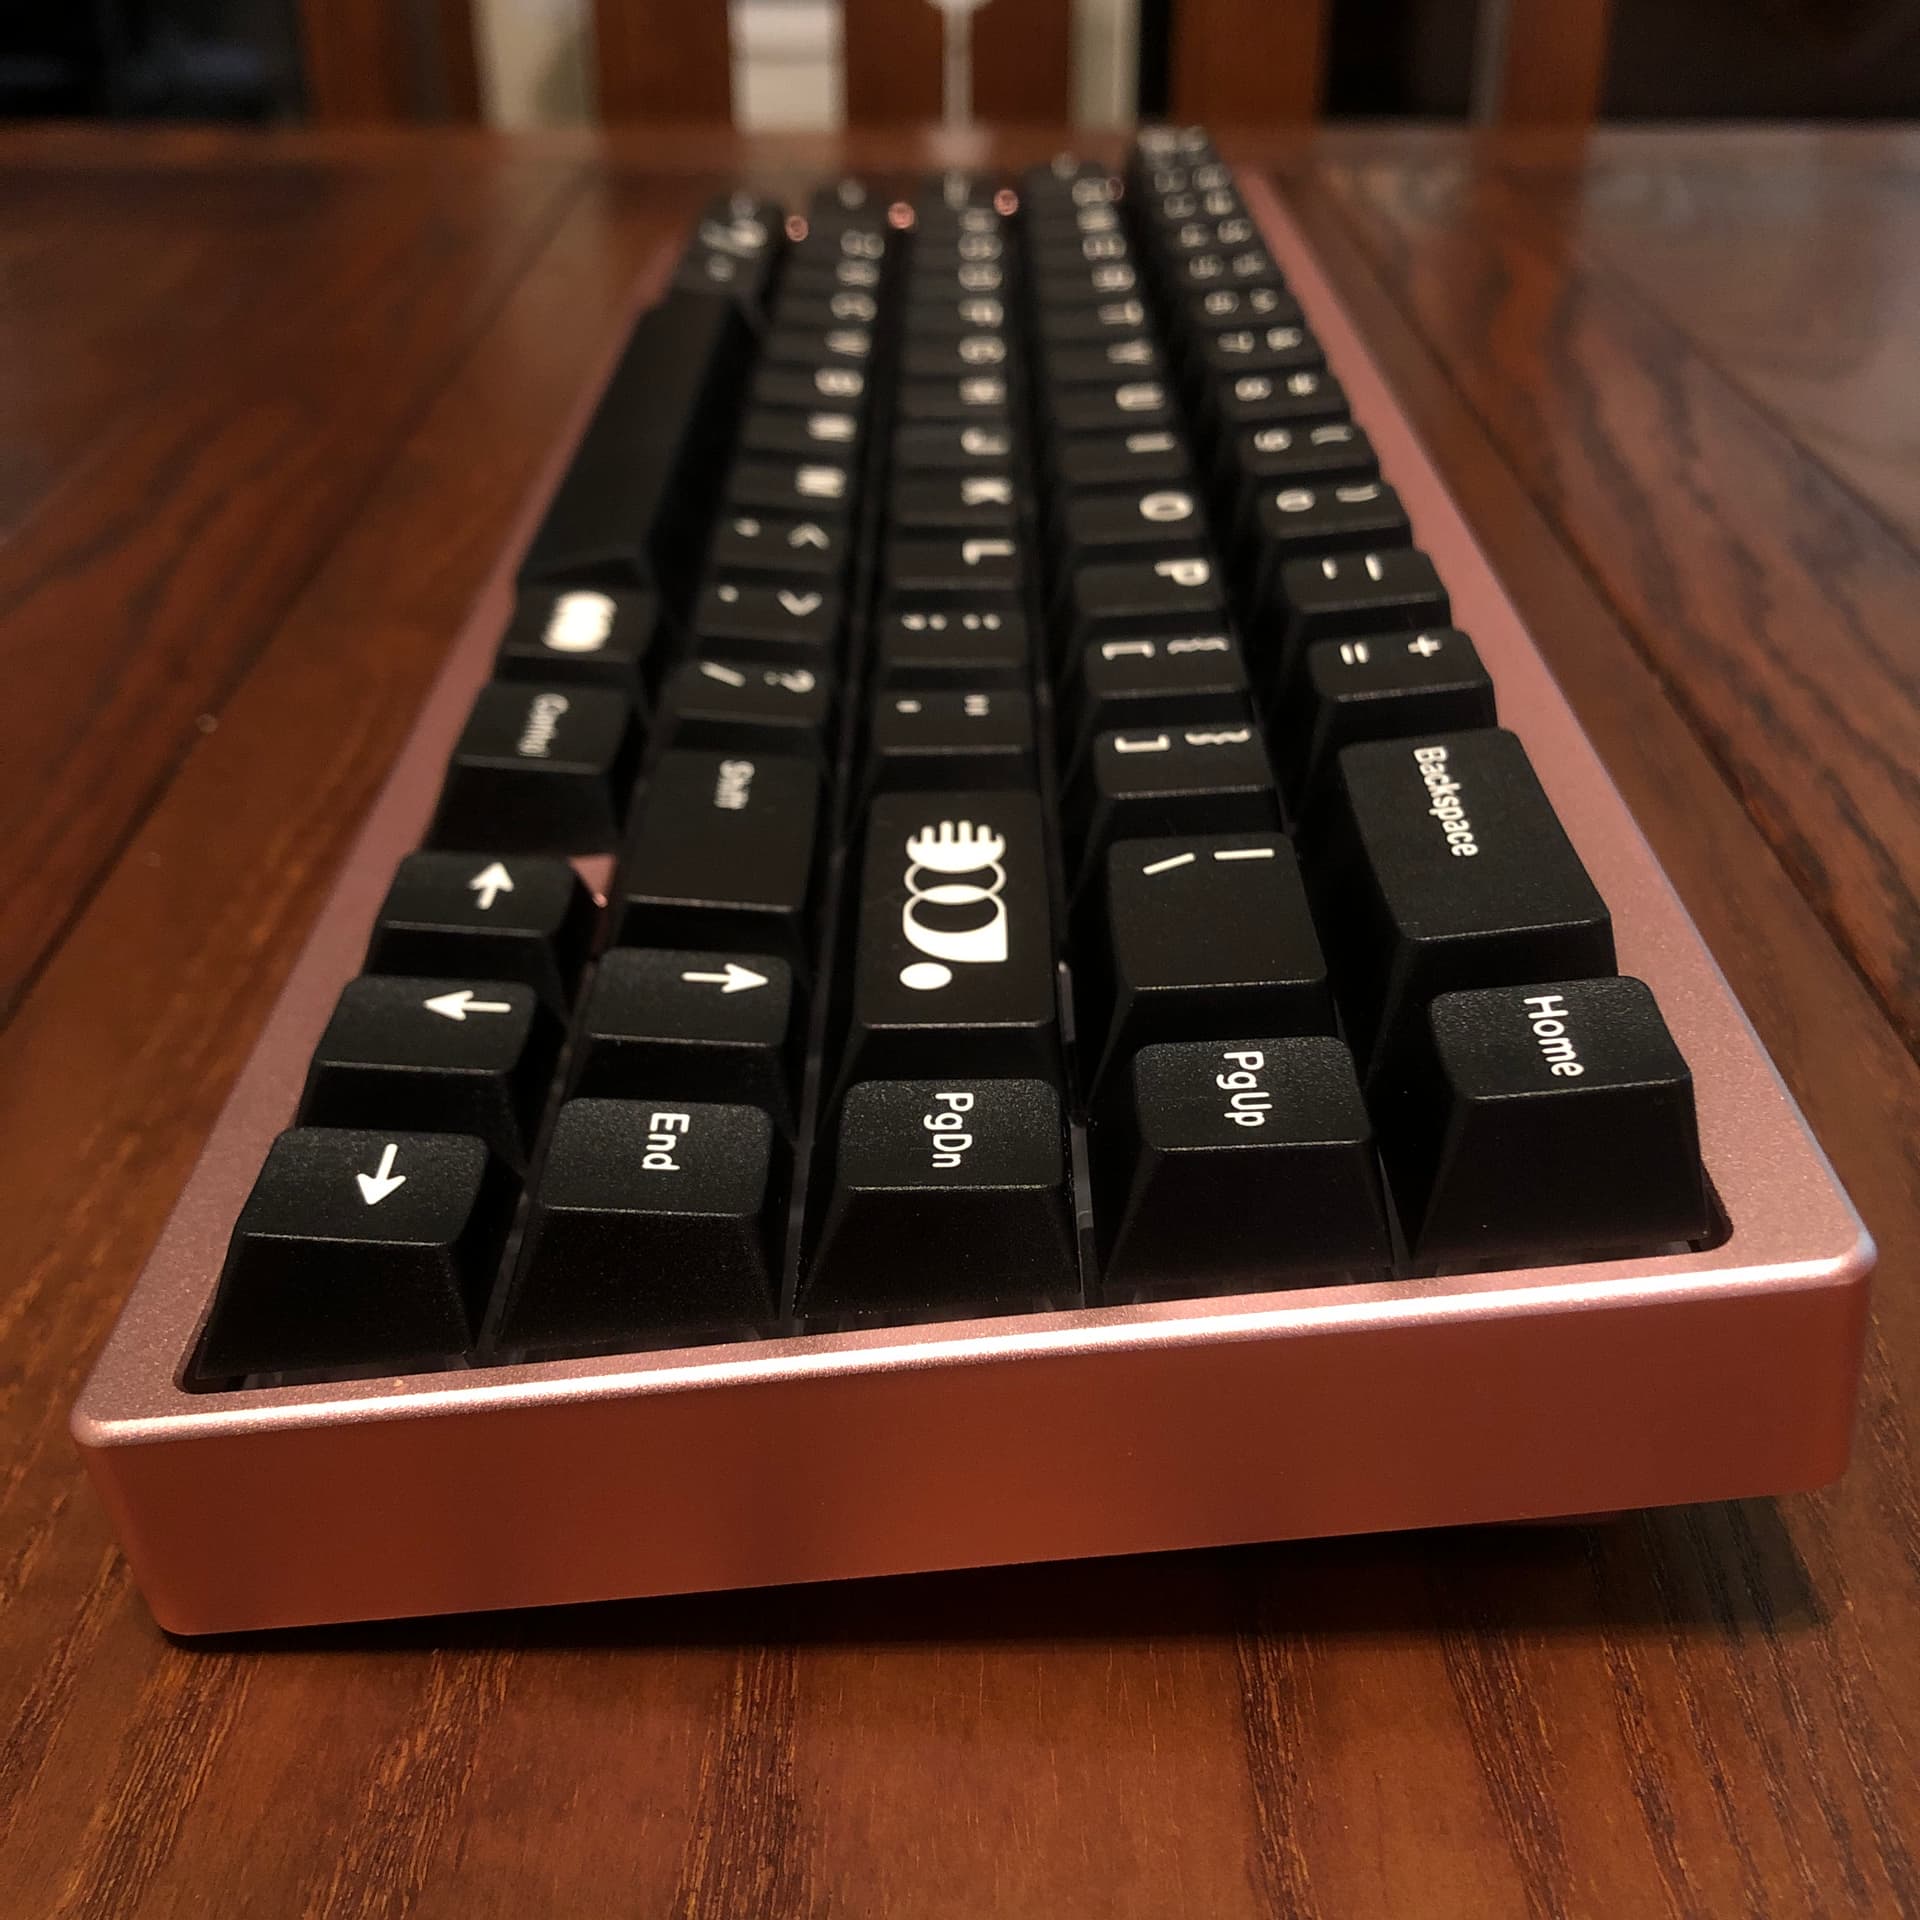
The frosty translucent case lets some light through, but the black version I have more or less looks solid at first glance. The bezel is a little chunky compared to your typical minimal design, but it’s not super thick. When looking from above, the thickness it does have is uniform on the front and sides with a little more at the back. Looking at the side, there’s a slight wedge shape to the case. Typing angle is adjustable with the flip-out feet, which have a nice snap-action.

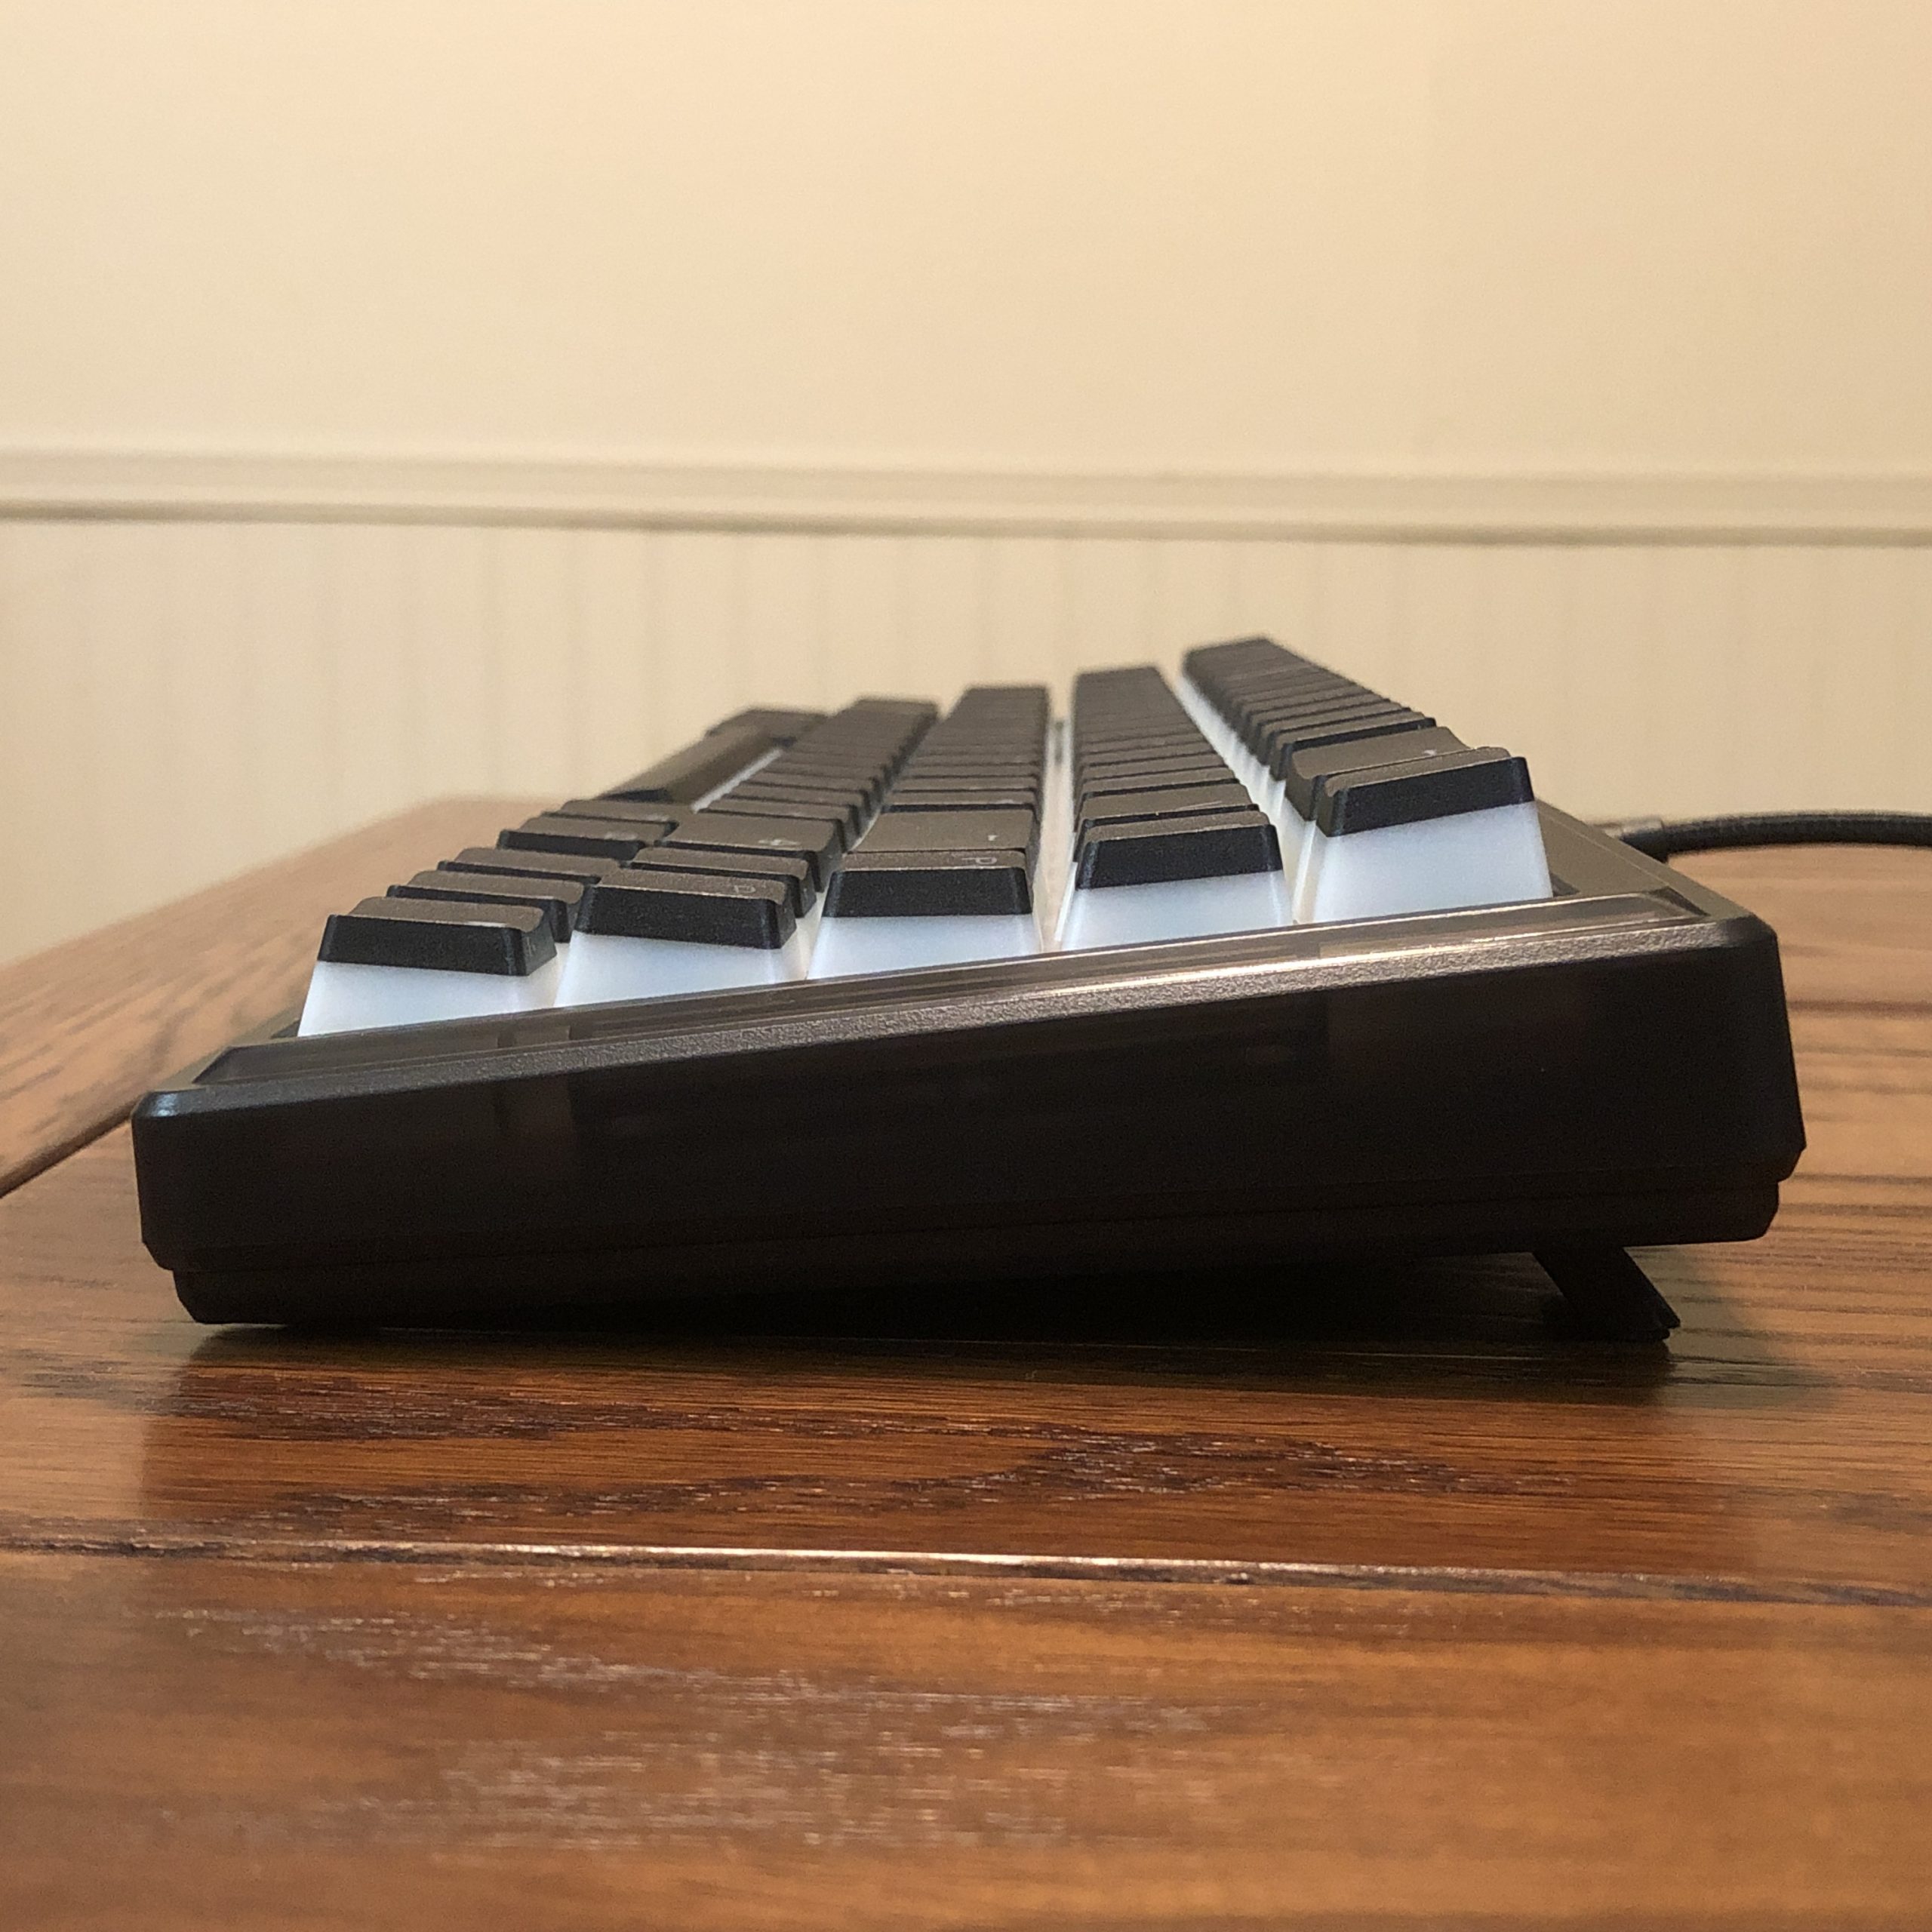
A view from the side; note the slight wedge shape, moderately chunky bezel, and extended flip-out feet.

Functionality:

It works, no complaints. It’s a wired keyboard with RGB, and I haven’t observed any reliability issues. I’ve tested it with one set of switches so far, and haven’t gotten into the software yet – this first impressions review will get an update that includes more information on the software among other aspects of living with the keyboard.

The RGB is pretty darn bright. Seen here glowing its way through a bunch of milky plastic.

Sound:

This is going to depend heavily on the switches and caps installed and I’ve so far only tried one set each with this board, but I can tell you that the plate material, mounting style, and dampening elements do their job when it comes to consistency across the rows and mitigating harsh vibrations.

The all-POM switches and half-POM caps I’m using are on the high-pitched side themselves so it’s hard for me to comment so far on how the chassis affects that; the caps aren’t new to me but the switches are. All that considered I’d say it’s a fairly typical timbre that’s also consistent and relatively free of harshness.

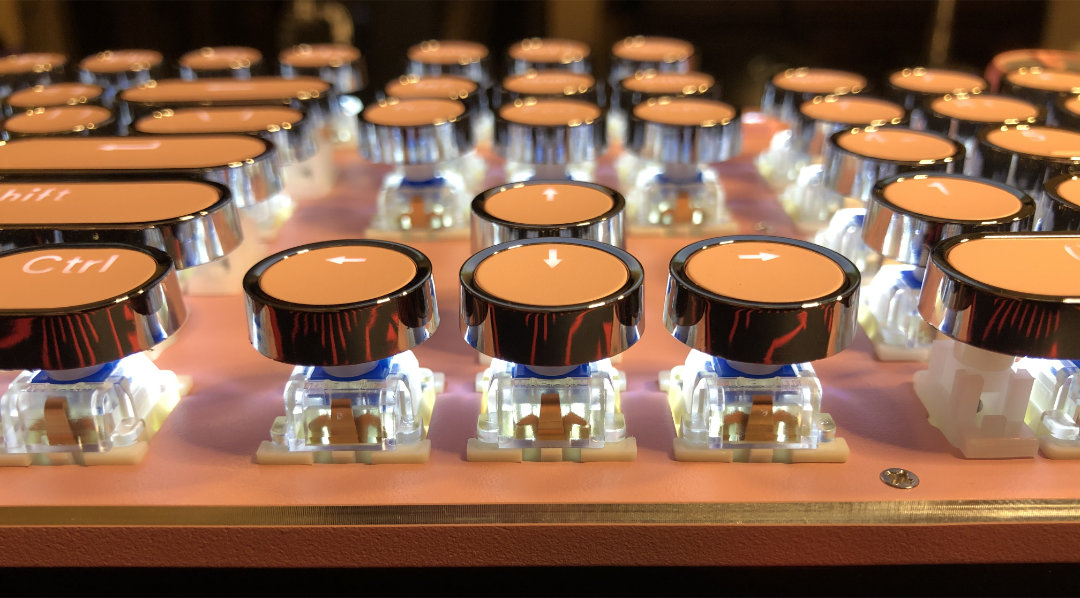
Another look at the all-POM switches I’m using today; Kailh FLCMMK Ice Mints. Smooth, stable, and clacky.

I think they really do match the plate quite well.

Feel:

If the mounting style & plate are the selling points of this keyboard, this is where it really has to perform beyond the aforementioned consistency and cleanliness in sound. This is the make or break performance point for this build – so does it bring home the bacon or swing and miss?

Well, I think it’s pretty good!

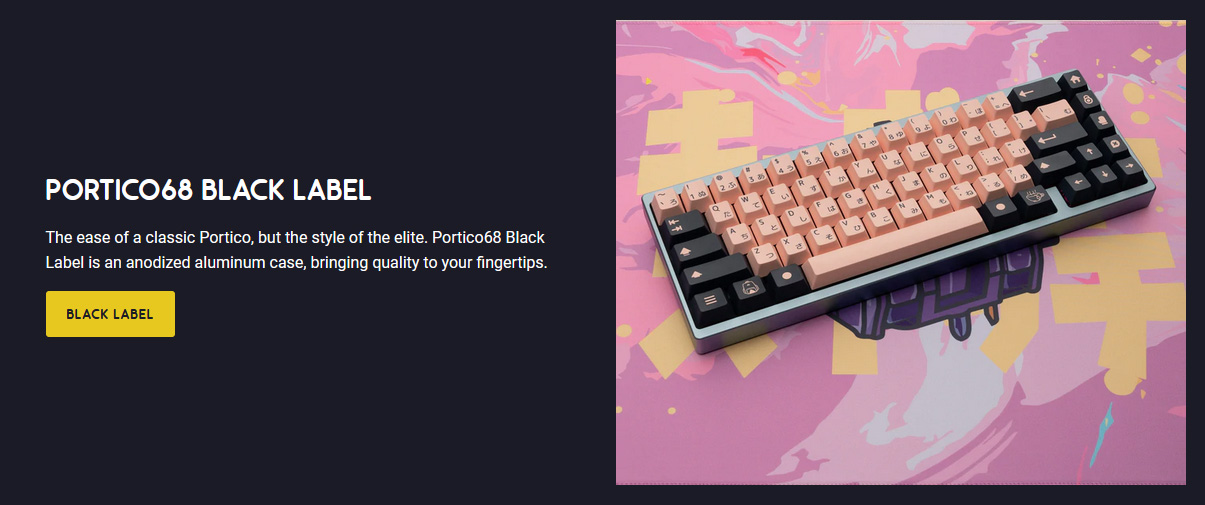
After a week or so of being positively spoiled by the Portico68 Black Label, a keyboard that costs around 5x what this one does if we’re comparing the barebones kits, I’m impressed with how well this budget keeb stacks up when it comes to feel. (I don’t think it can compete as much with sound, but at this price point it’s impressive how much it does.)

Specifically: the mounting has been executed successfully.

The polycarb plate does its job, and so does the gasket mounting. Impacts are dampened, and have a slight bouncy reverb to them. As mentioned before there’s a bit of deck flex; maybe not a ton but hey, more than any version of the KBD67 or Portico! The gaskets aren’t the fanciest or most nuanced – but they do work, and that’s pretty awesome.

Value:

That’s right, folks – it’s legit.

You can get a gasket-mounted keyboard for less than a hundo all-in. Price ranges from a little over $50 to around $70 with some people trying to hawk them for just under $100 on ebay. At $70 this is the least expensive competently-executed gasket keeb kit I know of (at time of writing, of course), and represents a major shift foward in the budget landscape. At $50 it’s a straight game-changer, no less than the KBD67L before it.

I’ve haven’t had a ton of time with it yet, but I don’t have any trouble telling my fine readers that I think this kit is a great value in general. If you’re still considering whether or not the kit is right for your use-case, the next section is here to help you off the fence into the greener pastures of yay or nay.


Who is This For?

As much as sharing this keeb with folks in general, this question is the biggest reason I wanted to write this review sooner rather than later.

Yep, it’s finally time to talk about the North-facing sockets, and come-around to why this keyboard is included in the WiTF series.

Who is this keyboard for? I think that’s a genuinely important question to ask when assessing its value for an individual buyer. While I think it’s an objectively good deal, generally speaking, it still might not be a good choice depending on what one is looking for; so let’s hone-in on that.

Two things I think make this a gaming-focused keyboard:

1. RGB (and specifically shine-through performance) is prioritized over custom keycap compatibility; this is dialed for pudding and other shine-thru caps, not GMK, and that’s a concious choice with its target market in-mind

2. The dedicated switch sitting in the blocker has one job: turn the Windows key into a second FN key. Like a win-key lock, but with a little more utility. The only user-group in particular I know of that prioritizes disabling the OS key would be keyboard-and-mouse gamers, and this feature is given priority for them.

If you’re looking to dip your toes into the custom keyboard market, this might be one of the cheapest and best for buck options out there right now no matter how you slice it – but I think who this is really for is the gamer who wants to enjoy some of the benefits offered by custom keyboards without sacrificing great RGB.

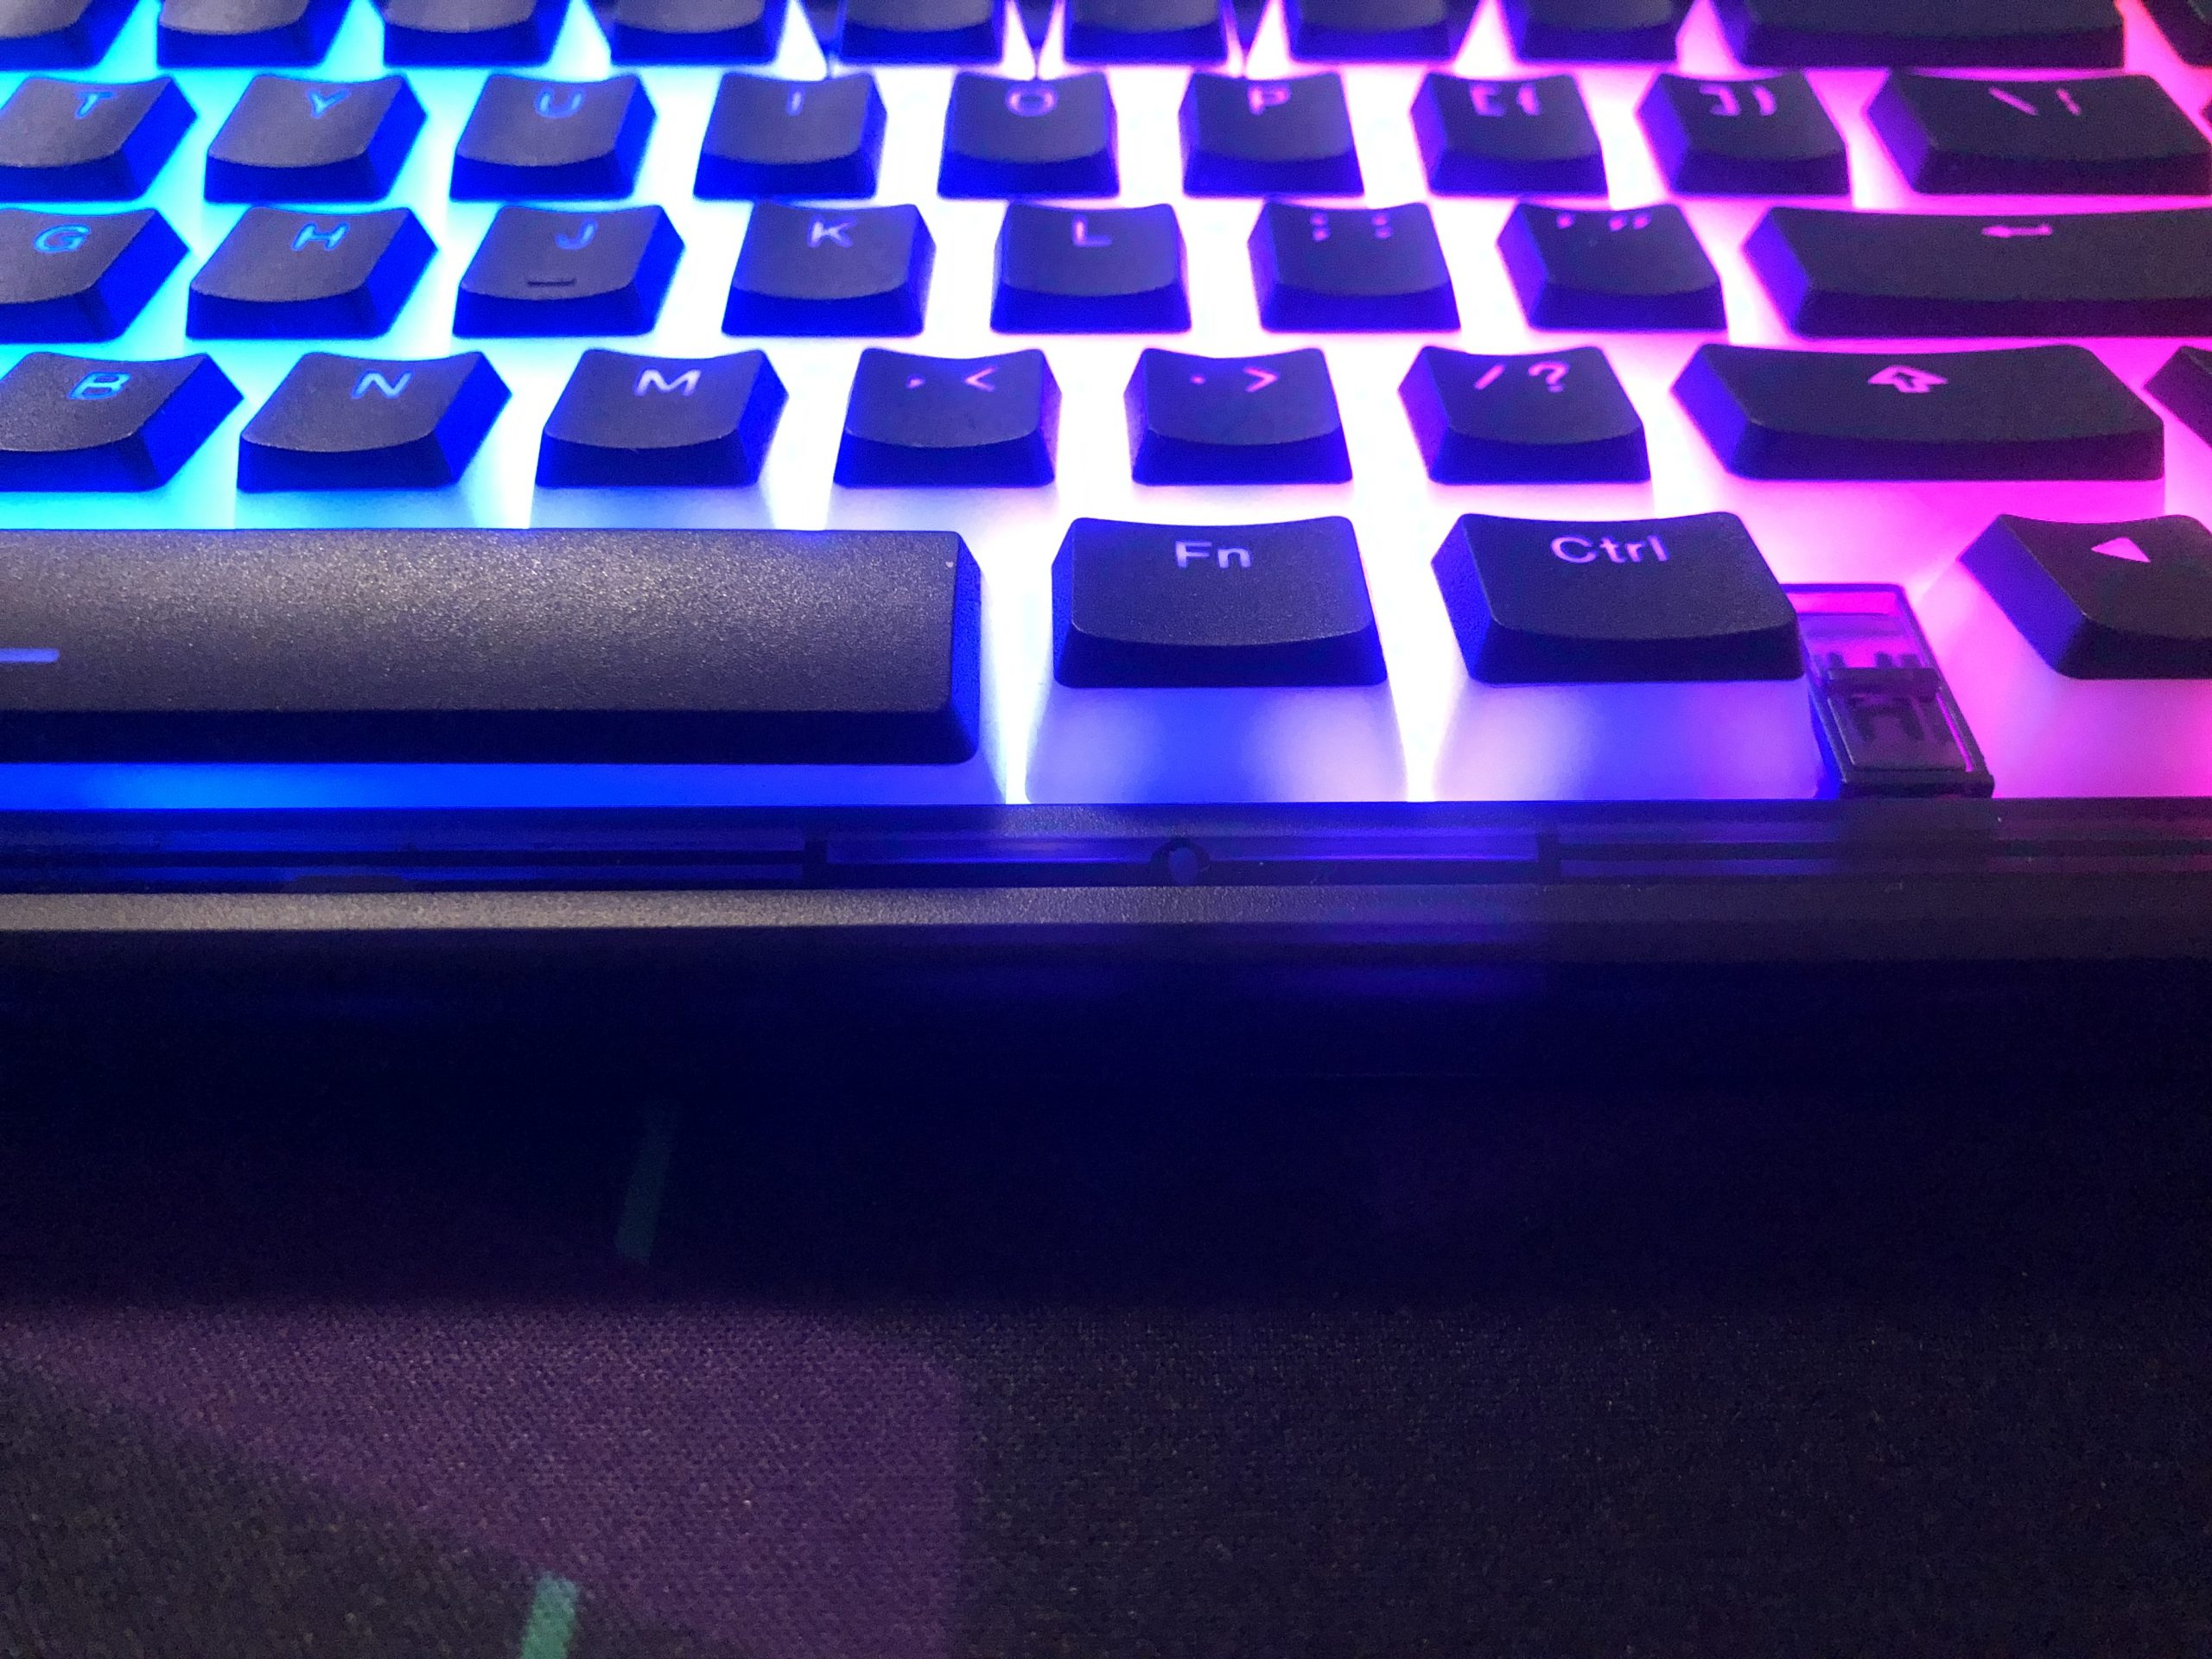
It’s bright! Here you can see it peeking through the case as well.

I think one reviewer I happen to be a fan of said this keyboard’s “fatal flaw” is that it has North-facing switch sockets (meaning this keyboard won’t play nice with popular expensive keycap brand GMK, whose caps are patterned from Cherry’s original standard). I don’t really think that’s a flaw for this keyboard, as much as I’d personally appreciate GMK compatibility.

As a fairly budget-oriented gaming keyboard, I think North-facing sockets is exactly what it should have.

No – I think this keyboard’s actual “fatal flaw” is that the case has plastic screw-holes and self-threading screws. In one swoop that pretty much kicks this keeb out of what I’d consider the “hot-swap” category and firmly into what I call the “solder-free” category.

The real “fatal flaw” – self-tapping screws and soft plastic holes to thread them in.

That is, this keeb is not suitable for frequent switch swapping – but – you also don’t need a soldering iron to assemble it.

You can change the switches a few times without major consequence – but much more than that and the threads will start to give out. Adding metal inserts here would literally be the only thing I’d change about this board. CIY if you ever see this – revise the case to include those and make that case available as its own product as well, for those of us who already own the GAS67 but want to turn it into a switch testing platform without chewing up the case!

Another side view; here you can appreciate the subtle transparency of the black case.

I think this fact does represent a knock against the keyboard for a potential enthusiast, but for someone who is buying this thing for its function as a solder-free gasket gaming keyboard, I don’t think it’s too much of a problem – especially considering the price. You build it, you use it. Maybe one day you decide you want different switches – no problem, don’t even need a soldering iron and the board comes with the tools to switch them.

If you’re really interested in trying lots of switches, though, this might not be the very best choice owing to those plastic case threads. The sockets will last a lot longer if you support them from below while installing switches – and you can’t do that without opening the case – which you can’t do without putting significant wear on those threads. You can still use this keeb as a switch testing platform, but you’ll either need to really trust yourself with lining up pins or be at peace with the fact that those threads will not go the distance. If you’re planning on testing lots of switches, maybe consider a Portico instead – you’ll get a lot more durability for that particular use-case for your extra money.

The RGB color really is no slouch on this keeb.

So, all that being said, I think the CIY GAS67 is a fantastic option for a gamer that wants a better, more consistent experience than the typical gaming keyboard provides – and at very least a decent and inexpensive option for those wanting to dip their toes into the pool of custom keyboards (or at least some of the features they’re famous for) without committing to a big expenditure up-front. For keyboard customers on a tight (specifically $100 or less) budget that really want to squeeze the most typing quality out of the least money, well, they could do a lot worse than this keyboard – and I think they’d find a challenge in doing better.


Alright! That’s all I have to say about the CIY GAS67 for today. This has been Deadeye Dave – thanks very much for reading, and whatever you’re typing on today, remember to enjoy it!

Introduction:

A few days ago, I visited thekey.company and and saw something neat on their front page – a new, metal Portico. The Portico68 Black Label, apparently – an updated design featuring an aluminum case.

Hey awesome! …it’s still got 67 keys, right? (It does.)

Now I don’t know about you, but the idea of a premium Portico is one I’m very happy to hear about. The KBD67L might still be my favorite “entry” board, but I actually put a lot more mileage on my Portico for a few specific reasons, and as such that keyboard has become my true stand-by daily driver.

That being the case, I was pleased indeed to find out about the metal one being a thing. I followed the link expecting an interest-check, group-buy page, or perhaps pre-order form.

Nope! This thing is in-stock and ready to go.

I bought one for myself because I wanted one, and am writing this to share my first impressions as a customer – this one isn’t sponsored.

A shot from TKC’s website of the four colors available.

Now. Before I go any farther I want to address the innocuous if quirky pink elephant in the room: the name. No, I have no real idea why a 67-key layout with a white label on the bottom is called the “Portico68 Black Label”.

My first guess is intentional dissonance to drive discussion. (If so, success here lol) My second guess is “67 +1”. My third guess is they associate “68” being in the name of many 65% keyboards while somehow missing it refers to the 68-key version of the layout. Naaahhh…

As for “Black Label”, I suppose that’s simply meant to be “fancy” – to communicate a premium, even exclusive identity for the product. There are lots of mildly-curious, head-scratching names in keeb-space, and this is just one more of them. Well. It is a 65%, and it is pretty fancy. Moving on.

Context:

As far as I can tell, this keeb was released with very little fanfare.

It’s at the top of TKC’s homepage as a featured product at the moment, but no special banners, no influencers talking about it all over the place (yet), no ICs on geekhack – just, “oh hey by the way we massively upgraded our really great entry keeb, and oh yeah it’s in stock” – definitely not how I would have expected this keyboard to come on the scene.

Here’s mine. Yes, I got the pink one. Yes, I love it.

I’m wondering if this means they don’t think of it as much of a big deal or big product – or perhaps they intend for the product to speak for and sell itself. I do have to say, the product page is almost NovelKeys-level scant in terms of detail… almost. The linked build guide and FAQ are for the plastic version. Not all the specs are correct (says it comes with felt instead of Poron, for example). BUT – what is clear on the page is this – what we have here is an aluminum take on the Portico, and to me, that’s a tantalizing prospect.

I bought one, I’m using it – now let’s see how it’s living up to my expectations so far.

Unboxing / In the box:

As noted in the sales page, this first run of P68BLs come with a generic hard-shell “gun-style” case rather than a typical keyboard bag. Apparently this was the result of some mix-up in the pipeline, but hey – good on them for finding an alternative solution that gets the job done. It is in fact a hard-shell pistol case, and it holds the keeb just fine. It’s a bit bigger and more chunky than a typical 65% case – but you won’t have to worry about protection.

This is ample but… well… I’m not taking this to work. Or school. Or anywhere I might otherwise take my keeb.

A look on the inside – yep, that’s a gun case, but hey it works. See inside the bonus FR4 plate that comes with the kit. You can even download the plate file on their website if you’d like it in some other material.

The MFR logo of the case is covered with a vinyl sticker indicating the Portico68 Black Label contained within; it looks a little slap-dash since the case logo is embossed, which you can see through the sticker. Gets the job done, though!

Included in the case is the mostly-assembled keyboard with flex-cut polycarbonate plate pre-installed along with some other accessories. There’s an additional FR4 plate, an optional foam/plastic composite layer for the PCB, and a set of C3 Equalz V3 stabs – complete with an accompanying kit of adhesive pads and gaskets for all sorts of modding options.

Another side-by-side comparing the two Porticos. On the left you can see the translucent polycarb case. On the right you can see the flex-cut plate, and the foam layer beneath it.

While it’s normal for a kit of this kind not to come with caps and switches, a cable of any kind is notably absent. I suppose that’s normal enough for keebs getting into the higher end of things, but it stands-out just a little in context of the plastic version including one.

Material Impressions:

On first glance, what we have here is indeed an aluminum take on the classic Portico. It has the same shape and format with a few small but notable changes:

  • USBC daughter board: this puts the port lower-down and improves the durability and serviceability of the keeb
  • Gasket placement: aside from being a bit thicker, the gaskets stay with the case instead of the plate this time around
  • Feet: generic bump-ons replaced with wider silicone bars that perform better
  • Materials: aluminum case aside, the kit now also comes with a polycarbonate flex-cut plate

Portico siblings. Classic version seen above with PBT Taro from NovelKeys, and the Black Label version with GMK Noire.

The quality of the case looks excellent. The finish is smooth and consistent, and I don’t see any imperfections on it. Only the tapped screw holes on the inside have a little silver showing around them. Just like with the plastic version, the seams face down towards the desk and the halves are joined with standard Philips-head screws.

I know a lot of custom enjoyers out there tend to prefer hex or torx head screws for their metal keebs, but in the case of a hot-swap board like this one, I actually appreciate how quick and easy this one is to get apart. That fact is half of why the original Portico has been and continues to be my test-bed for new switches. Aside from that, it’s stock FR4 plate sits in a happy medium in terms of grip – the NK65EE R1’s plate is too tight – so is the CIY TES68’s. The KBD67L’s stock plate is nice, but is honestly a bit loose for regular switch testing.

The Portico’s is just right. On that note – I do recommend using the FR4 plate if you’re going to be swapping switches regularly – it’s just a bit faster and easier to get the clips engaged compared to the flex-cut (and thusly flexible) poly one.

I put TTC Heart (aka Honey, Love) switches in mine; just seemed thematically appropriate with the case color, but I also really like them as switches.

Between the two versions I’d still say the classic Portico is a little more convenient for regular swapping; no wires connecting the top and bottom, and the brass thread inserts are more smooth to screw in and out of than the tapped holes in the aluminum case. This just means the plastic version is a little faster to dis-assemble and re-assemble, and that it can be done with a little less care – but this aluminum version remains an excellent switch testing platform that’s very easy to break-down and re-assemble.

A closer look at the TTC Heart / Honey / Love switches I installed in today’s keeb. These are fairly light, slow-curve linears with some very unique qualities.

Performance:

Now I’ve only had a few days with this so far, and that’s why this is a First Impressions article rather than a full review – but I do indeed have some of those impressions to share with you today.

While the original Portico feels almost surprisingly light until you put the silicone weight in it, the 68BL is no dainty keeb. The frame is nice and minimal, but the build has enough heft to keep it firmly planted where it’s placed on the desk – it has a solid stance that inspires typing confidence.

So far I’ve only tried the polycarbonate plate with flex-cuts, and I have to say I like it quite a bit. Because of the design there’s not a lot of “flex” per-se – no real trampoline action going on here – however the dampening does its job of absorbing high-frequency vibrations and eliminating hot-spots, while also taking the edge off of any hard bottom-outs. So far I’m finding the typing experience on this keyboard to be very pleasant.

A close look at the finish, and a view of the USBC port.

A note about the RGB: the previous Portico was unfortunately plagued with instability when it came to the RGB behavior, but I’m happy to report having seen no such issues so far with the 68BL. This doesn’t tend to be a big deal for custom keyboard buyers, but it’s nice to know the option is there and fully functional.

The last thing I’ll mention for performance today is sound. While the typing feel is better than I thought it would be, it’s almost eclipsed by how much better the sound is than I was expecting. By that I mean I fully anticipated this keyboard to be firm, harsh, and ping-y… I was impressed to find that it’s none of those things.

Have a listen:

I’m currently using the included foam sheet, which is actually a composite of foam glued to plastic. At first I thought the plastic was backing meant to be taken off, but the glue is pretty strong so it seems the plastic is meant to stay with it. I decided to give it a shot that way. I’m not sure how much of a role it’s playing yet, but the sound I’m getting from this keyboard is delightfully clean and poppy, sounding like a build that might easily cost twice as much. Not bad!

I’m happy with just about every aspect of this keyboard so far, but I think the sound is what impresses me the most. In terms of my own collection over the years, this is the first all-aluminum enclosed keyboard I’ve ever used that isn’t harsh or ping-y – and that counts for a lot in my book. Switching to a heavy metal keeb pretty much always meant sacrificing sound, feel, or both – but not with this one, and that’s awesome.

I think this keyboard is very pretty. I didn’t plan to use Noire with a pink keyboard, but I think it’s quite suitable.

A quick note about software; this keeb is sold as VIA-compatible, but I haven’t yet tested that feature. I can confirm it works on the previous iteration, but since the layout is already how I like it I haven’t had a reason to fiddle with it just yet.

Quick comparisons with peer products:

I see this keyboard’s most direct competitor as the KBD67 v3, and it’s a direct evolution from the classic Portico, so those are the two boards on which I’ll focus comparing with the 68BL.

I’m really quite a fan of both of these.

Compared with the classic Portico it’s obviously more heavy and planted on the desk, and unsurprisingly it feels more solid as a result. Since someone asked: the classic Portico pictured above weighs-in at 709g, while the Black Label next to it weighs 1209g. That makes the Black Label about half a kilogram – or just over a pound heavier.

It should also come as no surprise that the Black Label comes across as more premium with its material and finish. Functionally, I suppose the biggest difference is the addition of the daughter board – this means the cable is sitting lower to the desk, and that any potential servicing of the port will be easier.

Here you can see the rear side profiles, and the differing locations of the USB ports.

Compared with its ostensible rival the KBD67 v3, I think there’s a bigger gulf between these two than between their respective plastic versions. While the 67L and Portico are pretty comparable in terms of quality, features, and price with reasons to choose one or the other coming down to small feature differences, these two metal keebs aren’t quite so similar. With the KBD67 v3, moving over to metal sacrifices the sound the 67L is known for – and it also significantly firms-up the feel. The v3 isn’t a bad keeb by any means – but it does give up just about everything that makes it special for that weight and material.

In my mind, the main reason for getting a metal version of a keeb instead of a plastic one is to have that premium feel and presence on the desk – something about which I think the 67 v3 shoots itself in the foot. All of these keebs are some variation on a sandwich; top and bottom halves holding the rest together.

The 67s have a visible seam in the middle – itself not really a problem or anything – but on the aluminum version especially it comes off looking like an after-thought. It’s not beveled or chamfered like other edges, and the faces don’t meet up exactly – nor do the faces often reflect the same color at the same time, making the separate nature of the halves all the more evident. It’s the only kinda derpy looking thing on an otherwise very well-resolved design – kind of a non-issue for me on the plastic one – but on the metal version, I think it stands out just a bit too much, undermining that “premium” quality feel it’s going for.

KBD67 v3 – also known as the metal case upgrade for the KBD67 Lite. It looks good – but not great. So close – but that seam…

The Portico68 BL, on the other hand, has its seems thoughtfully hidden at the bottom of the keeb – just like its plastic version. More impressive than that, however, is that moving from the plastic to the metal Portico does not mean sacrificing good sound. Obviously it won’t be the same, but the P68BL has a nuance and cleanliness to the sound and feel that the 67 v3 just doesn’t. Going from a 67L to a 67 v3 feels like a lateral movement that involves compromise. Going from a Portico to a Portico68 BL just seems like an objective upgrade to me.

A closer look at the main PCB and lower gaskets. I think these traces look pretty cool.

Early Conclusions:

I’m still in my first week with this keyboard, but it’s quickly and comfortably becoming one of my very favorites, if not my absolute favorite. If it had bluetooth I think it actually would be perfect – but I don’t take off any points for that being absent. It really does check all my boxes: it’s beautiful, it’s reliable, it has excellent haptics, it sounds great, and it’s well-built.

I really like this keeb. I also really need a bigger dust filter for my house.

As of yet, I don’t have a single complaint. I like most of the keyboards I buy, but I’m especially pleased with this purchase.

That very well could change over the next few weeks so take it with a grain of salt – but my experience with the oddly-named Portico68 Black Label so far has been exclusively and remarkably positive. Right now I really can’t find a single reason not to recommend it to anyone looking for a premium (if not high-end custom) 65% keyboard.

As of writing the kit is currently available for sale, and you can find it here.


Who is This For ep. 1 • Xinmeng X9VR Keyboard & Mouse Bundle


Word-up: All the links in this article are affiliate ones that I only want you to use if you’re genuinely curious about or interested in what’s behind them. Disclosures and formalities accounted-for, let’s get right into it!

Oh, yeah.

Welcome to the first in my new series of review articles I’ve decided to call Who is This For? – today we’ll be looking at a full-size pre-built mechanical keyboard and mouse bundle, graciously provided for review by MechDIY.com – even after I said they could expect my honest opinion, positive or negative. High-five for being a good sport! I’ve spent a bit over a week with the pink peripherals as daily-drivers, and I’m happy to share my thoughts about them.

A neat little promo keychain, showcasing some Kailh Chocs. Thanks again to MechDIY, today’s enablers – er, sponsors!

I’m going to take a look at the mouse first, since this is a keyboard focused website, and I have quite a bit more to say about that part of the package.

The Mouse:

Autobots, roll out! …to the nail salon!

For a pack-in, it’s surprisingly suitable as a gaming mouse. The aesthetic is a mashup of Michael Bay and Mary Kay – perfect for D.va mains and the most fabulous Transformers. It has a color-matched cable with a branded USB-A plug and a glossy finish; available in dream-house pink or baby blue. It also has a readily accessible DPI switch right behind the scroll wheel, which itself is just as stylized as the rest of the mouse.

The wheel might be the highlight of this mouse.

Speaking of scroll wheels, this one is quite nice. It has plenty of texture with raised rubber covering the plastic in alternating ridges. The wheel has mild but clear indexing as it turns. It’s easy to scroll with being a nice, large wheel with just enough resistance. The middle-click is crisp, but not harsh, and the same is true of the right and left buttons. If you’ve ever used Kailh’s red gaming mouse switches, these are decidedly more gentle.

There are forward and back buttons to the side; the travel is a little springy, but actuation is crisp. The buttons stick out plenty to feel them, and they are close together – the value of which comes down to preference. For comparison, my Ducky Secret M is also a 5-button mouse, but its forward and back buttons are farther apart, and shaped differently from each-other. On the Xinmeng, the two buttons are one shape, split down the middle. This makes the forward button more quickly accessible, but perhaps easier to mistake for the rearward one.

I let out a small guffaw when I saw the bottom of this mouse – maybe I just didn’t expect to see material overkill here.

It has a good weight towards the bottom thanks to a metal plate. There are wide winglets at the bottom your fingers can rest on, and it has at least an ergonomically-inspired, ambidextrous shape. The forward and back buttons are only on the left, though.

I figured this thing for a party favor, but honestly, I quite like it. Don’t get me wrong – I think its hideous – but it feels nice to use. I’m sure the skates are cheap, but they work well enough. It may not be competitive equipment by any stretch – but it’s a better mouse for gaming than plenty I’ve used.

The USB ends for each peripheral are branded and match in shape, but not color; the keeb has the white one with the striped braided cable.

While the keyboard was easy enough to feel-around, and did come with a limited manual, the mouse didn’t have one – and I so far haven’t found one online. I figured out how to turn the RGB rainbow demo on and off, so far that’s it. Holding the DPI button will toggle the lighting. Seems there would be some kind of control if it has RGB capability, but I haven’t found it yet.

It won’t make you a champion, but it’ll get the job done.

To sum it up, this is a perfectly good mouse that matches the keyboard in color and no other way whatsoever. The aesthetic styling is about as far apart between the two as it could be, but at least they are color-coordinated.

Now that we have that mildly-curious pack-in covered, let’s take a look at this keyboard.

The Keeb:

Were you born in the wrong decade but can’t leave behind your all pink everything? This one’s here for you, baby.

Intro & Aesthetic Impressions

Obvious stuff out of the way first, what we have here is a full-size layout with three media buttons and a knob-with-clicker. The switches have the LED slot facing North, and have white SMD LEDs underneath, driven by a wide array of select-able effects. The knob can be switched between two modes, one of which controls the lighting, with the other controlling volume and other media functions. More on that a bit later.

Shiny. Clicky. Pink.

The defining quality of this board is its aesthetics; 2010’s tech with a *heavy* coat of Art Deco filtered through Mary Kay with a spritz of kawaii. Ye-olde type-writer style keys in a uniform profile with circular and pill-shaped footprints. A flat* top shell that doubles as a mounting plate, making for an out-board mounted look for the switches – I think this is actually an appropriate choice for the aesthetic, if it was a conscious choice.

The crunchy workhorse, Outemu Blue – topped with a very shiny hat.

Overall the keeb’s frame is quite thin, with a fairly flat plastic bottom shell. While this keeb basically looks like a pink GMMK with a knob, it’s quite a bit more flexible than one. *In fact, it looks like this particular one has a curve to it, with more of a bend on one side. I’m guessing this happened at least in some part during shipping. I’ll take a shot at flattening it back out.

A trip through the postal system is not for the faint of heart, or frail of frame.

Bridging into the subject of functionality from aesthetics, this keeb also has per-switch back-lighting, accomplished with surface-mounted LEDs. All of the lights (including the lock indicators) are a cool white. With the shiny silver rings of the stock keys, this makes for a fairly dazzling display. This would look right at home on the desk of a beautician or kawaii-aesthetic streamer, and brings to mind images of makeup and vanity mirrors as much as vintage typewriters.

It is pretty fabulous.

So – aesthetically speaking, who is this for?

I’d say, those aforementioned fans of kawaii and steam-punky retro seeking a keyboard to match the look of their lifestyle.

It most definitely is not for any keyboard enthusiast – unless they collect that sort of thing, or are writing a review like this one. By nature of this being a keeb community article, I’m sure at least a few of you are having a cheeky giggle at the sight of this thing – there’s more for you when we get to the sound – but this is a genuinely cool product for some folks. My sister, for example – she’s a Harley ridin’ Mustang drivin’ skip-second-gear kinda lady – and her first words upon seeing this keyboard were,

She meant it, too. I agreed to let her take the keys when I install different ones for the follow-up. Awesomely-bad word-art courtesy of cooltext.com.

I think it’s this dichotomy of love-it-or-hate-it that makes this keeb a perfect candidate to kick-off this series. Onward!

Functions:

Aside from the keys and the color, the most noticeable thing about this keeb is the inclusion of a knob in the top-right corner. To the left of the knob are three multi-function buttons that also double as lock-light indicators. Between the broken English in the manual and just playing around, I was able to familiarize myself with the functions in a few minutes. Here’s how it works:

The cluster has two modes; lighting control and media control. Long-pressing the knob switches between the two modes, which are indicated by a pair of white LEDs around the top-left and bottom-right of the knob. When the lights are illuminated, the cluster is in lighting control mode, and when the lights are off it is in media control mode.

IT’S GOTTA GNAWB, BREAU, (deuude)

In lighting control mode, turning the knob adjusts the lighting brightness, and quick-pressing it cycles through lighting animations. Tapping each of the three buttons to the left will select one of three pre-set lighting configurations.

In media control mode, turning the knob adjusts the volume, and quick-pressing it mutes and un-mutes the sound. In media control mode, the three buttons to the left have the media functions labeled on them; ⏮ for previous, ⏯ for play / pause, and ⏭ for next. If you have a media player open, these controls will likely work with it.

In either control mode, the LEDs under each of the three buttons are lock-light indicators: the left ⏮ button indicates Number Lock, the middle ⏯ button indicates Caps Lock, and the right ⏭ button indicates Scroll Lock.

In combination with other keys, the FN key also controls both media and lighting functions as well as a Windows-key lock for those high-stakes gaming sessions.

That’s the FN (or function layer) key, between the right Alt and Menu keys.

Under the umbrella of functionality, let’s get into who this keyboard will be useful for, which gets its own little section:

Use-cases:

  • Typing: Not the best, but plenty functional and even satisfying if you don’t mind lots of sound.
  • Gaming: Just fine for solo casual fun, but not great for voice-chat and definitely not for competition.
  • Display: Potentially awesome; as part of an ensemble, this keeb could be the missing piece of kit.

Sound:

Sound is going to be a polarizing feature of this one; I’d put it comfortably in the “love it or hate it” category, alongside the aesthetics.

I think it sounds like a family of gnomes, clogging atop corn-flakes in the bowl of a small steel drum. Have a listen:

This is a clicky-switch board, which I’d say fits given the typewriter-inspired keycaps. In fact, this keeb does sound remarkably similar to an old mechanical typewriter, which Cherry Blues and their cousins were originally designed to emulate. In that way, I’d call the sound of this board successful. Overall, it’s crunchy and noisy, but far from the loudest keyboard I’ve ever used.

There’s also quite a bit of ping and ring to the sound of this keeb. In terms of the typewriter theming, I’d say this is alright – and its at least vaguely reminiscent of venerable vintage mechanical keyboards like the IBM Model M when it comes to the ring. Enthusiasts of today have honed-in on tuning the sound, but back then keyboard users might lament that the thing isn’t loud enough – some keyboards of the day even had little electric hammers inside to slap the case – to make typists migrating from typewriters more comfortable, of course. While the keys of the X9VR are significantly lighter in weight than any mechanical (read: un-powered) typewriter, it still does a surprisingly good job of giving the user a typewriter-like experience.

This has nothing to do with sound but the rings are friction-fit and removable. Isn’t that neat?

Now, when it comes to the enthusiast community, I don’t think any one of them would be interested in this board from a sound or feel perspective. It uses click-jacket clone blues, which tend to be at the very bottom of a custom keeb builder’s switch list. The stabilizers rattle like a bag of small dry bones. What would really make an enthusiast wince, though, is that PING. This might be the most pingy mx-compatible keyboard I’ve ever used, and that’s something of an accomplishment. This goes right past “that’s kinda pingy” and comfortably into “is that a buckling spring keeb?” territory.

So – when it comes to sound, who is this keyboard for? Well – all that stuff I just mentioned means folks looking for a clean sound won’t even want to be in the same room as this thing – but folks who really love the retro aesthetic and the sound that comes with it will have nothing but fun using the X9VR.

Stay tuned for my follow-up video where I take-on the challenge of tuning this keyboard for, among other things, sound.

Feel:

There’s not a whole lot to say about feel here – it’s a clone blue board, and it feels like one. It’s pretty light. Between the lack of rubber on the flip-out feet and the bend in this one’s case, it won’t stay put on a hard surface. On a deskmat, though, it does just fine. I’ve used the X9VR to write the majority of this review.

Outemu blues, rando stabs. Nothing fancy, but gets it done.

If you’ve never used a “blue” switch before, “blue” comes from Cherry’s original color-coding for their first clicky switch. Many other manufacturers follow the same color-coding conventions that they do, though with the advent of color-coordinating with switches this is becoming less common. Blues in general have a satisfying “tactile event” just before actuating – at least, I found it really satisfying before I spoiled myself with hand-lubed switches – but that’s another topic altogether. Suffice to say that if you’re typing on the thing that came with your Dell and wish it was a bit more crisp, you might really appreciate some blues like the ones populating this keeb.

A close look at one of the MX-mount vintage-typewriter-inspired keys.

Probably the most unique aspect of this keeb’s haptics would be the keys themselves. While they’ve been around for some time and are easy to find if you’re looking for them, these typewriter style keys aren’t exactly super common, so most keeb enjoyers probably haven’t tried them yet. I can tell you that I find them surprisingly more usable than I expected them to be when it comes to touch-typing. They have traditional homing nubs, and the rings around each cap actually do a decent job helping ones fingers find their way around. Unlike the drastically angled typewriters that tended to have keys resembling these, this keyboard has a completely flat typing profile, with feet providing an optional angle.

An old QWERTZ typewriter with heavy, lever-action keys and a very steep incline between the rows. At least when it comes to the keys, this is the sort of thing today’s keeb calls-back to. • Photo by Tomasz Mikołajczyk.

So – when it comes to the typing feel, who is this for?

Like with the sound, when it comes to feel this keyboard is here for retro fans. Want to feel like you’re using hand-crafted, stylish, and archaic technology without all that would actually entail? Well – the X9VR might be worth a look for you.


Value & Conclusions:

Priced at eighty American Bacon Shares, this keyboard-and-mouse combo is comfortably less than anything in the custom keyboard universe, but a fair sight more than the cheapest basic gear. I guess this would be a mid-range kit in the prebuilt gaming keeb world – it might be on the expensive side for someone shopping purely for color. For those seeking a full-sized board with the shiny typewriter look in pink (or baby blue), I think this checks enough boxes to be worth the price of admission.

Under the knob – here you can easily see where the mode indicator LEDs are; the two small holes on either side of the rotary encoder.

Recommendations for Improvement:

Were I to try to improve this product on a commercial level, I think the biggest change I’d make would be with the box it ships in – it’s not quite sturdy enough to properly protect the keyboard in transit. While the keyboard is plenty durable for years of use, it didn’t fare that well in shipping. The mouse is good but not a fit for the bundle aesthetically. Beyond that, I would add rubber ends to the flip-out feet of the keyboard, and maybe a multi-lingual reference card for the mouse functions.

I’d be lying if I said I could read any of this, and full disclosure, I may not even have the name of this product quite right – but I think you got the idea.

This is a section where I’d normally talk about how to improve the sound and feel, but at least for the market this kit appears to be aiming for, I think it does just fine with its crunchy, crispy qualities.

That’s all I have to say about the Xinmeng X9VR keyboard and mouse kit for today. Stay tuned for a follow-up about modding this keyboard. Thanks again to MechDIY.com for providing this keyboard for review, and thank you very much for reading.

Whatever you’re typing on today, remember to enjoy it!